Hook adorable Crochet Bunny Amigurumi toys with this detailed pattern featuring fun step by step instructions to build perfect handmade creations.

Fun Free Crochet Bunny Amigurumi Pattern for Crochet Lovers
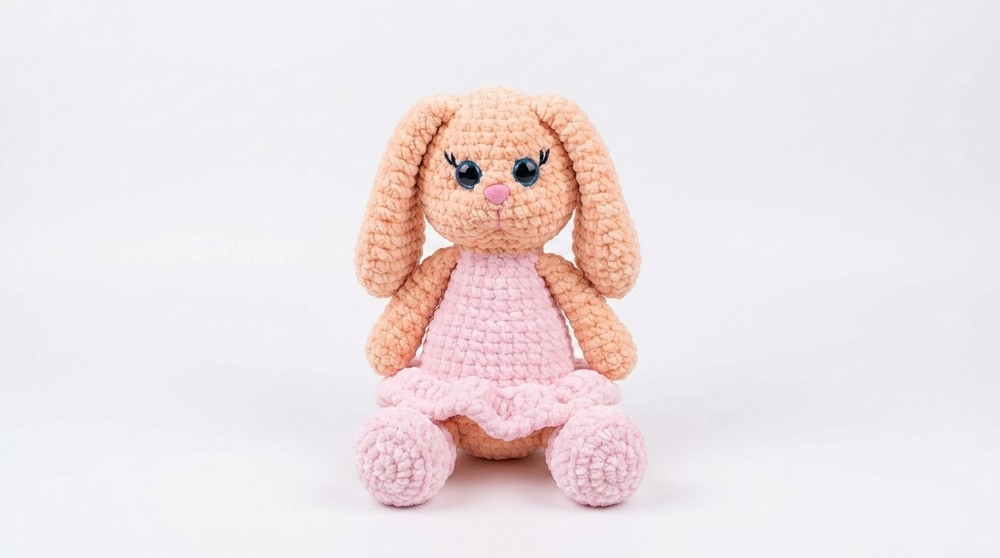
Crochet a cute and soft bunny with this free crochet bunny amigurumi pattern. This bunny is perfect for making gifts, decorating spaces, or simply enjoying as a cuddly toy. The pattern uses pink and peach yarn to create a charming bunny that looks adorable with its tiny shoes, dress, and floppy ears.
The bunny’s eyes and nose are carefully crocheted to give it a sweet and friendly face. The fluffy cheeks and delicate eyelashes add an extra touch of cuteness. The bunny’s dress is fun to crochet, and its wavy edges make it look playful. 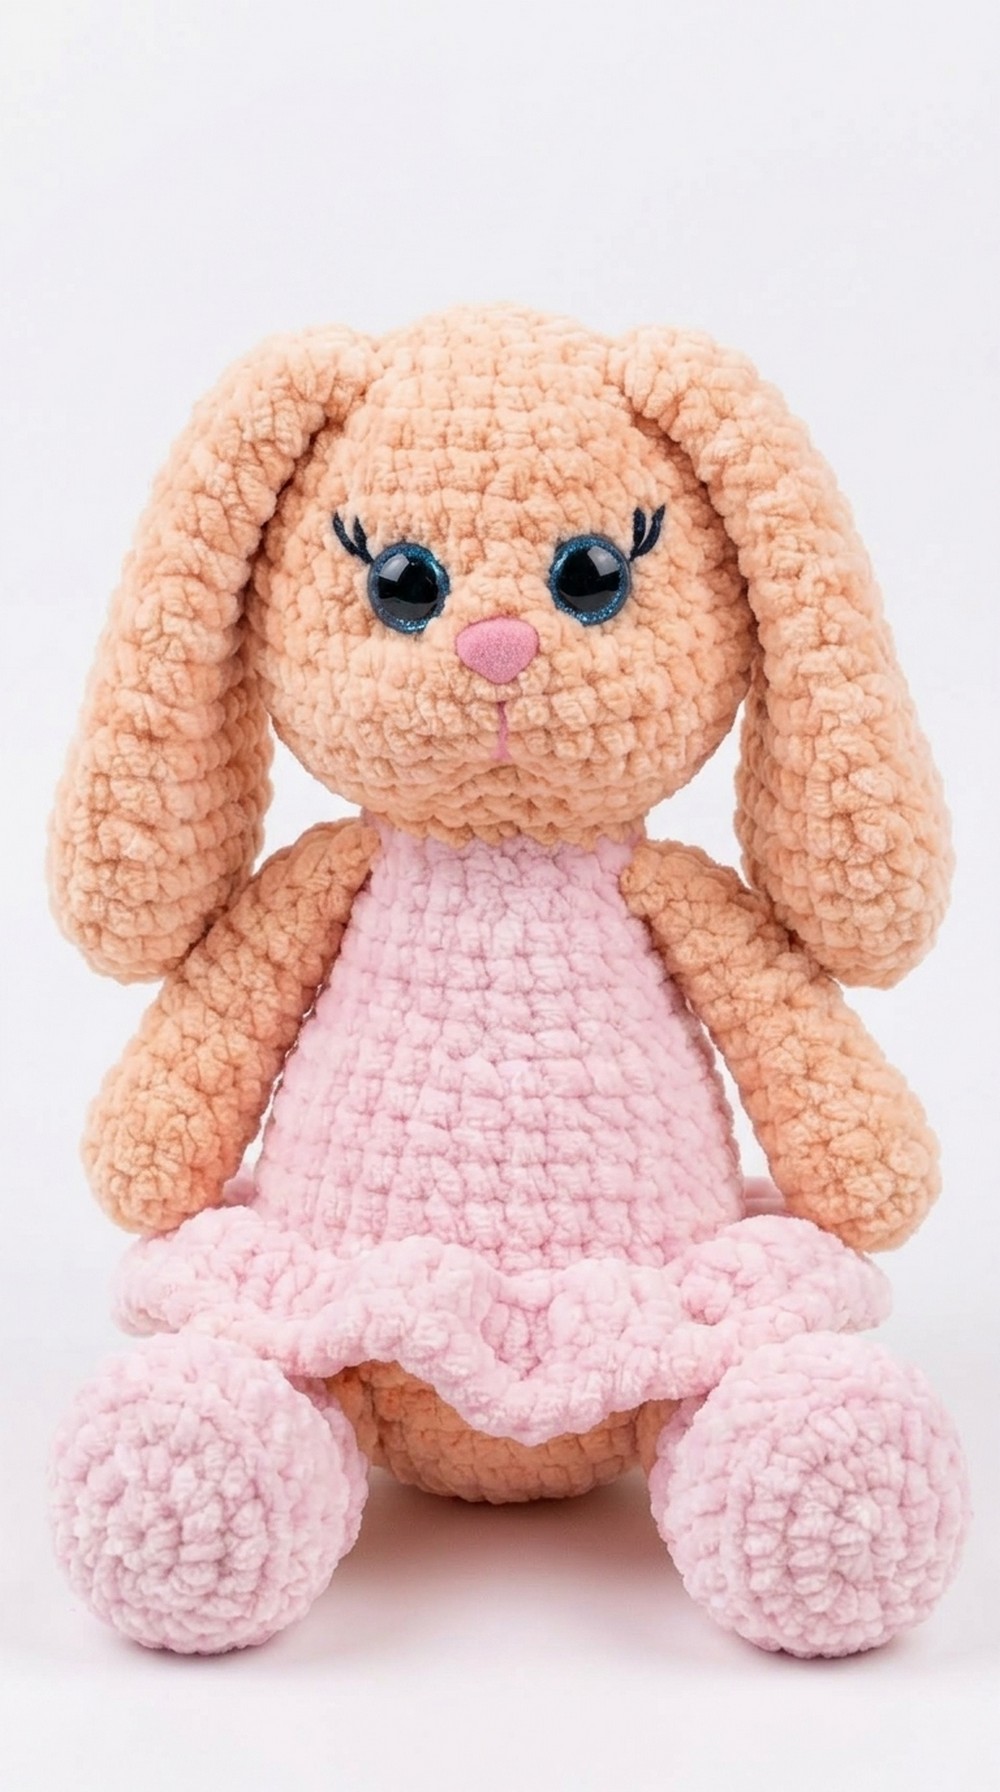 Whether you are making it for kids or as a handmade keepsake, this bunny is sure to bring joy to everyone. Start crocheting today and watch your creation come to life with love.
Cute Crochet Bunny Amigurumi Pattern
Materials Needed
- Yarn:
- Dress & Shoes: Pink yarn (e.g., Janard Dolce color number 750).
- Body: Peach/Apricot yarn (e.g., Janard Dolce color number 700/773).
- Hook: Hook size 4 mm.
- Additional Supplies:
- Fiber stuffing for the bunny.
- Scissors.
- Yarn needle for sewing and finishing.
- Marker (optional, to keep track of rows).
- Doll eyes, safety nose, or thread to create facial features.
Pattern Instructions
Legs
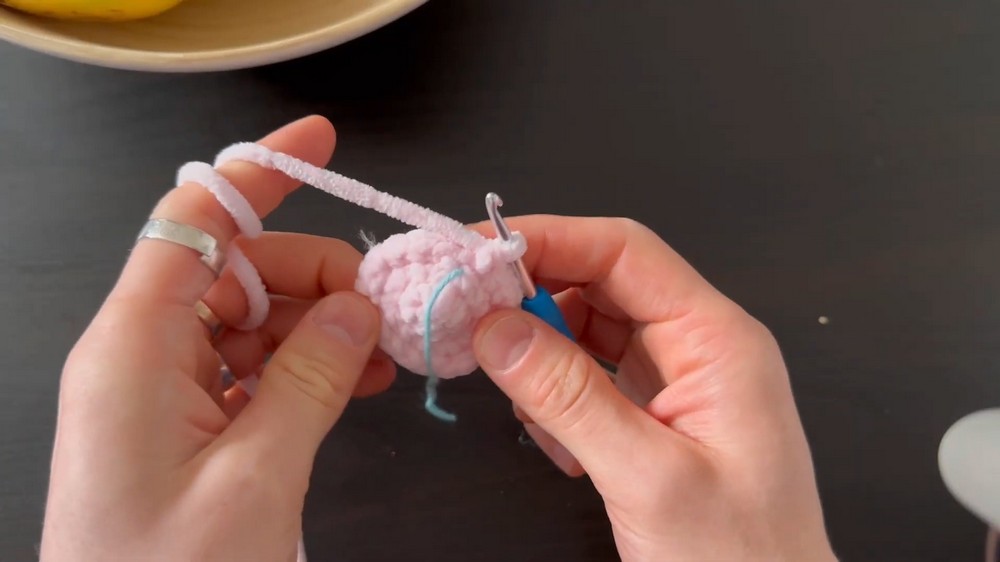
- Begin with shoes (pink yarn):
- Create a chain of 5 stitches.
- Work 3 stitches in the second loop from the hook.
- Crochet 2 stitches in the next two loops and create 3 stitches in the final loop.
- Turn work and crochet 2 stitches along the opposite side.
- Row 2:
- Start with 3 increases (2 stitches in one loop, repeated 3 times).
- Work 2 stitches.
- Crochet 3 increases at the end of the row.
- Finish with 2 stitches.
- Row 3:
- Crochet 1 stitch, 1 increase (repeat 3 times).
- Work 2 stitches.
- Repeat 1 stitch, 1 increase three times on the opposite side.
- End with 2 stitches. You should now have 22 stitches.
- Rows 4–6:
- Work 22 stitches for three rows with no increases or decreases.
- Decreasing the Legs (Rows 7–10):
- Create 3 decreases while working around the leg.
- Crochet one stitch, one decrease (repeat three times).
- Continue working two decreases in subsequent rows until the legs taper down.
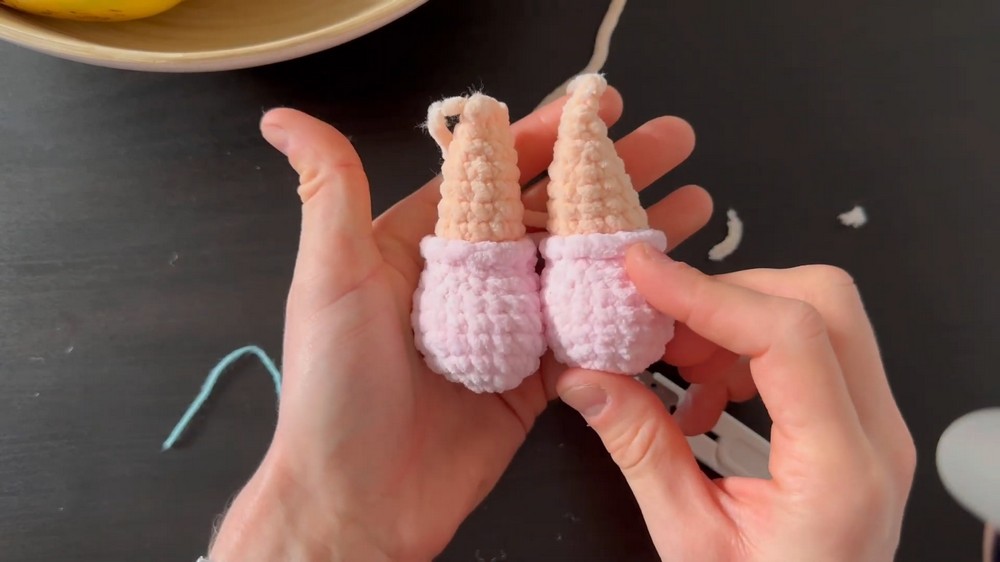
- Transition to Body Color (Peach/Apricot yarn):
- Attach the peach yarn at the back of the feet for minimal visibility.
- Work 12 stitches in a single round from the back side of the loops.
- Crochet 12 stitches for four rows.
- Finish the Lower Legs:
- Add stuffing carefully, ensuring the bottom section is firm and the top is lightly stuffed.
- Fold the legs and crochet the edges together using 5 stitches.
Arms
- Begin the arm with peach yarn:
- Create a chain of 2 stitches and work 4 stitches in the second loop.
- Row 2:
- Work 4 increases to form a total of 8 stitches.
- Rows 3–12:
- Crochet 8 stitches per row for 10 rows, with no increases or decreases.
- Shape and Finish:
- Fold the edges and crochet them together using 4 stitches. The arms should remain soft, so do not overstuff them.
Body
- Base Circle for Body:
- Work 6 stitches into a magic ring or chain of 2 stitches with 6 stitches in the second loop.
- Gradually increase stitches:
- Row 2: 6 increases.
- Row 3: 1 stitch, 1 increase (repeat 6 times).
- Row 4: 2 stitches, 1 increase (repeat 6 times).
- Row 5: 3 stitches, 1 increase (repeat 6 times).
- Row 6: 4 stitches, 1 increase (repeat 6 times).
- Continue increasing up to 36 stitches.
- Attach Legs:
- Position the legs evenly, ensuring they align properly.
- Attach each leg using 5 stitches for each leg.
- Body Rows:
- Work 7 rows of 36 stitches around the body without increasing or decreasing.
- Begin decreasing gradually:
- Row 8: 4 stitches, 1 decrease (repeat 6 times).
- Row 9: Work 3 rows of 30 stitches.
- Row 12: 3 stitches, 1 decrease (repeat 6 times).
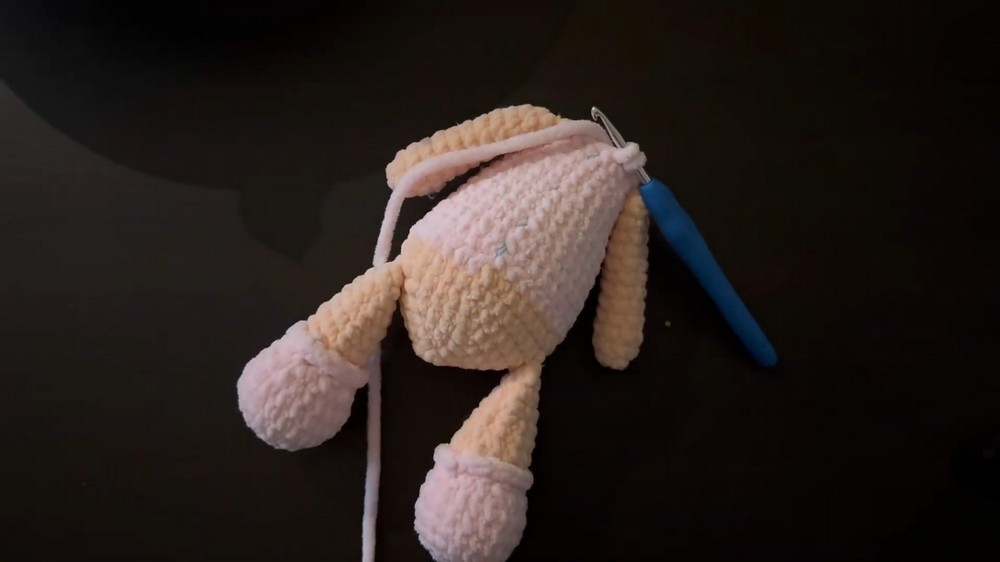
- Attach Arms:
- Position and attach each arm symmetrically using 4 stitches for each arm.
Head
- Begin with 6 stitches in a magic ring or chain of 2.
- Gradually increase stitches in the same pattern as the body, until the head forms a full circle (36 stitches).
- After Increasing to 36 stitches:
- Work 7 rows with no changes.
- Begin decreasing:
- 4 stitches, 1 decrease (repeat 6 times).
- Gradually decrease further rows until the opening narrows sufficiently for closure.
- After Increasing to 36 stitches:
- Eyes and Features:
- Attach doll eyes between rows 7–10, ensuring three stitches of space separate them.
- Insert the safety nose or crochet one between rows 7 and 8, centered between the eyes.
Ears
- Begin with a chain of 2 stitches and work 6 stitches into the second loop.
- Gradually increase:
- Row 2: 6 increases.
- Row 3: 1 stitch, 1 increase (repeat 6 times).
- Row 4: 2 stitches, 1 increase (repeat 6 times).
- Shape and Finish:
- Work 2 rows of 24 stitches.
- Gradually decrease:
- 1 decrease, 10 stitches (repeat 2 times).
- Fold and crochet together—use 5 stitches to close the bottom edge of each ear.
- Attach the ears symmetrically on the head, four rows down from the top.
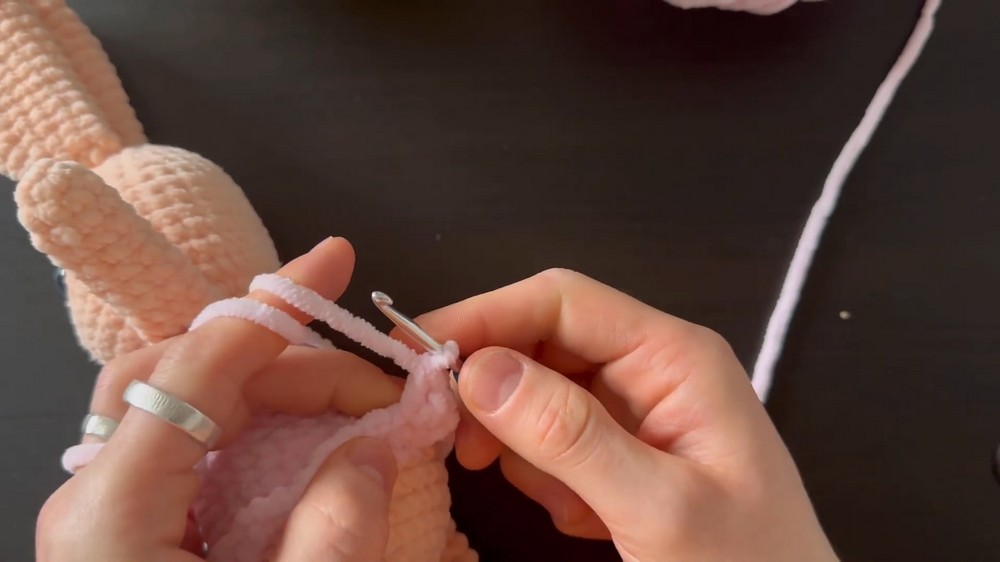
Dress
- Attach pink yarn to the loops set aside earlier for the dress.
- Work 2 stitches into each loop (increases) to create a flared pattern.
- Work double crochet for the next row to form the main portion of the dress.
- Optional: For a wavier effect, alternate between 1 double crochet and 2 double crochet in one stitch.
- Add an edging row:
- Crochet backwards in every stitch to form a ruffled hem.
- Crochet backwards in every stitch to form a ruffled hem.
Finishing Instructions
- Tie loose ends securely.
- Hide stray yarn between rows using a yarn needle.
- Adjust stuffing throughout the body, head, and limbs to ensure smooth shaping.
- Use black thread to stitch facial details, such as eyelashes and the mouth, for the final touches.
Final Words
Congratulations on completing your adorable crochet bunny, This bunny makes for a perfect handmade gift or decoration. Experiment with different dress colors, yarn textures, and accessories for variety.
Tips to Maintain the Pattern
- Control yarn tension: Keep stitches consistent for a neat finish.
- Keep track of rows: Consider using a stitch marker for easier counting.
- Stuff evenly: Pay attention to stuffing firmness for optimal shaping.
- Experiment: Add flowers, bows, or tails for personalization.