Bring a splash of charm to your projects with this fun and simple Crochet Star Granny Square Pattern that’s perfect for all kinds of creative ideas.

Free Crochet Star Granny Square pattern for Trendy Creators
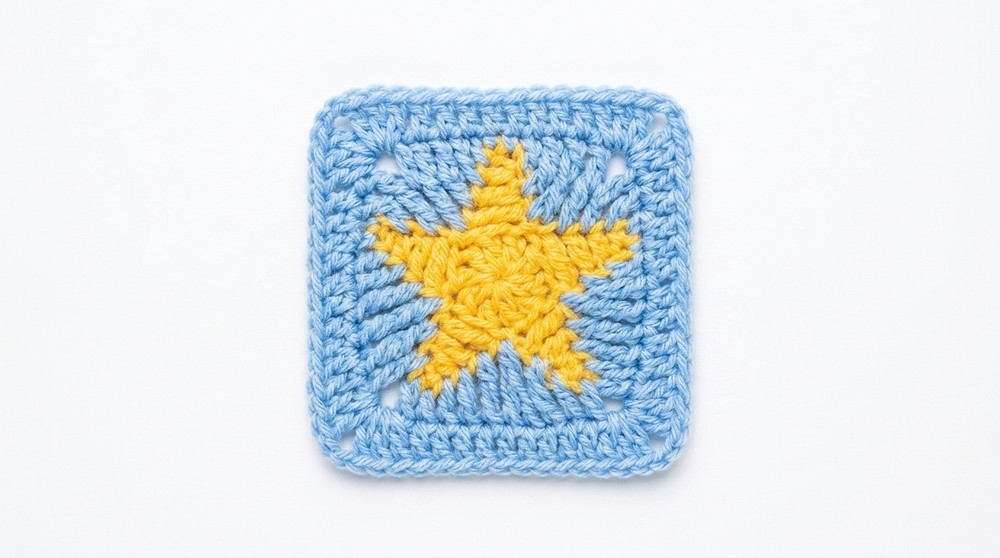
Light up your world with a splash of color by making a shining star with your own hands using this Free Crochet Star Granny Square Pattern. This lovely square looks like a twinkling star sitting right in the middle of a soft frame that works wonderfully for making blankets, bags, or home décor. The points of the star stretch gracefully to the edges, giving it a clean shape.
The sturdy structure keeps it lying flat, making sure your work always looks neat and polished. The slightly raised star shape catches the light beautifully, adding a special charm to your project.
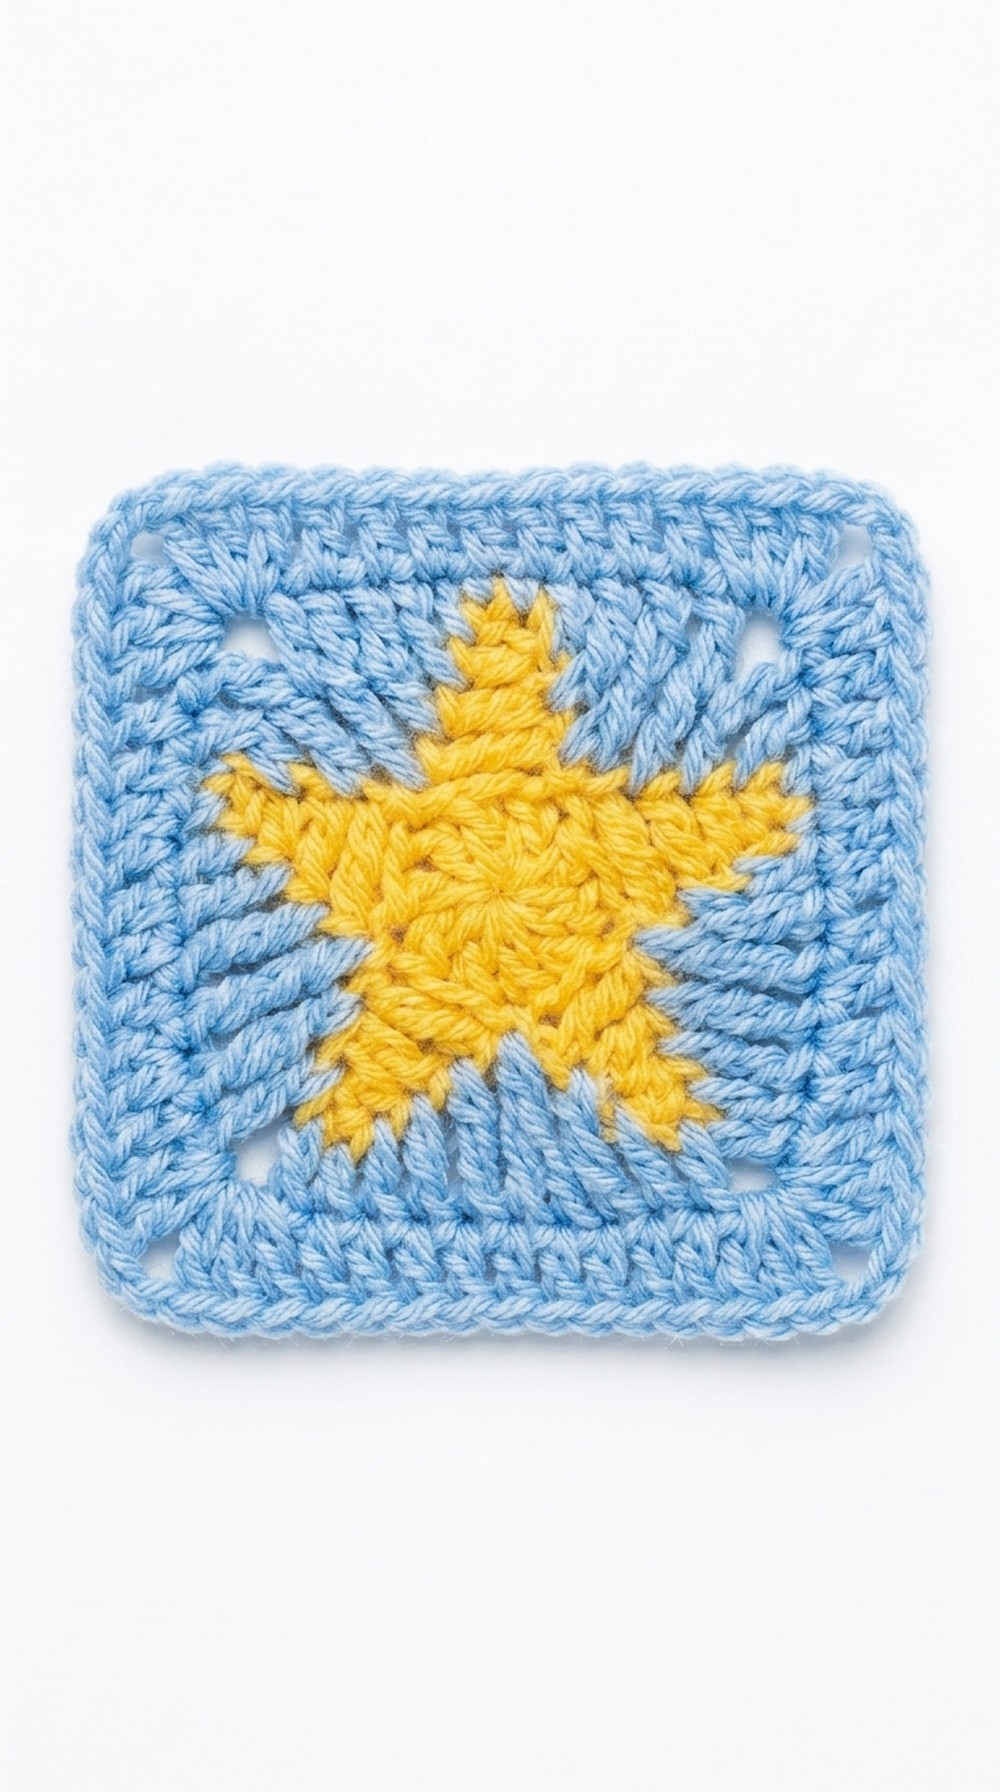
This square is quick and simple to finish, even for beginners, and each one is a little piece of art. Use them to bring some cozy warmth or playful brightness into your everyday life while showing off something handmade and special.
Bright Crochet Star Granny Square Pattern
Materials Needed
- Yarn: Two contrasting colors of medium weight yarn:
- Color A (for the star)
- Color B (for the granny square)
- Crochet Hook: Use a hook size that suits the weight of your yarn (e.g., 4mm to 5mm).
- Scissors
- Tapestry Needle: For weaving in the ends.
Abbreviations Used
- ch: Chain stitch
- sc: Single crochet
- hdc: Half double crochet
- dc: Double crochet
- tr: Treble (or triple) crochet
- dtr: Double treble crochet
- sl st: Slip stitch
Pattern Instructions
Make the Star
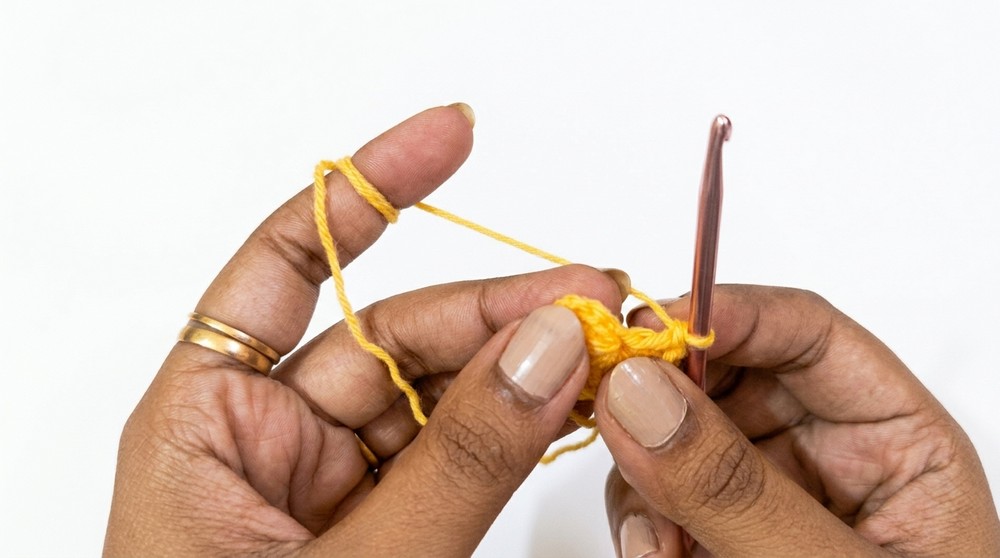
Step 1: Create a Magic Circle
- Start with a magic ring (adjustable loop).
- Pull the working yarn through to form your loop.
- Secure it by chaining 2 ch within the magic circle.
Step 2: Build the Foundation Round
- Crochet 3 ch (counts as your first double crochet).
- Add 10 dc into the magic ring, making a total of 11 stitches.
- Tighten the magic ring.
- Join with a sl st to the top of the 3 ch you made at the beginning to close the circle. You now have a round base.
Step 3: Form Star Petals
- Begin 5 ch to start the first petal.
- Work the following stitches into the subsequent chains:
- 2nd ch from the hook: sc
- 3rd ch from the hook: hdc
- 4th ch from the hook: dc
- 5th ch from the hook: tr
- Skip 1 stitch on the circle, then sl st into the next stitch to anchor the petal.
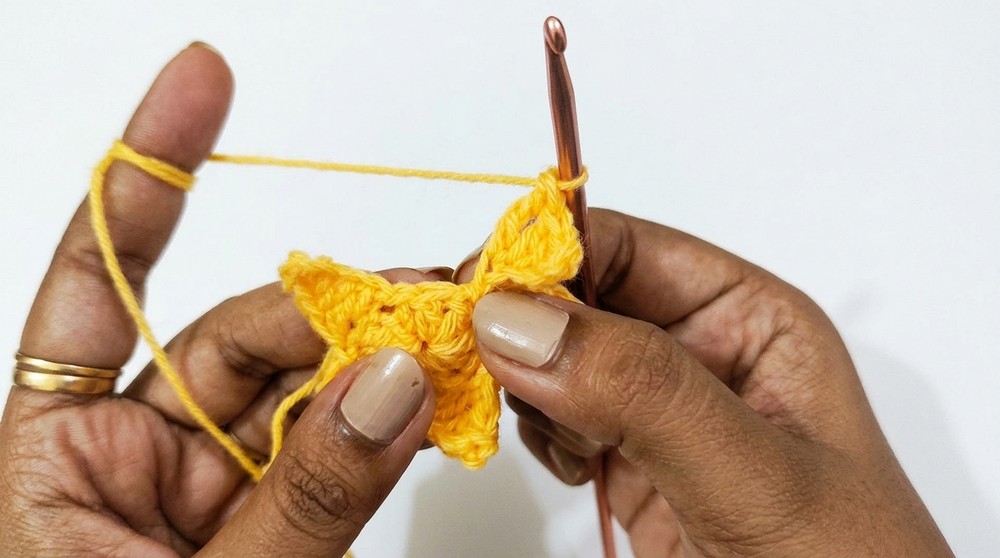
- Repeat the above steps to create a total of 5 petals, ensuring you skip 1 base stitch for each petal.
- Finish with a sl st between the last petal and the first star petal. Cut and fasten off the yarn. Your star is now complete.
Make the Granny Square
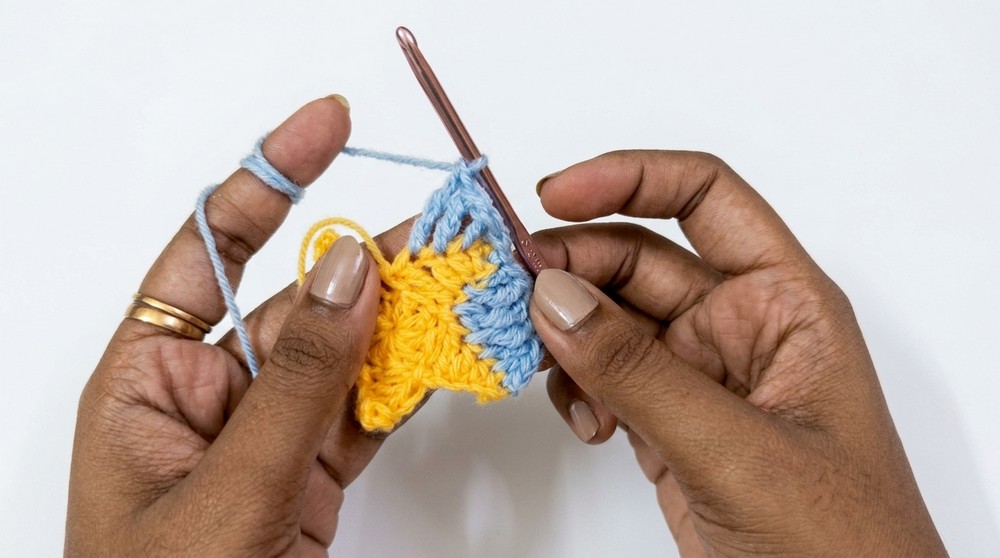
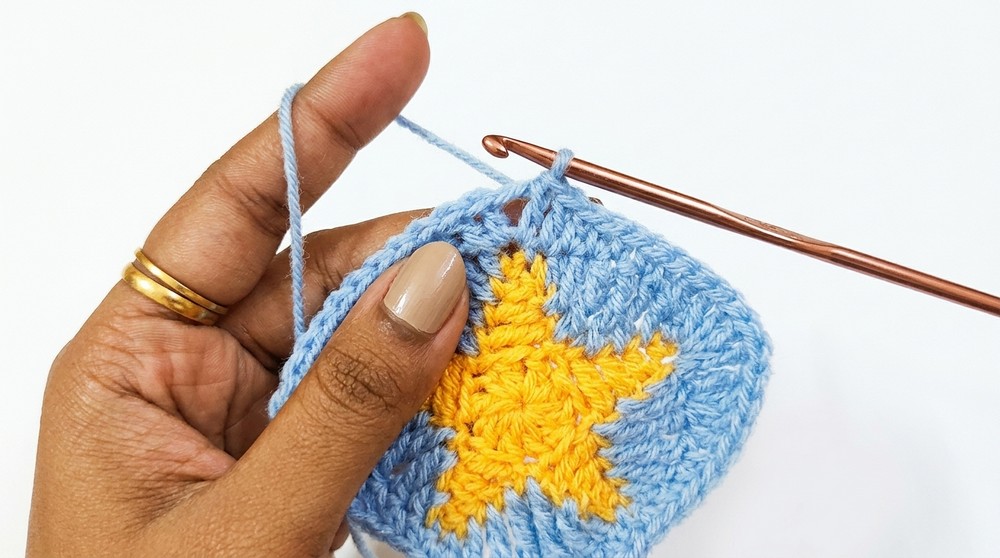
Step 4: Attach Color B
- Using the second color of yarn (Color B), join in the first stitch of any petal from the star.
- Secure with a sl st and chain 1.
Step 5: Form the Side Stitches
- Using the 4 visible stitches on one side of a petal:
- First stitch: sc
- Second stitch: hdc
- Third stitch: dc
- Fourth stitch: tr
- For the corner, repeat 2 tr, ch 2, 2 tr in the peak of the petal. This forms the corner of the granny square.
Step 6: Repeat Around the Star
- On each side of the petals, repeat:
- First stitch: sc
- Second stitch: hdc
- Third stitch: dc
- Fourth stitch: tr
- For the corners: 2 tr, ch 2, 2 tr in the same space.
- Continue crocheting around, forming the granny square shape.
Step 7: Completion of Rounds
- Sl st to the first stitch of the round to complete it.
- Repeat the granny square pattern as needed to expand further.
Finishing
- Weave in Ends: Use a tapestry needle to weave in any loose yarn ends, ensuring the design stays clean and professional looking.
- Trim Ends: Secure the yarn by tying it tightly and trimming the excess.
- Block the Square (Optional): Lightly stretch the square into shape and pin it down. Mist with water and allow it to dry for a cleaner finish.
Final Words
Congratulations, Your granny square with a star is now complete. You can use this versatile design to make blankets, cushion covers, or other creative crochet projects. Experiment with different color combinations for more variety.
Tips for Success
- Tension Control: Keep your tension consistent for a neat, uniform design.
- Master the Magic Circle: This technique ensures a tight and professional center.
- Use Stitch Markers: If you’re new to crochet, use markers to track your corners or the start of rounds.
- Practice Smooth Transitions: While switching yarn colors, ensure the stitches are not too tight or loose to avoid uneven edges.
- Block Your Project: For a polished look, block your final piece to shape it properly.