Turn yarn into a fluttering crochet butterfly keychain pattern that’s perfect for brightening up your bag, guarding your keys, or gifting with love.
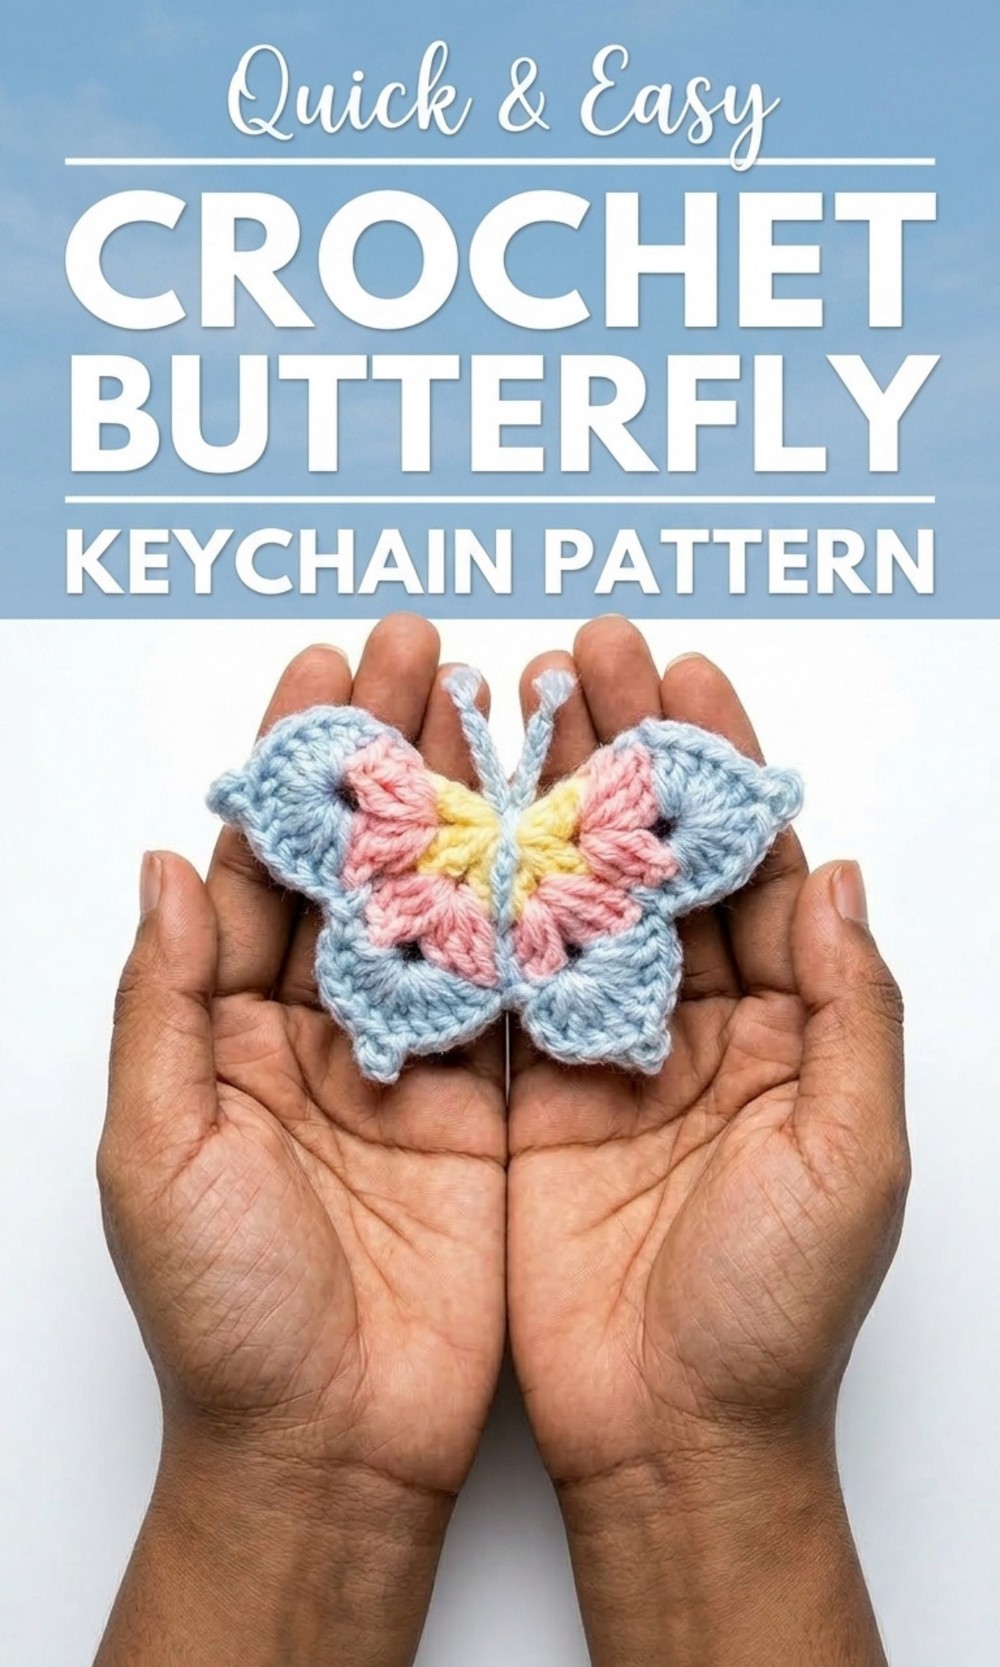
Simple Free Crochet Butterfly Keychain Pattern That’s So Useful
Fly away with a colorful little friend that’s cute, useful, and fun to make. With the Free Crochet Butterfly Keychain Pattern, you can turn soft yarn into a stunning butterfly that’s perfect for keys, bags, or as a thoughtful gift. Watching yarn transform into wide, fluttering wings and a charming little body feels magical and easy, thanks to the simple steps that anyone can follow.
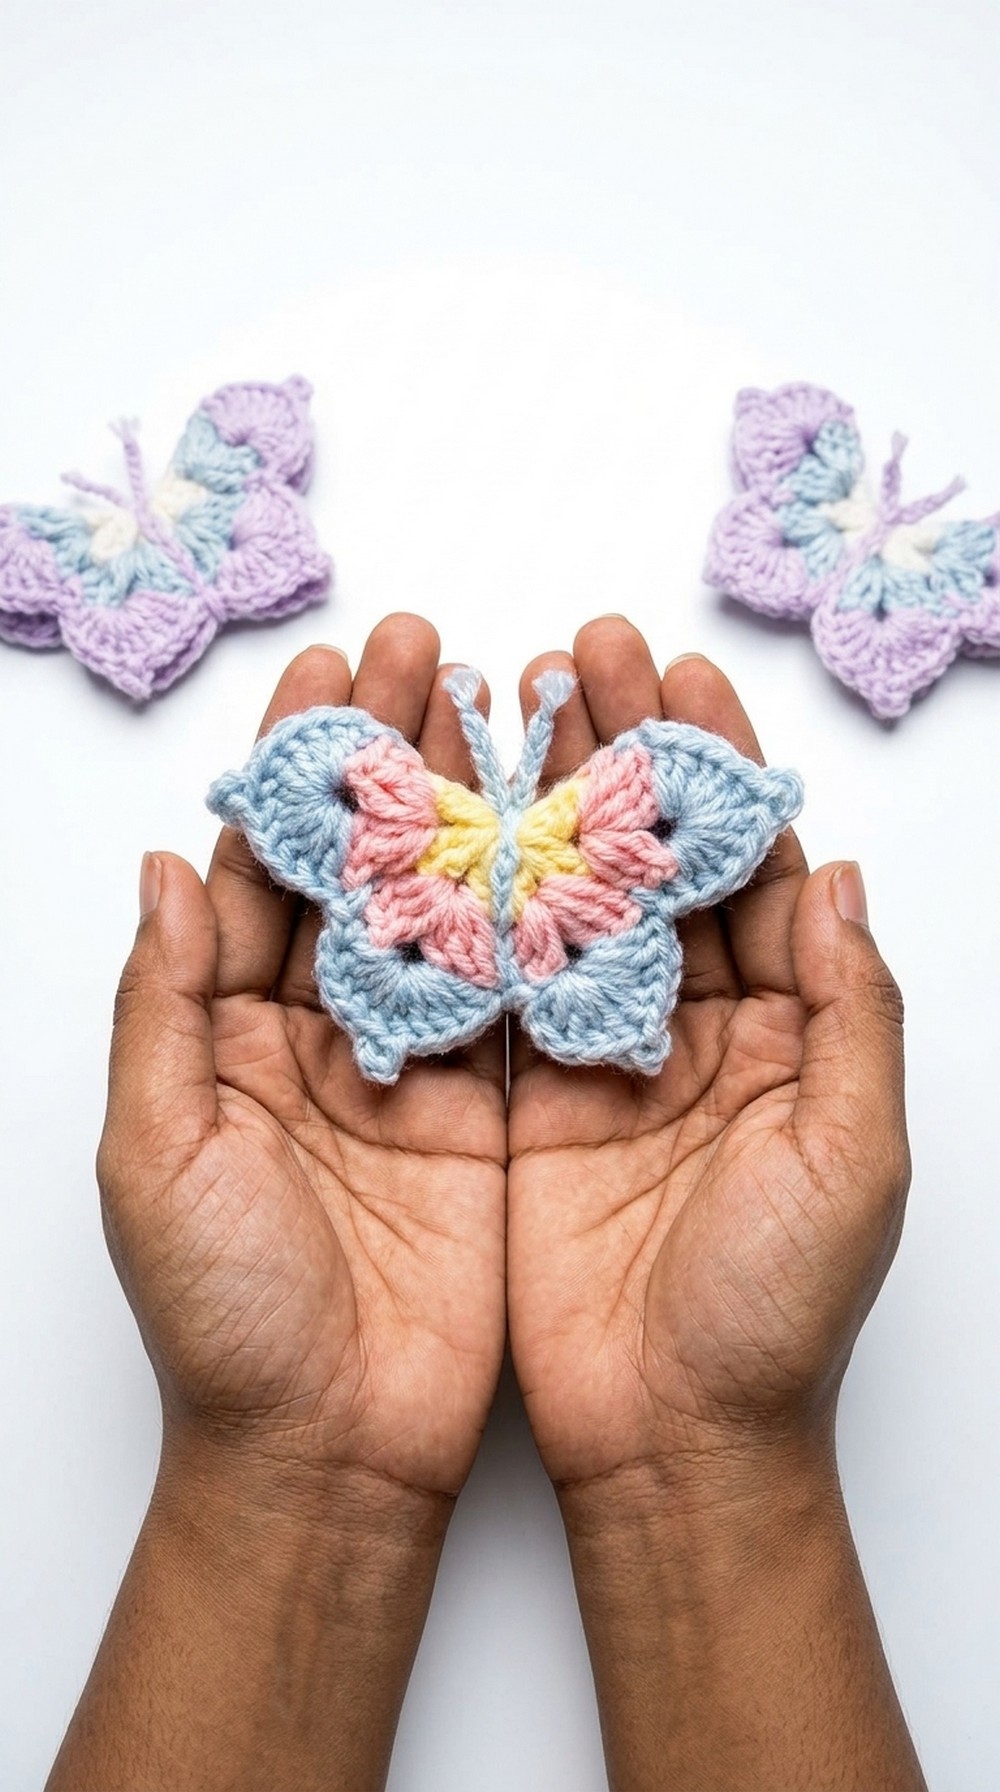
The lightweight design makes it easy to carry, while the sturdy stitches ensure it stays beautiful and strong for years, even with daily use. It’s small enough to fit right in your palm but big enough to make a stylish statement wherever it goes. Whether you use it to keep track of your keys or give it as a handmade party favor, this project is unique, useful, and full of fun.
Enchanting Crochet Butterfly Pattern
Finished Size
The butterfly measures approximately 3 inches wide and 3 inches tall once folded into shape.
Materials Needed
- Yarn:
- Base Flower Color (Color A): 4 ply acrylic yarn in any bright or soft tone.
- Edging Color (Color B): Contrasting color for the butterfly border.
- Body and Antennae (Color C): Dark toned yarn (e.g., black or brown).
- Crochet Hook: 2.5 mm hook.
- Scissors: For cutting yarn.
- Tapestry Needle: For weaving in ends and final touch ups.
Gauge
Gauge is not critical for this decorative project. However, ensure consistent tension while working with 4 ply yarn and a 2.5 mm hook to maintain appropriate butterfly proportions.
Special Techniques
- Magic Circle: Using the magic circle ensures an adjustable central ring for the flower foundation.
- Picot Stitch: Adds decorative peaks to the butterfly’s edging.
- Slip Stitch: Used for joining rounds and creating the butterfly’s body line.
Pattern Step by Step
Round 1: Flower Base
- Start the Magic Circle:
- Hold your yarn and form a loop so that the working yarn crosses over the tail. Insert the hook into the loop. Yarn over and pull through to create a slip knot.
- Foundation Chains:
- Chain 3 (counts as the first double crochet).
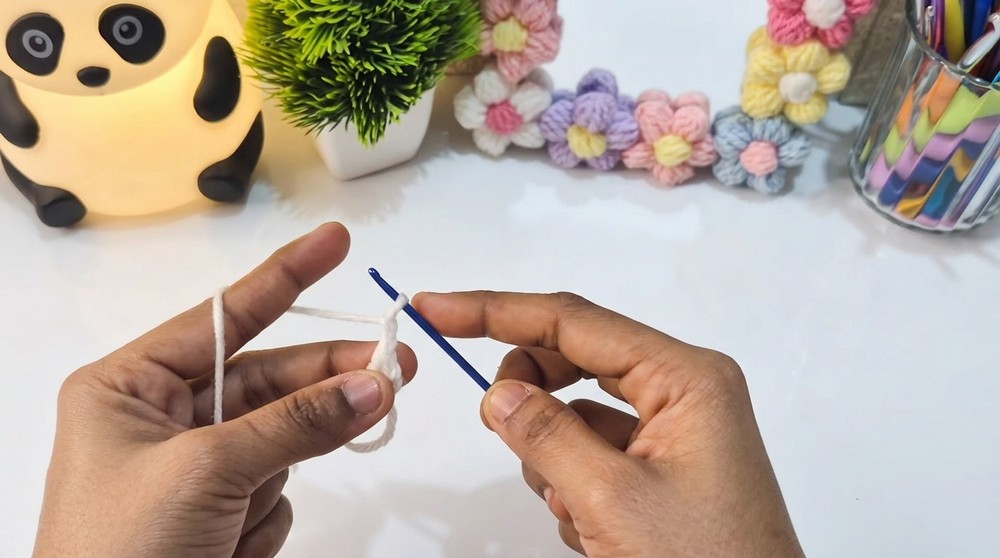
- Chain 3 (counts as the first double crochet).
- Double Crochet Pairs:
- Into the magic circle, work 2 double crochets, followed by chain 2. Repeat this sequence (2 double crochets, chain 2) seven more times for a total of 8 pairs of double crochets.
- Closing Round 1:
- Join to the third chain from the start with a slip stitch.
- Pull the loose end to close the circle tightly. This creates the central foundation of your flower.
Round 2: Adding Petals
- Attach Yarn:
- Start working in any chain 2 gap. Join Color A with a slip stitch.
- Building the Petal Structure:
- Chain 3 (counts as a double crochet).
- Work 2 double crochets into the same chain 2 space.
- Chain 3, then work 3 double crochets into the same gap (creating one petal).
- Transition Between Petals:
- Work 1 single crochet into the next chain 2 gap.
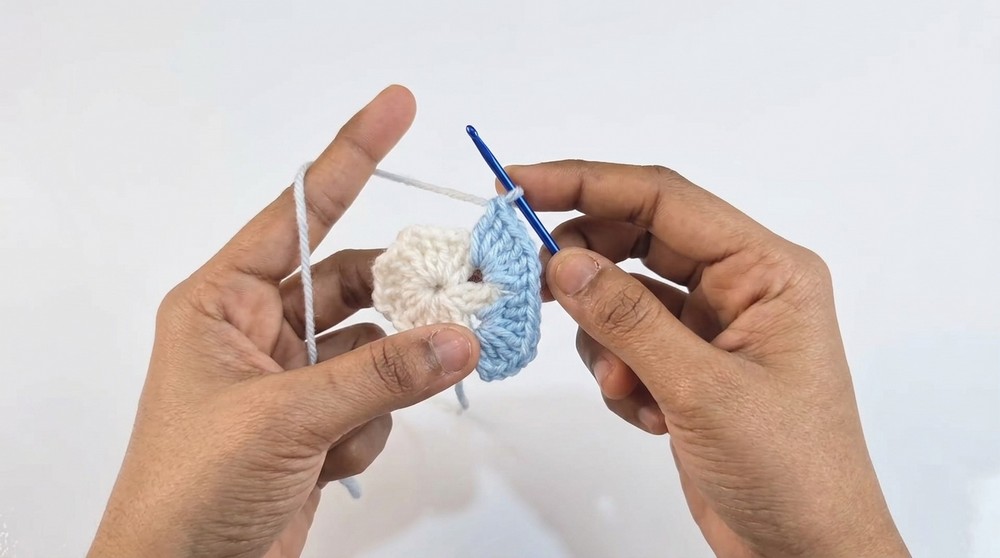
- Work 1 single crochet into the next chain 2 gap.
- Repeat Petal Sequence:
- Continue working 3 double crochets, chain 3, 3 double crochets in the gap; single crochet in the next gap around.
- Closing Round 2:
- Before fastening off Color A, join to the third chain of the first set with a slip stitch. Cut yarn and secure the loose ends.
Round 3: Butterfly Edging
- Attach Yarn:
- Using Color B, join to any chain 3 space in a petal. Chain 1.
- Double Crochet Sets:
- Work 5 double crochets into the chain 3 space.
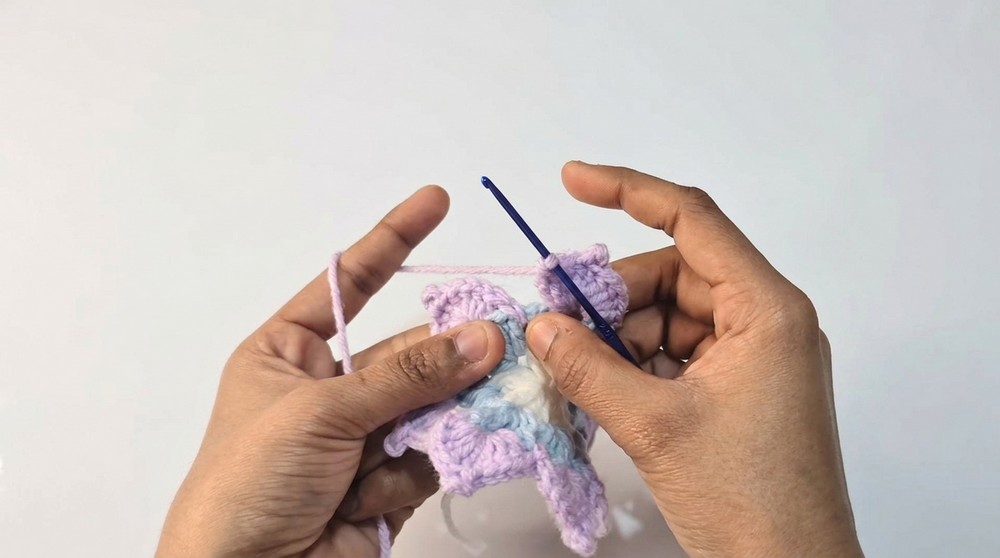
- Work 5 double crochets into the chain 3 space.
- Picot Stitch:
- Chain 3. Insert your hook into the top of the fifth double crochet. Yarn over and pull through both loops to form a decorative peak (picot stitch).
- Complete the Petal’s Edge:
- Work another 5 double crochets into the same chain 3 gap.
- Transition to Next Petal:
- Single crochet into the next single crochet between petals.
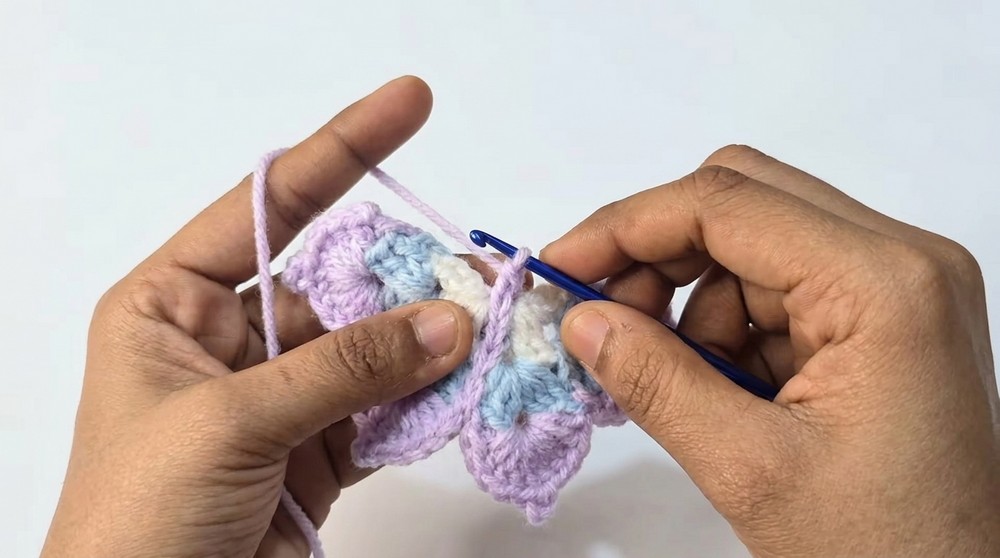
- Repeat Edging:
- Continue working 5 double crochets, picot, 5 double crochets in chain 3 gap; single crochet into the next single crochet around.
- Closing Round 3:
- Join with a slip stitch to the first chain 1 of the round. Cut yarn and secure ends.
Creating the Body and Antennae
- Fold into Butterfly Shape:
- Fold the flower in half, aligning petals to resemble butterfly wings.
- Body Line:
- Using Color C, insert your hook at the center fold of the butterfly and pull yarn through to begin a slip stitch row.
- Make slip stitches along the fold to create a straight body line.
- Antennae:
- Chain 5 after finishing the body line, then fasten off yarn.
- Reattach yarn at the same starting point and chain another 5 for the second antenna.
Finishing
- Weave in Ends:
- Using a tapestry needle or the crochet hook, weave all loose ends into the back of the butterfly wings neatly.
- Trim Excess Yarn:
- Carefully snip off any extra yarn to create a clean finish.
- Carefully snip off any extra yarn to create a clean finish.
Final Words
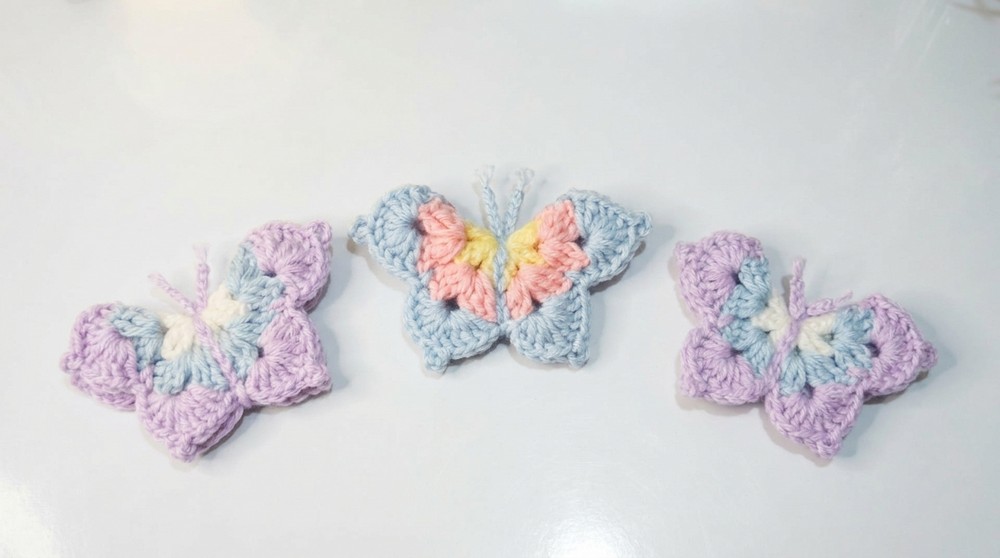
Your crochet butterfly is ready. This versatile butterfly can be used as:
- A decorative applique for bags, clothing, or blankets.
- A cheerful wall hanging or gift embellishment.
- A toy or craft for children.
Tips to Maintain Pattern Quality
- Experiment with Yarn: Try thinner threads for delicate butterflies or chunky yarn for larger, more bold designs.
- Blocking: Use wet blocking techniques for smoother edges if necessary.
- Customizing Colors: Incorporate vibrant or gradient yarn combinations for a unique look.
- Practice Picot Stitches: The decorative peaks may require some practice initially.
Conclusion
This crochet butterfly pattern combines simplicity and elegance while introducing foundational techniques like the magic circle, picot stitch, slip stitch, and double crochet. Perfect for beginners and experts alike, the butterfly adds a handmade touch to any space or project.