Make your own sweet crochet pig with this free and simple pattern, ideal for anyone learning amigurumi or looking for a quick, fun project.
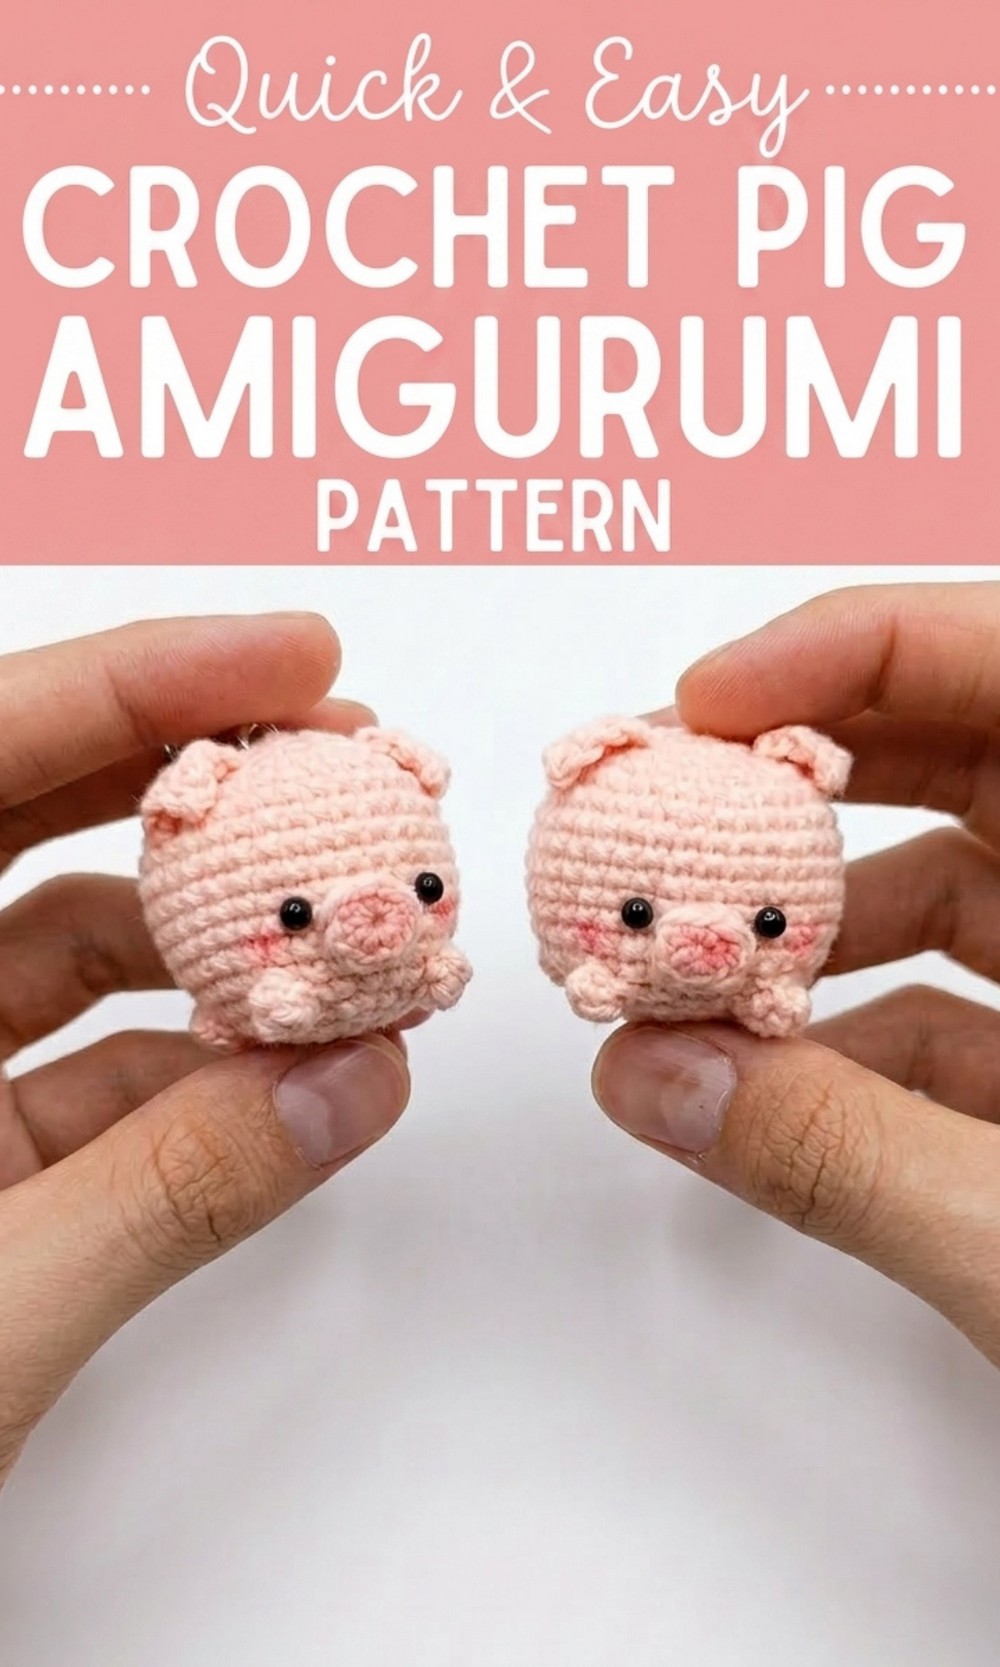
Cuddle with This Cute Free Crochet Pig Amigurumi Pattern
Crochet this adorable little pig and add a touch of whimsy to your world. The Free Crochet Pig Amigurumi Pattern is perfect for creating a soft, huggable piglet that can be used as a keychain, decoration, or a thoughtful gift. This pig is small and cute, with tiny feet, a round body, and a curly tail that makes it look like a mini treasure. Its bright cheeks and sweet little snout bring it to life, making it hard not to smile when you see it.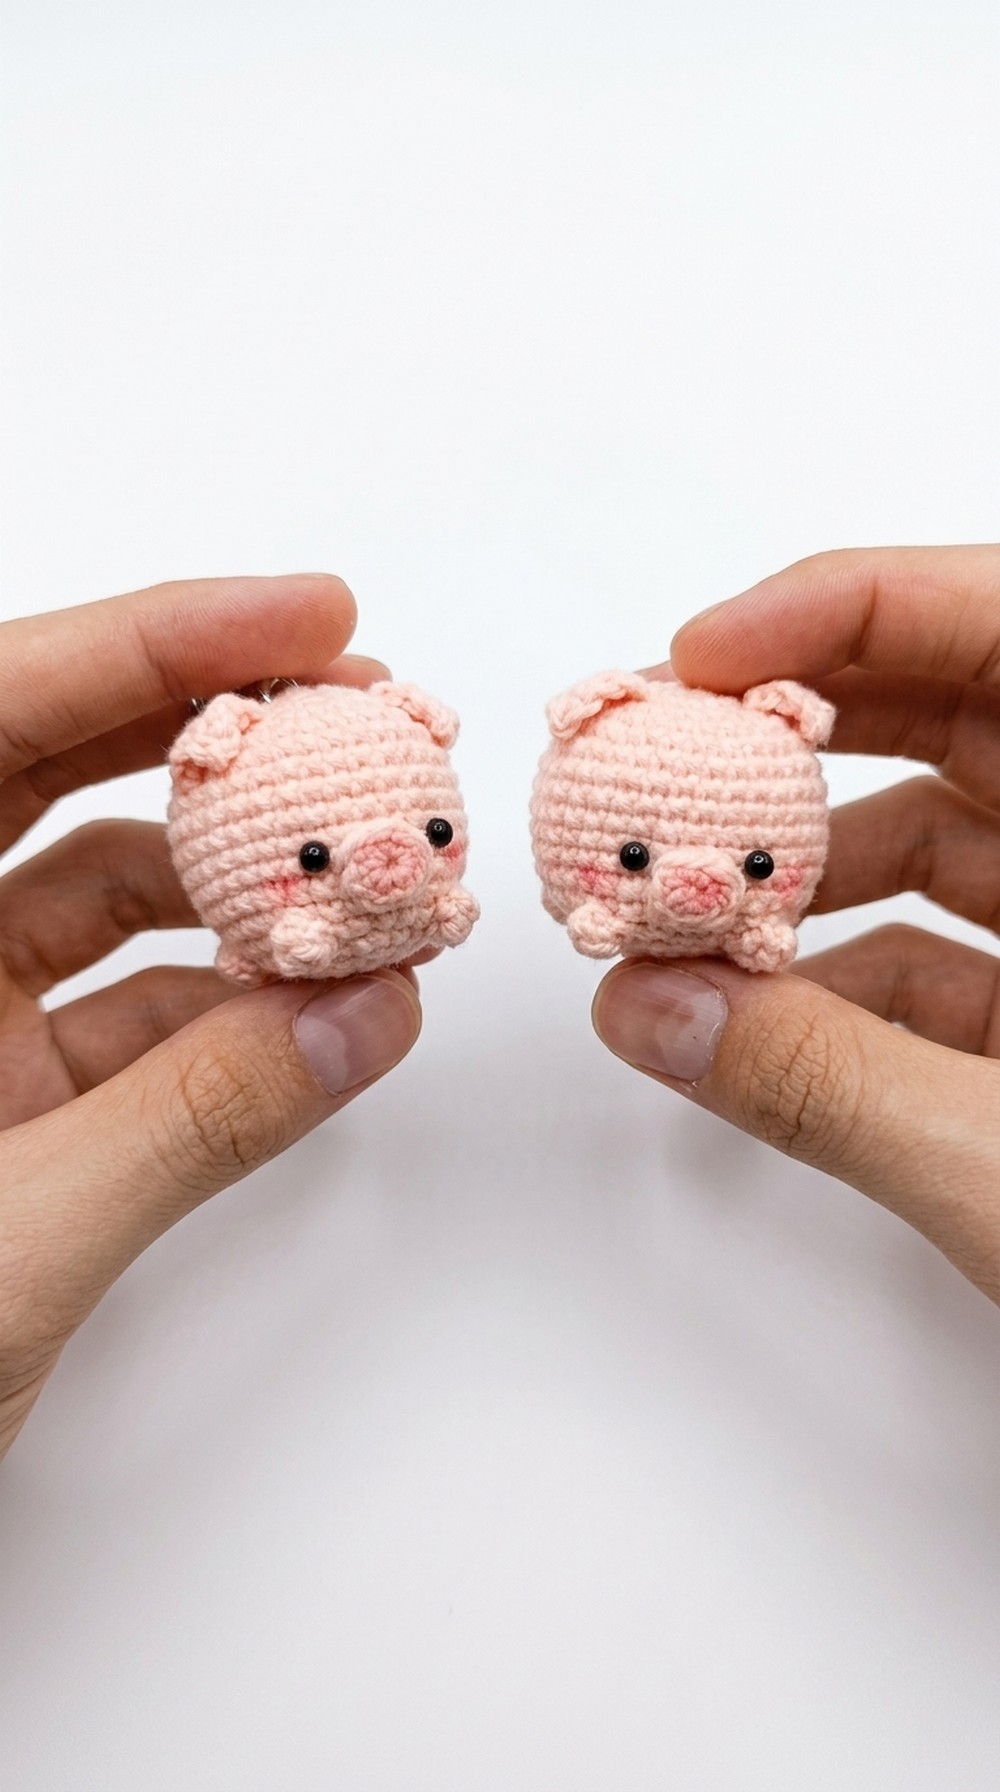 What makes this pattern special is how easily you can adjust the size. Use thicker yarn and a larger hook for a bigger pig or thinner yarn for an even smaller one.
Whether you’re a crochet pro or just starting out, this pattern is designed for success. Make it today, add a keyring or a little bow, and share the joy of this tiny pig with your loved ones. It’s cute, creative, and so much fun to make.
Crochet Pig Amigurumi Pattern
Materials Needed
- Yarn: Thin or chenille yarn (your choice of color).
- Hook: Choose hook size according to the yarn thickness. For smaller pigs, use thinner yarn and smaller hooks.
- Stuffing: Fiberfill to stuff the pig’s body.
- Stitch Marker: Optional but helps in tracking rows.
- Scissors: For cutting leftover threads and shaping.
- Pins/Alicates: Useful for threading and adjusting small details.
- Rubor: For cheek coloring.
- Keyring or Brochette Stick: Optional, for turning your pig into a keychain or bouquet decoration.
- Glue or Hot Silicone: To secure details like the snout, eyes, and tail.
- Plastic Eyes or Beads: For the pig’s eyes.
- Lanera Needle: For sewing smaller details like the ears and tail.
Special Techniques
- Magic Circle: Used to create a tightly closed starting round for the body.
- Increases: Adding extra stitches into a single point to expand rounds.
- Decreases: Combining stitches to make smaller rounds.
- Bean Stitch (Garbanzo Stitch): Used for detailing the pig’s feet.
Pattern Instructions
Step 1: Start the Body
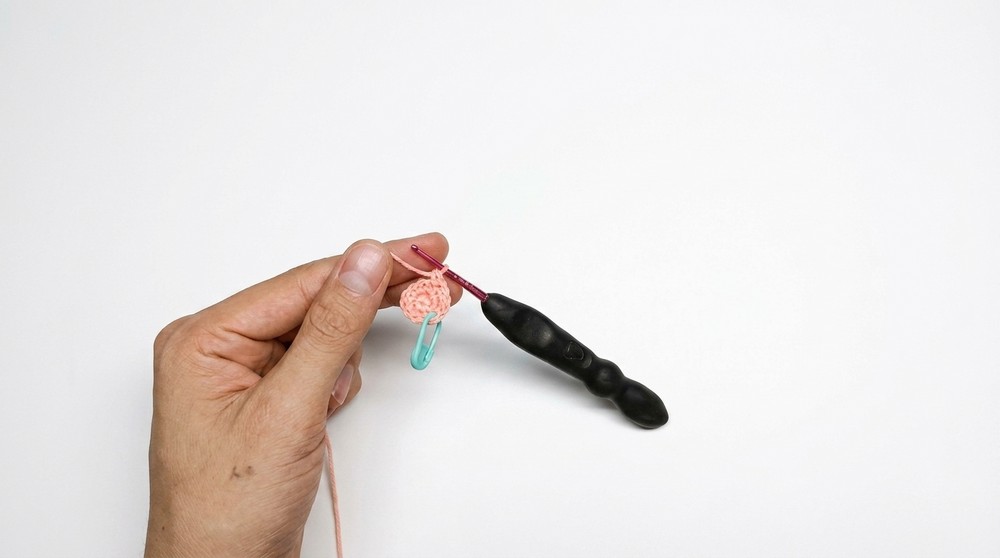
- Vuelta 1: Begin with a magic circle and crochet 6 single crochet (SC) stitches into the circle. Pull the tail to close.
- Vuelta 2: Work 6 increases (2 SC per stitch) around. You’ll have 12 stitches at the end of the round.
- Vuelta 3: Alternate 1 SC, 1 increase across the round. 18 stitches total.
- Vuelta 4: Alternate 2 SC, 1 increase across the round. Finalize with 24 stitches.
- Vuelta 5: Begin adding the legs using the bean stitch (see below).
Step 2: Create Legs
- Formulating the Garbanzo Stitch:
- Crochet 5 SC, then in the next stitch, work 4 double crochet (DC) into a single space.
- Pull through to close the first bean stitch.
- Continue this process around the round to form 4 legs, spaced evenly.
- For each bean stitch, remember to pull tight and secure the loop to ensure clean shaping.
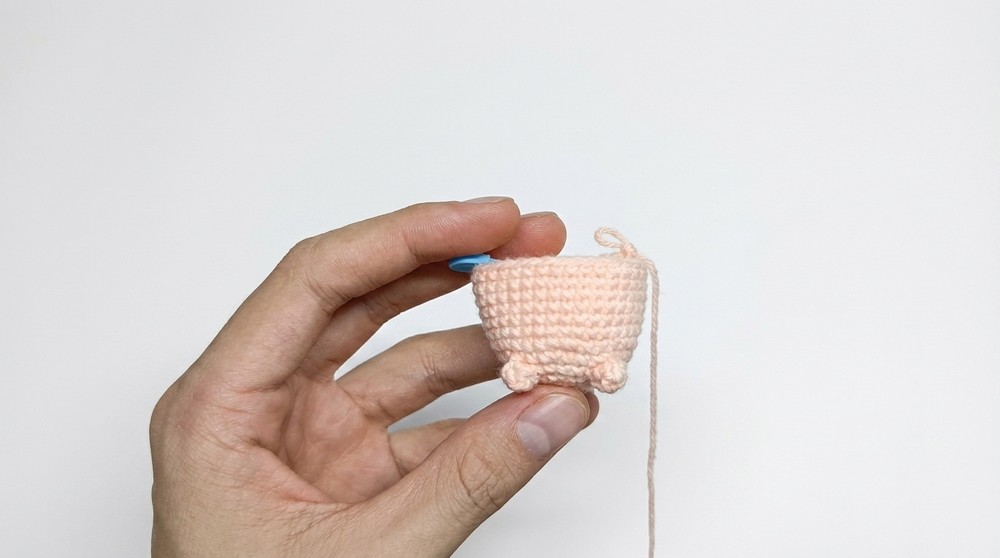
Step 3: Build the Body Shape
- Vuelta 6: Alternate 3 SC, 1 increase across. 30 stitches.
- Vuelta 7: Alternate 4 SC, 1 increase across. 36 stitches.
- Vuelta 8–13: Work 1 SC in each stitch around for six rounds to give the body its cylindrical shape.
Step 4: Begin Decreasing
- Vuelta 14: Alternate 4 SC, 1 decrease. 30 stitches.
- Vuelta 15: Alternate 3 SC, 1 decrease. 24 stitches.
- Vuelta 16: Alternate 2 SC, 1 decrease. 18 stitches.
Note: Before moving forward, stuff the body firmly using fiberfill. Ensure no gaps remain unfilled to maintain a smooth round shape.
Step 5: Close the Body
- Vuelta 17: Alternate 1 SC, 1 decrease. 12 stitches.
- Vuelta 18: Work 6 decreases, leaving 6 stitches. Cut the thread, leaving about 12 cm for sewing.
- Using the needle, weave through the remaining stitches and pull tight to close. Secure and hide the yarn inside the body.
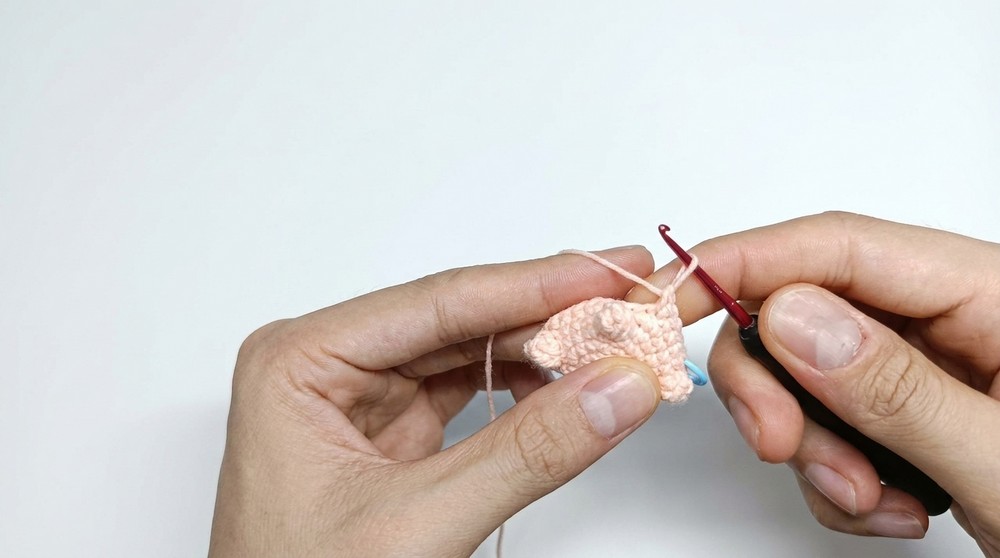
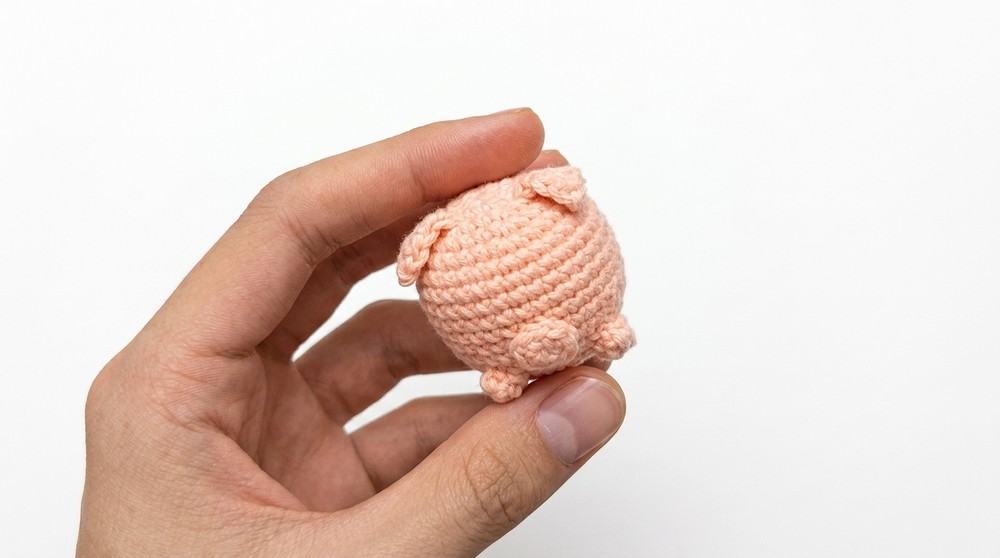
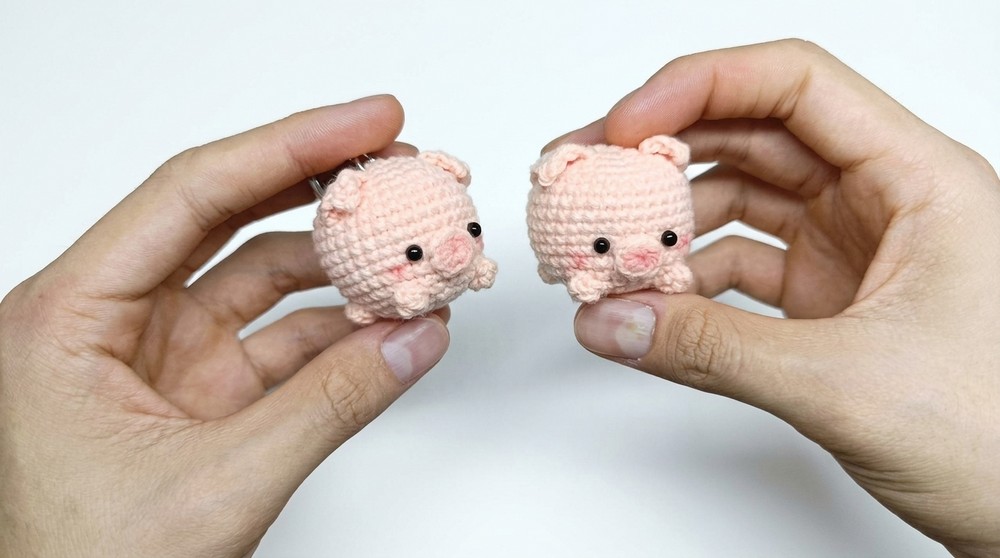
Details and Finishing
1. Snout
- Make a magic circle with 7 SC stitches.
- Close the circle and finish with a slip stitch. Cut the yarn with a small tail for gluing.
- Attach to the body using hot glue or silicone. Press gently to flatten slightly for a better fit.
2. Ears
- Create 4 chains.
- Work 1 SC in the first chain, 1 DC in the second chain, and 1 extended DC in the third chain.
- Finish with a slip stitch, leaving long tails to sew into the body.
- Sew the ears securely using the needle, ensuring symmetrical placement.
3. Tail
- Chain 8.
- Work slip stitches across the chain.
- Leave a long tail and sew the tail into the back of the body.
- Use glue or silicone and curl the tail into a spiral shape.
4. Eyes
- Position plastic eyes just above the snout symmetrically.
- Use a brochette stick to create holes and secure the eyes using glue or gentle pressure.
5. Final Touches
- Apply rubor to the inside of the ears, cheeks, and snout for added detail.
- Massage and reshape the body gently to ensure even rounding.
Helpful Tips
- Choosing Materials: If using chenille or thicker yarns, adjust your hook size accordingly for a fluffier pig.
- Stitch Tracking: Use stitch markers to prevent losing count during repetitive rows.
- Customization: The pattern can be adjusted for smaller or larger pigs by tweaking the yarn thickness and hook size.
- Safety: If gifting to children, ensure embellishments (such as eyes) are securely glued or stitched.
Final Words
This mini pig pattern is a delightful project for beginners and experienced crocheters alike. It combines creativity and practicality, turning basic stitches into a charming keepsake or souvenir. Customize the colors, use the pig as a keychain or a decorative element, and enjoy the satisfaction of creating something unique—each pig will have its own personality.
If you enjoyed this tutorial, use what you’ve learned to diversify your handmade projects further. Whether you’re crocheting for entrepreneurship or gifting, this mini pig is perfect for both.