Feel relaxed and trendy with this free crochet cardigan pattern simple process makes a light and soft layer perfect for cool mornings and evenings.
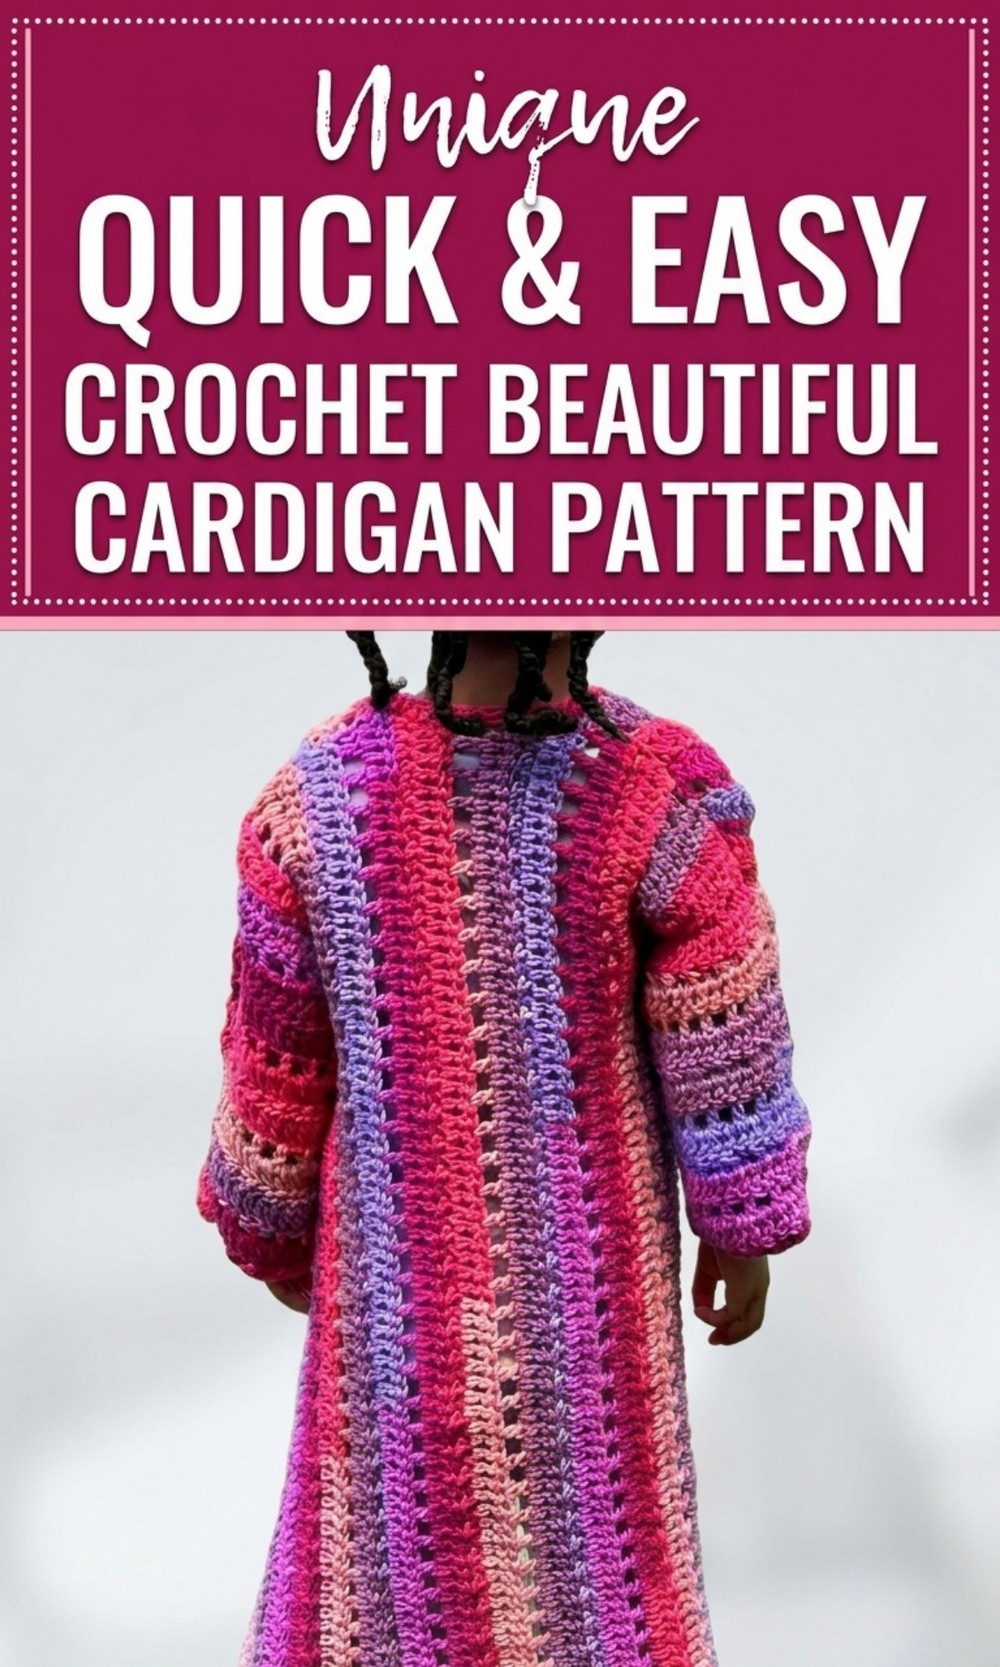
Wow Your Wardrobe with This Free Crochet Cardigan Pattern
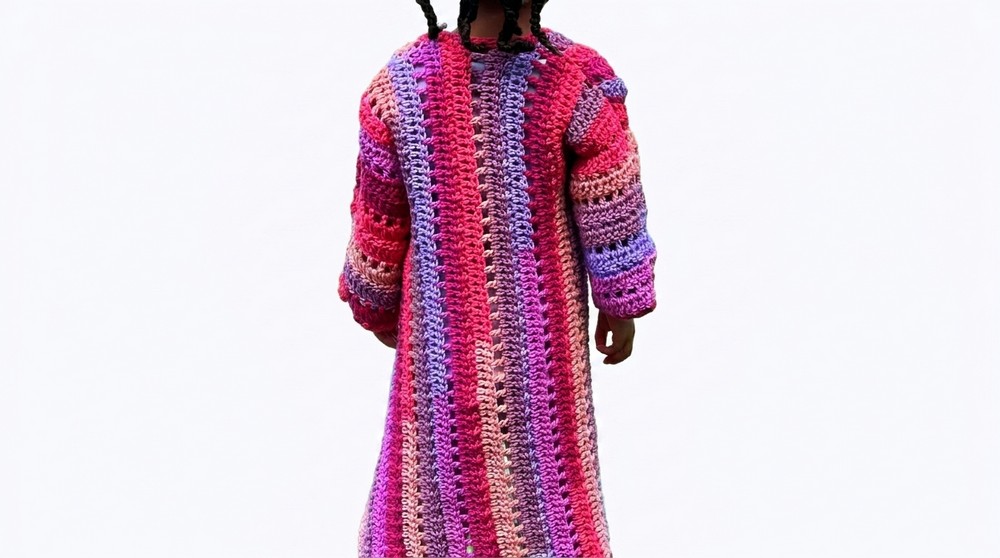
Crocheting a beautiful cardigan has never been easier and more fun. This Free Crochet Cardigan Pattern teaches you how to make a cozy duster style cardigan that’s perfect for toddlers, but you can adjust it to fit any size. Designed with soft, medium 4 weight yarn, the cardigan has a lovely texture and a lightweight feel, making it ideal for everyday wear in any season. The soft colors, like the “Hibiscus” shade mentioned, add charm and elegance to this handmade masterpiece.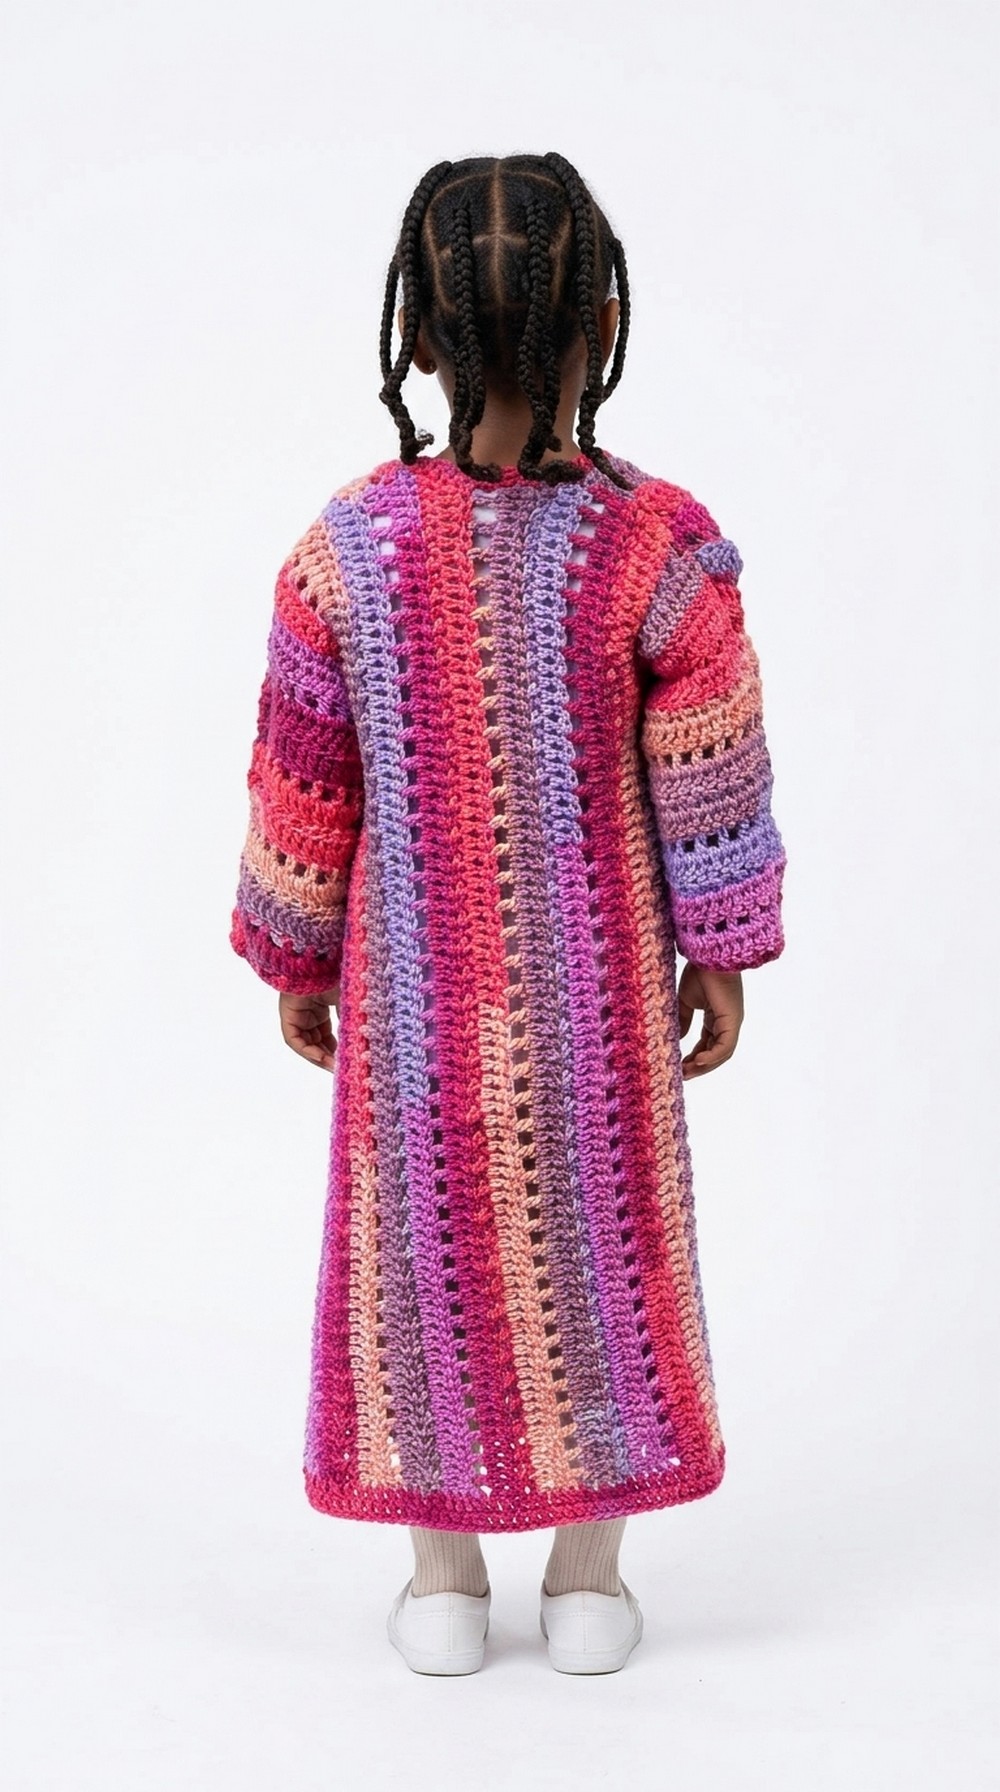 The design is unique because it’s made in one piece, reducing seams for a clean finish. It uses a four row pattern, combining stitches like half double crochet and double crochet to create a textured yet durable appearance.
The border and sleeves add extra stretch and a professional knit like look. With easy to follow steps and minimal materials, this cardigan is perfect for beginners or experienced crocheters looking for a fun project.
Comfy Crochet Cardigan Pattern
Finished Size
- Size: Approx. 2T to 3T, suitable for a toddler aged around 3.5 years.
- Length: Adjustable based on the number of foundation chains.
- Sleeve Length: Can be customized based on measurement preferences.
Tip: This pattern uses a made to measure approach, so ensure you measure for personalized results.
Materials
- Yarn: Medium 4 Weight Yarn
(Example: Caron Cinnamon Swirl Cakes, 100% acrylic, “Hibiscus” color as used in the video.) - Suggested Yarn Amount: 1 to 2 cakes or approximately 400 to 500 yards, depending on size.
- Hook: 6mm crochet hook (e.g., Furls Crochet Hook)
- Stitch Markers: 4 or more markers to mark important stitch points.
- Measuring Tape: To ensure proper sizing and for custom measurements.
- Scissors: For trimming the yarn.
- Darning Needle: For weaving in ends.
Gauge
- 4″ x 4″ (10 cm x 10 cm):
10 rows x 14 stitches in half double crochet (HDC).
Tip: Always check your gauge to ensure the correct size.
Special Techniques
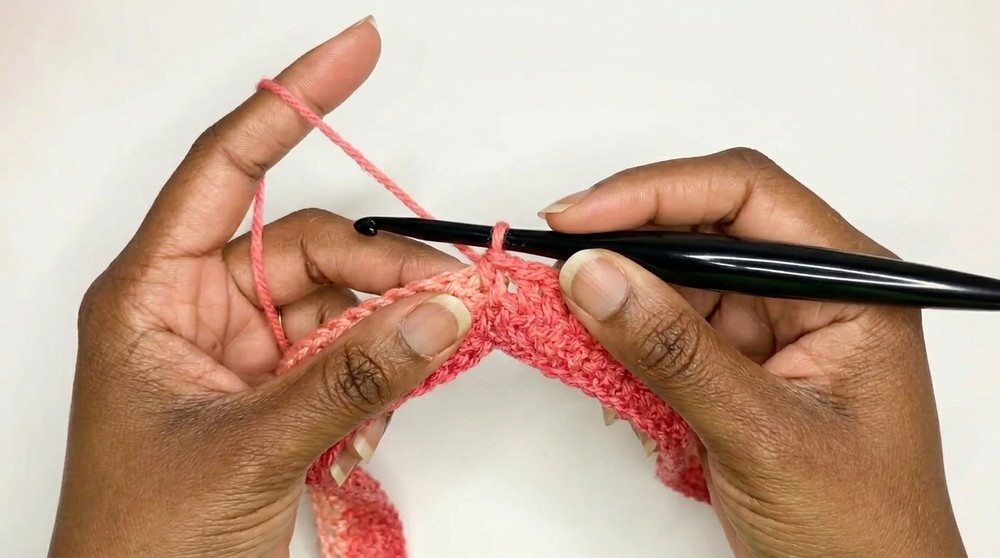
- Stacked Single Crochet: Used as an alternative to the traditional turning chains for a cleaner edge.
- Make a single crochet in the first stitch, insert the hook in the “left leg” of the stitch, and make another single crochet. This counts as the first double crochet.
- Half Double Crochet in Back Loops: Used for texture and flexibility in alternating rows.
- Seamless Body Construction: The cardigan is worked in one piece, minimizing seams.
Instructions
Step 1: Create the Foundation Chain
- Begin with a foundation chain of 75 stitches for the front panel, which determines the length of the cardigan.
Customization: Adjust the foundation chain to increase or decrease cardigan length.
- Turn your chain and insert stitches into the back bump of the chain for a smooth edge.
Step 2: First Front Panel
- Row 1: Half double crochet (HDC) across the foundation chain (75 stitches). Use a stitch marker to indicate the first stitch.
- Row 2: Without a traditional turning chain, use a stacked single crochet in the first stitch (as the first double crochet), and double crochet (DC) across the row.
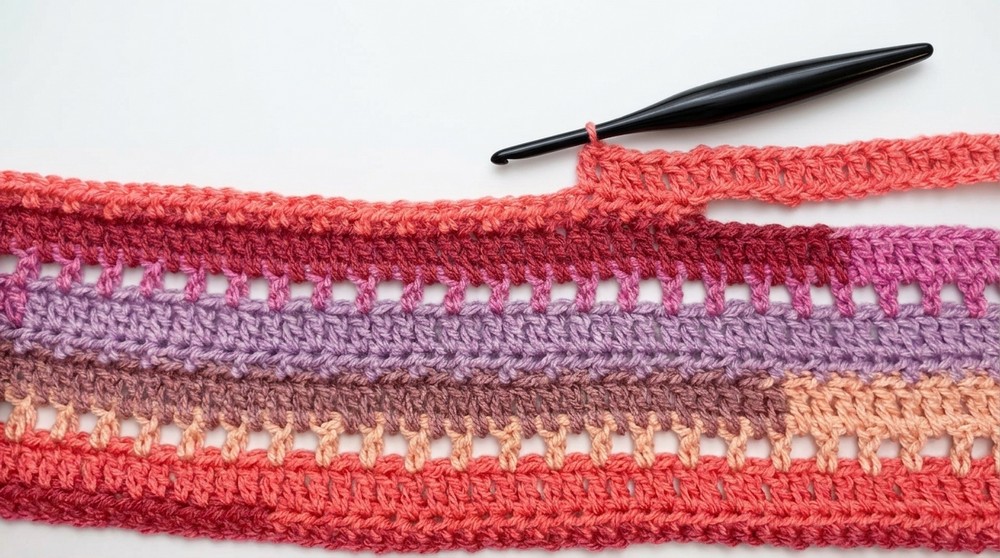
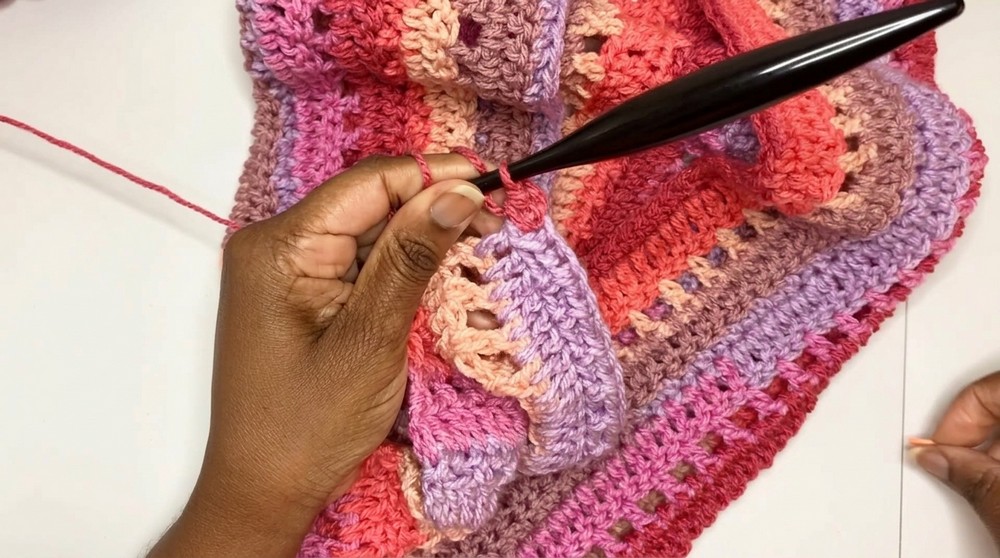
- Row 3: Start with a stacked single crochet, then alternate as follows:
- Chain 1, skip 1 stitch, DC in the next.
Repeat across the row to create a mesh pattern.
- Chain 1, skip 1 stitch, DC in the next.
- Row 4: DC across the row, alternating between:
- Insert your hook in the chain space below (for one stitch).
- Insert your hook into the post of the double crochet stitch for the next.
Repeat this four-row sequence to complete the first front panel (approximately 8 rows).
Step 3: Back Panel
- Once the front panel is done, measure 5 inches (for toddler size) and mark this depth with a stitch marker for the armholes.
- Begin your back panel:
- Create a chain off the end of the row equal to the number of stitches skipped for the armhole (e.g., 17 chains).
- Work the same four row repeat pattern for the back panel.
- Work for approximately 20 rows or until it matches the width needed for your child’s size.
Step 4: Second Front Panel
- When the back panel is complete, continue to the second front panel:
- Mark the armhole depth (5 inches) and chain off as before.
- Use the same four row repeat for the second front panel.
- Match the rows of the second front panel to the first front panel.
Step 5: Seam the Shoulders
- Align the front panels with the back panel and use a slip stitch method to seam the shoulders securely.
- You may also use a whip stitch or mattress stitch for seaming.
Step 6: Sleeves
- Starting the Sleeve: Without cutting the yarn after seaming the shoulders, begin working the sleeve in the round starting at the armhole.
- Work a row of half double crochet evenly around the armhole to begin the sleeve.
- Sleeve Pattern: Follow the same 4 row repeat used for the body, working in joined rounds.
- Length: Work for 16 rounds or until desired sleeve length is achieved.
- Use a slip stitch at the end of each round to join, and turn your work before starting the next round.
- Finish: Fasten off and weave in ends.
Repeat for the second sleeve.
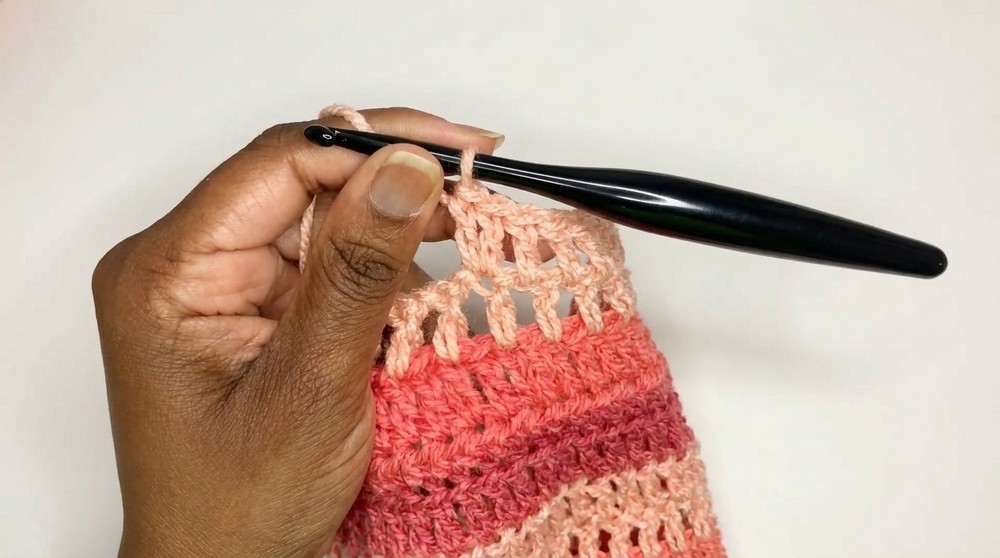
Step 7: Border
- Attach a new ball of yarn at the bottom of the cardigan.
- Work a row of half double crochet in back loops only along the bottom edge, up the first front panel, around the neckline, and down the second front panel.
- For a polished finish, you can add multiple rows to the border if desired.
Customization Ideas
- Resize: Adjust the foundation chain length, armhole depth, or number of rows to make this cardigan for other ages or sizes.
- Sleeve Style: Make the sleeves short or eliminate them for a vest like design.
- Color Changes: Use striped yarn or alternate colors for a playful look.
- Additional Border Designs: Add a scalloped or ribbed border for texture.
Conclusion
This toddler duster cardigan is a simple yet elegant project that utilizes a seamless construction and textured design. Its customization friendly approach makes it perfect for creating a cardigan tailored to your child. Whether it’s your first cardigan project or part of your growing crochet collection, this pattern combines beauty and function. Happy crocheting!
Important Remarks: Ensure proper tension and alignment during seaming and turning rounds. The finished cardigan should have a cozy and stretchy drape, making it ideal for layering over casual outfits. Experiment with different yarn colors for a unique touch.