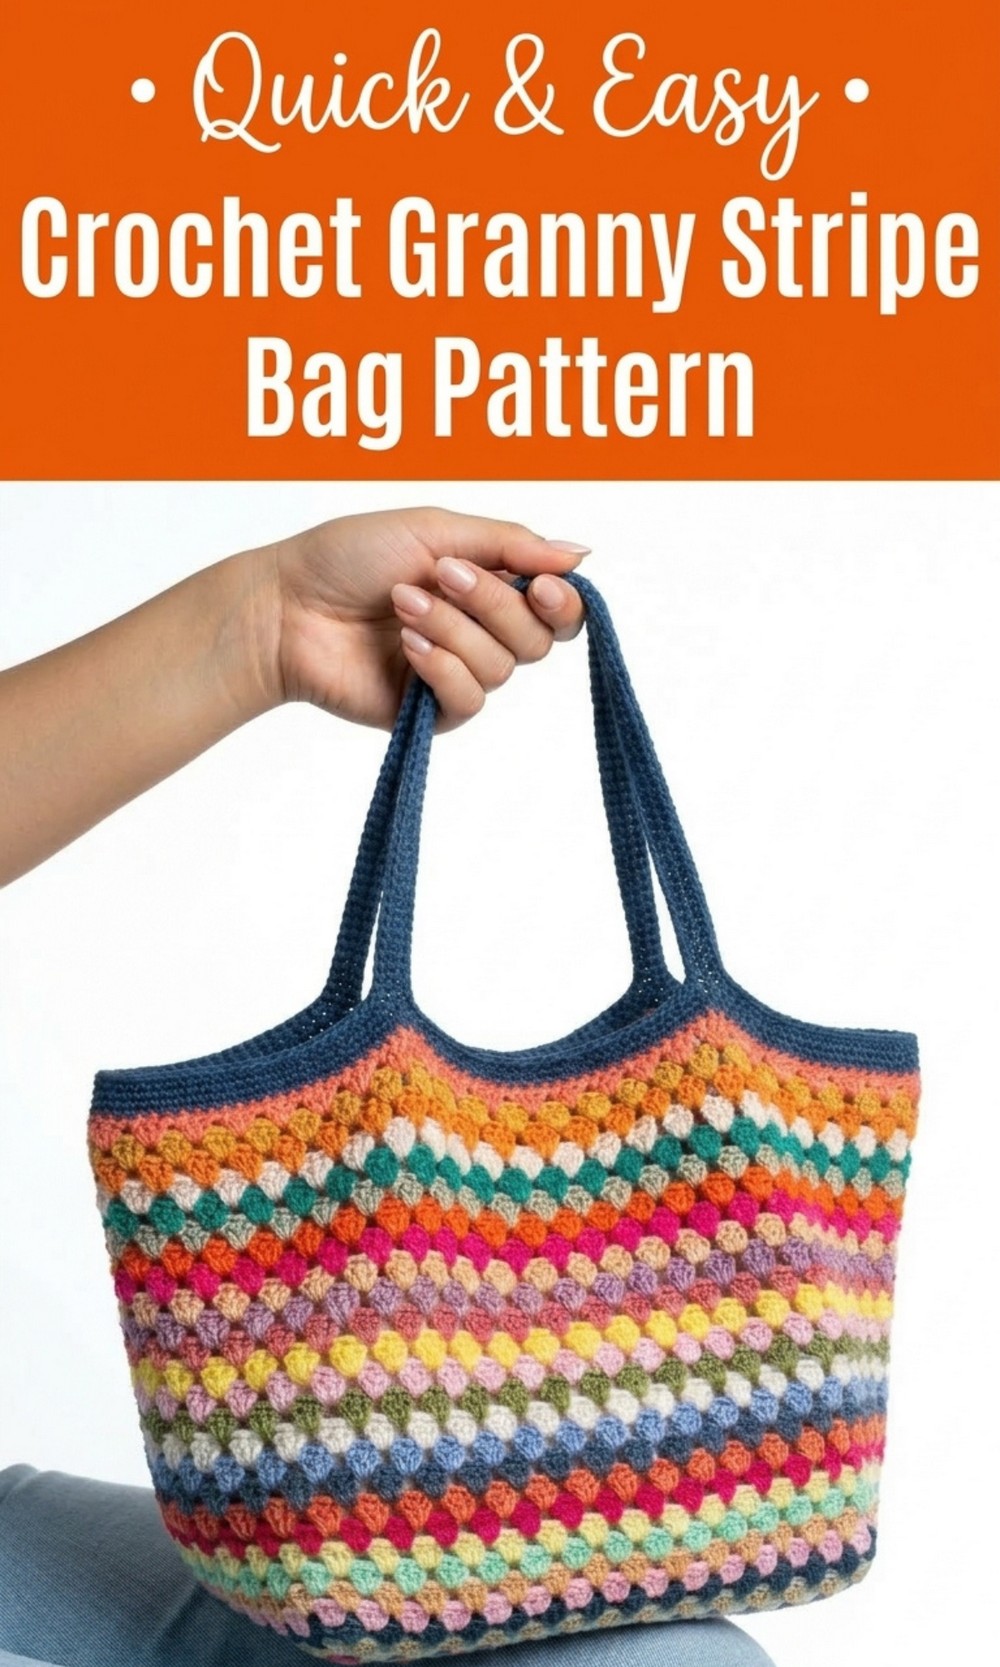
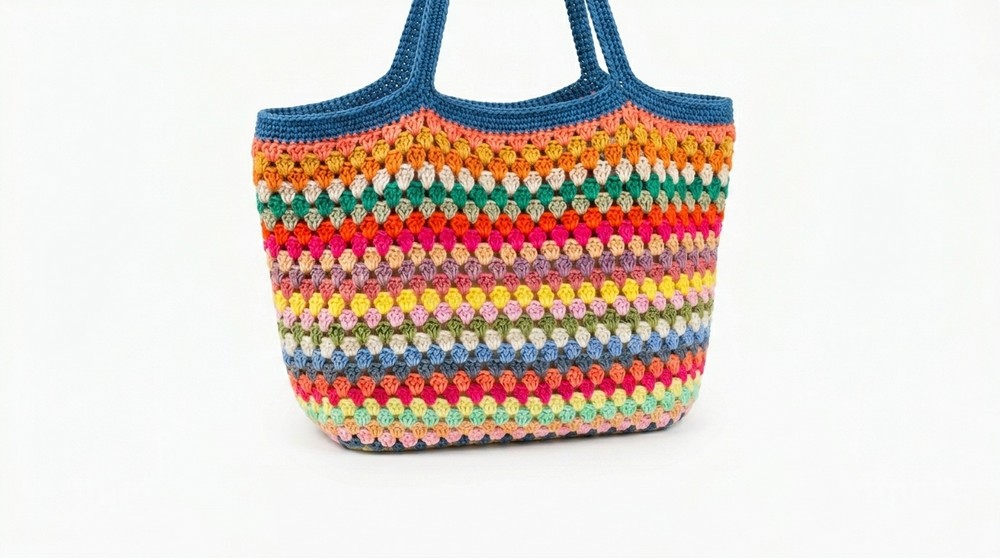
Learn to hook a colorful Crochet Granny Stripe Bag with this free pattern that’s simple, fun, and great for carrying your everyday essentials in style.
Carry Your Laptop in Style with This Free Crochet Granny Stripe Bag Pattern
Are you ready to crochet something amazing—introducing the Free Crochet Granny Stripe Bag Pattern. This bag is like a burst of happiness with its colorful stripes and adorable design. It’s easy to make, fun to customize, and perfect for anyone who loves creativity. Whether you’re new to crochet or already a pro, this pattern will make you smile as you turn simple yarn into a beautiful and practical masterpiece.
This bag isn’t just pretty—it’s super useful. You can take it shopping, pack it for a picnic, carry books, or use it as a trendy accessory. The granny stripe stitch gives it a playful texture while being super beginner friendly. Plus, you can pick your favorite colors and make the bag truly yours.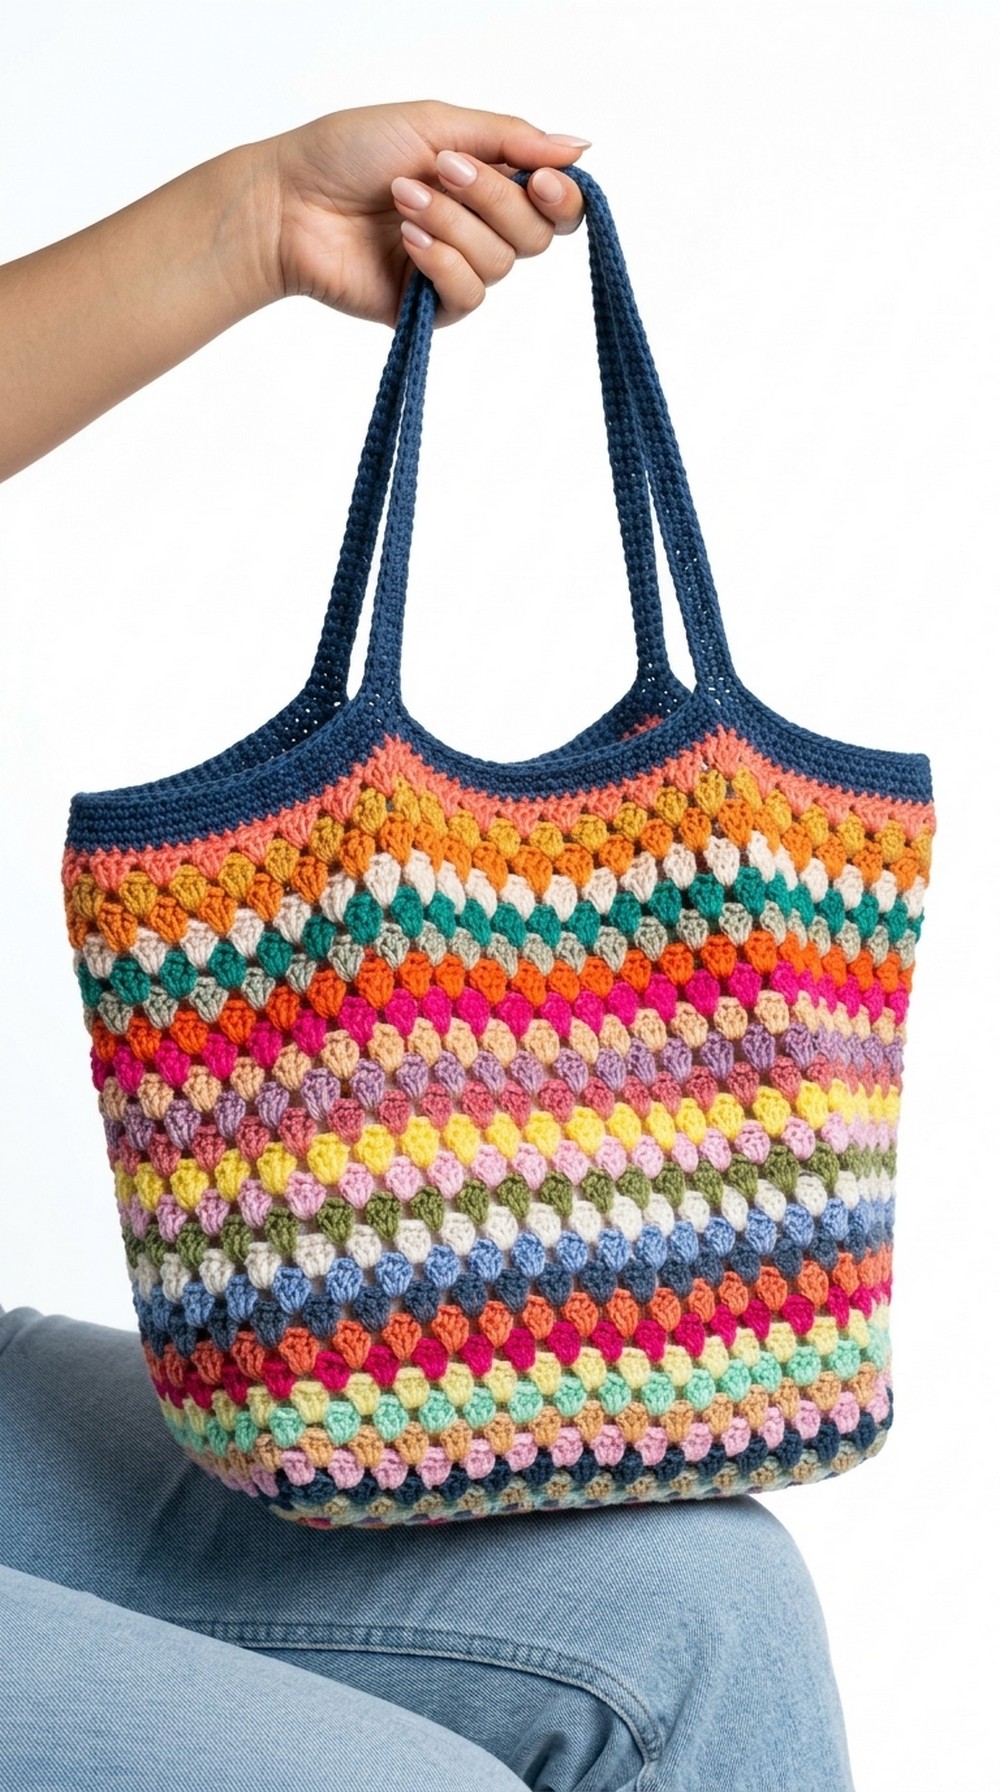 Lightweight, reusable, and eco friendly, this crochet project is both fun and functional. So, grab your yarn, start stitching, and create your very own Granny Stripe Bag that everyone will admire. It’s time to make something amazing.
Crochet Granny Stripe Bag Pattern
Materials:
- Yarn: 200g of 100% cotton yarn (2mm thickness), use any colors of your preference.
- Hook: 3mm crochet hook.
- Tapestry needle: For weaving in the ends.
- Stitch markers: To mark key points like the sides of the bag or part of the handles.
- Scissors: For cutting the yarn.
Gauge
- Approximately 10 double crochets (dc) and 5 rows measure 5 cm (2 inches) in length.
Finished Size
- Rectangular base: 27 cm x 15 cm (can be adjusted).
- Folded bag height: 23 cm with a width of 40 cm (can vary based on customization).
Special Techniques Used:
- Slip Stitch (sl st): Insert hook, yarn over, pull through both loops on the hook.
- Chain (ch): Yarn over, pull through loop on hook.
- Double Crochet (dc): Yarn over, insert hook into the stitch indicated, yarn over, pull through (three loops on the hook), yarn over and pull through two loops (twice).
- Granny Stitch: A combination of three double crochets worked into the same space or stitch.
Pattern Instructions
Step 1: Create the Base of the Bag (Rectangular Foundation)
- Make a slipknot on your crochet hook and chain 24 chains (ch).
- Once you have chained 24 ch, add 1 additional ch (total 25) to serve as the turning chain.
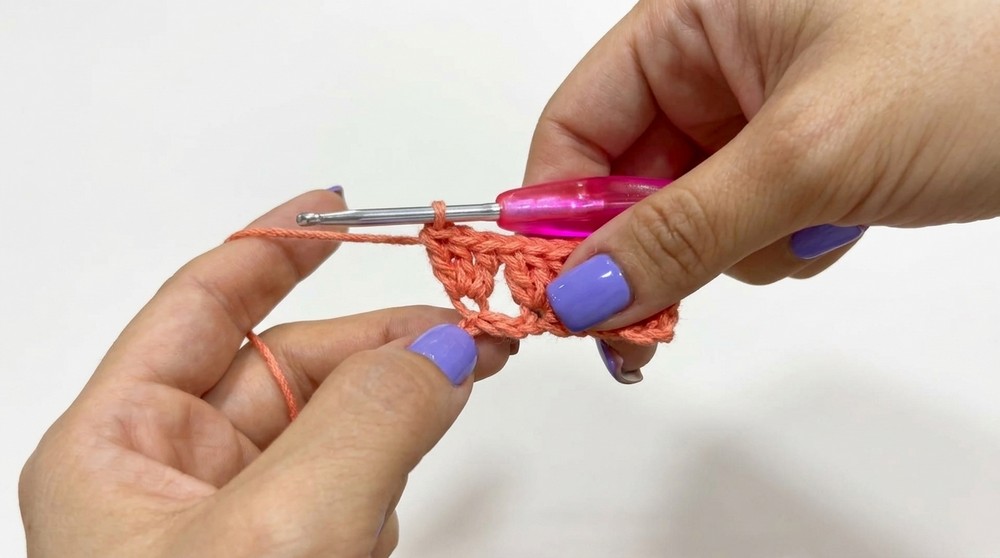
- Starting in the 4th chain from the hook, work 2 double crochet (dc) into this chain. These, along with the skipped chains, will form the first group of 3 dc (Granny Stitch).
- In the same chain as the first group of dc, make an additional 3 dc, then chain 2, and work another 3 dc into the same chain. This creates the first corner.
- Move along the foundation chain:
- Skip the next 2 chains, then work 3 dc into the next chain.
- Repeat this step (skip 2 chains, 3 dc into the next chain) until 3 chains remain on your foundation chain.
- For the second corner, skip the next 2 chains and work into the last chain on the foundation:
- Do 3 dc, chain 2, 3 dc, chain 2, and a final 3 dc in the last chain.
- Starting on the opposite side of the foundation chain, work 3 dc into each chain space directly below where you worked groups of stitches in the previous step. You will be working back down the opposite side of the chain.
- Once you have reached the last chain (that already has sets of dc), work the corner stitches again (3 dc + 2 ch + 3 dc) into the last chain.
- Finally, join the round with a sl st into the top of the starting chain. Cut the yarn and weave in the ends.
Congratulations, you have completed Round 1!
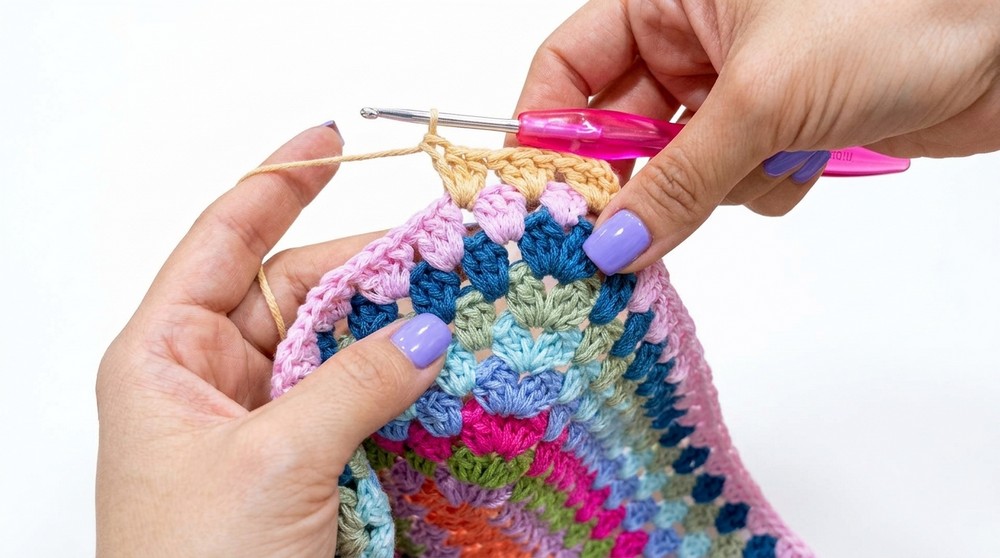
Step 2: Continue with Rounds 2–8
- Join a new color of yarn into any ch 2 corner space and make the corner:
- Chain 3 (counts as 1 dc), work 2 dc into the same space, chain 2, and work another 3 dc into the same space.
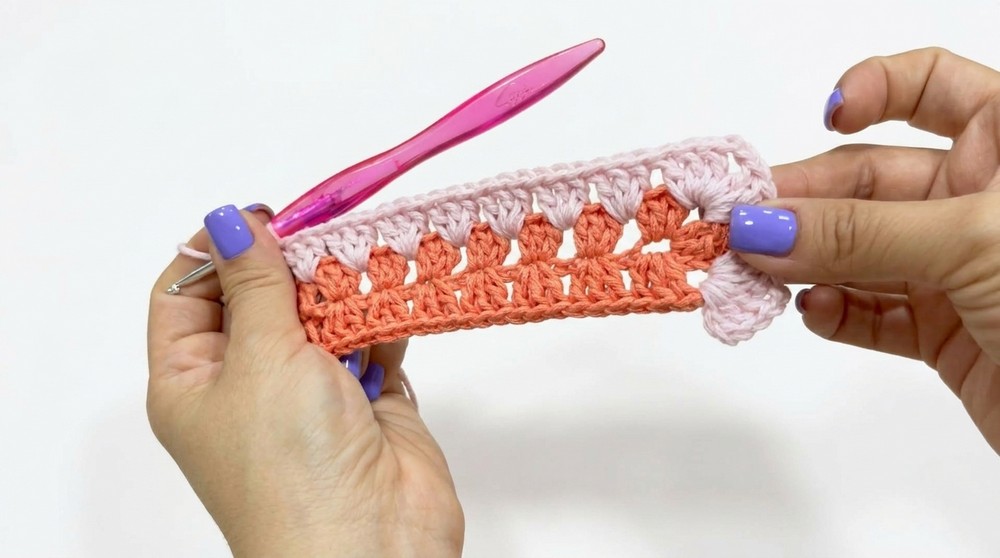
- Chain 3 (counts as 1 dc), work 2 dc into the same space, chain 2, and work another 3 dc into the same space.
- For the side spaces between corners: In each consecutive ch 2 and middle space, work 3 dc clusters.
- Continue creating corners in the same way (3 dc, ch 2, 3 dc) into each corner space, lining up the 3 dc clusters along the straight edges.
- At the end of the round, connect with sl st into the top of the starting ch.
- Repeat this process for a total of 8 rounds or until the base reaches your desired size for the bag.
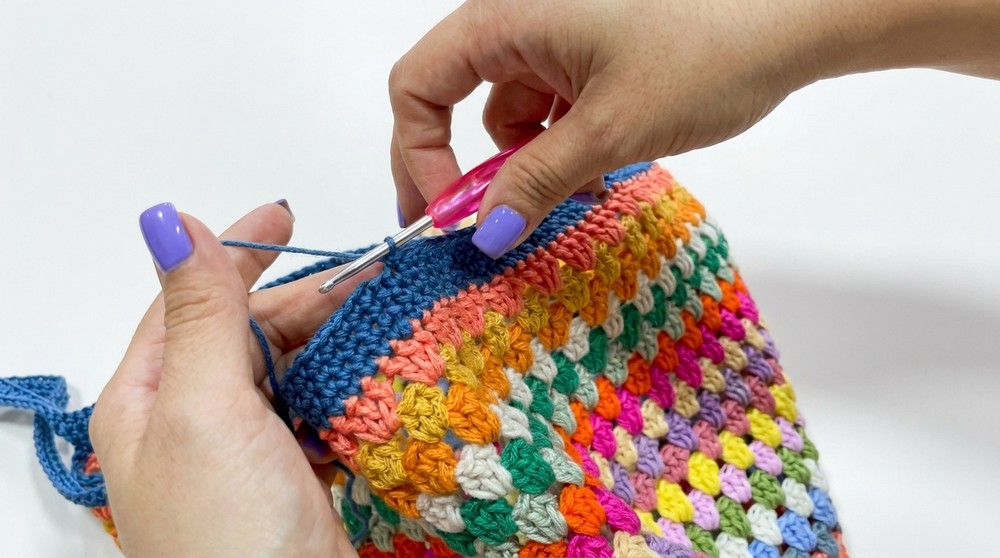
Step 3: Creating the Main Body
- With the base complete, switch your yarn to your next color by joining any of the 4 ch 2 spaces that form the corners.
- For the body, you will no longer work corner stitches. Instead, in this round and all the following rounds:
- In every corner ch 2 space: Work only one cluster of 3 dc (no chains in between).
- In each space between the clusters along the rows: Work 1 cluster of 3 dc in every space.
- Work in a continuous circle (without stopping at the corners) until the bag reaches your desired height. For reference, the tutorial reached 23 cm (measured when folded) by completing 23 total rounds.
Step 4: Add the Handles
- Fold the bag in half to find the midpoints and mark the top two corners of each side with stitch markers. Use these as guide points for the handle placement.
- From each top midpoint, measure 13 cm inward from both sides. Place a stitch marker to indicate where the handles should begin and end. Repeat this process for the other side of the bag.
- Join new yarn to one handle point, then:
- Work one single crochet (sc) into the marked stitch.
- Chain 50 chains (or your desired length) to create the handle.
- Skip the marked stitches in between (based on your previous measurements), and sc into the next marked stitch to join the other end of the handle.
- Complete the round by continuing to work 1 sc into each stitch, including on the opposite side of the bag.
Step 5: Strengthening the Handles
- Work an additional round of single crochets (sc) around the entire handle and top edge of the bag for added strength. Be sure to add sc stitches all along the length of the handles.
- Cut your yarn, weave in the ends, and secure your work.
Tips for the Best Results
- Color Choices: Use contrasting bright colors for a vibrant look or muted tones for a more subtle appearance.
- Customization:
- Increase the base size to make a bigger bag, or use fewer rounds for a smaller bag.
- Adjust the handle length to suit your needs – shorter for a handbag or longer for a shoulder bag.
- Block Your Bag: Once completed, lightly block your bag by dampening it and shaping it to your desired measurements. It will help enhance its final look.
Conclusion: Finishing Touch
After completing your colorful granny square bag, you can add a lining for extra durability or even a zipper if desired. This bag is ideal for carrying your essentials or as a custom gift for loved ones. Lastly, remember to weave in all ends securely and check for any loose stitches before finishing.
By following these steps, you’ll have a stylish, handmade crochet bag that showcases your skills and creativity.