Hook a cute flower bag pouch with this free crochet flower bag pouch pattern that is simple to follow and perfect for keeping small items safe and easy to carry.
Enhance Your Bag Collection With This Free Crochet Flower Bag Pouch Pattern
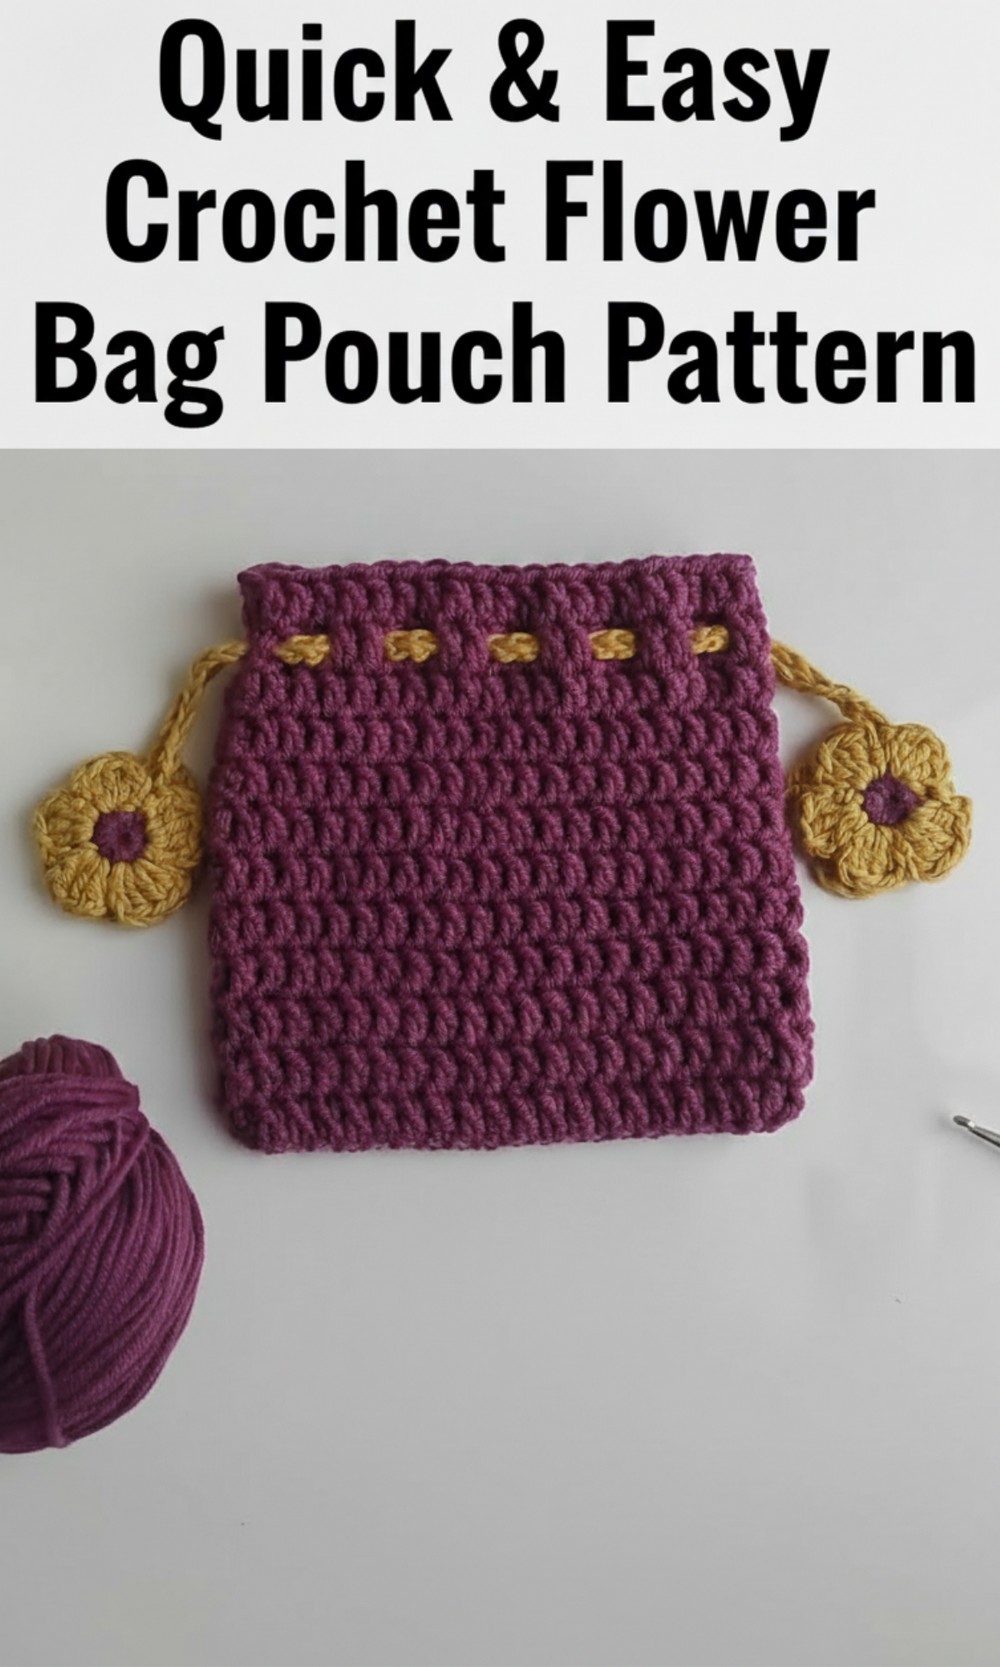
Ready to create something beautiful and useful? This guide introduces an easy and free crochet flower bag pouch pattern that’s perfect for all ages, including beginners. With its charming round shape and colorful flower designs, this bag stands out as a delightful handmade accessory.
Using soft yarn and vibrant colors like purple and yellow, it’s both stylish and practical. It’s ideal for keeping small items like keys, scissors, or crochet tools. The simple design features a handy drawstring cord to keep your belongings secure. 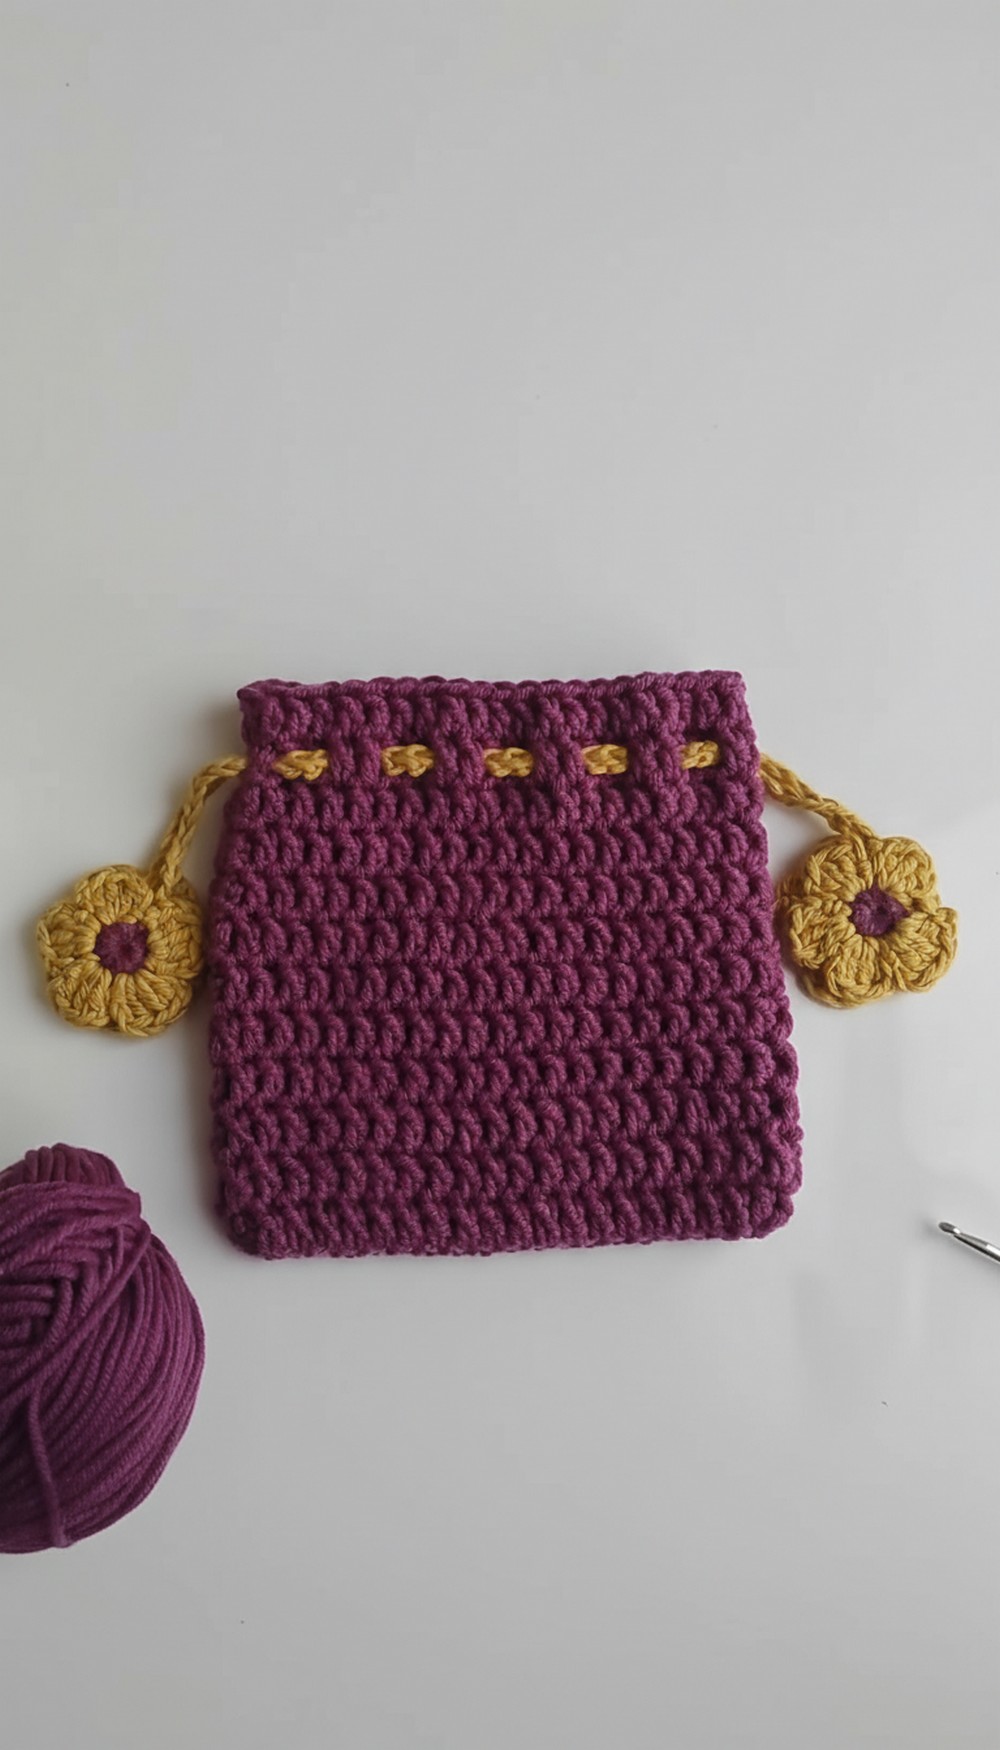
Whether you’re adding a personal touch to your daily essentials or making a thoughtful gift for someone special, this crochet flower pouch is a wonderful choice. Even if you’ve never crocheted before, you can easily follow along and create a pouch that’s lightweight, unique, and full of charm.
Adorable Crochet Flower Bag Pouch Pattern
Materials Required
- Yarn: Choose the yarn color based on your preference. In the video, purple yarn was used for the bag base, while yellow yarn was used for the cord and accents such as flowers.
- Crochet Hooks: Match the size of the crochet hook to the yarn used. In the video, a 4.5 mm hook was used for the bag, and a 3.5 mm hook for the cord and flowers.
- Needle: A needle is required for weaving in ends and attaching decorative elements like flowers.
- Scissors: To cut the yarn.
- Hook Marker (Optional): To mark your starting points in the stitches.
Pattern Instructions
Step 1: Starting the Bag
- Begin by creating a Slip Knot to start. Loop the yarn around your fingers and pull the yarn through to create a knot.
- Make 21 chains by pulling the yarn through each loop on the hook. Ensure your chains are even and not too tight.
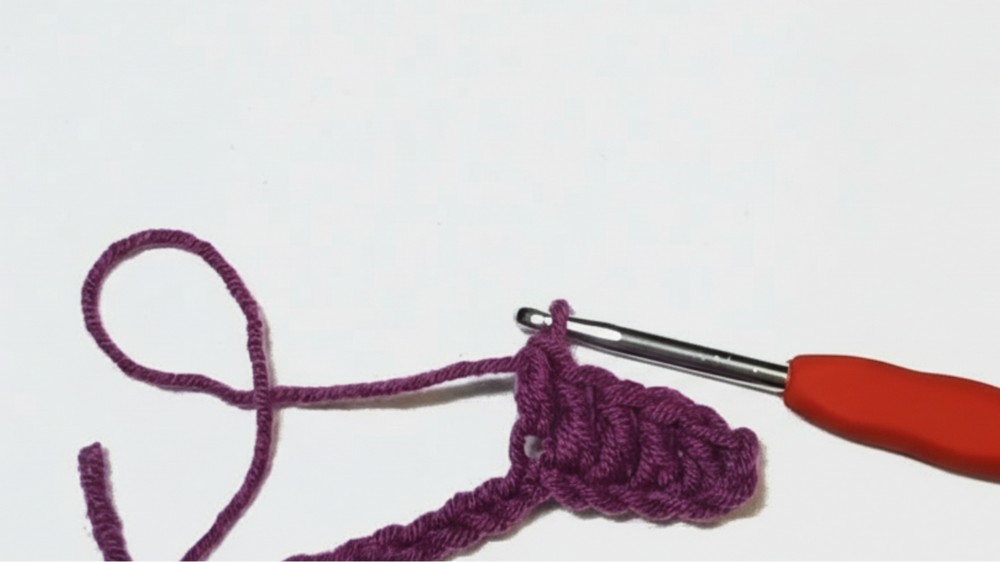
Step 2: First Row (Foundation Stitches)
- Skip the first two chains of the foundation row.
- In the third stitch, work Double Crochets (DC).
- Yarn over your hook, insert it into the third chain, pull up a loop, yarn over again, and pull through two loops, then yarn over and pull through the last two loops.
- Continue making one DC in each stitch along the chain, creating 18 Double Crochets in total for the first row.
Step 3: Turning Point
- On the last stitch, make 3 Double Crochets in the same stitch to form the turning point of the bag. This will create a rounded edge for the base.
- Continue working DC along the opposite side of the chain, inserting the hook into the “bottom chains.”
Step 4: Completing the Round
- Work 17 DCs into each stitch on the opposite side.
- On the last chain, work 2 Double Crochets to balance the turning edge.
- Use a Slip Stitch to join the first and last stitches of the row together.
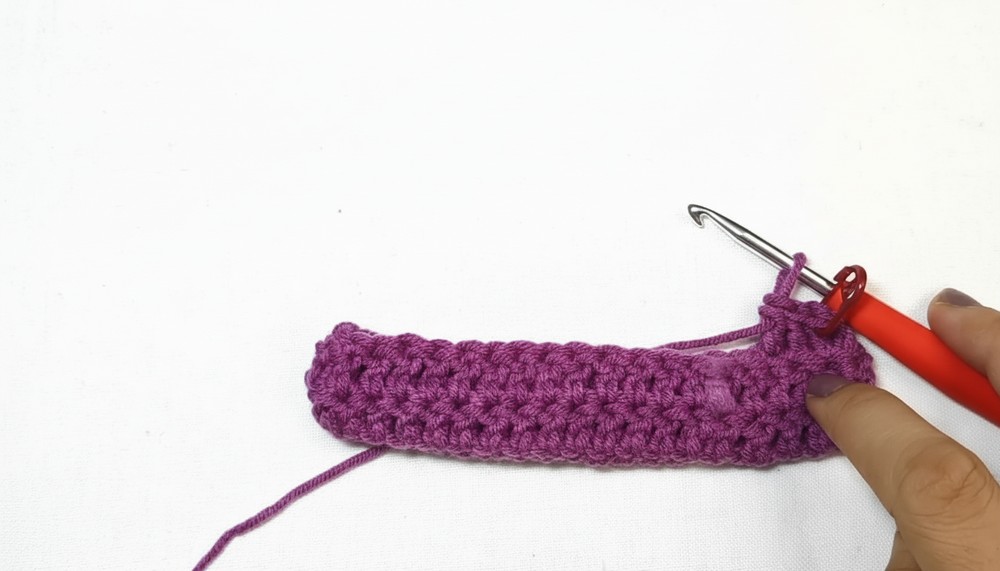
Step 5: Building the Bag Base
- Begin each new row by making 2 Chain Stitches (these count as the first DC).
- Work 1 DC into each stitch from the previous row, ensuring that each row has 40 stitches.
- Repeat the process for 12 rows, maintaining the symmetry of the bag design.
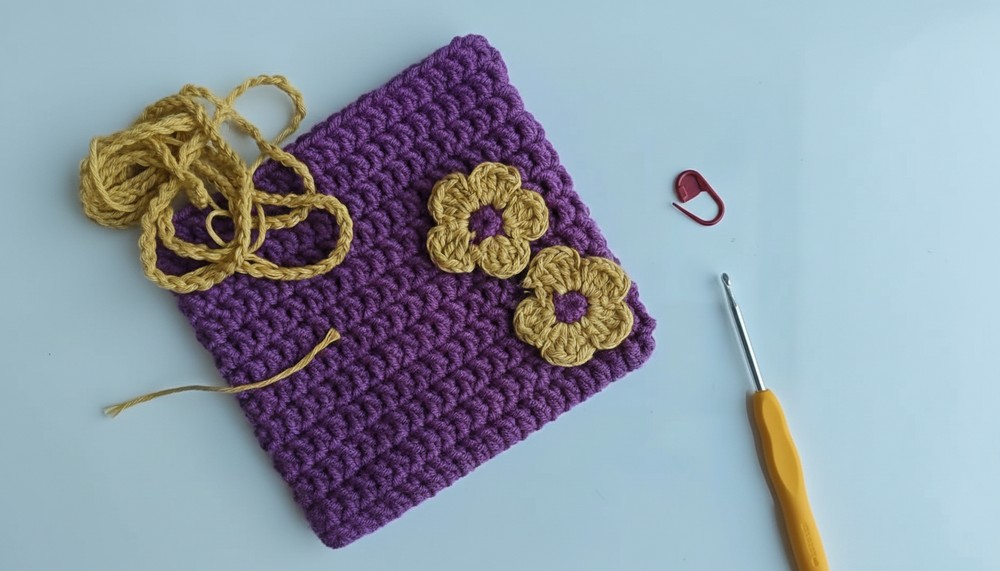
Making the Cord
- Use a different color yarn (e.g., yellow). Create a Slip Knot and make 70 chains by pulling the yarn through each loop.
- Repeat this process to make two cords of 70 chains each.
- Fasten off and trim the ends securely.
Creating the Flowers
- Start with the bag colored yarn (purple). Use a Magic Ring to create the center of the flower:
- Wrap the yarn around your fingers to form a loop. Insert the hook into the loop, pull up a loop, yarn over, and pull through.
- Tighten the ring slightly and create 5 Single Crochets (SC) in the loop.
- Pull the thread tightly to close the circle.
- Switch to the second color yarn (e.g., yellow):
- Create 3 Double Crochets in the first stitch, chain 2, then secure with a Slip Stitch to form a petal.
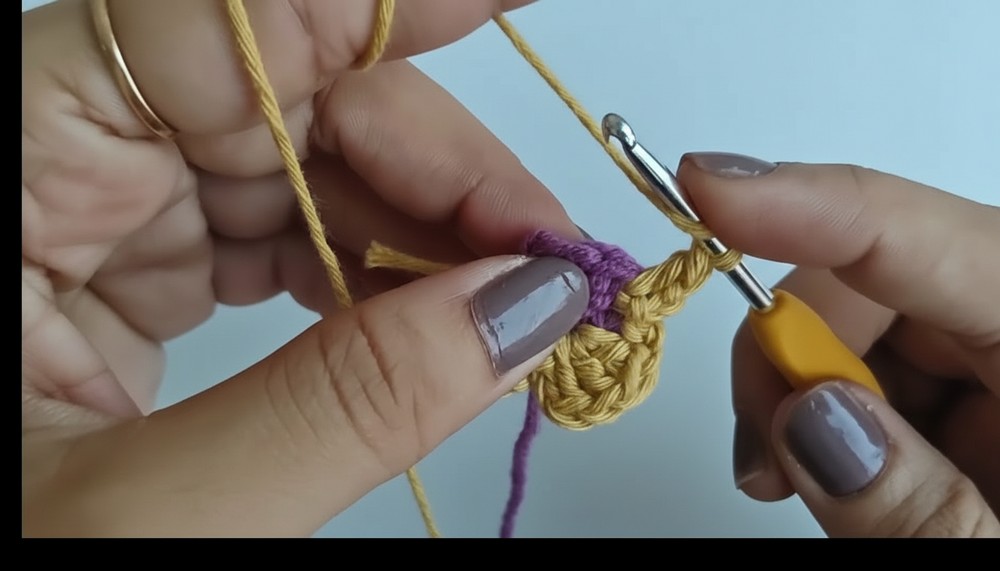
- Continue this process for all remaining stitches to create 5 petals.
- Create 3 Double Crochets in the first stitch, chain 2, then secure with a Slip Stitch to form a petal.
- Fasten off and weave in the ends. Repeat this process to make 4 flowers total.
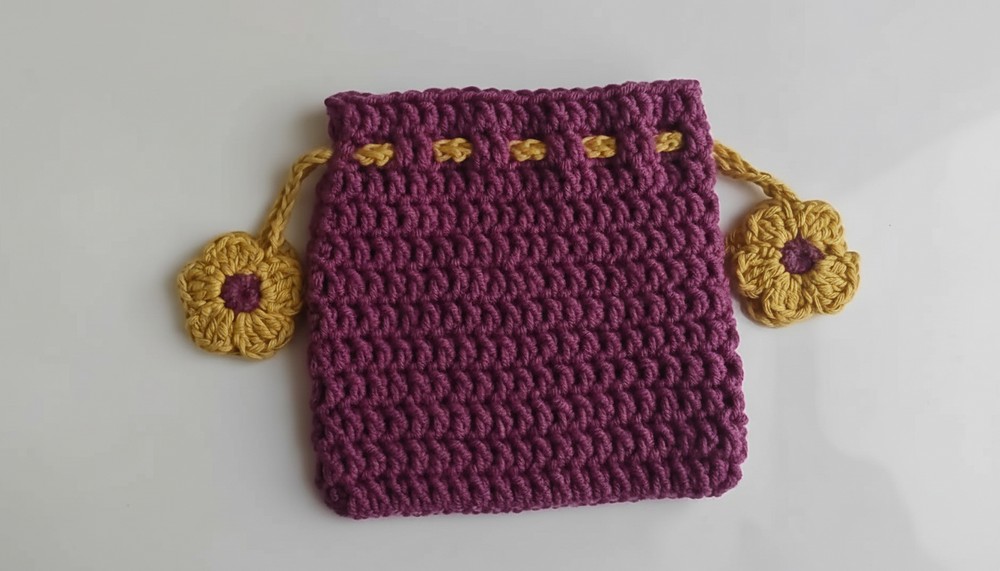
Finishing the Bag
- Attach the cords:
- Using a needle, weave the cords through the openings in the second row of the bag. Ensure the cords align evenly on each side.
- Tie knots at the cord ends and trim the edges neatly.
- Attach flowers:
- Use glue or a needle to affix the flowers to the bag. Place two flowers on one side of the bag and two on the opposite side.
- Use glue or a needle to affix the flowers to the bag. Place two flowers on one side of the bag and two on the opposite side.
Final Tips
- Practice Your Stitches: If you’re new to crochet, practice basic stitches (Chain, Single Crochet, and Double Crochet) before starting the bag.
- Choose Durable Yarn: Ensure the yarn used is durable enough for everyday handling, especially for bags.
- Wash with Care: Handwash the crochet bag and dry it flat to maintain its shape.
- Adjust Size: Make the bag larger or smaller by increasing or decreasing the number of foundation chains and rows.
Final Words
This crochet bag pattern is beginner friendly yet allows room for creativity. From a practical storage pouch to a decorative accessory, this bag boasts both functionality and beauty. Feel free to experiment with different yarn colors and floral arrangements to make it uniquely yours.