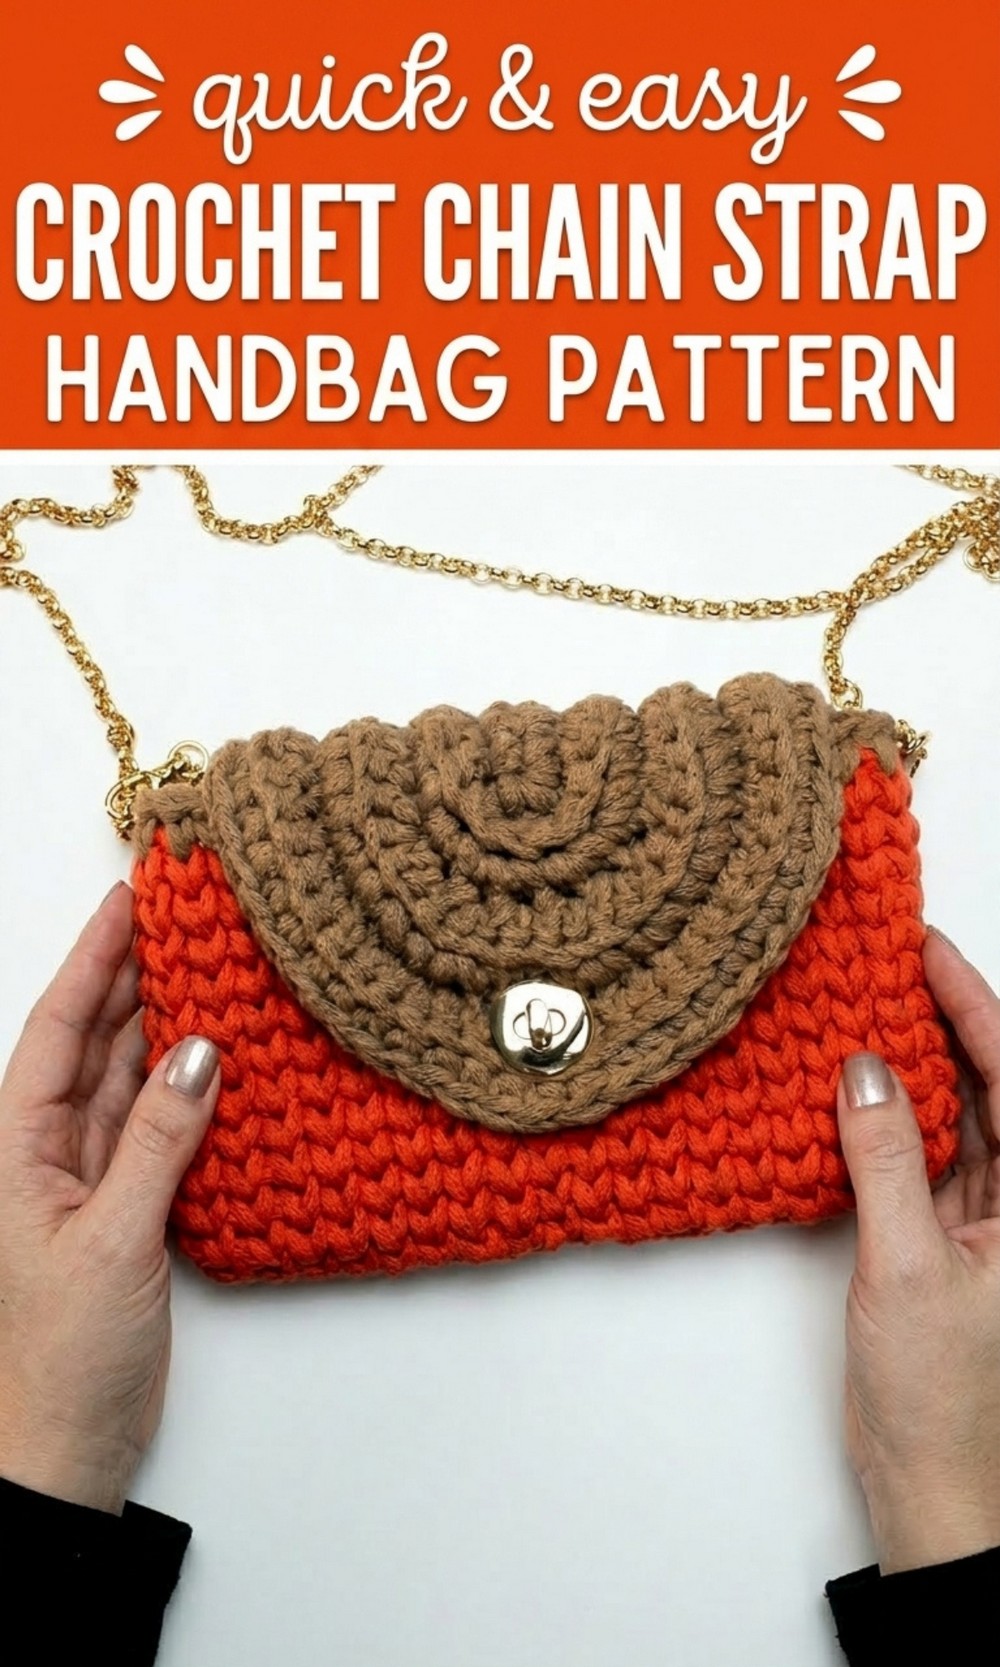
Follow this fun and easy free crochet chain strap handbag pattern to make a trendy and soft purse that feels very comfortable and looks like a high quality treasure.
Free Crochet Chain Strap Handbag Pattern Perfect for Any Style
Looking for a stylish and fun project you’ll love to show off? This free crochet chain strap handbag pattern is just what you need. It’s simple to make, looks absolutely stunning, and is perfect for anyone who enjoys creating unique accessories from scratch. Whether you want a fancy bag for special occasions or a practical everyday purse, this design combines beauty and functionality effortlessly.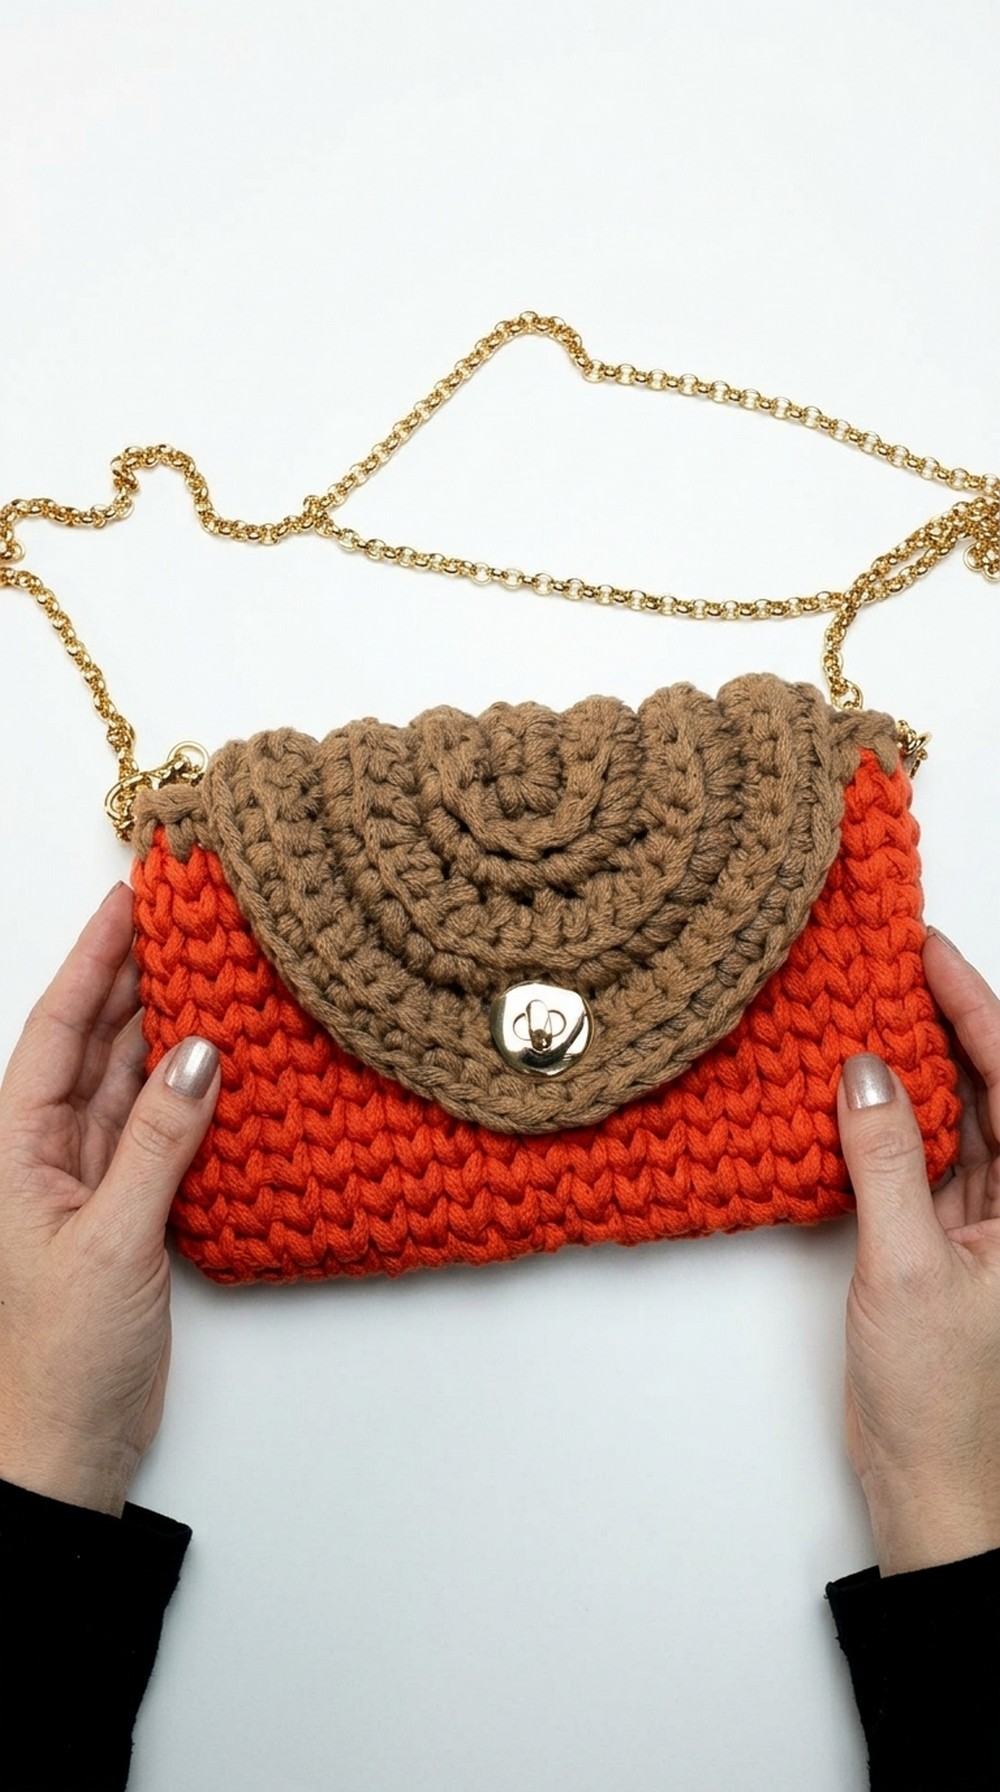
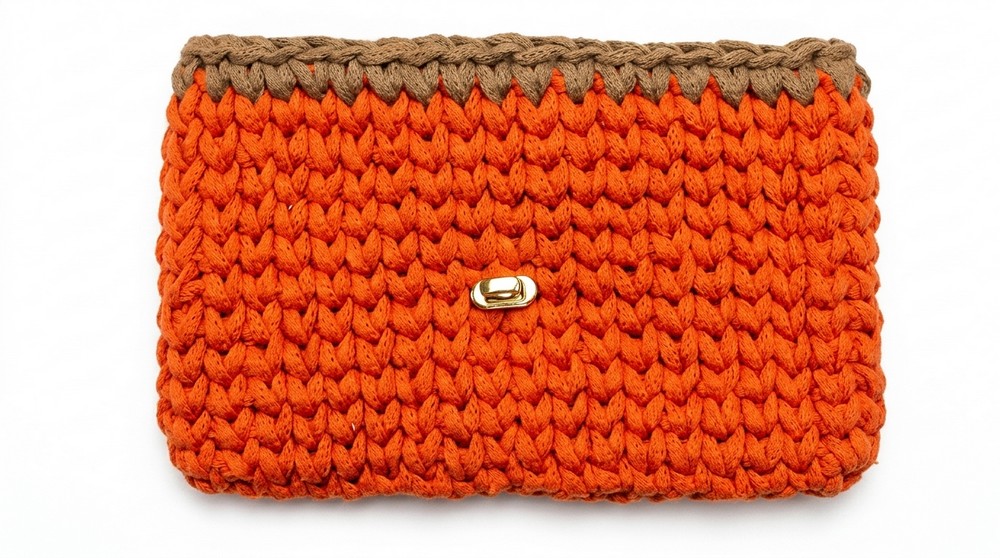
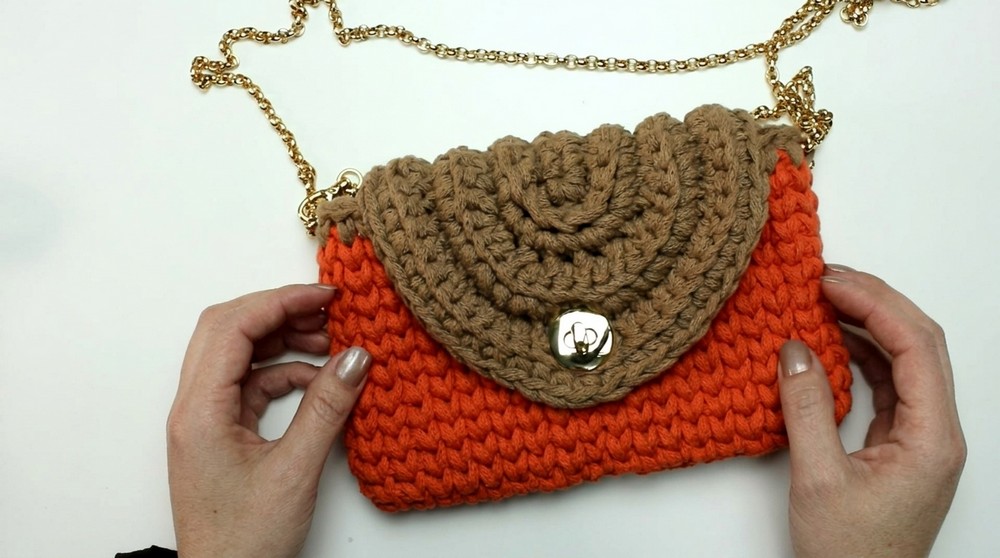
It features sturdy metal clasps for safety, chain straps for an elegant touch, and a neat lining that adds durability and polish. The finished bag is the perfect size for carrying essentials like keys, wallets, or makeup while looking trendy and sophisticated.
This free pattern is your chance to make a gorgeous, usable accessory that adds charm to your wardrobe and can even become a thoughtful handmade gift.
Crochet Chain Strap Handbag Pattern
Materials Needed
- Yarn:
- Knit straps: 85% cotton knit straps, such as Fial, in two colors:
- Chocolate (Color 34)
- Rust (Color 75)
- Knit straps: 85% cotton knit straps, such as Fial, in two colors:
- Weight of Yarn: Approximately 700 grams per cone.
- Note: Knit straps are lighter and more uniform compared to regular yarn, which creates a soft and neat finish.
- Hooks and Needles:
- Crochet hook: 7 mm
- Tapestry needle: No. 9 for weaving in the ends
- Manual sewing needle: For sewing the lining and closure
- Fabric for Lining: Tricoline in your choice of print or solid color
- Other Tools/Supplies:
- Metal clasp and screws for the closure
- Metal handle or chain strap with adjustable hooks
- Small screwdrivers for fixing screws securely
- Soft napa (5 cm x 6 cm) in a color that complements the yarn (used as reinforcement for the closure)
- Scissors with sharp tips for cutting the fabric and yarn
- Stitch markers or yarn in a contrasting color for marking important points
- Sewing thread (in colors matching both the yarn and the napa)
Step by Step Instructions
Base of the Bag
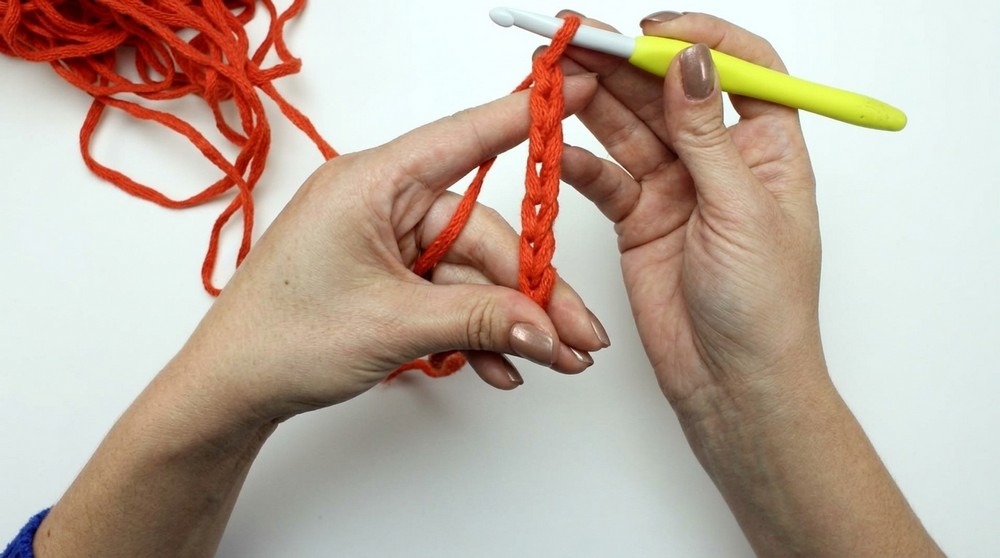
- Preparing and Measuring the Base:
- Start with an initial loop on your hook.
- Work 18 chain stitches.
- Ensure the chain measures approximately 18.5 cm.
- First Row Single Crochet (SC):
- Skip the first chain from the hook, and make the first single crochet (SC) in the next chain.
- Continue working 1 SC in each chain across the row (17 SC in total).
- Turning the Corner:
- Add 2 SC in the last chain to create a rounded turn for the bottom.
- Add 2 SC in the last chain to create a rounded turn for the bottom.
- Working Back Along the Chain:
- Work a single crochet into each chain on the opposite side, inserting the hook into the same chain base.
- You will again have 17 SC across this side.
- Turning the Second Corner:
- When you reach the opposite end, add 2 SC in the last chain (mirroring the first corner).
- You will now have completed the foundation row with 36 SC in total: 17 SC on each side and 2 SC for each corner.
- Closing the Round:
- To make the join seamless, extend the last loop slightly, insert the hook into the first SC from the back, and pull the extended loop through.
- Insert the hook into the current SC and work into the center of the first SC to prepare for the next row.
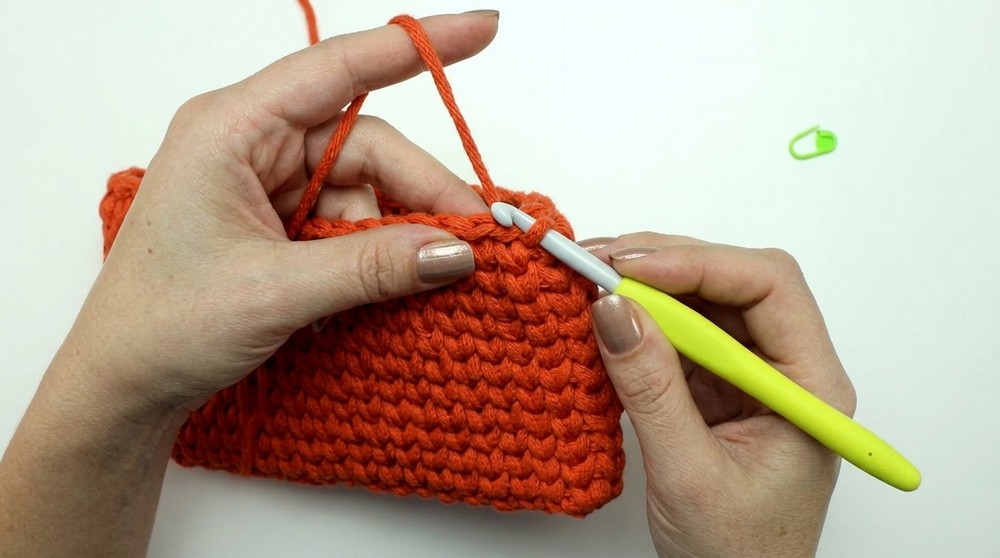
Building the Bag Body
- Working the Subsequent Rounds:
- Work SC in centered single crochet stitches for each point of the base (do not insert the hook in the top “cords” of the stitch; instead, go through the “center” of the previous SC).
- Maintaining Shape:
- Repeat the process for approximately 12 rows (this builds the walls of the bag).
- The walls should reach a height of approximately 13 cm.
- Finishing the Body:
- Once you achieve the desired height, fasten off the yarn, leaving a tail of approximately 15 cm for finishing the edges later.
- Once you achieve the desired height, fasten off the yarn, leaving a tail of approximately 15 cm for finishing the edges later.
Creating the Flap
- Foundation Chains:
- Attach the rust colored yarn at the top edge of the bag to begin the flap.
- Chain 6 and insert the hook into the second chain; begin working SC across (5 SC total).
- Shaping the Flap:
- On the edges of the flap, use 2 SC in a stitch to create slight increases, shaping the corners.
- Work in SC for additional rows, ensuring the flap gradually develops its rectangular or square shape.
- Aim for approximately 11 rows total, ensuring it aligns evenly over the bag opening.
Adding the Metal Closure
- Preparing the Material:
- Using the napa (5 cm x 6 cm), mark the exact placement for the screws of the metal closure.
- Make small cuts in the napa for the screws.
- Attach the napa to the interior of the flap to reinforce the closure.
- Fixing the Clasp:
- Fix one part of the clasp to the bag body and the matching part to the flap.
- Use a screwdriver to securely tighten the closure screws.
Adding the Lining
- Cutting the Liner:
- Measure the liner fabric to the exact base dimensions of your bag.
- Leave 1 cm of seam allowance on all sides.
- Sewing the Liner:
- Sew the liner sides using a backstitch, leaving the top open to attach to the bag.
- Attaching to the Bag:
- Hand stitch the liner into the bag, ensuring it is aligned just under the brown finishing row of the bag’s interior.
Final Assembly
- Adding the Handles:
- Attach 15 chain links on each side to form adjustable straps. You can secure these by opening one link and hooking it into the stitch before closing it with pliers.
- Finishing Touches:
- Close any remaining stitches or gaps using the tapestry needle and matching yarn.
- Trim any visible excess threads.
Finishing the Pattern
Your crochet bag is now complete! Test the metal clasp to ensure it closes securely and admire how the project comes together.
Final Words and Tips
- Blocking: Lightly block the bag if the shape isn’t perfectly even. Use steam gently to help settle any stitches.
- Maintaining Durability:
- Reinforce metal closures by sewing the napa securely.
- Periodically tighten screws on the closure to prevent wear.
- Personalization:
- Experiment with colors for the yarn and lining to create unique versions of the clutch.
- Add embellishments such as tassels or small crochet flowers for additional flair.