Free your hands during every long walk with this easy free crochet water bottle holder pattern to make a beautiful and light bag that looks very trendy.
Easy Free Crochet Water Bottle Holder Pattern for Outdoorsy People
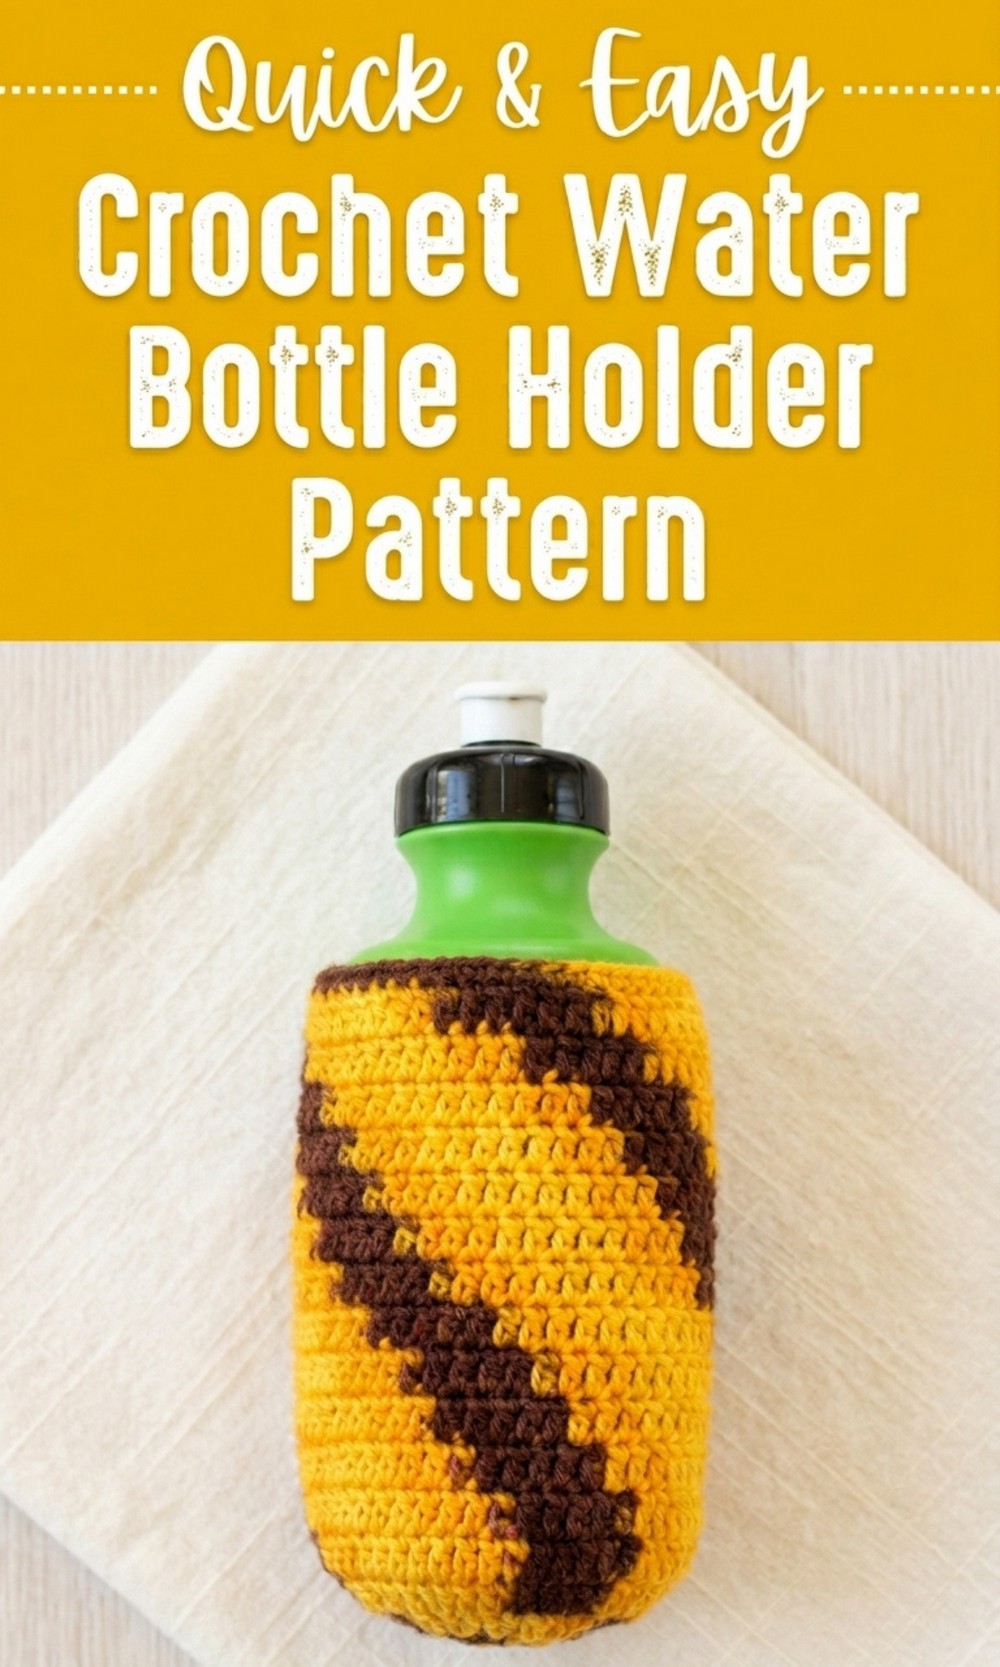
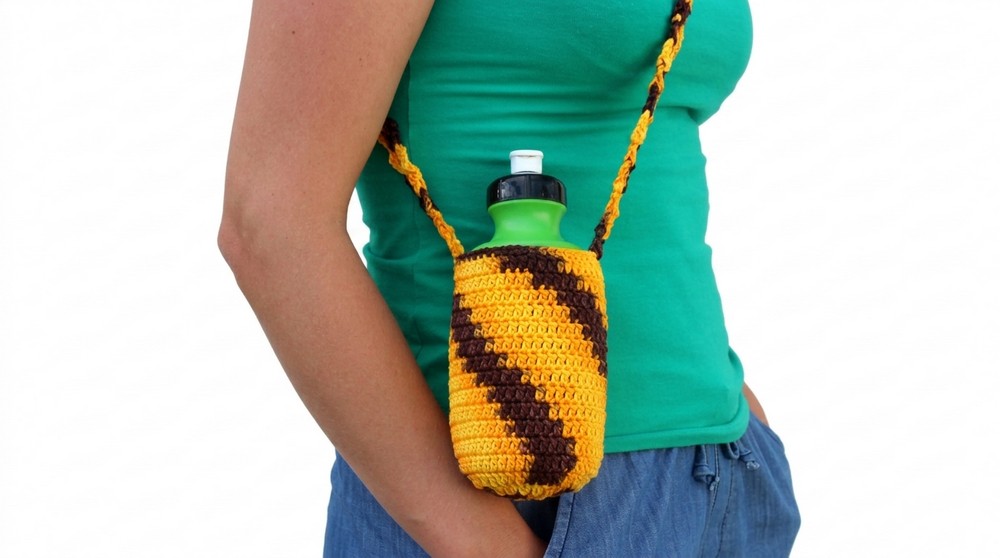
Carry your drink in style and total comfort with a cozy yarn bag that keeps your hands free for all your adventures. With this Free Crochet Water Bottle Holder Pattern, a soft yarn magically transforms into a charming, useful accessory that adds a touch of fun to your walks, games, or outdoor play. 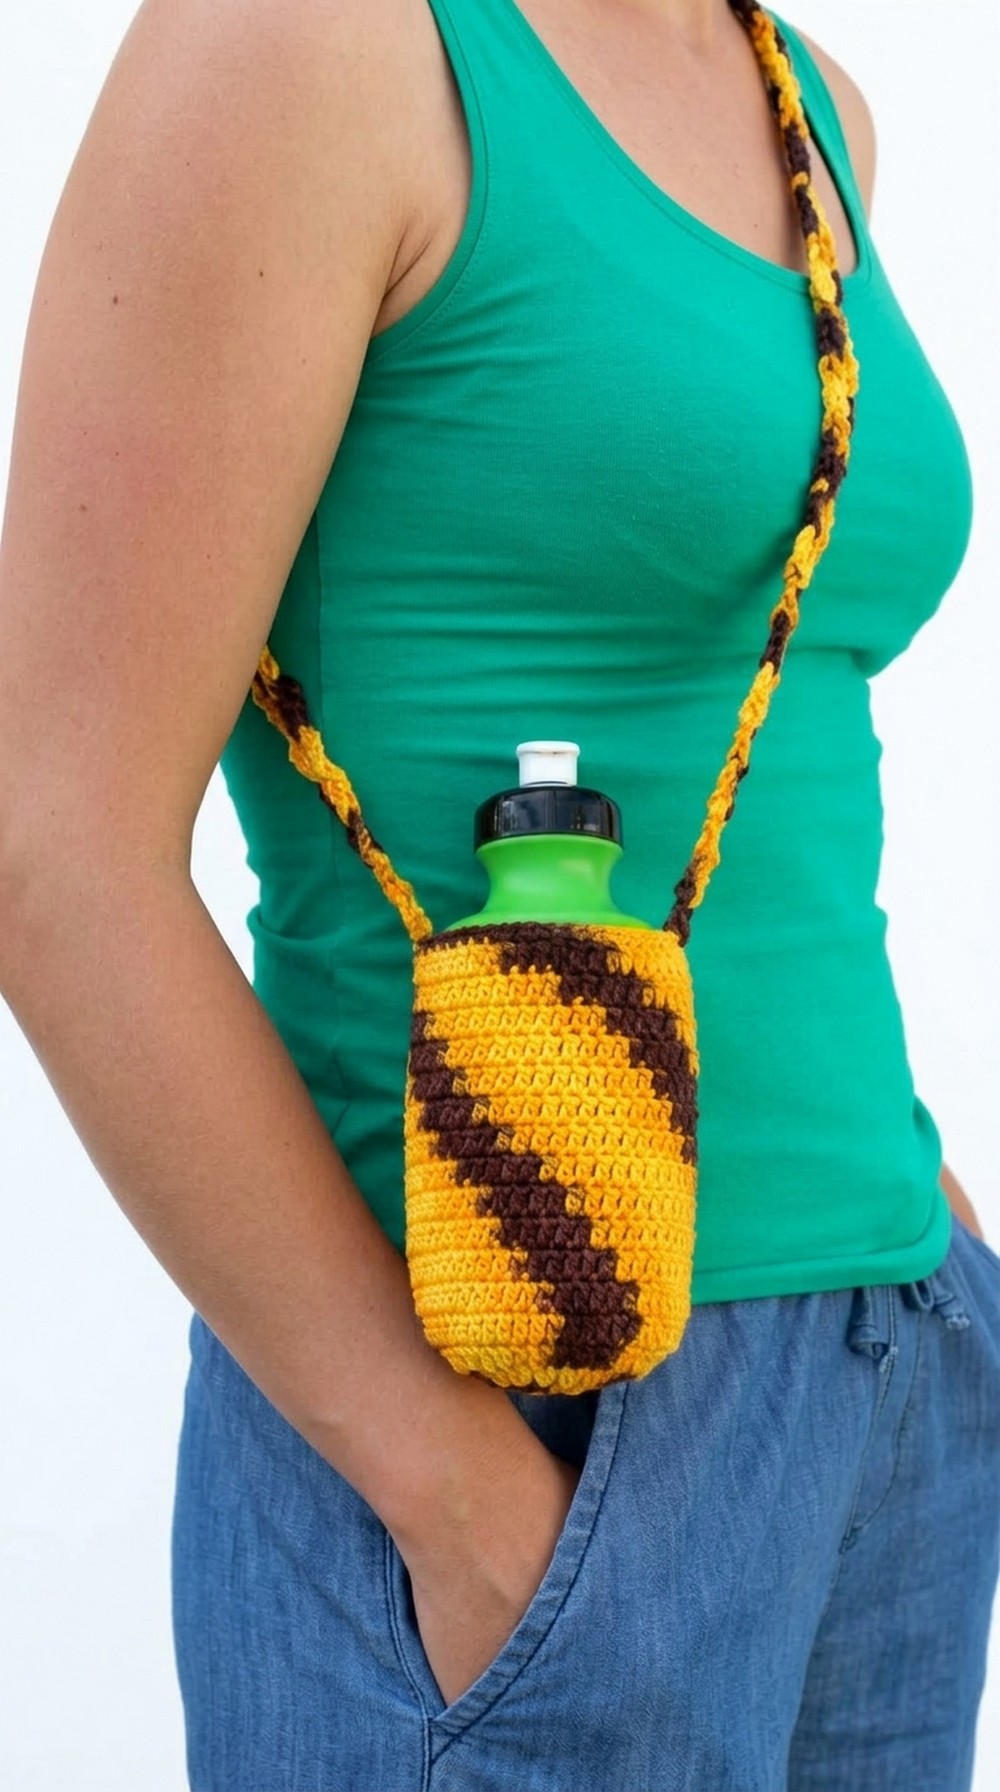 The beauty of this piece shines in its lively colors, creating a cheerful design perfect for sunny days. It’s lightweight and flexible, making it ideal for hiking, school trips, or hands free strolls, while keeping your bottle snug and safe.
Crochet Water Bottle Holder Pattern
Materials Needed:
- Yarn: Dona yarn in color 9492 or any medium weight yarn of your choice.
- Crochet Hook: 2.5mm (as suitable for your yarn weight).
- Scissors: For cutting the yarn.
- Tapestry Needle: For weaving in loose ends.
Special Techniques Used:
- Magic Ring (Magic Circle): To start the base.
- Slip Stitch (ss): To join rounds.
- Chain Stitch (ch): Forms the foundation and adds height.
- Single Crochet (sc): For edging and shaping.
- Double Crochet (dc): Used to create the body of the holder.
- Increase: Working additional stitches into the same space to expand the base.
- V Stitch: Used to craft the strap design.
Step by Step Instructions:
1. Base of the Water Bottle Holder (Circular Bottom):
- Start with a magic ring and secure it with a slip knot.
- Work 1 chain (ch) to secure the ring, and then crochet 8 single crochets (sc) into the magic ring. Tighten the ring by pulling the tail.
- Close the round with a slip stitch (ss) into the first single crochet. (Total: 8 stitches)
- Round 2: Chain 3 (counts as a dc), then work 2 double crochets (dc) into each stitch around. Complete the round by slip stitching into the top of the starting chain. You should now have 16 double crochets.
- Round 3: Chain 3, work 2 double crochets in the first stitch, and then alternate between 1 double crochet in the next stitch and 2 double crochets in the next. Repeat this pattern around to create a flat circle. (Total: 24 stitches)
- Continue increasing the rounds in this manner until the base fits snugly to the bottom of your water bottle:
- For 500ml bottles, you may stop after Round 3.
- For larger bottles (800ml), you’ll need one or two additional rounds, ensuring the bottom is fully covered before proceeding.
For larger rounds beyond Round 3:
- Round 4: Increase to 32 double crochets, working 2 dc in one stitch and 1 dc in the next 2 stitches alternately around.

- Round 5 (if required): Continue increasing the diameter by spacing increases further—e.g., 2 dc in one stitch, then 1 dc in the next 3 stitches.
After completing the base, ensure the circle lies flat and fits comfortably around the bottle base.
2. Body of the Water Bottle Holder:
- Once the base is complete, chain 3 to start the body of the holder.
- From this point onward, work 1 double crochet (dc) into each stitch around without increasing. The stitches will naturally start forming the sides of the holder.
- Repeat several rounds of double crochet on double crochet, keeping the stitch count constant.
- For shorter bottles (500ml), this will take approximately 10 to 12 rounds.
- For larger bottles (800ml), this will take approximately 16 rounds.
- You can test the fit periodically by placing the bottle inside the holder. Stop crocheting when the height reaches just below the bottle’s neck to leave space for easy access.
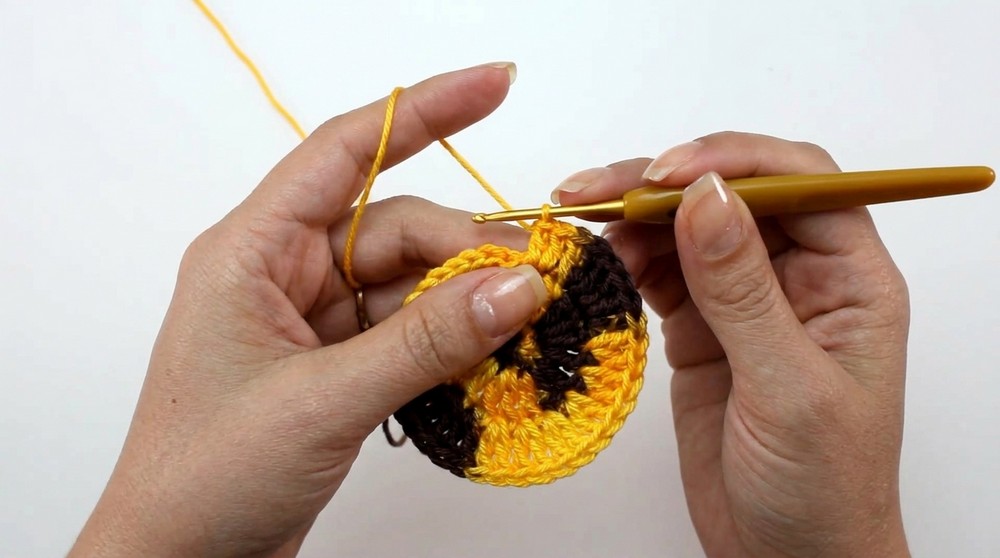
3. Edging the Top:
- To finish the top edge, work 1 round of single crochets (sc):
- Work 1 single crochet into each double crochet from the previous round for a neat, polished edge.
- Slip stitch into the starting point of the round to close. Fasten off.
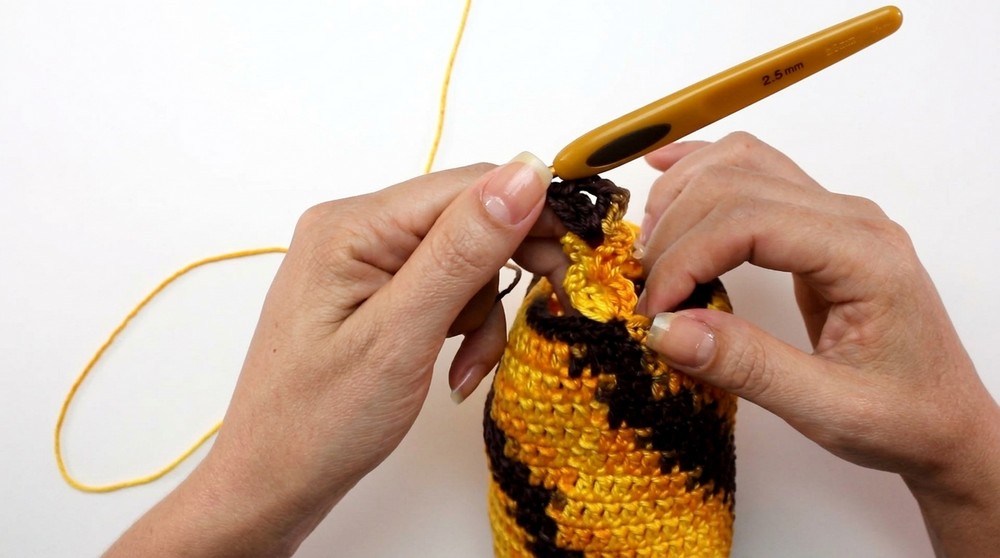
4. Adding the Strap:
- Find a starting point on the top edge (left or right side of the holder) and attach the yarn.
- Chain 3 (counts as 1 dc), and in the same stitch, work 1 more double crochet, followed by 2 chains and 2 double crochets (this creates a V Stitch or V Shape).
- Work the strap by repeating this pattern:
- Start with a chain 3, and in the V shaped space created in the previous round, work 2 dc, 2 chains, and 2 dc.
- Use slip stitches to move between V stitches when transitioning.
- For an adult sized full length strap, complete 30 V shaped repetitions before aligning and attaching the strap to the opposite side of the top edge.
- To attach: Line up the strap ends and join it by slip stitching or sewing securely into the opposite top edge.
- For children or smaller straps, reduce the number of repetitions as needed while ensuring symmetry.
Final Finishing:
- Weave in all loose yarn ends using a tapestry needle.
- Tighten the initial magic ring and secure the yarn tail for durability.
- Trim any excess yarn to give your work a neat appearance.
Final Words:
Congratulations! You’ve now completed a chic, durable crochet water bottle holder with a strap. With its stylish design and sturdy construction, it adds convenience and practicality to everyday activities like hikes, cycling, or even casual strolls. The design supports bottles of various sizes, and the strap can be adjusted for children or adults, making it versatile for anyone.
Tips to Maintain the Pattern:
- Washing: Hand wash or machine wash on a gentle cycle to prevent stretching or damage to the yarn.
- Reshaping: After washing, reshape the holder by placing the bottle inside while drying to maintain its form.
- Tension: Maintain even tension throughout to ensure a consistent fit and aesthetic appeal.
- Customization: Experiment with different yarn colors, textures, or even adding embellishments (e.g., buttons or embroidery) to personalize your holder.