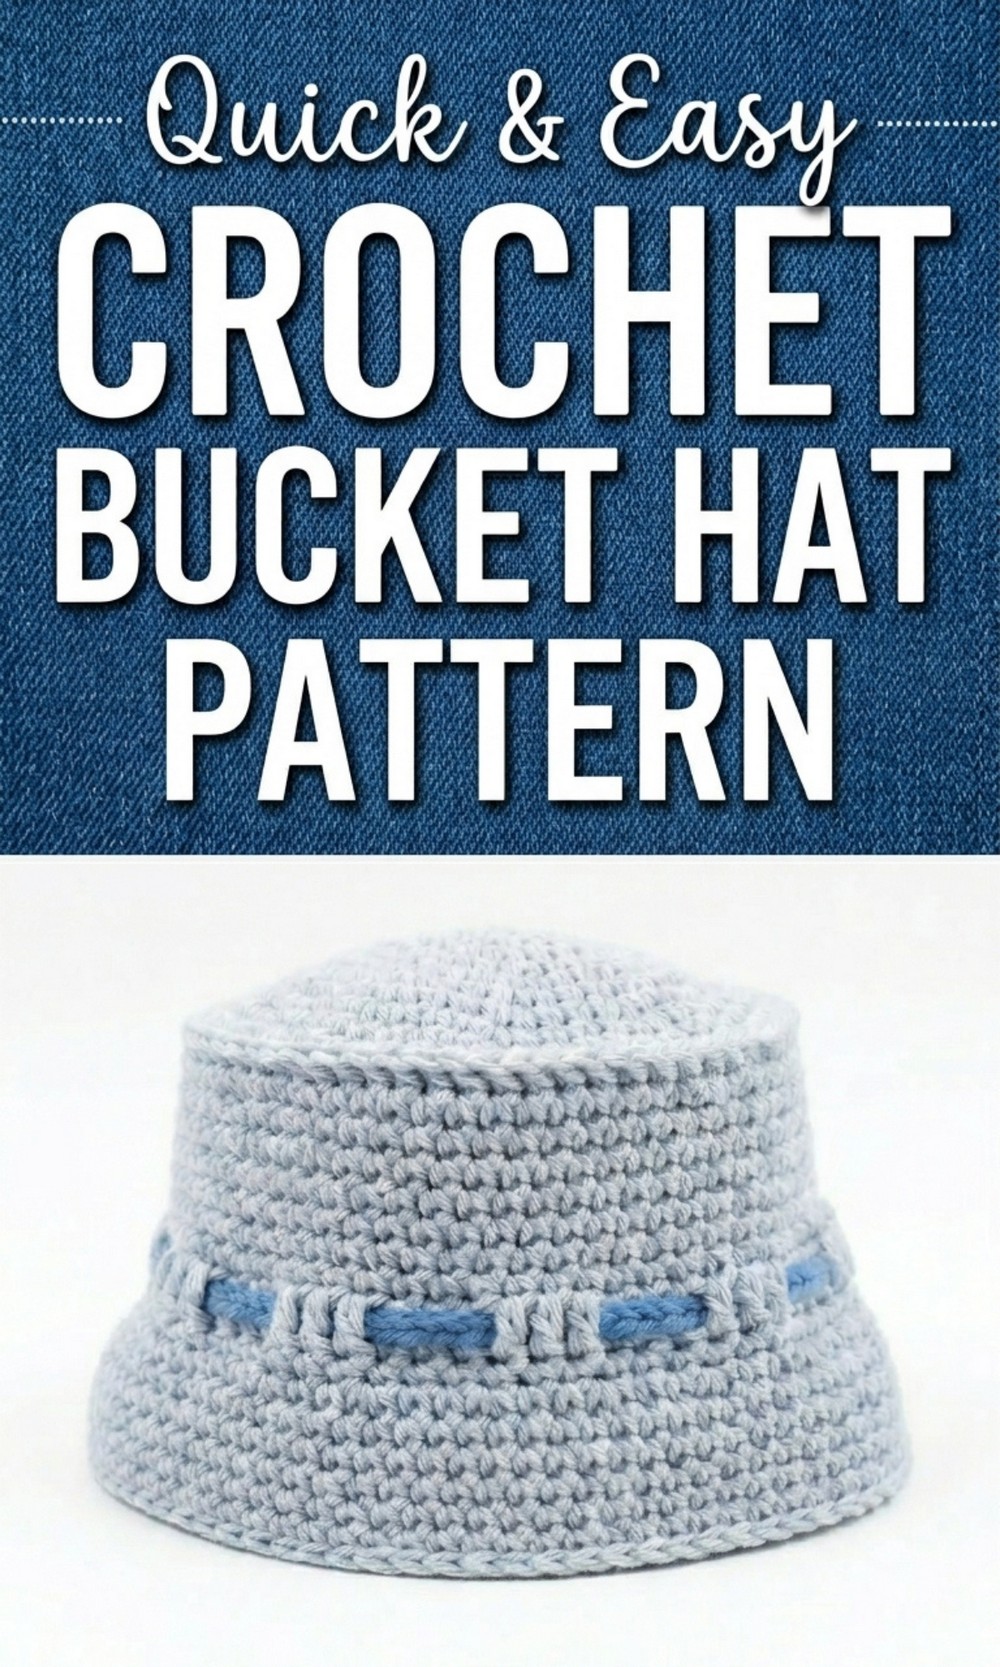
Use this free Crochet Bucket Hat Pattern to make a cute and comfy bucket hat that’s great for sunny days and fits any size or style preference.
Ultimate Free Crochet Bucket Hat Pattern You’ll Love to Use
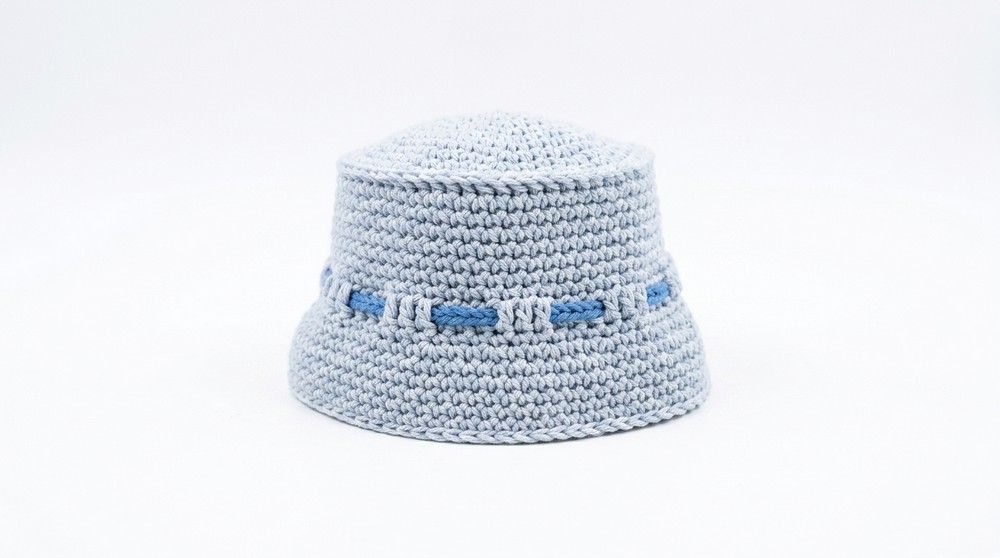
A fun and stylish crochet bucket hat can be yours with this free and easy free crochet bucket hat pattern. This hat is the perfect mix of comfort and fashion, offering a floppy brim for sun protection and a round, snug fit for all day wear. It’s lightweight and practical, making it great for sunny days or even as a cozy accessory for colder weather.
What makes this hat stand out is the chance to use your favorite yarn colors to make it truly one of a kind. A simple woven band can be added for a pop of contrast or to match your personal style. This hat works for all ages and sizes, so it can be customized for anyone in your family or friend group.  Whether it’s for casual outings or just to show off your handiwork, this bucket hat is a charming and functional addition to any wardrobe. Start something fun today and show off your skills with this exciting project.
Crochet Bucket Hat Pattern
Materials Needed
- Yarn: Use a soft, medium weight yarn in your desired color. Recommended: Cotton or Acrylic yarn for durability and comfort.
- Primary color for the hat.
- Contrasting color for the band (optional).
- Hook: Crochet hook size suitable for the yarn (commonly 4mm–5mm for medium weight yarn).
- Stitch Marker: To keep track of the starting stitch for rounds.
- Tapestry/Darning Needle: For weaving in ends and attaching the band.
- Scissors: For cutting the yarn.
Skill Level
- Beginner-friendly, but familiarity with basic stitches is recommended.
Abbreviations (US Terminology)
- ch: Chain
- sc: Single Crochet
- dc: Double Crochet
- sl st: Slip Stitch
- st: Stitch
- inc: Increase (two stitches in one stitch)
- dec: Decrease (optional if adjusting)
Special Techniques
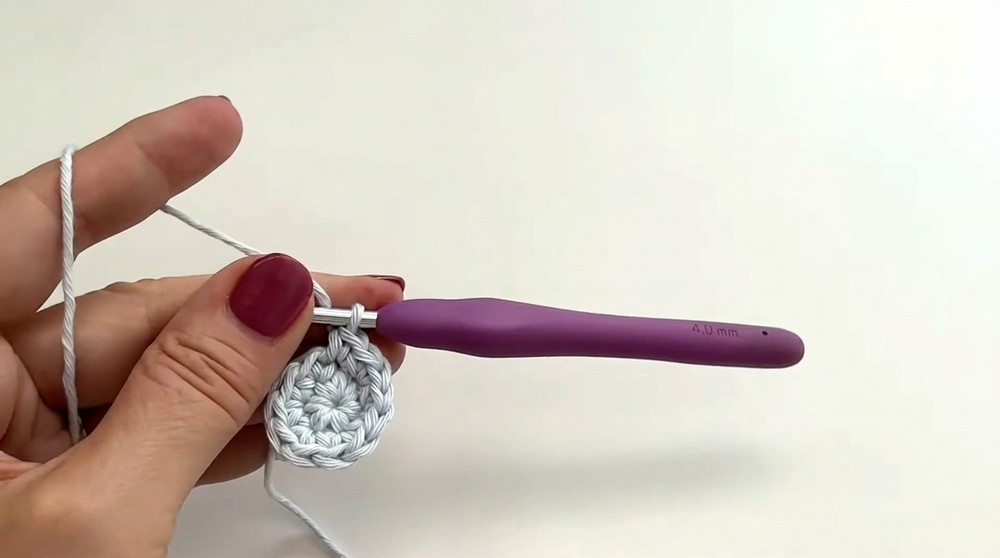
- Magic Circle: A method used to begin the top of the hat circularly.
- Working Around the Post: Creating raised edges by crocheting around the post of the previous stitches.
- Braided Rope Band: A decorative technique to make a textured band using chain loops.
Step-by-Step Pattern
1. Sizing Chart
The hat size is determined by the diameter of the crown. For reference:
- 1–2 Years Old (17–18 inches head circumference): Diameter: Approx. 5.5–6 inches
- 4+ Years Old (19–20 inches head circumference): Diameter: 6.5–6.8 inches
- Adult Small (21–22 inches head circumference): Diameter: 7 inches
2. Crown
Start with a magic circle.
Round 1: Magic Circle
- Begin with a magic circle.
- Work 6 sc into the circle. (6 sts total)
- Pull the circle tight.
Round 2: Increase
- Work 2 sc into each st around. (12 sts total)
Round 3: Single Crochet and Increase
- (1 sc, 2 sc in next stitch) – repeat in a pattern around. (18 sts total)
Round 4: Gradual Increase
- Place a stitch marker in the first stitch.
- (1 sc, 1 sc, 2 sc in next stitch) – repeat around. (24 sts total)
Round 5: Progression
- Start with (1 sc, 1 sc, 1 sc, 2 sc in the next stitch) – repeat around. (30 sts total)
Round 6 (And Beyond): Continue Increasing
- Add one more sc to each set before the increase on every round until you reach the desired diameter:
- Round 6: (1, 1, 1, 1, 2 36 sts)
- Round 7: (1, 1, 1, 1, 1, 2 42 sts)
- Round 8: (1, 1, 1, 1, 1, 1, 2 48 sts)
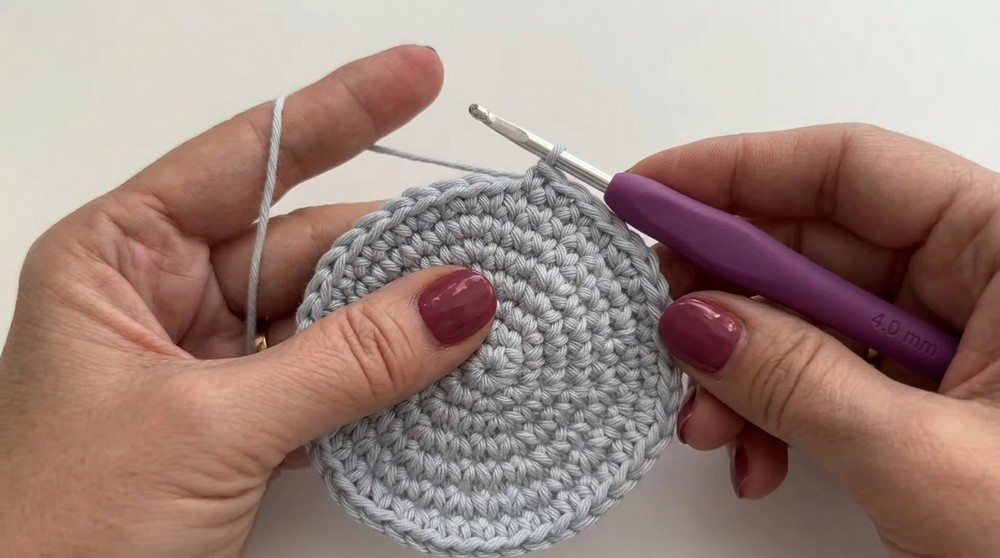
- Keep adding rounds until the diameter matches your required size based on the sizing chart.
To Fix Hexagonal Shape:
- Occasionally, after finishing a round, start the next round with a “slip over three stitches” to smooth the edges into a proper circle.
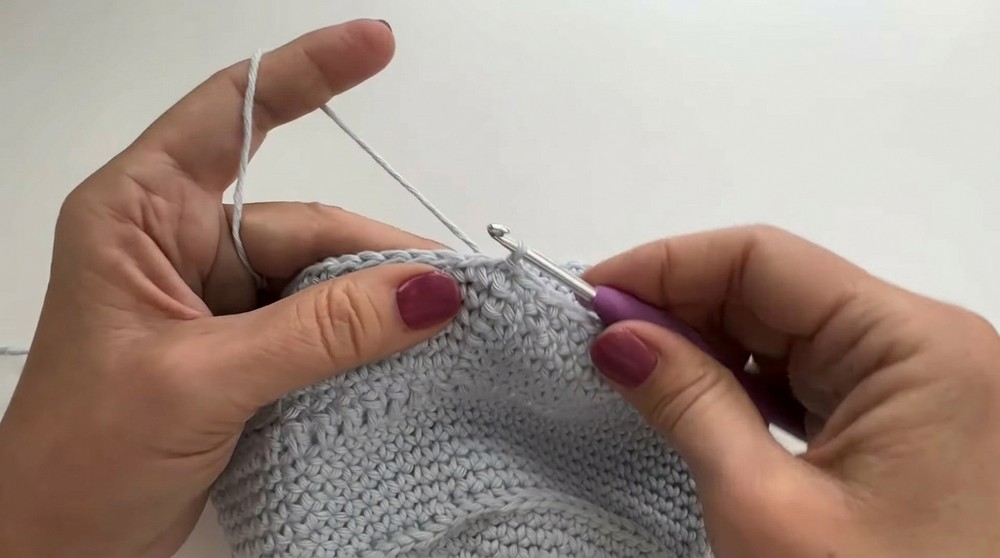
3. Body
- Once the desired diameter is achieved, continue working without increases for 6–7 rounds. This forms the straight edges of the bucket.
- Place a stitch marker at the start of the first stitch of every round to keep track.
4. Band (Double Crochet Round)
- After the single crochet section, work 1 row of dc across to create the band.
- Chain 3 at the start (counts as the first dc).
- Work 1 dc into each stitch around.
- Join with a sl st at the end.
- Complete the band with an additional finishing round using sc in each stitch around.
5. Brim
- Next round: Begin flaring out the brim by introducing increases.
- Round 1: (1 sc, 1 sc, 1 sc, 2 sc) repeat around.
- Round 2: (1 sc, 1 sc, 1 sc, 1 sc, 2 sc) repeat around.
- Continue this increase pattern every few rounds to make the brim as wide as desired.
- Finish with sl st along the last row for a clean edge.
Optional Decor: Braided Rope Band
- Start with your contrasting yarn and create a slip knot.
- Chain 1, then work into the back loop of the chain.
- Insert the hook into the loop, pull up the yarn, and yarn over.
- Create a long, even braided rope, measuring enough to weave around the band of the hat.
- Weave the rope through stitches or gaps above the band, over 3 stitches, under 3 stitches, ensuring no twists.
Finishing
- Weave in all loose ends, including the magic circle tail (secure it to ensure it doesn’t unravel).
- Block the hat if necessary by pinning it and lightly steaming or spraying with water to set its shape.
- Add decorative elements like flowers or appliques for a unique touch.
Final Words and Tips
- Consistency: Maintain uniform tension throughout the project for a polished look.
- Yarn Choice: Pick a light, breathable yarn like cotton for summer hats or bulky acrylic for warm winter versions.
- Size Adjustments: Increase or decrease the crown diameter and brim width to customize the fit and style.
- Care: Wash gently by hand or in a delicate cycle, and lay flat to dry to preserve your handmade hat.
Enjoy wearing or gifting your beautifully crafted bucket hat—it’s a timeless accessory that’s both stylish and practical.