Enjoy making a charming free crochet daisy purse pattern that’s the perfect size for your keys, money, and a touch of happiness.
Amazing Free Crochet Daisy Purse Pattern You’ll Fall in Love With Instantly
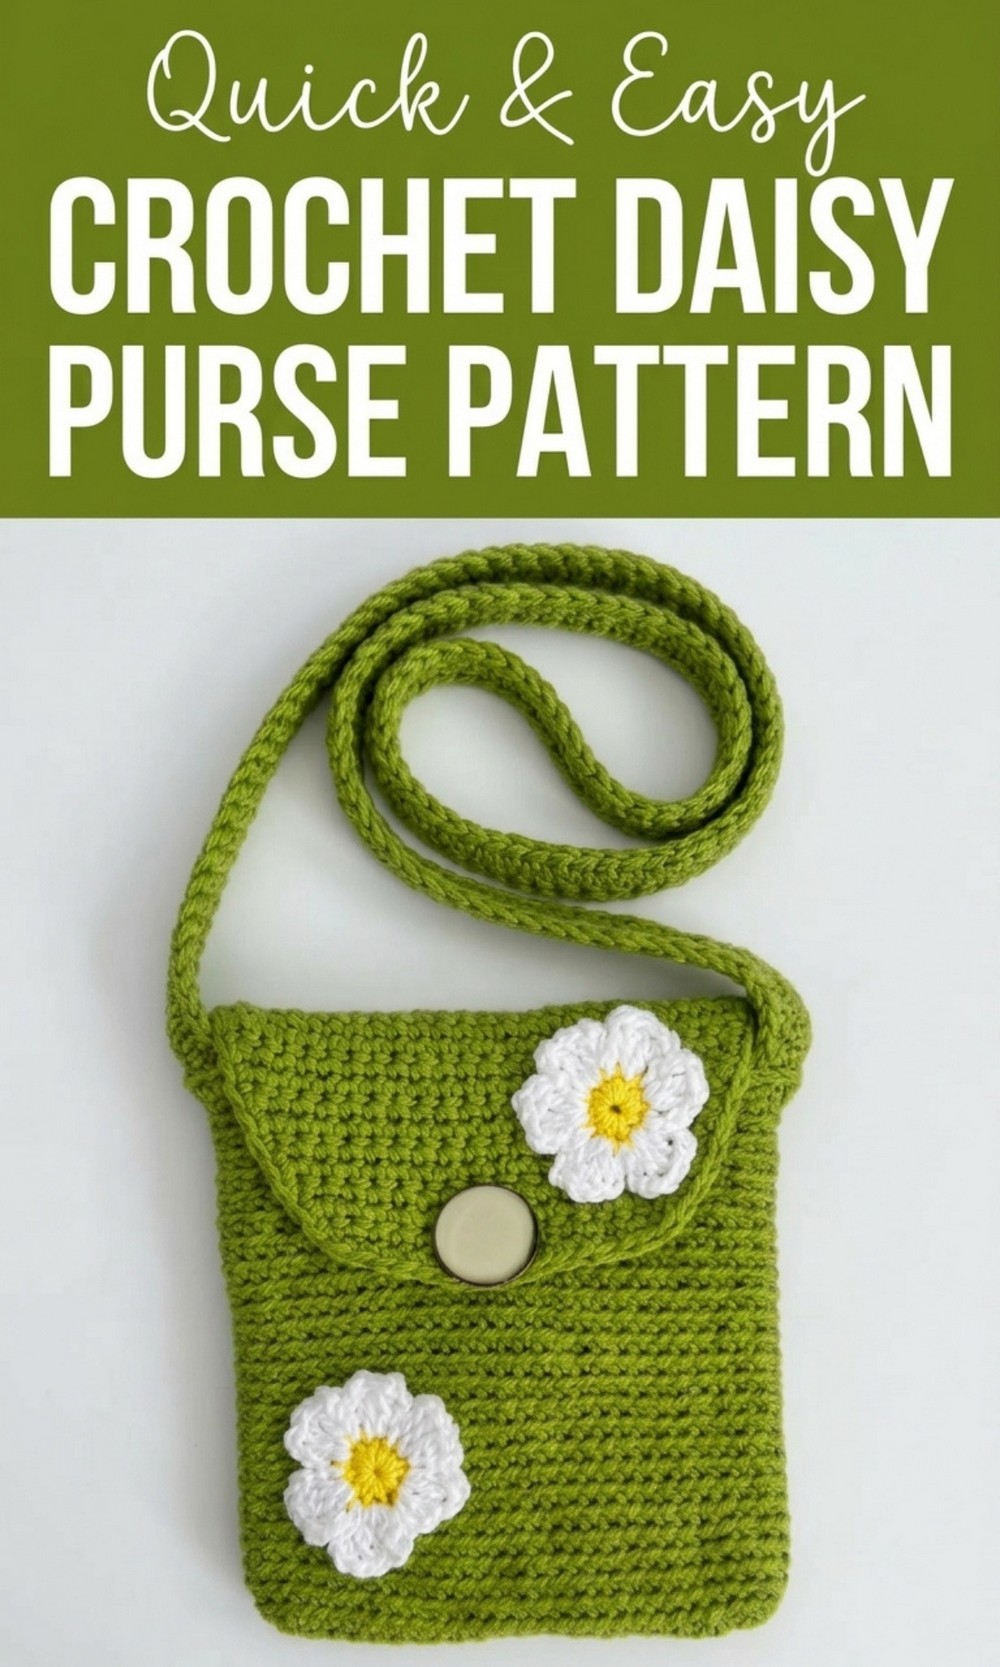
This Free Crochet Daisy Purse Pattern is a fun and simple way to make your own cute little bag. The purse is decorated with a cheerful daisy on the front, giving it a fresh and happy look that’s perfect for any age. It’s small, lightweight, and just the right size to carry your keys, money, or other tiny treasures.
The purse is about 6 inches wide, and you can easily make it bigger or smaller to suit your needs. The strap can be adjusted to wear it as a shoulder or crossbody bag, making it super convenient. A neat button closure keeps everything secure inside, so you don’t have to worry about losing anything.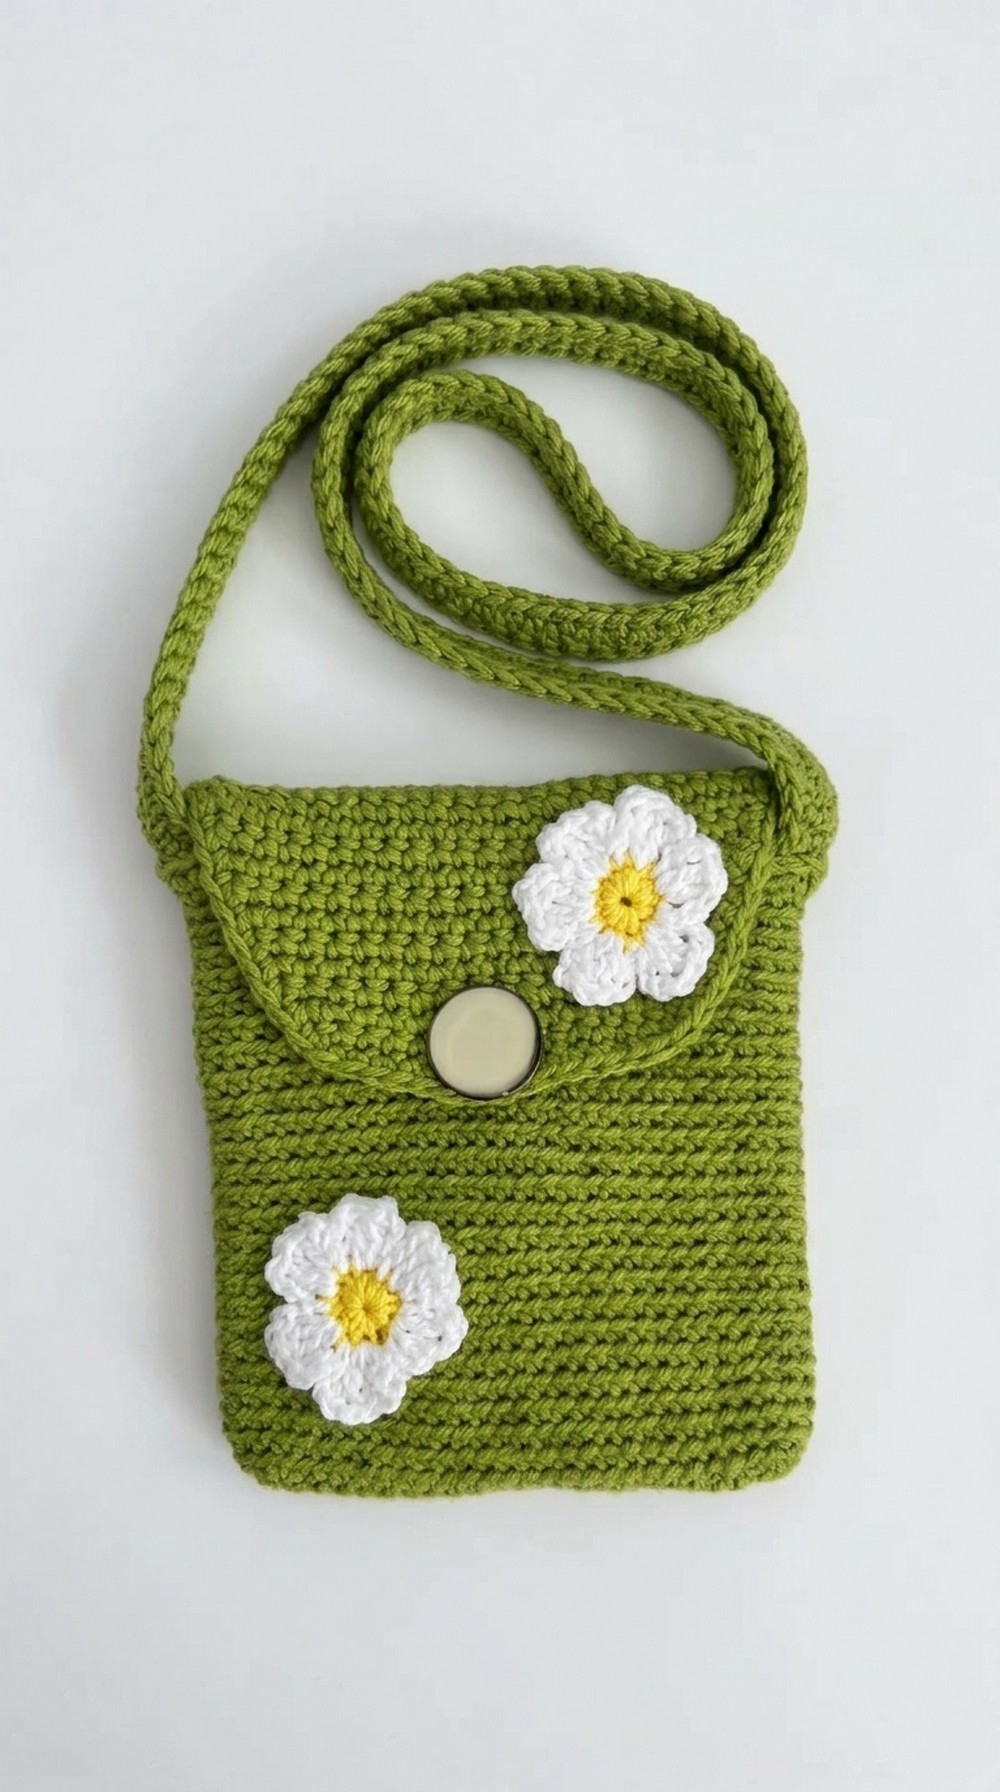 The daisy adds a bright and playful touch, making this purse stand out in the best way. Whether you’re new to crocheting or already know the basics, this project is easy to follow and so much fun to try.
Cheerful Crochet Daisy Purse Pattern
Finished Size
- Body of Purse: 6″ (15 cm) wide by 6″ (15 cm) high
- Flap: Length adjustable to your preference
- Strap Length: Approximately 35″–45″ (89 cm–114 cm), adjustable
Materials Needed
- Yarn:
- Main color (MC) for purse: 1.5 balls of medium weight yarn (such as worsted weight, category 4)
- Scrap yarn for making the daisy: Use contrasting colors for the center (yellow) and petals (white/any desired color)
- Crochet Hook:
- 4.5 mm crochet hook
- Other Tools & Supplies:
- Darning needle (for weaving ends and sewing pieces)
- Stitch markers
- Button for closure (approximately 0.75″/2 cm diameter; adjust size to your flap design)
- Scissors
Gauge
- 10 single crochet stitches x 10 rows = 2″ (5 cm) in single crochet
Adjust hook size if your gauge does not match.
Pattern Notes
- Skill Level: Beginner friendly
- Special Techniques:
- Magic Ring (for flower center)
- Back Loop Only Single Crochet (for purse body texture)
- Invisible Finishing Stitch (to seamlessly close yarn ends)
- Customization Ideas:
- Adjust purse width by increasing or decreasing the initial chain length.
- Modify flap length by extending or shortening rows.
- Use multi colored yarn or stripes to add visual interest.
- Add extra daisies or embellishments like beads, appliques, or embroidery for personalization.
Pattern Instructions
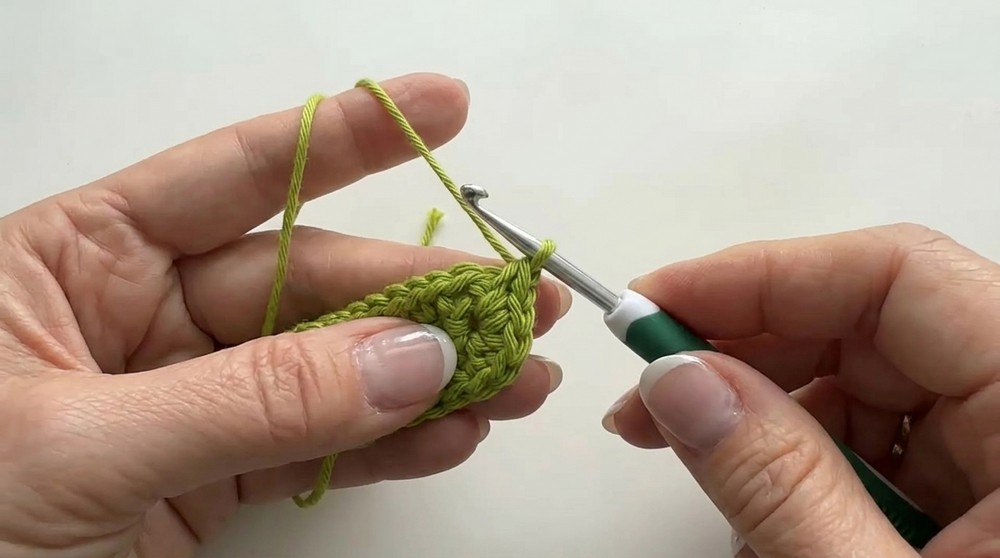
1. Purse Base and Body
Foundation Chain:
- Make a slip knot.
- Loosely chain 25 stitches. Adjust the chain length if you prefer a wider purse (each chain adds approximately 0.25″/0.6 cm).
First Round:
3. Starting from the second chain from hook, work 1 single crochet (sc) into the back loop/bump of every chain across.
- At the last stitch, put 4 sc into the stitch to create a rounded corner. Distribute these stitches evenly around the knot.
- Continue on the other side of the chain, working 1 sc under both loops or V of each chain back across.
- At the end, add 4 sc into the first stitch, creating symmetry between the corners on both ends.
End Rounds:
7. Place a stitch marker at each end corner to track positions.
- For the following rounds:
- Work 1 sc in each stitch, stopping at the previous 4 corner stitches.
- Place 2 sc in each corner stitch (4 stitches on each end), increasing as you round the corners.
- Continue for another round, ensuring symmetry and a rounded base shape.
Switch to Texture Stitch:
10. From this point forward:
Work only in the back loop of each stitch around, without increases.
Continue until the purse height reaches approximately 6″ (15 cm) or desired size.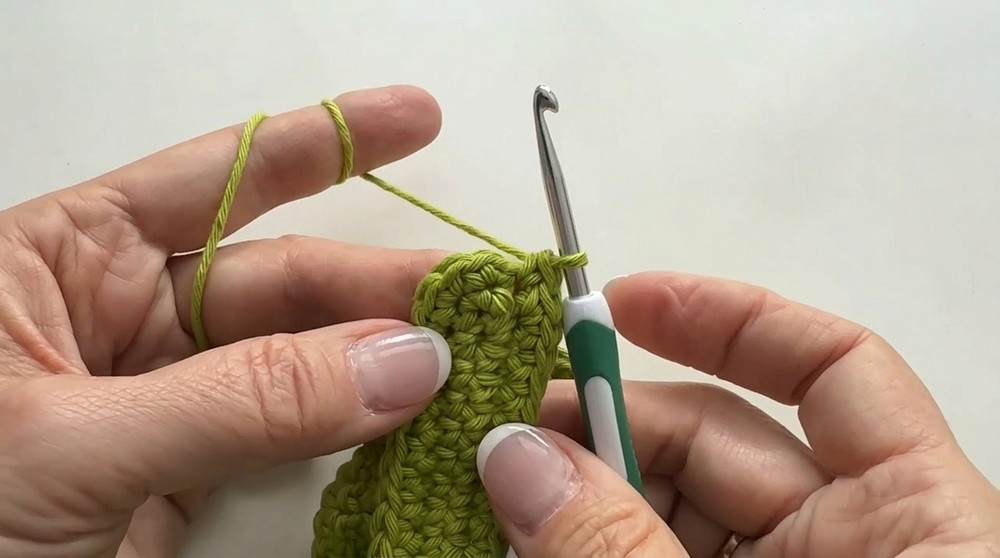
2. Purse Flap
- Stop working rounds at the back of the purse to begin the flap.
- Mark the edges to ensure flap placement aligns at the back.
- Row 1:
- Chain 1, turn work, and start in the first stitch.
- Work 1 sc across flap stitches until you reach the marker on the opposite side.
- Row 2:
- Chain 1, turn, and repeat sc across.
Shape the Flap:
5. Starting from Row 3 onwards, decrease each row by skipping the first stitch:
- Chain 1, skip the first stitch, and crochet across in sc until last stitch.
- Repeat this on every row to shape the flap into a triangular or tapered form.
3. Buttonhole
- Stop flap rows when it reaches your desired length.
- Determine button placement by marking the central flap stitch.
- Buttonhole Row:
- Chain 1, turn work, and crochet until 1 stitch before the center marker.
- Chain enough to create a buttonhole (use 1 extra chain for flexibility). Skip 3 stitches, and continue single crochet on the other side until the end.
- Test buttonhole opening after completing the row to ensure button fits snugly.
4. Strap
- Create a chain 120–150 stitches (approximately 35″–45″) depending on strap length preference.
- Round 1:
- Starting from the second chain from hook, work into the back loop of every chain.
- Add two sc in the first stitch and four sc in the last stitch to shape corners, then return along the opposite side of the chain.
- Round 2:
- Work sc into each stitch with corner increases of 2 sc per corner stitch.
- Finish round with an invisible stitch closure.
- Leave a long tail for sewing straps to both sides of the bag near the flap edges.
5. Daisy Embellishment
Center of Flower (Yellow):
- Create a magic ring, chain 1, and crochet 11 sc into the ring.
- Pull yarn snug and close the round with an invisible stitch.
Petals (White or Any Color):
3. Attach the petal color yarn to any stitch.
- First Petal:
- Chain 3, work two double crochets (dc) into the next stitch.
- Chain 3, slip stitch into the next stitch.
- Repeat the petal process for a total of six petals.
- Finish with a slip stitch into the first stitch made.

Conclusion and Final Steps
- Assembly:
- Attach the strap ends to the purse using the flap side alignment. Ensure the strap lays flat and symmetrical.
- Sew the daisy to your chosen location.
- Testing:
- Check button placement and ensure functionality.
- Final Remarks:
- This purse is an excellent DIY gift or accessory. Modify size, strap length, and embellishments for added creativity.