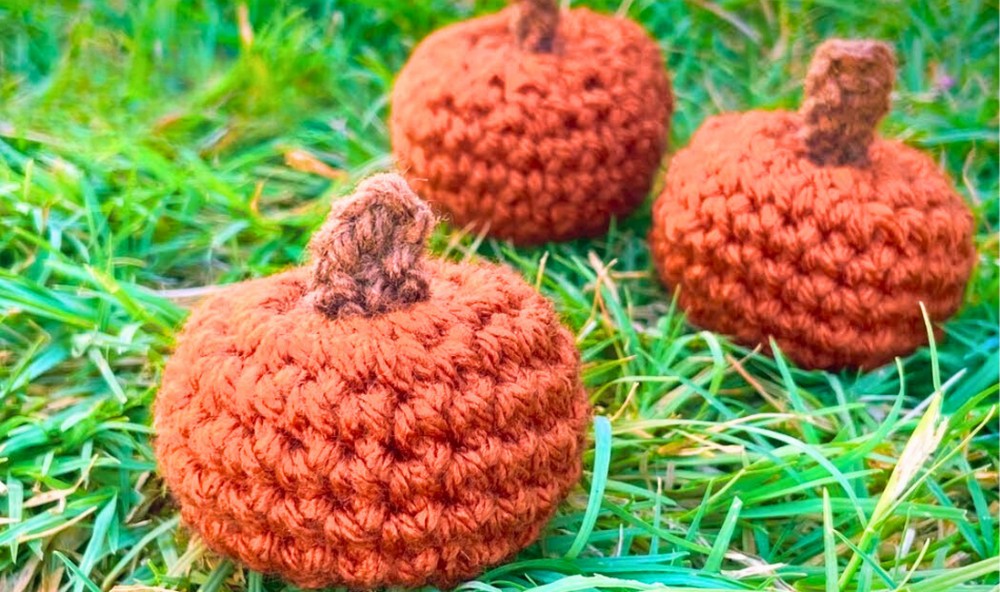
Spice up your autumn with this Free Crochet Mini Pumpkin Pattern that adds a festive touch to your décor, gifts, or cozy seasonal displays.
As autumn whispers through the crisp air and leaves cascade into vibrant hues of gold and copper, the charm of seasonally themed decorations blossoms like never before. Among the beloved symbols of fall, the humble pumpkin holds a special place, evoking thoughts of cozy nights, festive gatherings, and the warmth of home. The miniature crochet pumpkin, with its delightful simplicity and versatility, offers more than just a decorative piece; it becomes a means of infusing personality and artistry into your surroundings. Whether it adorns your mantelpiece, serves as a centerpiece, or adds charm to a Halloween nook, this tiny marvel effortlessly enriches your autumn decor with its rustic beauty.
How to Crochet the Cutest Mini Pumpkin for Fall Displays

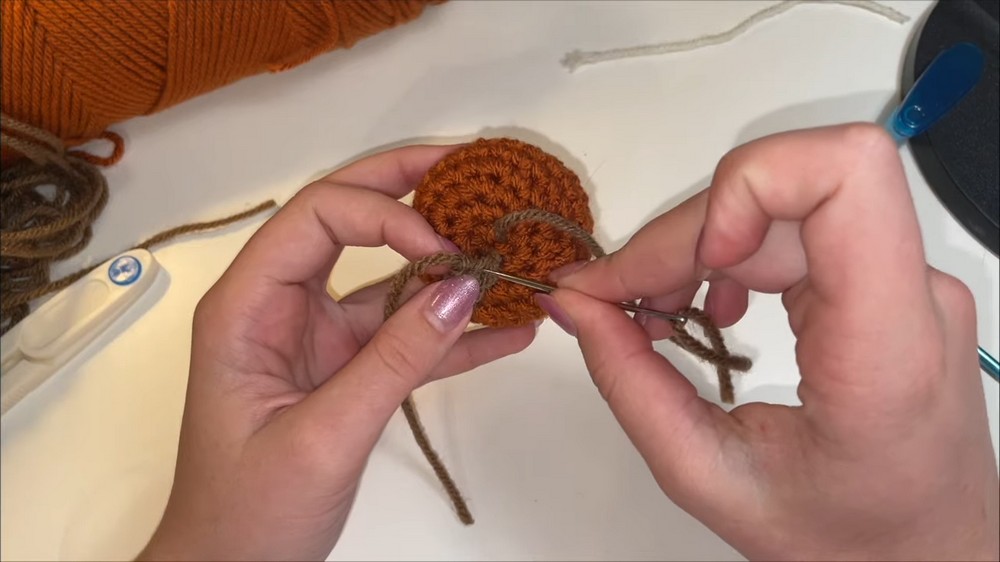
While the pumpkin itself is striking, the real artistry lies in its finishing touches, the attachment of a textured stem, sewn on securely to evoke authenticity. Adjustments to the stem offer added customization, allowing you to shape it to your preference. A simple thread and needle technique helps give dimension to the pumpkin’s grooves, capturing the natural curvature that characterizes this seasonal icon.
The result is a charming, handmade decoration whose seamless fusion of form and function serves as both a visual delight and an emblem of autumn’s heartwarming vibes. Perfect for gifting or transforming your space into a haven of fall-inspired elegance, this mini pumpkin promises to leave you enamored by its timeless appeal.
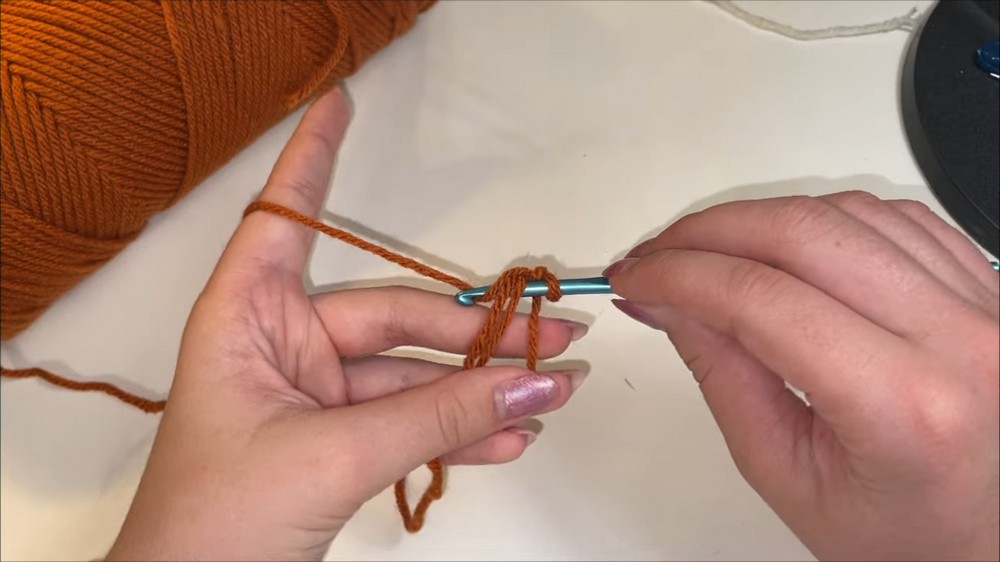
The pattern begins with the creation of a magic ring, an essential technique for forming the rounded base of the pumpkin. With steady hands, six single crochets are worked into this magic ring before tightening the yarn tail to secure the circle.
This marks the foundation of the project, the first glimpse of what will soon evolve into a petite, three-dimensional pumpkin. Using a stitch marker, progression through rounds becomes seamless, allowing each row’s count to flourish smoothly.
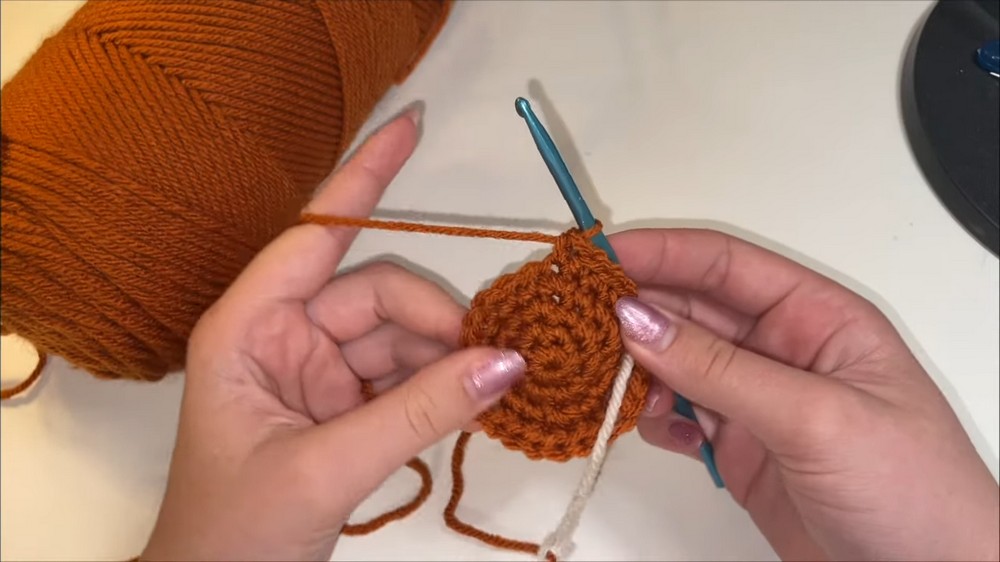
The second row introduces increases in every stitch, a technique that doubles the count from six to twelve. With precision, rounds continue to expand by alternating between increases and single crochets.
As the pattern builds, rows five through seven transition into a phase of steady single crochets, where the material begins to curve upward, taking on its distinctive pumpkin-like shape. This method provides consistency while sculpting the body of the mini pumpkin.
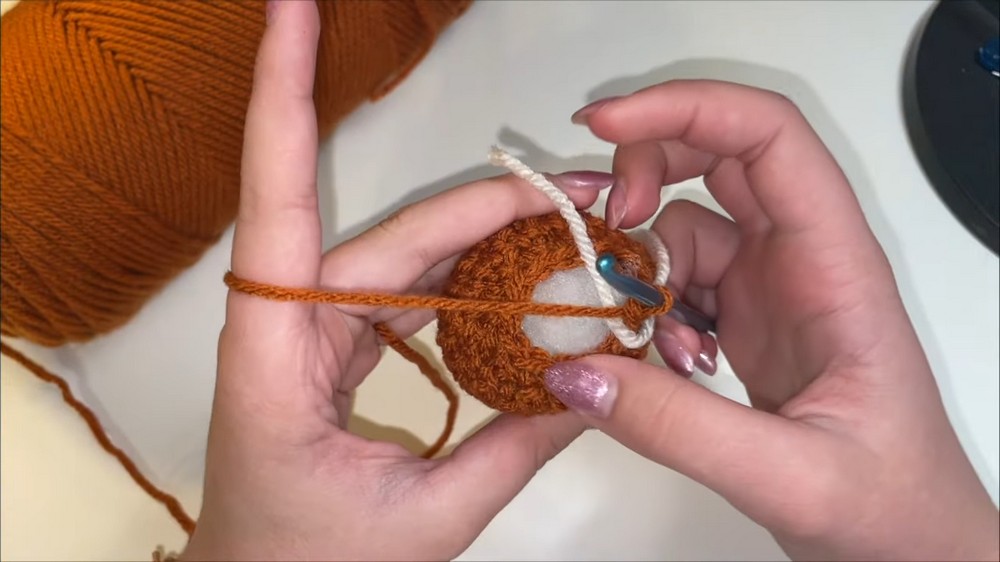
After reaching row eight, decreases are strategically incorporated to refine the structure and narrow the diameter. Detailed stitching, followed by thoughtful stuffing, ensures the pumpkin retains its rounded appearance while exuding durability. By the final row, uniform decreases close the project entirely, leaving behind a firm yet delicate crocheted form.
Materials Needed
- Yarn: In orange for the pumpkin and brown for the stem.
- Crochet Hook: A size suitable for the yarn you’re using.
- Stuffing: Any kind of filling (e.g., polyester fiberfill or an old pillow).
- Stitch Marker: Can be a piece of yarn or a store-bought marker.
- Sewing Needle: A tapestry needle to shape and finalize the pumpkin.
- Scissors: For cutting yarn.
Special Features
- Magic Ring: The tutorial begins with a clear explanation of the magic ring technique, allowing you to start the pumpkin seamlessly.
- Worked Continuously: The pumpkin is crocheted in rounds without joining, creating a smoother appearance.
- Shaping Technique: The shaping of the pumpkin through tightening stitches is a key feature, giving the final product its realistic contours.
Tutor’s Suggestions
- Magic Ring Help: Maddie recommends watching the detailed magic ring tutorial linked in the video’s description if you’re struggling with this step.
- Yarn Alternatives: Use any spare yarn for this project. Even pieces from old projects work well.
- Stitch Markers: A small piece of contrasting yarn works just as well as store-bought markers.
- Take Your Time: Especially for the decreases, as the stitches may become tight and crowded.
Uses
- These tiny pumpkins are perfect for seasonal decor during fall or Halloween.
- They can be used as table centerpieces, bowl fillers, or garlands.
- Add them as cute handmade gifts or embellishments for crafts.
Level of Difficulty
- Beginner-Friendly: Although the video features the magic ring and shaping techniques, Maddie explains each step in great detail, making it accessible even to new crocheters.
Tip
If you’re new to crochet, practice the magic ring and single crochet before attempting the project. This will make the process smoother and more enjoyable.
Step-by-Step Instructions
This tutorial from Maddie explains the process of making a cute and tiny crocheted pumpkin. Perfect as fall or Halloween decor, this quick project is beginner-friendly and uses simple techniques to create a delightful seasonal accent.
Conclusion
This adorable crocheted pumpkin is a fun, quick, and easy project suitable for all skill levels. Maddie provides detailed explanations, helpful tips, and clear visuals, ensuring a successful result. Whether decorating for fall, Halloween, or just adding seasonal charm to your home.