Add a splash of color to your style with a Crochet Leftover Yarn Top Pattern that turns small yarn scraps into a soft, trendy, and unique summer essential.
Turning those little balls of leftover yarn sitting in your drawer into a beautiful, colorful top that brightens up any outfit. This Crochet Leftover Yarn Top pattern is a wonderful way to give new life to scraps and make something stylish and unique. The top is made by joining small crochet squares or shapes, each showcasing different vibrant colors and textures, creating a charming patchwork look.
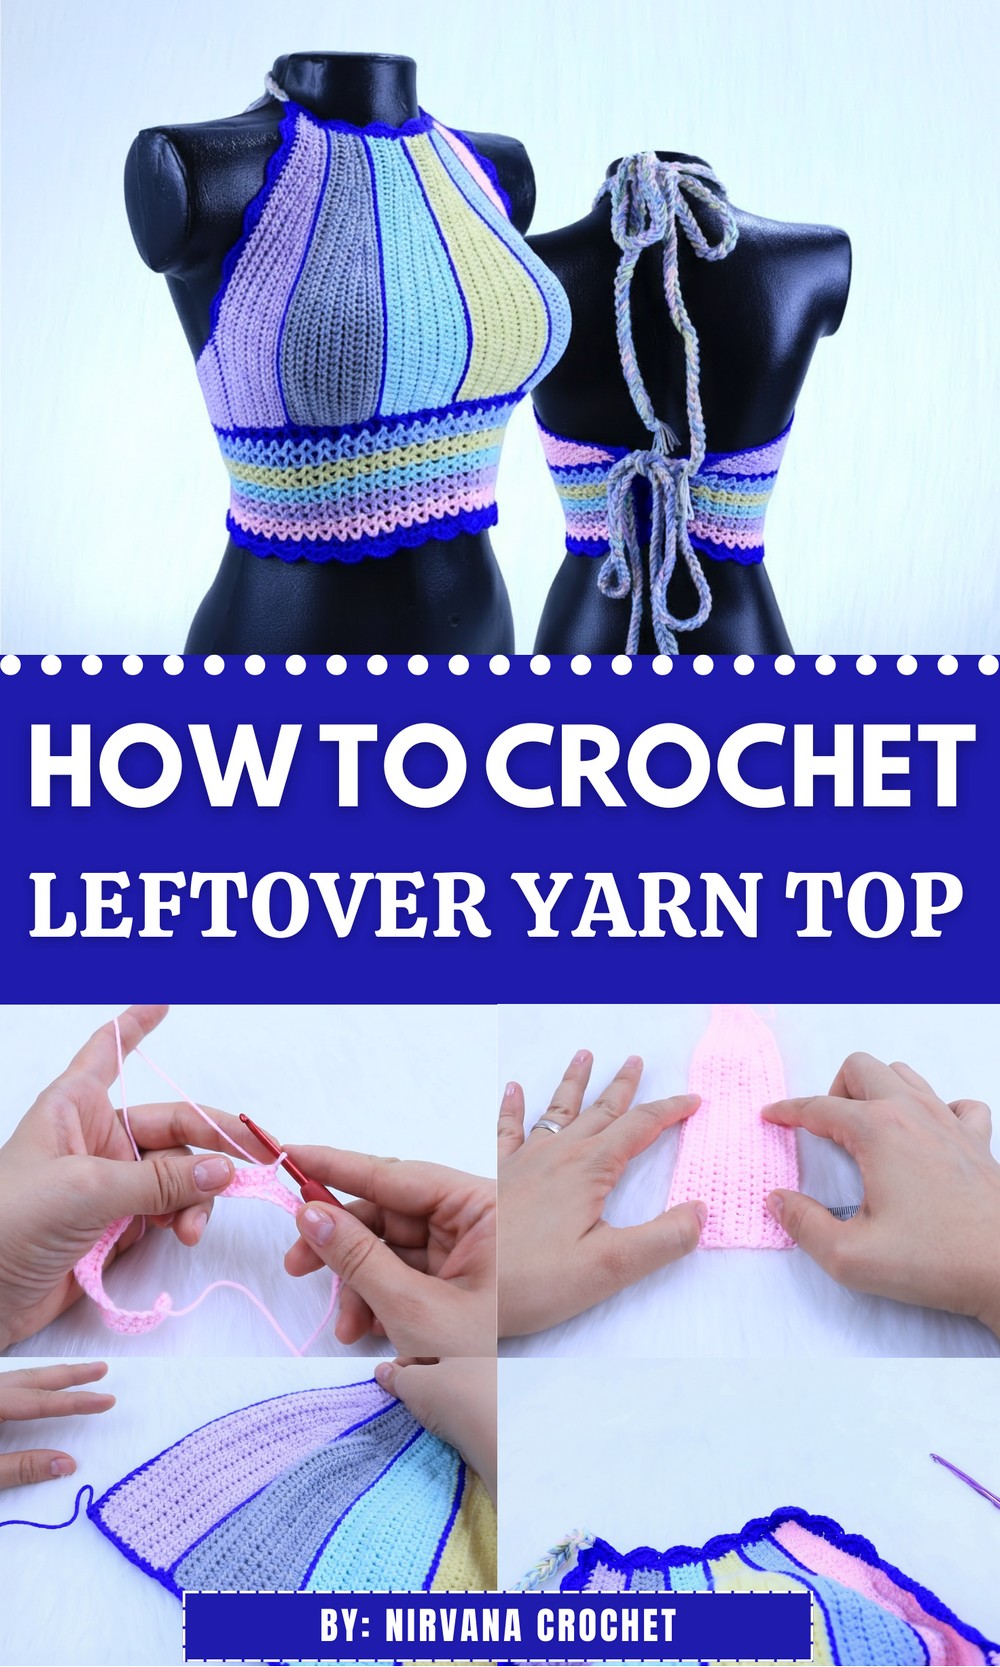
Delightful Crochet Leftover Yarn Top Pattern to Upcycle Yarn
It’s light, comfortable, and perfect for warm days, making it great for casual outings, beachwear, or layering with other clothes. Its handmade appeal adds a special touch that you won’t find in regular store-bought tops. The fun part is how each leftover yarn piece contributes to the overall beauty, making your top truly one-of-a-kind. Plus, this top is easy to adjust to fit your style and size, offering a creative way to recycle and craft at the same time.
Crochet Multicolor Top Pattern
Materials Needed
- Leftover yarn (approximate quantities given below)
- 3mm crochet hook (recommended for main work)
- 6mm and 7mm crochet hooks for straps and edging
- Tape measure
- Stitch marker
- Scissors
Example Yarn: Acrylic yarn, brand unspecified but 100% acrylic.
Sizes and Measurements
Measure your bust width and desired top length (from underbust down). Refer to the approximate chain and stitch counts for your size (S, M, L, XL). For example, size S bust width is approximately 43 cm, and the base chain worked measures approximately 23 cm before starting rounds.
Step-by-Step Pattern
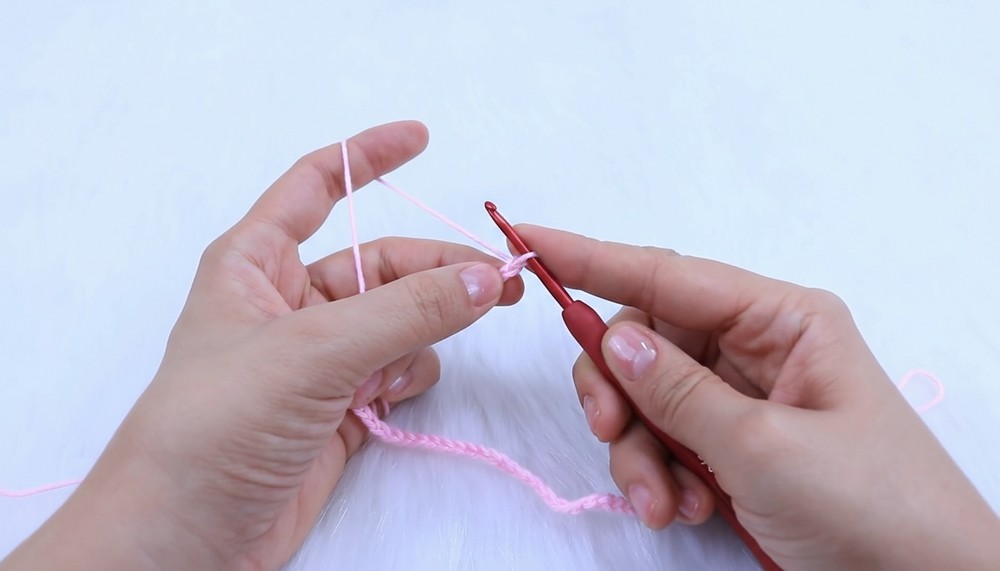
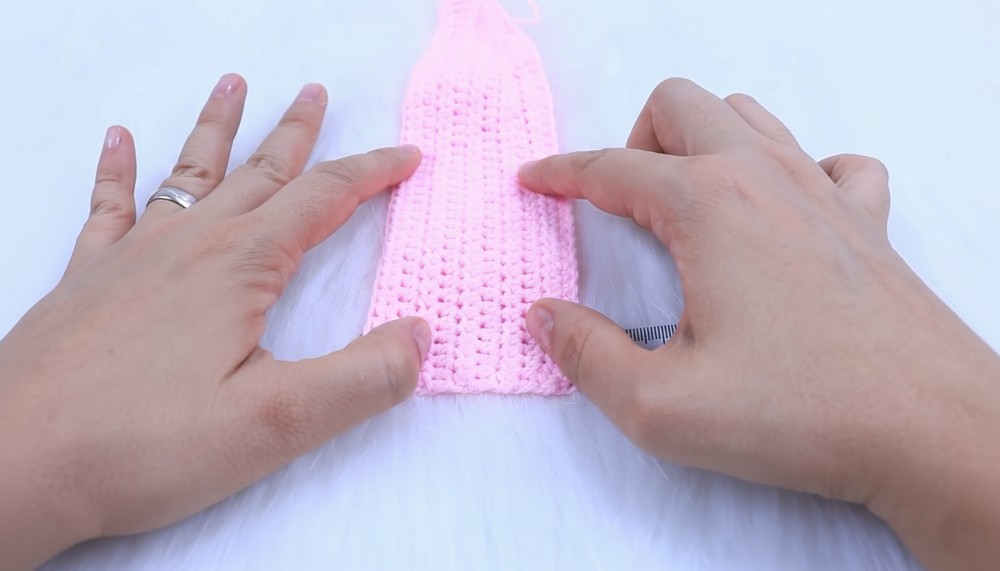
Step 1: Foundation Chain
- Make a slip knot.
- Crochet foundation chains equal to your underbust measurement (e.g., 23 cm for size S).
- Add about 10 extra chains to account for chain stretch difference vs. stitches.
- Example: 54 chains + 10 extra = 64 chains for size S.
Step 2: Single Crochet Foundation Row
- Single crochet in each chain across.
- Count stitches and use stitch marker at the 20th single crochet (for size S) or refer to your size multiples of 5.
- Continue crocheting single crochets until you reach underbust length (~23 cm).
- Measure width stretched to ensure accuracy.
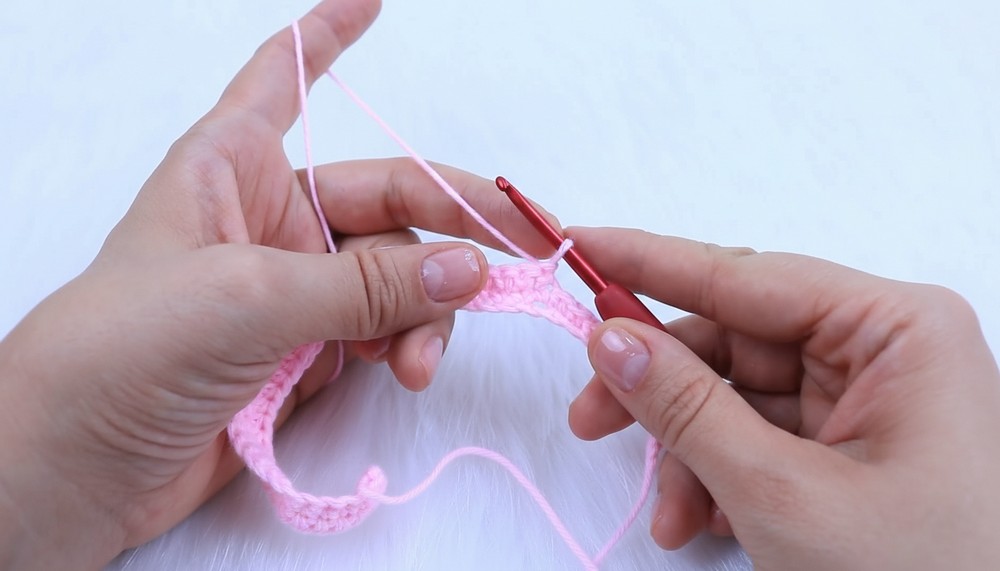
- Fasten off.
Step 3: Loosen Chains
- Loosen foundation chains by gently pulling to avoid tightness.
- Remove slip knot to make the foundation flexible.
Step 4: Round 2 – Half Double Crochet (HDC) Back
- Chain 1, turn work.
- Crochet half double crochet in each stitch until just before the marked stitch.
- When you reach stitch marker:
- Remove the marker.
- Crochet 5 single crochets to create the base for decreases.
- Continue half double crochet to end.
- Join last stitch to first stitch to form a round.
Step 5: Rounds With Decreases and Patterning
- Turn work and crochet rounds alternating between half double crochets and blocks of 5 single crochets separated by 5 slip stitches:Sequence per round:
- Chain 1 or 2 depending on the height needed.
- Work half double crochets across.
- At decrease zone: work 5 single crochets, then 5 slip stitches, then 5 single crochets.
- Join rounds and maintain stitch count.
- Decreases are worked mainly by slip stitches which pull fabric tight.
- Continue rounds until underbust measurement is reached in width (23 cm for size S).
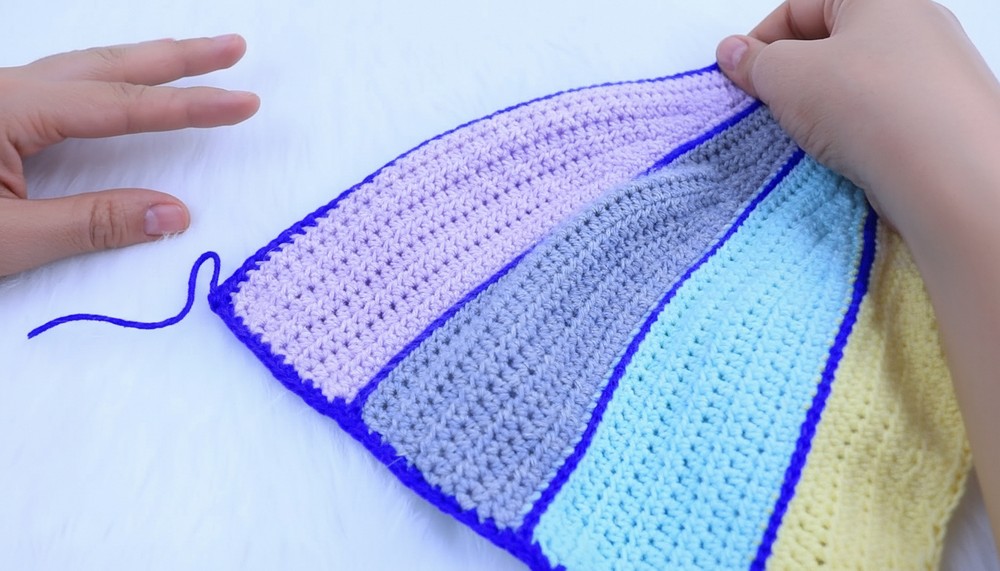
Step 6: Adding Colors
- When changing yarn colors, start new yarn at right place on the right side.
- Work the same number of rounds per color: approx. 20 single crochets + rounds with stitch pattern, followed by cutting yarn.
- Hide yarn tails under stitches as you proceed.
Step 7: Border and Edging
- After desired colored panels are complete, add a border using single crochets all around.
- Increase at corners by working 3 double crochets, chain 2, 3 double crochets.
- The border creates a nice curved edge and sturdy shape.
Step 8: Back Strap Decrease Panel
- On back, measure about 7 cm from side mid-point.
- Crochet double crochets in a straight strip, then start decreases by skipping stitches on one side, joining decreased stitches by crocheting two together.
- This shapes the back triangle for better fit.
Step 9: Finishing Buttonholes
- Work buttonhole rows by crocheting double crochets with chains in between to create gaps.
- Reinforce buttonholes:
- Crochet single crochets over double crochets and in between chain spaces.
- Final rounds are single crochet finishing around edge.
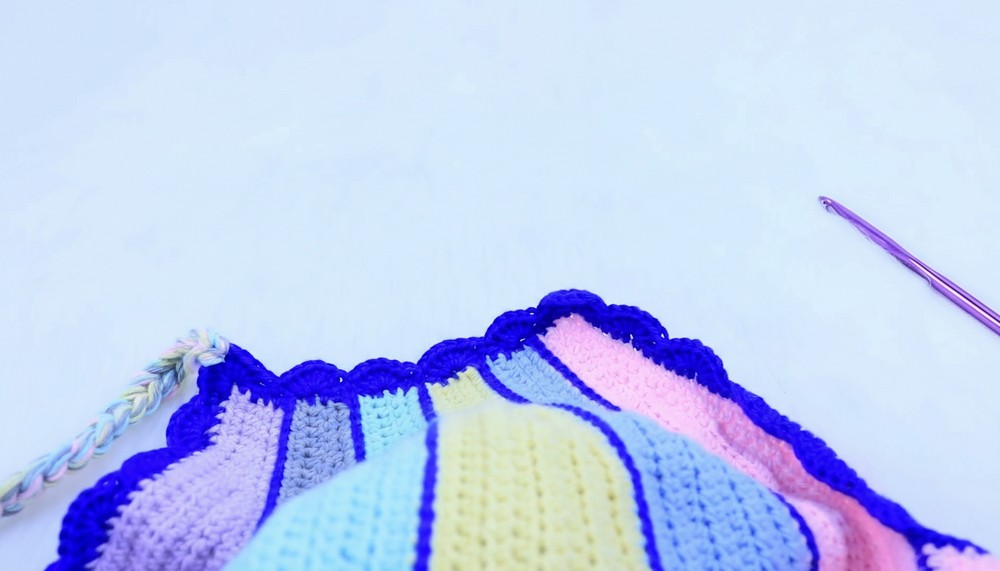
Step 10: Fans Decorative Stitch on Edges
- Skip 2 stitches, then crochet 6 double crochets in one stitch (fan).
- Skip 2 stitches, single crochet in the next.
- Repeat around edges for a pretty motif.
- Add corner fans for shape.
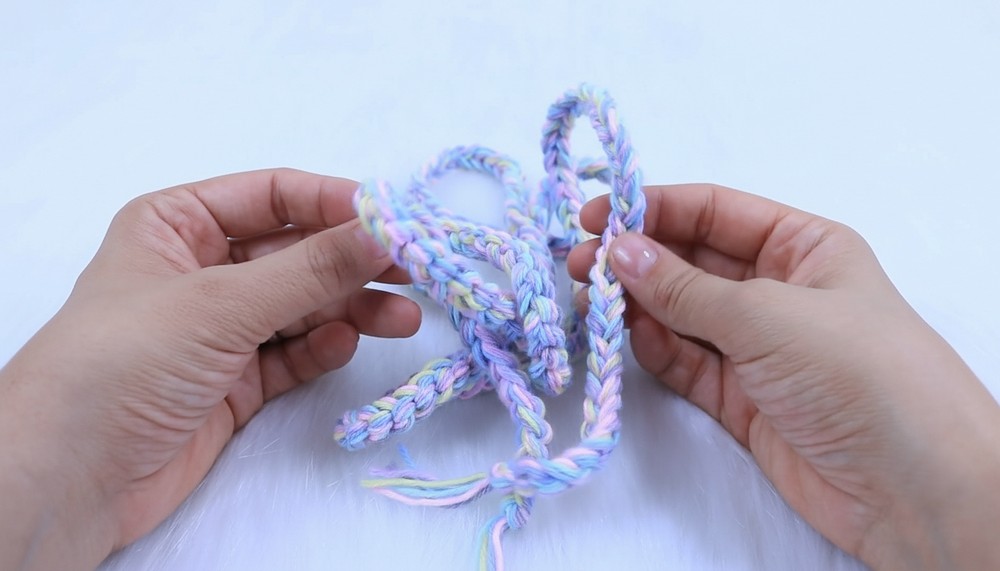
Step 11: Making Straps
- Use 6mm or 7mm hook for thicker chain strips.
- Chain long strips approx. 100-110 cm for back straps; about 72 cm thick straps for neck tie.
- Use multi-colored yarn to make dynamic straps.
- Attach straps through buttonholes and tie for size adjustment.
Special Features
- Multicolor stripes with easy color change.
- Decreasing construction on sides/back for shape without seams.
- Buttonholes for adjustable back straps.
- Decorative fan edging for stylish finish.
- Suitable for lightweight acrylic yarn leftovers.
- Versatile for summer or layering.
Difficulty Level
Intermediate: Requires familiarity with half double crochet, slip stitch decreases, buttonholes, and shaping.
Tutor’s Suggestions
- Use a tape measure often to maintain correct sizing.
- Keep tension consistent especially on chain basis to avoid holes.
- Always start new rounds on the right side.
- For beginners, watch tutorials on slip stitch decreases and buttonholes first.
- Hide yarn ends neatly to finish professionally.
Uses
- Casual summer top.
- Layering piece.
- Customize in any size or length.
- Great reusable project for scrap yarn!
Final Tip
Always block your finished top by stretching gently and pinning it to final measurements, then allow to dry. This helps set your stitches and improves fabric drape and fit.
Conclusion
This multicolor crochet top uniquely blends colorful stripes, intricate stitch work, and shaping techniques for a stylish, wearable piece. While the pattern requires intermediate skills, careful attention to size and tension will create a beautiful, custom-fitted garment. Perfect for using up leftover yarns, this project generates an eye-catching top that’s both practical and fun to wear.
