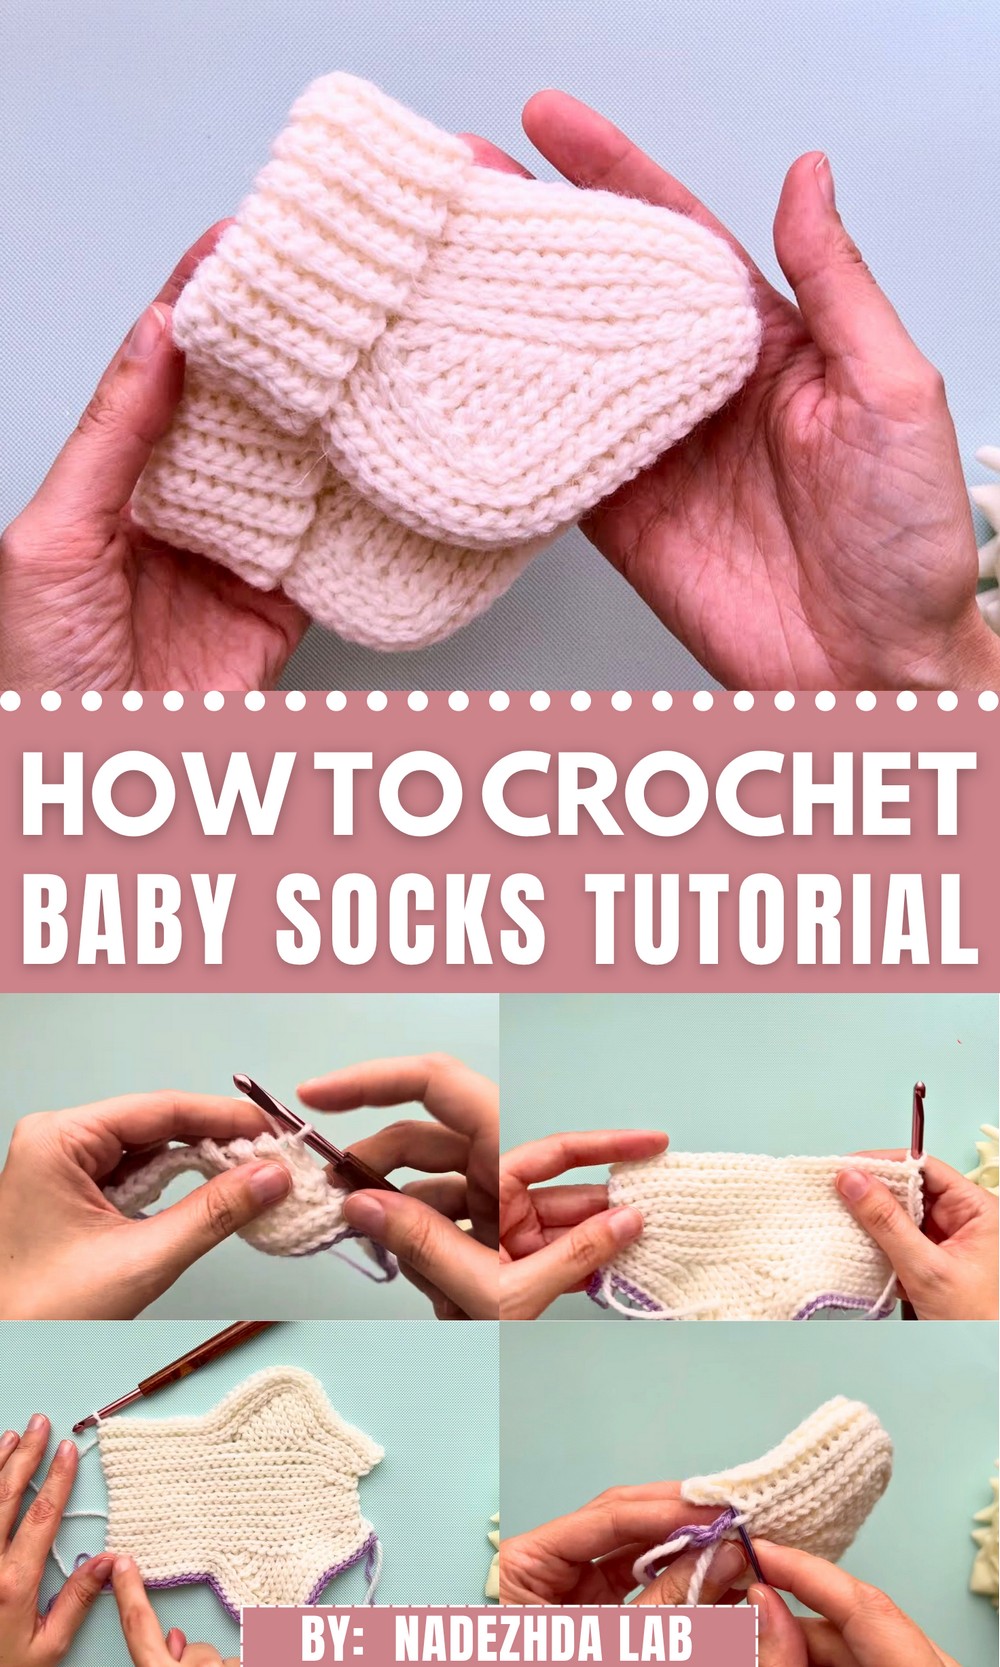
Make your winter special, crocheting these tiny socks for newborns with a step-by-step tutorial for all skill levels. It details creating the heel, toe, and top of the sock using techniques like slip stitches and working through the back loop. With a ribbed design, these crochet socks are very cozy and comfortable to wear. Follow through with us for the complete tutorial for crocheting these tiny socks. They are also perfect for gifting at a baby shower!
Crochet Baby Socks Tutorial
Crochet Baby Socks Pattern
This pattern guides you through crocheting seamless and comfortable newborn socks. Using just 15g of yarn and a 5mm hook, you’ll learn to create the heel, toe, and top sections. The video emphasizes a special sewing technique for an invisible seam, ensuring a cozy fit for the baby.
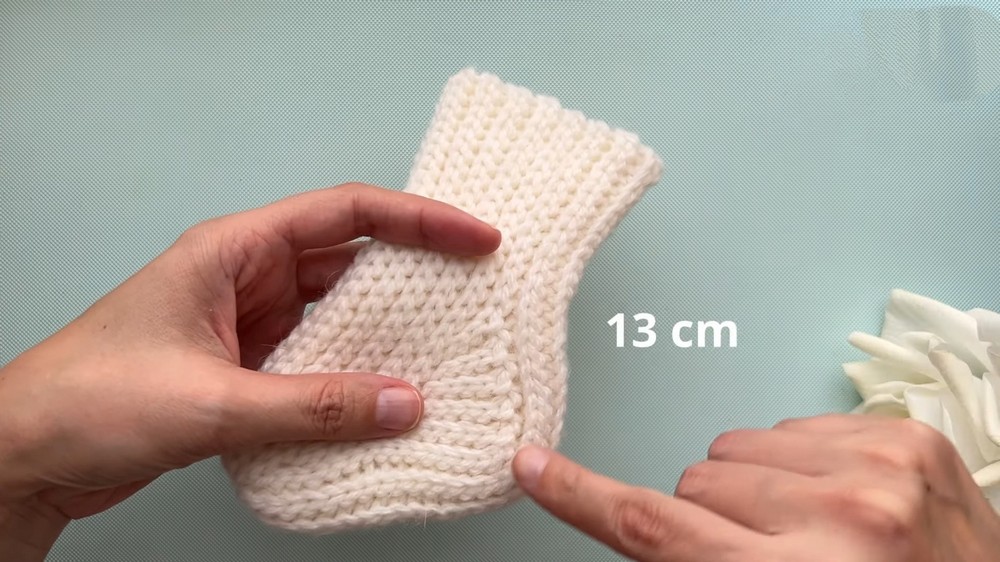
Finished Size
The socks are designed for babies and toddlers, with measurements displayed on the screen in the transcript. Ensure these measurements match your preferred size, or adjust if necessary.
Materials
To make one pair of tiny socks, prepare the following:
- Yarn:
- Main thread: Approx. 15g of acrylic yarn.
- Contrasting thread: Used for casting on stitches (recommended in a vivid contrasting color for visibility).
- Crochet Hook: Size 5mm.
- Scissors: For trimming yarn.
- Tapestry Needle: For sewing and weaving in tails.
- Optional Marker: Useful for marking steps during the heel shaping process.
Special Techniques Used
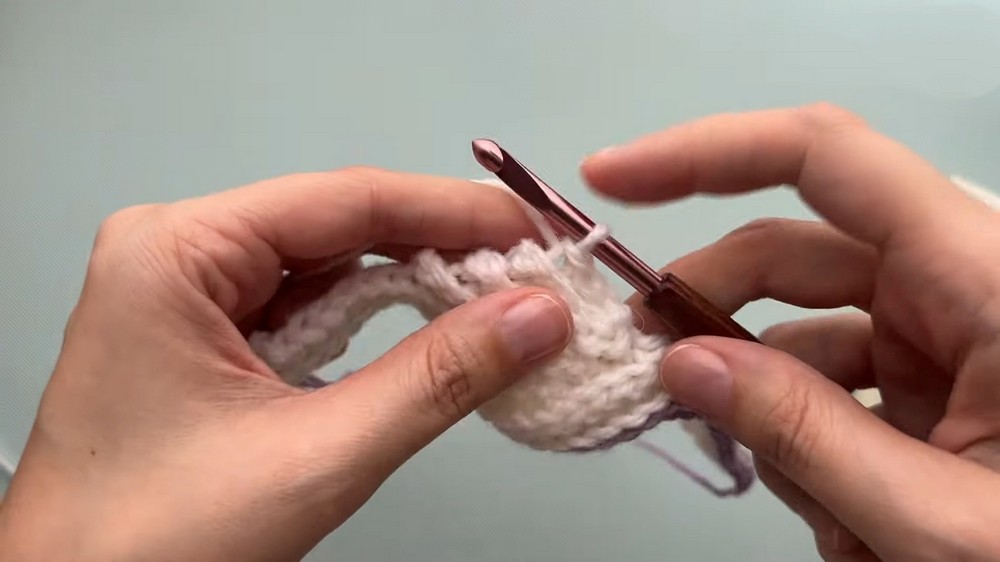
- Connecting Loop: A seamless method used throughout this pattern.
- Insert the hook into desired stitch, yarn over, pull up the loop through the stitch, and pull through the loop on the hook. (Creates tight, Bosnian-style stitches).
- Working in the Jumper/Back Loop: Specifically, stitches are placed in the far jumper or back loop only to create elasticity.
- This provides stretch and dimension to the fabric.
- Heel Shaping and Steps: A progressive method to build the heel using shortened rows, connecting loops, and seamless integration with the cuff.
- Toe Tightening and Finishing: The toe is seamlessly closed using a tightening technique similar to creating the crown on a crocheted hat.
Gauge
Gauge is not critical in this project. However, ensure consistent tension to maintain uniformity throughout.
Pattern Instructions
Part 1: Casting On
- Foundation Chain:
- Use the contrasting thread to cast on 38 chain stitches. This helps with visibility during finishing and ensures clean edges.
- Switch to a Main Yarn:
- Begin the first row with the lifting chain loop (chain 1).
- Turn the chain slightly to expose the jumper (middle horizontal segment) of each chain link.
Part 2: The Body
Rows 1 to 3:
- Row 1:
- Insert the hook into the jumper of the second chain from the hook.
- Work connecting loops (CL) into each jumper across the row.
- Total stitches: 1 lifting chain + 38 connecting loops.
- Complete this row.
- Row 2 (Back Loop Work):
- Begin with a chain 1 lifting loop.
- Turn. Insert the hook into the far back loop starting on the second link.
- Work connecting loops across all 38 stitches.
- Continue consistently.
- Row 3:
- As in Row 2, begin with a lifting chain loop.
- Turn and repeat by working connecting loops into the far back loop.
- Row total remains 38 stitches.
Row 4:
- Begin the row with a lifting chain loop, turn, and start working in the far back loop.
- This row will decrease by leaving one loop unworked at the end of the row, resulting in 37 stitches.
Part 3: Heel Construction
Rows 5 to 13 (First Half of the Heel):
- Row 5:
- Work 13 connecting loops in the back loops, starting at the second stitch from the hook.
- Mark the 14th stitch using a stitch marker.
- Continue until you reach the marked stitch.
- At the marker: Work 1 connecting loop.
- Rows 6 to 13:
- Each row starts with a lifting chain loop.
- Repeat the sequence of working connecting loops into the far back loop, progressively reducing by 1 stitch per row to create a ladder-like structure for the heel.
- End with 2 stitches, forming a complete triangular heel segment.
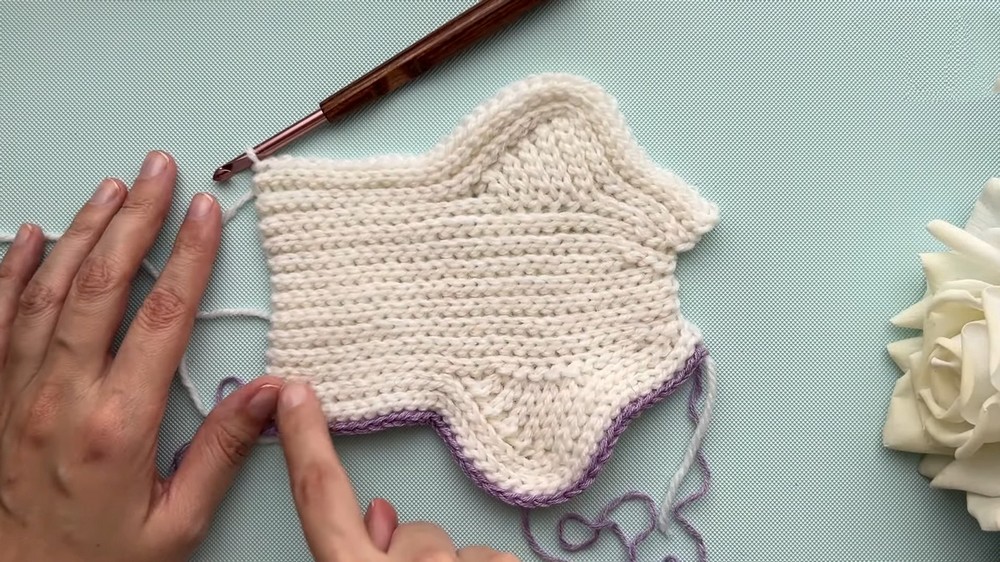
Rows 14 to 19 (Continuation):
- Start each row with the lifting chain loop.
- Work connecting loops in full rows, reaching the edge of the heel and toe.
- Each row totals 28 connecting loops, blending the heel ladder seamlessly into the cuff.
- Ensure symmetry by knitting three pairs of complete rows (Rows 14-19).
Part 4: Toe and Final Rows
Rows 20 to 27 (Toe Construction):
- Row 20:
- Begin with a lifting chain loop.
- Work 27 connecting loops, leaving 1 loop unworked at the end.
- Row 21 to 27:
- Begin each row as before.
- Decrease by progressively leaving 2 or 3 unworked loops in alternating rows until the toe narrows cleanly.
Row 28:
- Reintroduce the 14 marked loops to knit the cuff seamlessly alongside the toe.
- Work connecting loops behind the far-back loop, finishing the heel ridges neatly.
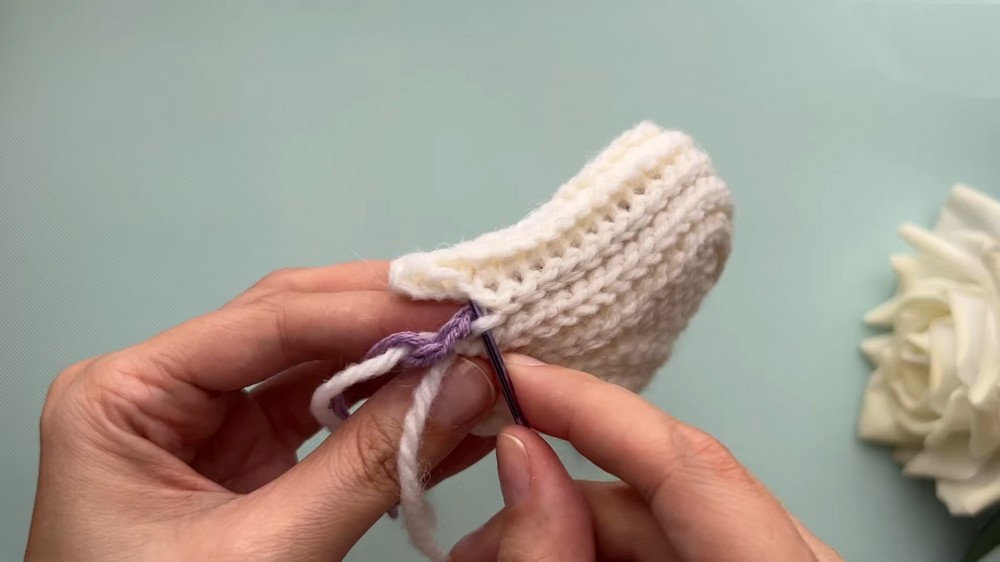
Part 5: Seamless Closing and Finishing
- Toe Tightening:
- Use remaining yarn tail to sew the toe. Insert needle into each jumper around the perimeter of the toe edge.
- Draw the yarn taut to close the toe similar to the crown of a crocheted hat.
- Knot securely and weave the tail into the knitting for invisibility.
- Assembly of Seam:
- Follow the visibility provided by the contrasting thread used during foundation chaining.
- Use a tapestry needle to sew the edges together by inserting into two threads picked by the contrasting thread.
- Ensure the seam matches the knitting density for invisibility and comfort.
Tips and Suggestions
- Count Your Stitches:
- After every row, recount stitches. This prevents mistakes in shortened or lengthened rows.
- Use Markers:
- Helpful during heel construction to identify turning points.
- Adjust for Size:
- Add or reduce foundation chains to customize for different sizes.
- Contrast Thread:
- Always use a visible contrasting color for chaining for easy finishing or modifications.
Final Words
Congratulations—your seamless tiny socks are complete! This unique approach highlights Bosnian-style connecting loops, perfect for ensuring elasticity and comfort. This beautifully tailored tiny sock offers functionality and appearance without messy seams.