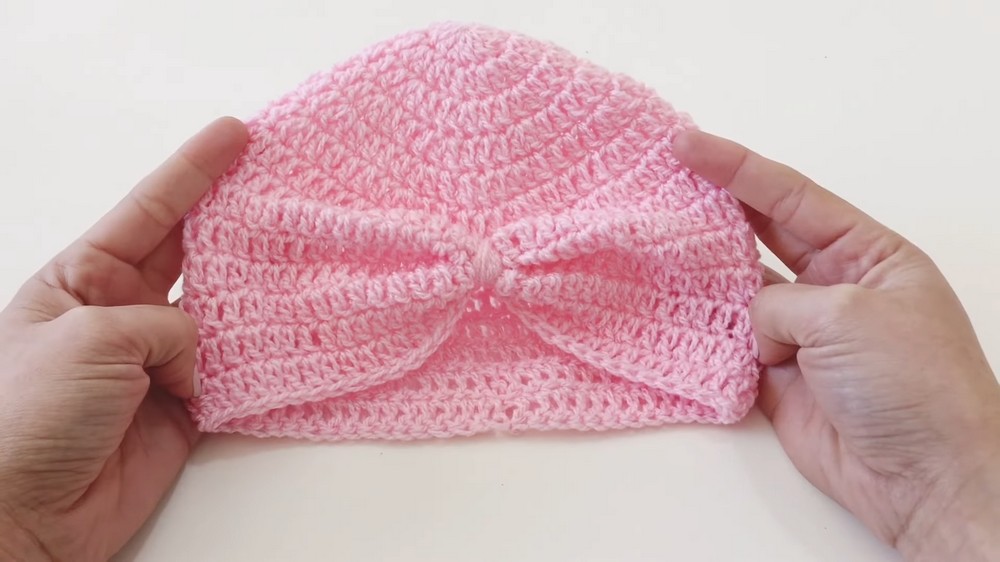
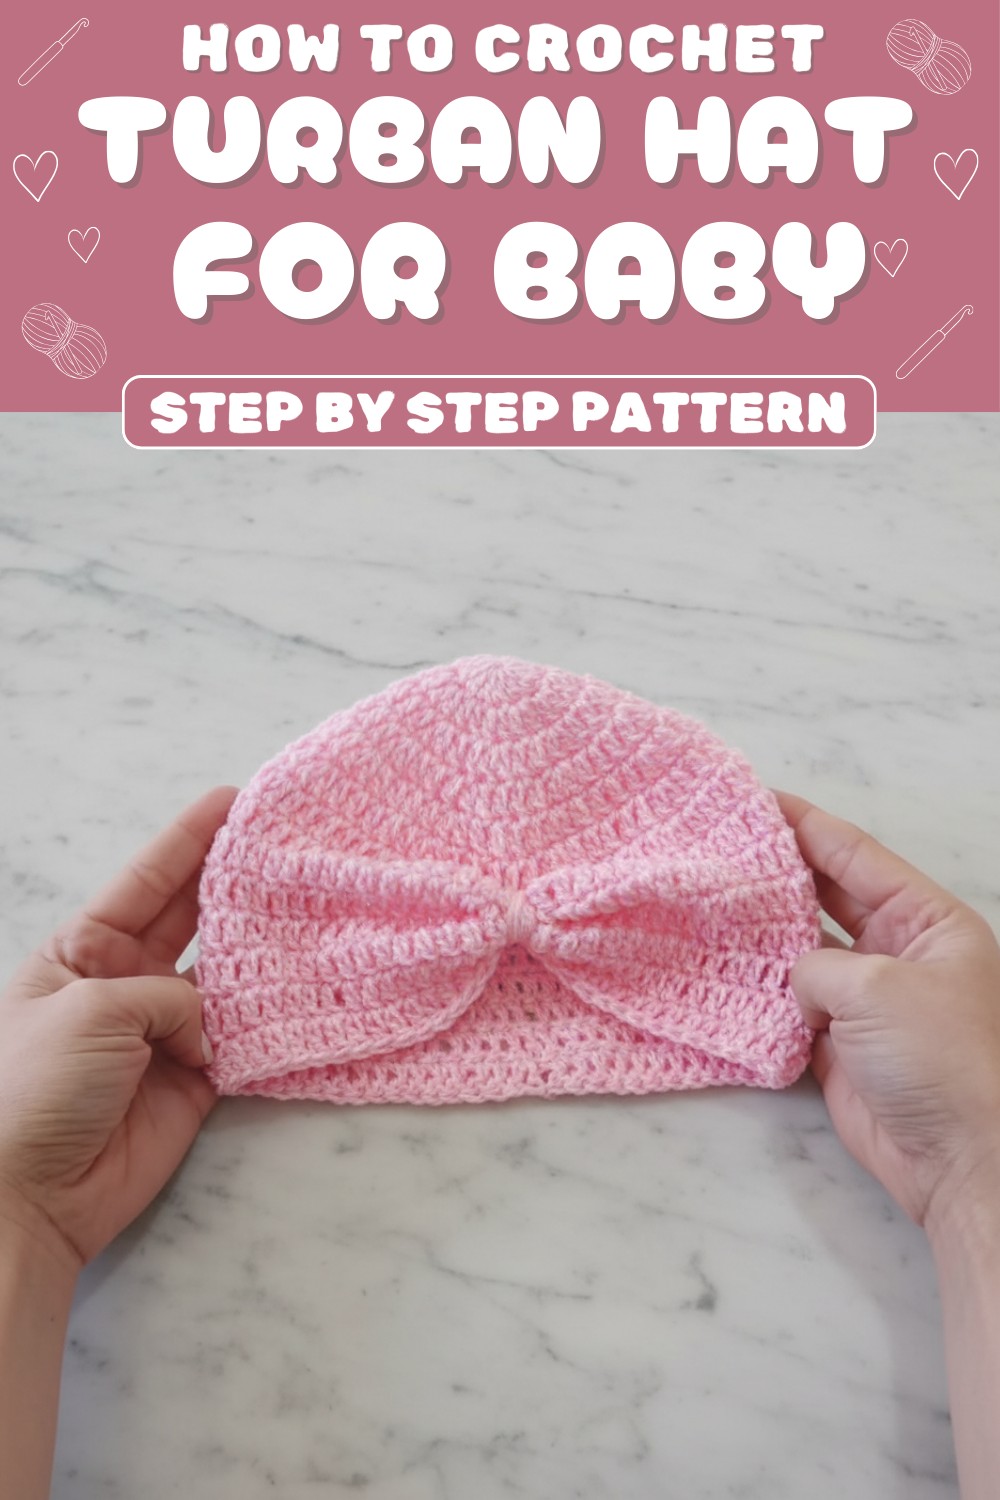
Master the art of crocheting a cozy bonnet-style hat that combines vintage charm and practical warmth, perfect for gifting or upgrading your winter wardrobe.
Looking for a cozy yet stylish project that’s both fun and practical? This Free Crochet Bonnet-Style Hat Pattern is the perfect match for warmth and timeless appeal, this bonnet-style design features full ear coverage, making it ideal for chilly winter days while adding a touch of vintage charm to your wardrobe.

Stylish Crochet Bonnet-Style Hat Pattern to Stay Chic
Whether you’re a beginner searching for an easy crochet project or a seasoned maker wanting something unique, this pattern is adaptable to your skill level. Use your favorite yarn to create a snug, fashionable hat that’s perfect for personal use or as a heartfelt handmade gift. With endless possibilities for customization, this crochet bonnet hat is all about combining creativity, comfort, and style effortlessly.
Materials
Essential Materials:
- Yarn: Lightweight or baby yarn in a color of your choice.
- Recommended yarn weight: Size 3 or “baby yarn”.
- The pattern uses pink yarn, but you can use any color for customization.
- Crochet Hook: 4mm hook (US size G/6).
- Scissors: For cutting the yarn after finishing.
- Yarn Needle: For assembling the turban and weaving in yarn ends.
Optional Supplies:
- Measuring Tape: To ensure the correct circumference and height of the hat.
Skill Level
Beginner-Intermediate
This pattern uses fundamental stitches such as chains, double crochet, slip stitches, and simple shaping techniques. It’s suitable for beginners with basic crochet experience and intermediate crocheters.
Key Abbreviations (US Terminology)
- Ch: Chain
- Dc: Double crochet
- Sl st: Slip stitch
- St: Stitch
- Yo: Yarn over
Special Notes
- Starting with a Magic Ring: The magic ring allows the hat to have a seamless and adjustable base. Pull it closed firmly to avoid any gaps in the center.
- Increases: The pattern builds the hat by adding increases every round during the initial few rounds. Understanding how increases work is essential.
- Stitch Count: Make sure to count your stitches after each round to ensure proper symmetry and shape.
- Customization: Adjust the size of the hat by modifying the number of rounds with increases.
Pattern Instructions
Foundation Round: Magic Ring
- Create a magic ring: Wrap the yarn around your fingers to form a loop. Insert the hook into the center, pull up a loop, and chain 1 to secure the ring.
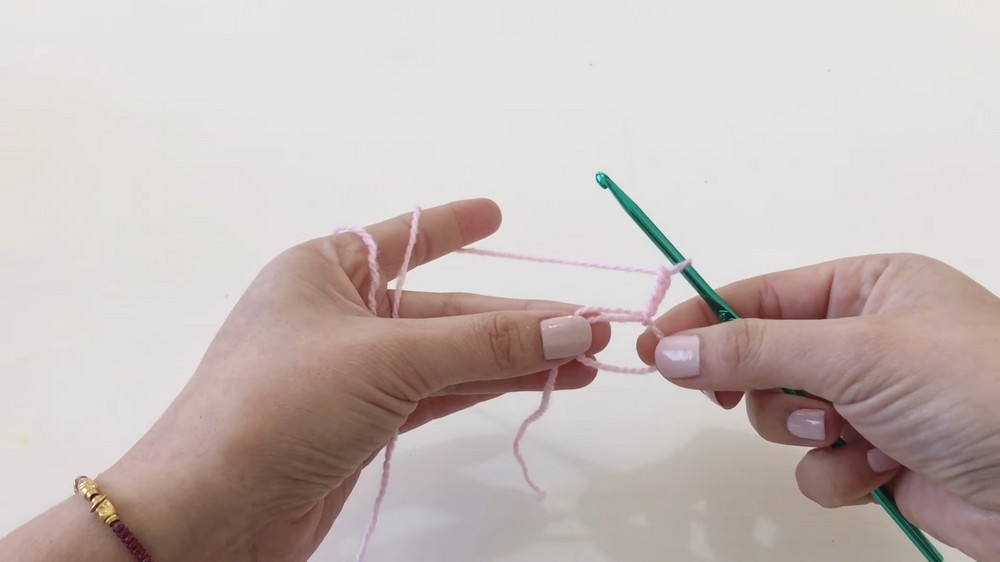
- Ch 3 (counts as the first Dc).
- Work 12 Dc into the magic ring.
- Pull the yarn tail tightly to close the ring.

- Join with a Sl st to the top of the starting Ch 3. You should have a total of 12 stitches.
Round 1 (Increase Round)
- Ch 3 (counts as the first Dc).
- In the same stitch, work 1 Dc (your first increase).
- For every stitch from the previous round, work 2 Dc into each stitch (an increase in every stitch).
- You should now have 24 Dc at the end of the round.
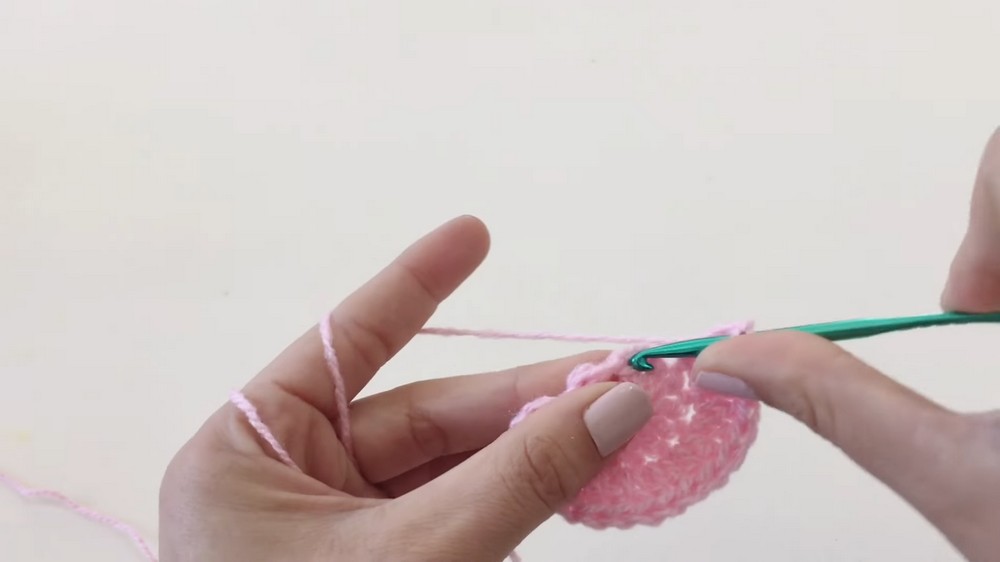
- Join with a Sl st to the top of the starting Ch 3.
Round 2
- Ch 3, and in the same stitch, work 1 Dc (first increase).
- In the next stitch, work 1 Dc.
- Repeat: Increase in one stitch (2 Dc), followed by 1 normal Dc in the next stitch.
- Pattern: (Increase, normal stitch).
- At the end of this round, you should have 32 Dc.
- Join with a Sl st to the top of the starting Ch 3.
Round 3
- Ch 3, and work 1 Dc in the same stitch (first increase).
- Work 2 normal Dc, one in each of the next two stitches.
- Repeat: Increase in one stitch (2 Dc), followed by 2 normal Dc.
- Pattern: (Increase, 2 normal Dc).
- At the end of this round, you should have 40 Dc.
- Join with a Sl st to the top of the starting Ch 3.

Rounds 4–7
Continue working in a similar manner, adding an extra normal stitch between increases with each new round:
- Round 4: (Increase, 3 normal Dc) — Total: 48 Dc.
- Round 5: (Increase, 4 normal Dc) — Total: 56 Dc.
- Round 6: (Increase, 5 normal Dc) — Total: 64 Dc.
- Round 7: (Increase, 6 normal Dc) — Total: 64 Dc.
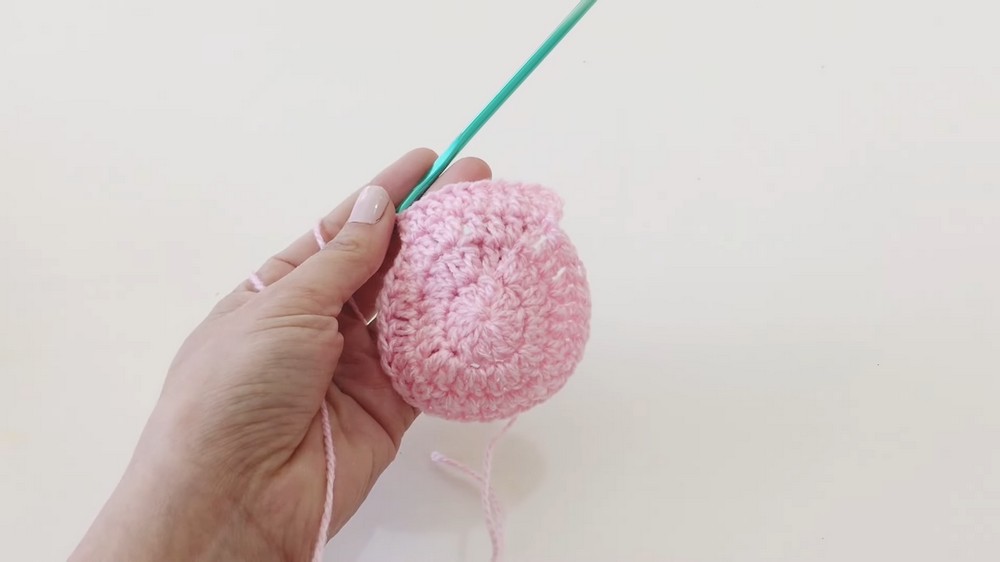
Rounds 8–14: No More Increases
From Round 8 onward, you will no longer make increases.
- Ch 3, work 1 Dc in each stitch of the previous round.
- Continue until you complete 64 Dc and join with a Sl st at the end of each round.
- Repeat for a total of 7 rounds (Rounds 8–14).

At the end of Round 14, your base hat should measure approximately 16cm high and 20cm wide.
Shaping the Turban
- Locate Round 6 (3rd round from the bottom): Using your yarn needle and about 40cm of yarn, insert the needle along the edge of this round.
- Thread Through Half the Hat: Weave the yarn through half of the stitches in Round 6. Once complete, gently pull tight to form the fold at the front of the hat (turban effect).
- Secure the shape: Fold the hat slightly to create a harmonious design. Tie a knot tightly at the base of the fold to secure.
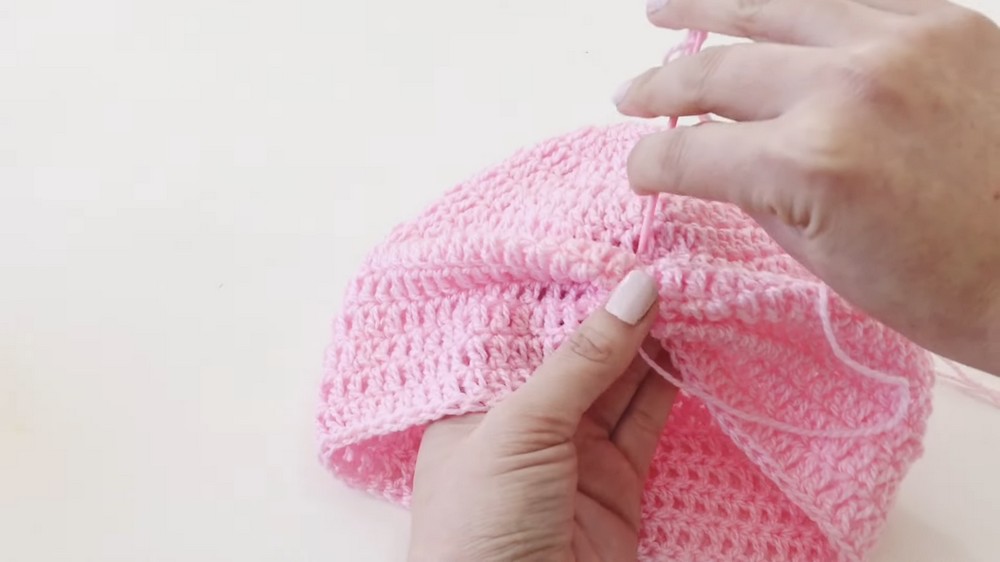
- Wrap Yarn: Using the same yarn, wrap multiple times across the center front of the turban (this creates the signature band shape). Wrap tightly for a clean look.
Finishing Touches
- Trim any excess yarn and weave in all loose ends with your yarn needle.
- Ensure the fold is securely tied and adjust the wrapped band to your liking.
- With the yarn needle or crochet hook, hide any leftover threads to create a polished finish.
Project Variations
Colors:
- Create a design with alternating colors in each round for a striped turban look.
- Use gradient yarn for a beautiful ombre effect.
Sizes:
- To make larger sizes, continue increasing beyond Round 7. For smaller sizes, stop increasing earlier.
- Adjustments: Measure the baby’s head circumference. Add or reduce rounds to match the measurement.
Tips for Success
- Counting: Ensure you count your stitches carefully on each round to avoid mistakes in the pattern.
- Tension: Maintain consistent tension throughout for uniform stitch sizes.
- Blocking: If needed, lightly block the hat to ensure all edges and folds sit neatly.
Conclusion
This baby turban hat is a unique and stylish accessory for babies aged 6–9 months, cozy and snug due to its seamless design. With options for colors, sizes, and custom details, it’s perfect for gifting or personal use.