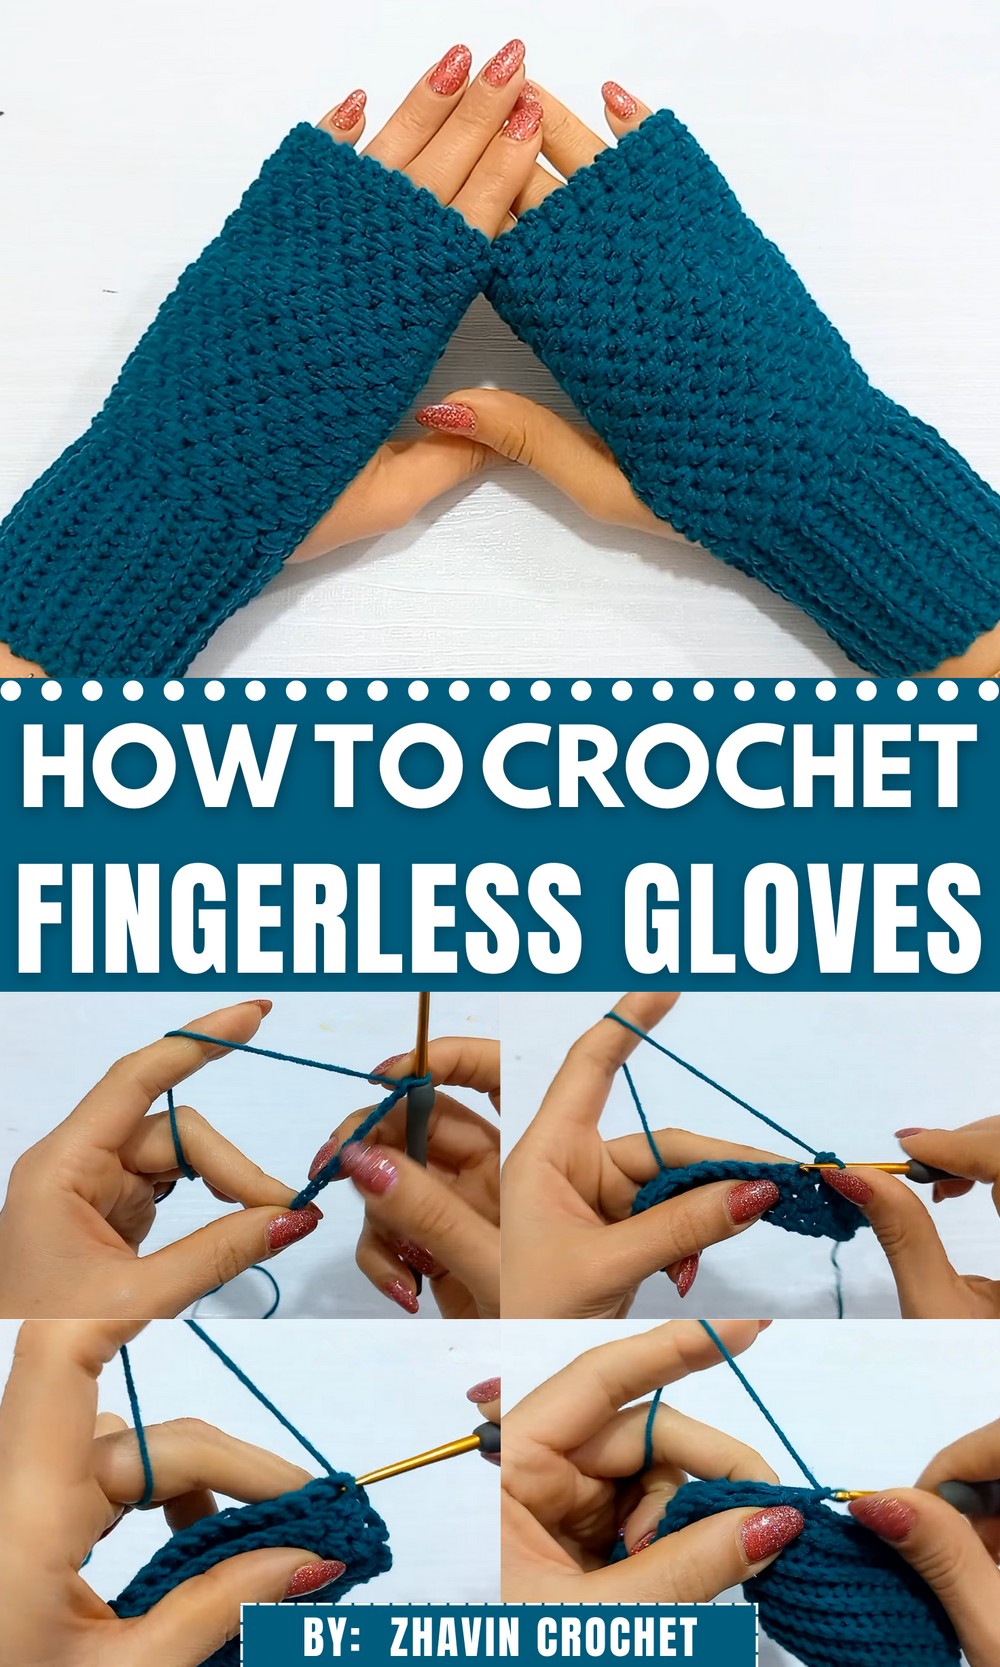
Slide into cozy comfort with this Free Crochet Fingerless Gloves Pattern that’s perfect for everyday warmth, style, and lightweight wear all season long.
A chilly winter morning often calls for small comforts that make all the difference, like a warm cup of tea or a snug accessory that keeps you cozy while offering the freedom to move. This is exactly where crochet fingerless gloves find their perfect place. Fusing practicality with understated charm, these gloves keep your hands warm while allowing full dexterity, making them ideal for texting, typing, or even holding that favorite morning mug. Their beauty lies not only in their functionality but in the textured elegance of crochet stitches that give them a timeless and personalized appeal.
Everyday Use Crochet Fingerless Gloves Pattern in Minimal Steps
What makes these gloves so versatile is their adaptability, they can be made in any size and with any type of yarn to match personal preferences. Beyond this, their layered texture adds a cozy, handmade aesthetic that complements both casual and formal winter outfits.
Sliding into a pair of these gloves is like wrapping your hands in something tailored just for you, a perfect balance of warmth and freedom, ideal for the modern world’s hustle and bustle. They turn an everyday accessory into a little luxury, reminding you of the beauty in simplicity and the practicality of well-thought-out comfort.

Crochet Fingerless Gloves Pattern: Step-by-Step Instructions
Materials Needed:
- Yarn: YarnArt Jeans (or similar Category 2 lightweight yarn). You’ll need enough yarn for two gloves.
- Hook: 3 mm crochet hook.
- Additional Tools: Scissors, yarn needle or tapestry needle, and stitch marker (optional).
- Measuring Tape: To measure hand size for a perfect fit.
Special Notes and Techniques:
- Back Loop Only (BLO): Some slip stitches are worked in the back loop to add texture and elasticity.
- Spike Single Crochet: Insert hook into the row below the stitch and pull up a long loop. This creates a textured, elongated stitch.
- Gauge and Adjustments: Use chains that fit from your wrist to just below your smallest finger. This base chain length determines the gloves’ size.
Pattern Instructions:
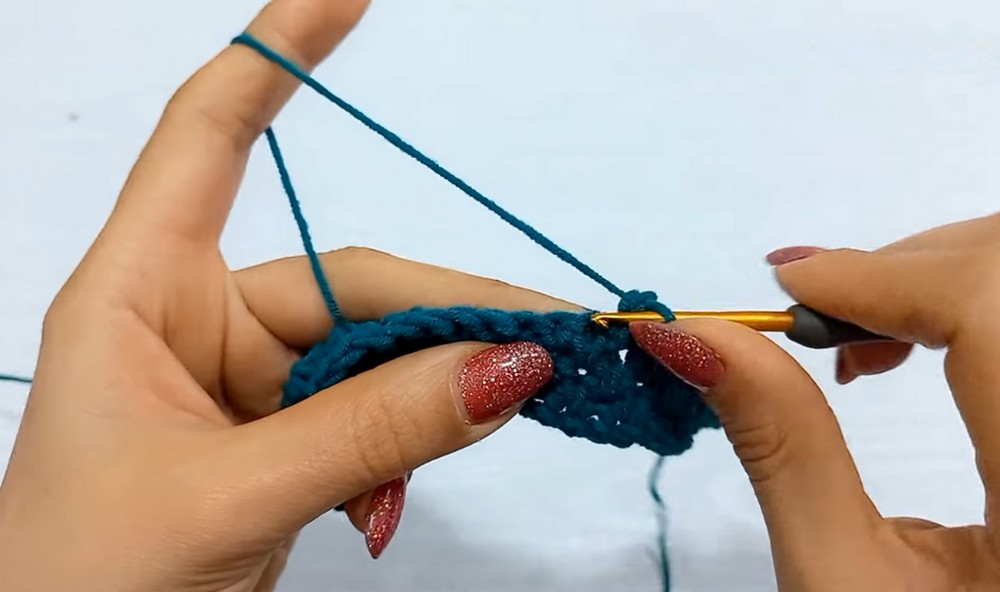
Step 1: Creating the Base Rectangle
- Begin the Foundation Chain: Leave a long tail for sewing. Start with a slip knot and chain the desired number to fit your hand from wrist to the point under the smallest finger. For reference, 36 chains were used in this example. Adjust this number for smaller or larger hands.
- Row 1 (Foundation Row):
- Start in the second chain from the hook.

- Work single crochet (SC) across the first 21 stitches.
- For the remaining 14 stitches, work slip stitches (SL ST). The division of stitches (e.g., 21 SC and 14 SL ST) ensures glove shaping at the wrist and palm areas.
- Start in the second chain from the hook.
- Row 2:
- Chain 1, turn the work.
- Work yarn-over slip stitch (YO SL ST) into the back loop of each of the previous row’s 14 slip stitches.
- After completing the slip stitches, work single crochet into the rest of the row.
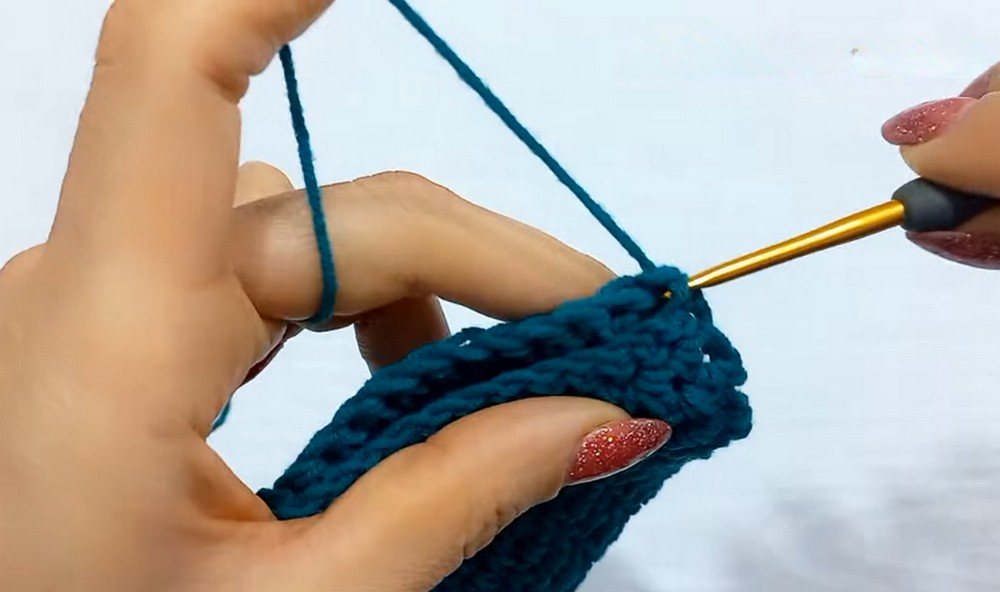
Step 2: Adding Texture with Spike Stitches
- Row 3:
- Chain 1, turn.
- Work single crochet into the first two stitches.
- For the third stitch, create a spike single crochet. Insert the hook into the stitch one row below, pull up a long loop, and complete the single crochet.
- Alternate between single crochet and spike single crochet until the slip stitch section.
- Once you reach the slip stitch section, work SL ST in BLO across the stitches.
- Row 4:
- Chain 1, turn.
- Work YO SL ST across the slip stitch section, ensuring you use the back loop for texture.
- Transition into the single crochet and spike crochet section. Follow the same alternating pattern of single crochet and spike single crochet.
- For the last stitch, always end with a single crochet.
- Repeat Rows 3 and 4 until the rectangle fits around your hand comfortably, leaving space for the thumb hole. A total of 36 rows (2 SC rows + 34 textured rows) were used in this example. Adjust the number of rows based on your hand size.
Step 3: Joining the Glove
- Creating a Thumb Hole:
- Fold the rectangle in half, matching the first row with the last row.
- Use your hand as a guide to determine the thumb placement.
- Mark the stitches for the thumb hole. For example, leave 7 stitches unsewn for the thumb and join the rest (14 stitches on the top and 14 stitches on the bottom were joined in this example).
- Joining the Edges:
- Use the long yarn tail left at the beginning.
- For the first section, slip stitch across 14 stitches to join the edges.
- Skip the 7 stitches for the thumb hole.
- With the other yarn tail (from the end of the rectangle), slip stitch across the next 14 stitches to close the remaining section.
- Ensure the seam is neat and not bulky.

Step 4: Finishing and Final Touches
- Fasten Off:
- Secure the yarn by fastening off and weaving in all loose ends using the yarn needle.
- Hiding Tails:
- Carefully tuck the yarn ends into the glove’s stitches to make them invisible.
- Trim any excess yarn.
Repeat for Second Glove
- Repeat the entire pattern for the second hand. Ensure you create a mirror image if there is any difference in thumb placement.
Final Words and Tips:
- Fit and Adjustments: Customize the number of chains and rows to fit your hands perfectly. Measure as you go for the ideal fit.
- Durable Seams: Ensure the slip stitches and joins are tight enough to hold but not too tight to restrict movement.
- Washing and Maintenance: Wash the gloves gently by hand in cool water and let them air dry. Blocking the gloves lightly will help to shape them.
- Yarn Substitution: If you cannot find YarnArt Jeans, use any lightweight yarn with a similar weight (Category 2).