Bursting with this crochet flower keychain pattern that is perfect for anyone who loves colorful crochets, handmade accessories, and adding a touch of personal creativity to their everyday style.
 Vibrant Free Crochet Flower Keychain Pattern for Cute and Stylish Gifts
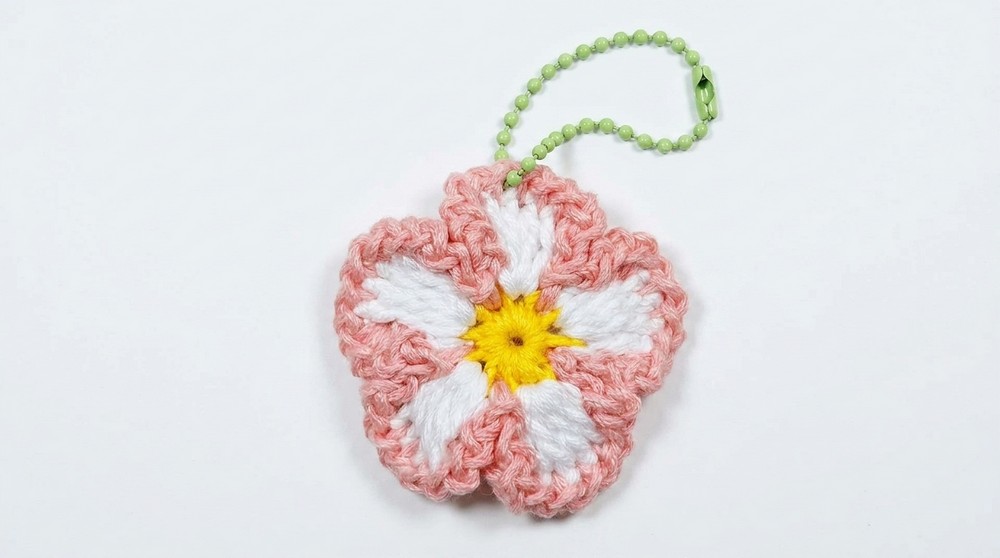
Whether you want to spruce up your keyring or crochet something meaningful for a friend, this pattern is a fantastic choice to explore creativity with just your hands and yarn. This free crochet flower keychain pattern allows you to make a small, colorful flower that’s as lovely as a tiny work of art. The flower has vibrant, soft petals, making it both eye catching and adorable. Its lightweight and portable design makes it perfect for adding a personal touch to your keys, bags, or even giving it as a special handmade gift.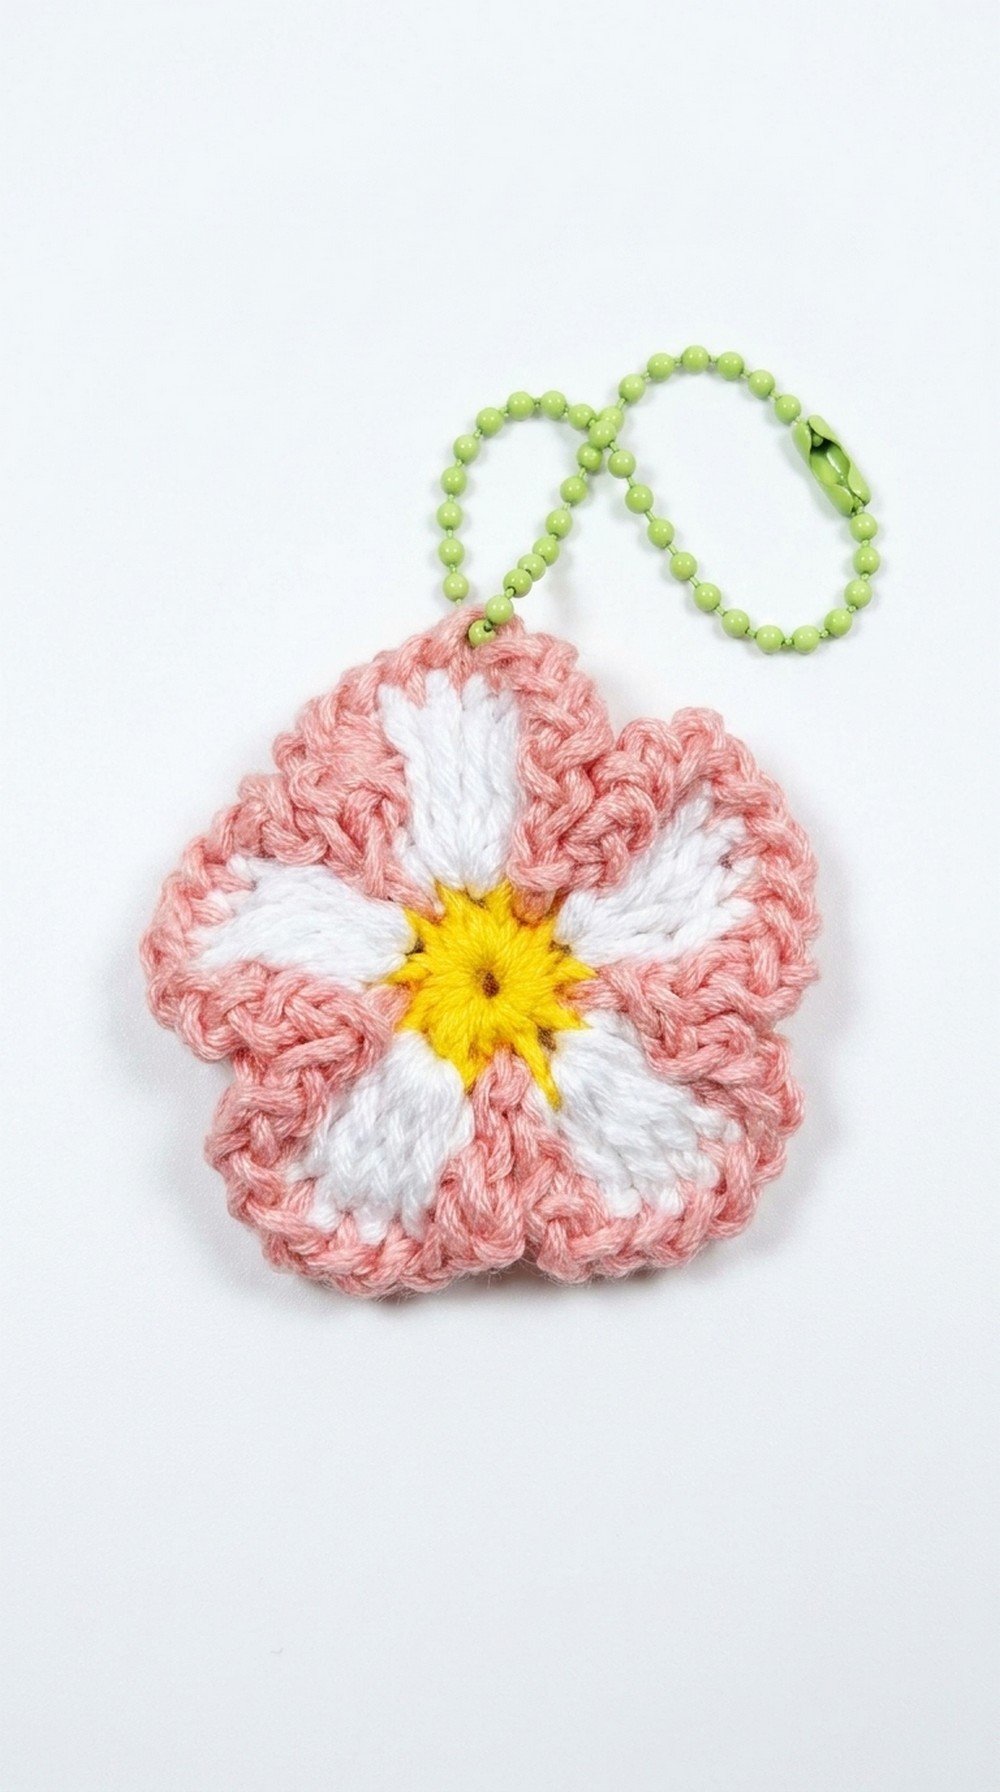
What’s special about this pattern is how flexible it is. You can choose your favorite colors to make it unique, whether you prefer bright, cheerful shades or soft, delicate pastels. The cute and bright flower design will always make you or someone else smile. So, grab your yarn and start creating something beautiful today.
Blooming Free Crochet Flower Keychain Pattern
Finished Size
- Approximate Diameter: 6 cm (2.5 inches)
(May vary based on your yarn weight and hook size.)
Materials Needed
- Yarn:
- Yellow for the flower center (small quantity).
- White for the petals.
- Pink (or any contrasting color) for the border and joining.
- Crochet Hook: 2.5 mm or a size suitable for your chosen yarn.
- Tapestry Needle: For weaving in ends.
- Scissors: For trimming excess yarn.
- Keychain Ring or Clip: For mounting the finished flower.
Gauge
Gauge is not critical for this project; however, if you desire a specific size, practice creating tight, even stitches to maintain a firm shape.
Pattern Instructions
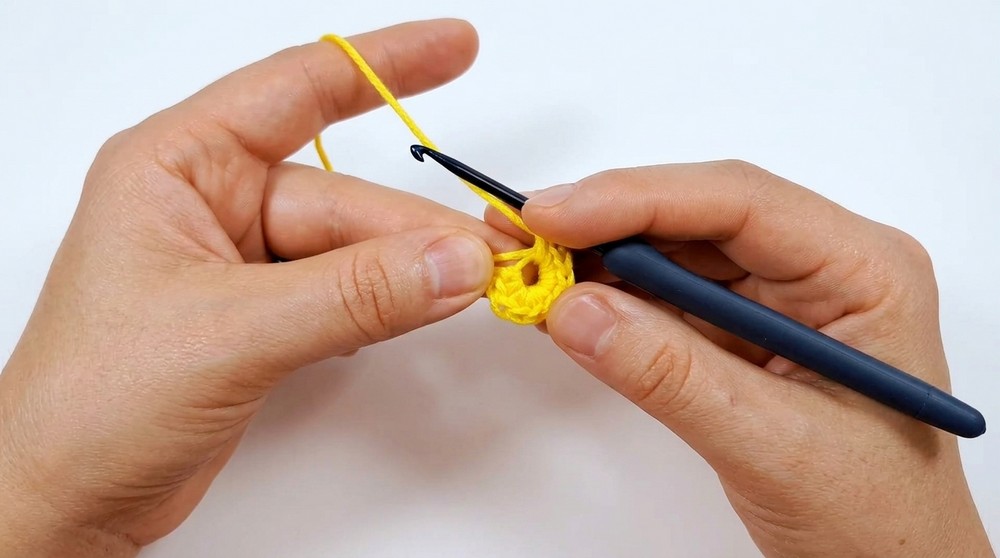
Step 1: Flower Center (Magic Ring)
- Create a Magic Ring: Wrap yellow yarn around your fingers to form a loop and secure it with your hook.
- Crochet Inside the Ring: Work 10 single crochet (sc) stitches into the magic ring.
- Close the Ring: Pull the starting yarn tail to tighten the ring.
- Cut Yarn: Leaving about 8 cm (3 inches), fasten off by pulling the yarn through the loop.
Special Closure Technique:
- Using your tapestry needle, bring the remaining yarn tail from the back to the front through the first stitch.
- Insert the needle through the center of the last stitch and pull gently. This creates an invisible join. Knot securely at the back.
Step 2: First Petal
- Switch to White Yarn: Attach the white yarn by inserting your hook into any stitch of the yellow center and pulling up a loop.
- Chain 3: This serves as the first double crochet (dc).
- Work 4 Double Crochet (dc) into the Same Stitch:
- Yarn over, insert the hook into the same stitch, pull up a loop, yarn over, and pull through two loops, then yarn over and pull through the remaining two loops. Repeat this step 4 times.
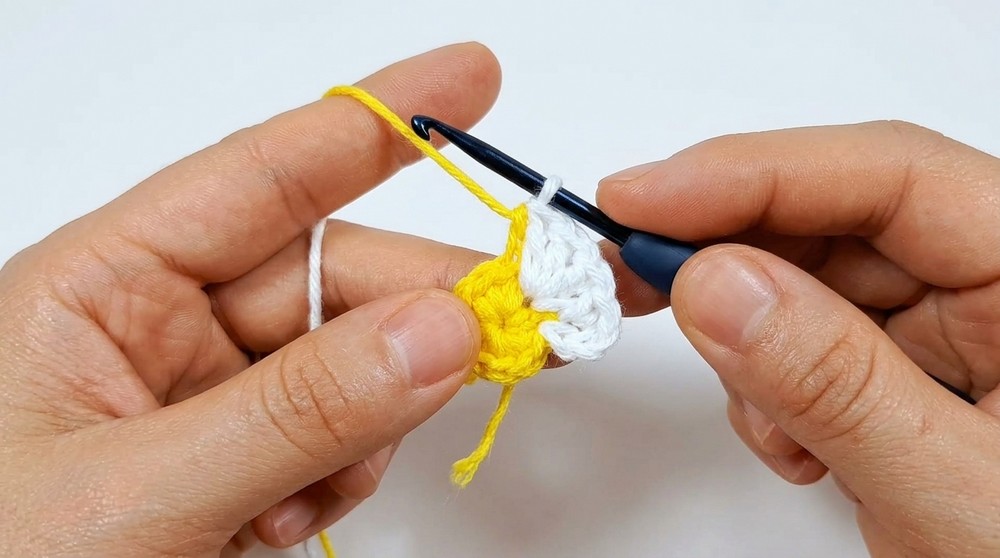
- Yarn over, insert the hook into the same stitch, pull up a loop, yarn over, and pull through two loops, then yarn over and pull through the remaining two loops. Repeat this step 4 times.
- Chain 3: To complete the petal, chain 3 and join with a slip stitch (sl st) into the next stitch of the yellow center.
Step 3: Repeating the Petals
- Repeat the sequence: Chain 3, 4 double crochet into the same stitch, chain 3, and slip stitch into the next.
- Continue until you have 5 petals in total.
- Finish: Once the last petal is complete, close the round with a slip stitch at the base of the first petal and fasten off.
Tip: Ensure that your stitches remain consistent in tightness for an even appearance throughout, and hide any loose ends under the petals as you crochet.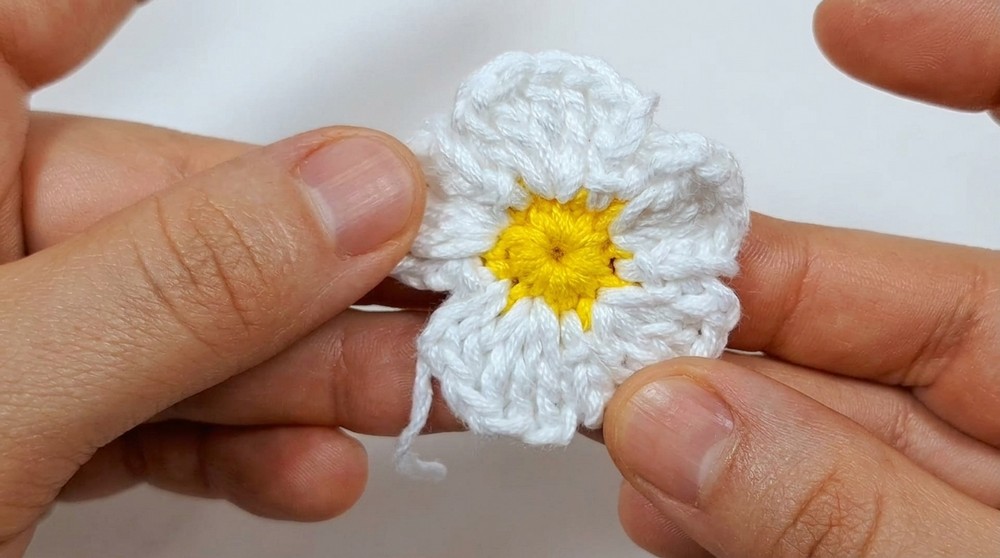
Step 4: Creating a Second Flower
- Repeat all steps above to create a second flower. Ensure the colors and stitch counts match for uniformity.
Step 5: Joining the Flowers
- Align the Two Flowers: Place the flowers wrong sides together, ensuring the petals overlap perfectly.
- Attach Pink Yarn: Insert the hook into a slip stitch from both flowers at the same point. Pull up a loop and chain 1.
- Work the Border:
- For each petal space, follow this sequence: (sl st, chain 1). Repeat this three times across each side of the petal.
- At the base (between petals), work a slip stitch into both flowers to secure them.
Tip: Take care to hide any loose ends between the layers of the flowers as you work. This will create a clean finish.
Step 6: Final Touches
- Close the Round: Once you’ve worked around the entire flower, finish with a slip stitch into the starting stitch.
- Fasten Off: Chain 1 to secure, trim the yarn, and weave in any remaining ends with a tapestry needle.
- Attach Keychain Ring: Insert a keychain ring or clip between any two petals securely.
Special Techniques
- Magic Ring: Creates a tight, closed center for the flower.
- Invisible Join: Ensures a professional, seamless finish.
- Consistent Tension: Helps maintain the shape and symmetry of the project.
Tips for Customization
- Color Themes: Experiment with pastel tones, bold hues, or multi color yarns for new looks.
- Layers: Add extra petal rows with an additional color to make the flower bigger.
- Sparkle Effect: Use metallic or glittered yarn for a glamorous finish.
- Accessories: Incorporate beads or buttons at the flower center for added texture.
Conclusion
Congratulations on completing your Granny Flower Keychain! This versatile project adds a personal and artistic touch to everyday accessories while being a great handmade gift. Whether used as a keychain, bag charm, or decorative accent, this flower is a timeless addition to your crochet repertoire.
Final Remarks
- Look: The finished piece has a polished and professional appearance with a sturdy structure.
- Durability: Proper finishing reinforces the structure, ensuring years of use.
- Share Your Work: Tag your creations online to inspire others and share ideas.