Start a fun project with this Crochet Mouse Amigurumi Pattern to have a beautiful and soft little toy that is perfect for a sweet gift for a friend.
Easy & Cute Crochet Mouse Amigurumi Pattern for Everyone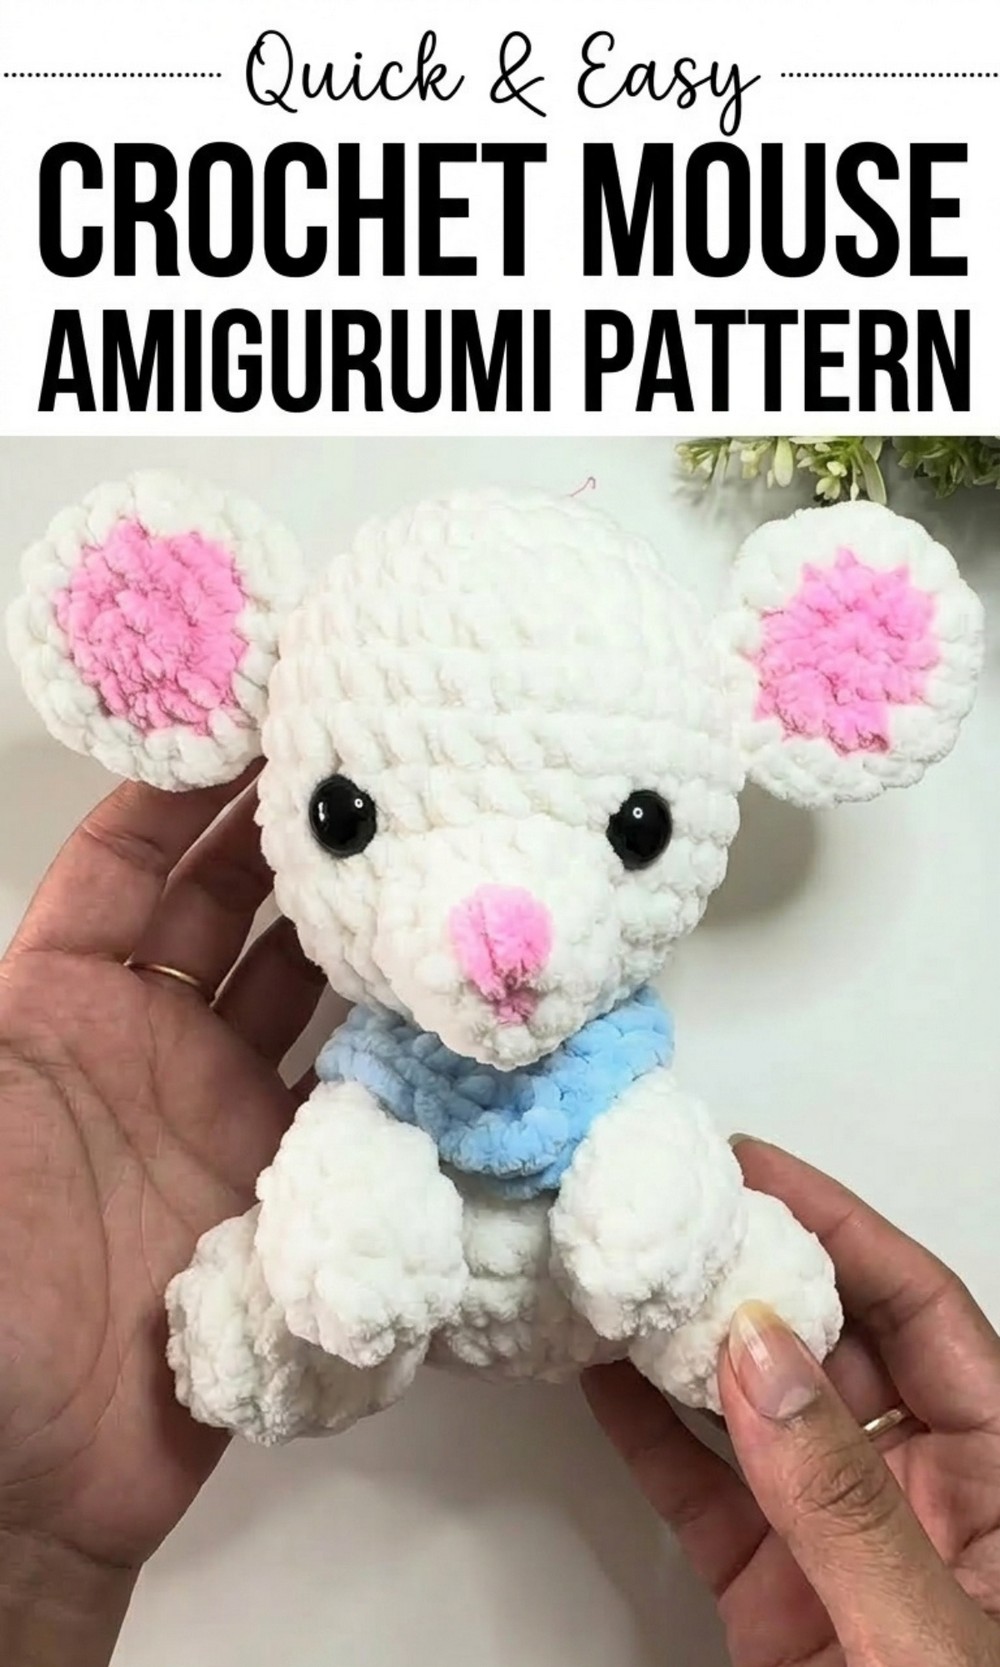

Cute Free Crochet Mouse Amigurumi Pattern for Easter baskets
Learn how to make a cute and soft crochet mouse that is perfect for hugs and playtime. This free pattern helps you create an adorable mouse with a cozy blue scarf, tiny pink ears, and a sweet tail.
The plush yarn makes it soft and cuddly, while the small security eyes and simple stitches give it a lovely appearance. This project is beginner friendly and great for kids, gifts, or room decorations. The mouse is fun to make and your creativity can shine by picking your favorite colors for the scarf and details. 
It is a wonderful handmade companion for children and anyone who loves crochet toys. Start crocheting your own crochet mouse today and enjoy every moment creating this charming piece.
Crochet Mouse Amigurumi Pattern
Materials Needed
- Plush yarn in three colors:
- Main body color (e.g., white or gray)
- Inner ear and nose tip color (e.g., pink)
- Scarf color (e.g., blue)
- 5.5 mm crochet hook
- Fiberfill stuffing
- 14 mm security eyes (2 pieces)
- Darning needle
- Scissors
- Stitch marker (or alternative like a paper clip, safety pin, or scrap yarn)
Techniques Used
- Magic Ring (optional): An adjustable loop to start crocheting in the round.
- Slip Knot and Chain
- Single Crochet (sc): Insert hook, pull up a loop, yarn over, pull through two loops.
- Increase: Work two single crochets into the same stitch.
- Decrease: Work two single crochets together (invisible decrease preferred for a neat look).
- Half Double Crochet (hdc): Yarn over, insert hook, pull up a loop, yarn over, pull through all three loops.
Pattern Instructions
I. Body
- Start the Head:
- Using the main color yarn, make a slip knot and chain 2.
- Round 1: Work 6 sc into the second chain from the hook. Pull the tail to close the hole (or use a magic ring).
- Round 2: Work 6 increases (2 sc in each stitch) — 12 sts.
- Round 3: 1 sc, increase repeat around — 18 sts.
- Round 4: 2 sc, increase repeat around — 24 sts.
- Round 5: 3 sc, increase repeat around — 30 sts.
- Rounds 6 to 11: Work 30 sc for 6 rounds.
- Insert Eyes:
- Insert 14 mm security eyes two rounds above the last round and 5 to 6 stitches apart.
- Secure the eyes with their backing firmly.
- Shape the Head Base:
- Round 12: 3 sc, decrease repeat around — 24 sts.
- Round 13: 2 sc, decrease repeat around — 18 sts.
- Round 14: 1 sc, decrease repeat around — 12 sts.
- Stuff the head firmly with fiberfill.
- Round 15: 6 decreases to close the head — leave the tail for sewing.
- Body:
- Attach yarn back to the open end of the head.
- Round 1: Work 6 increases — 12 sts.
- Round 2: 1 sc, increase repeat around — 18 sts.
- Round 3: 2 sc, increase repeat around — 24 sts.
- Rounds 4 to 6: Work 24 sc for 3 rounds.
- Round 7: 2 sc, decrease repeat around — 18 sts.
- Round 8: 1 sc, decrease repeat around — 12 sts.
- Round 9: Work 6 decreases — bind off, leaving a tail for sewing.
II. Legs (Make 2)
- Start with 6 sc in a magic ring.
- Round 2: Work 6 increases — 12 sts.
- Round 3 to 4: Work 12 sc for two rounds.
- Round 5: 1 sc, decrease repeat around — 8 sts.
- Stuff lightly and sew closed.

III. Arms (Make 2)
- Start with 6 sc in a magic ring (or chain 2 and 6 sc in the second chain).
- Round 2: 1 sc, increase repeat around — 9 sts.
- Rounds 3 to 5: Work 9 sc for three rounds.
- Stuff lightly and sew closed.
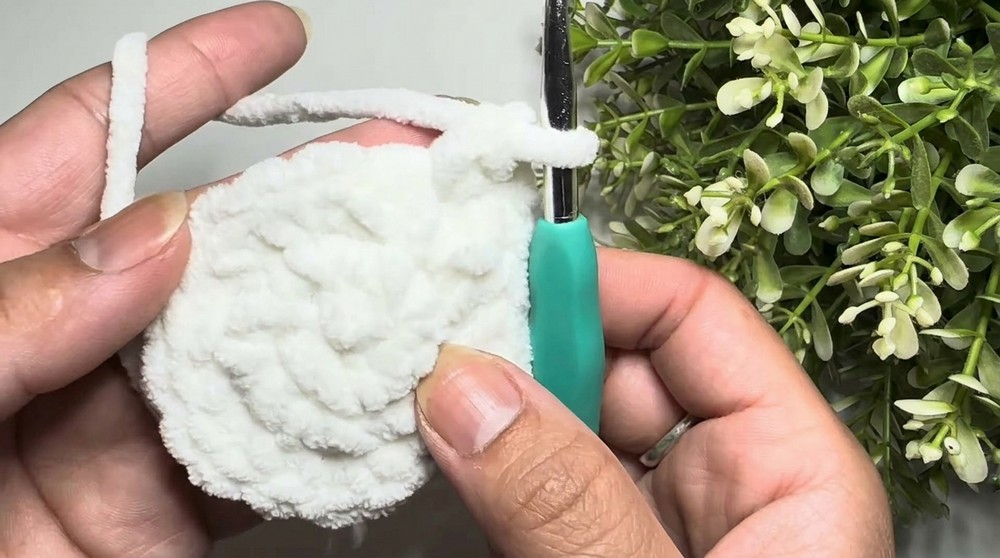
IV. Ears (Make 2)
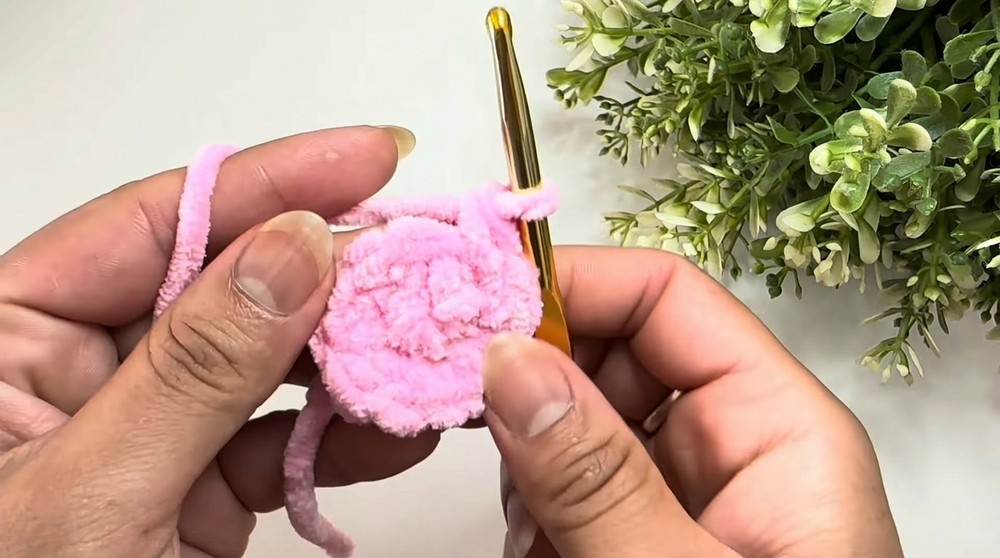
- Inner Ear:
- With pink yarn, work 6 sc in a magic ring.
- Round 2: 6 increases — 12 sts. Fasten off.
- Outer Ear:
- With white yarn, repeat the same steps as above but do not fasten off.
- Assembling the Ears:
- Hold inner and outer ear together, backs touching.
- Work 1 sc into each stitch around to join the edges together.
- Fasten off, leaving a tail to sew to the head.
V. Nose
- Start with 6 sc in a magic ring.
- Round 2: 1 sc, increase repeat around — 9 sts.
- Round 3: Work 9 sc around.
- Stuff the nose lightly and sew it onto the face, positioning it between the eyes.
Optional Detail: Use pink yarn to embroider the nose tip for extra detail.
VI. Tail
- Attach the yarn to the back center of the body.
- Chain 15 (or desired length) for the tail.
- Fasten off, leaving a secure knot.
VII. Scarf
- Use contrasting yarn and chain 25.
- Half double crochet (hdc) in the 3rd chain from the hook and across — 23 hdc.
- Fasten off, weave in ends, and tie the scarf securely around the neck.

Assembly
- Attach Components to the Body:
- Legs: Position below the body in line with the eyes.
- Arms: Position midway between the head and body.
- Ears: Attach 4 stitches above the eyes on either side.
- Tail: Sew securely at the back.
- Scarf Placement:
- Wrap the scarf snugly around the mouse’s neck.
- Sew the ends of the scarf if desired to keep it in place.

Final Words and Tips
- Stuffing Tips: Ensure not to overstuff to maintain a soft, cuddly texture, especially in smaller parts like the arms and legs.
- Neat Finishing: Use a darning needle to hide all loose ends for a clean finish.
- Customization: Experiment with different yarn colors for a unique look.
- Preservation: Handwash gently with cold water and air dry to maintain the plush yarn texture.
Enjoy making this delightful little mouse that is Perfect for gifting or as a cozy addition to any stuffed toy collection.