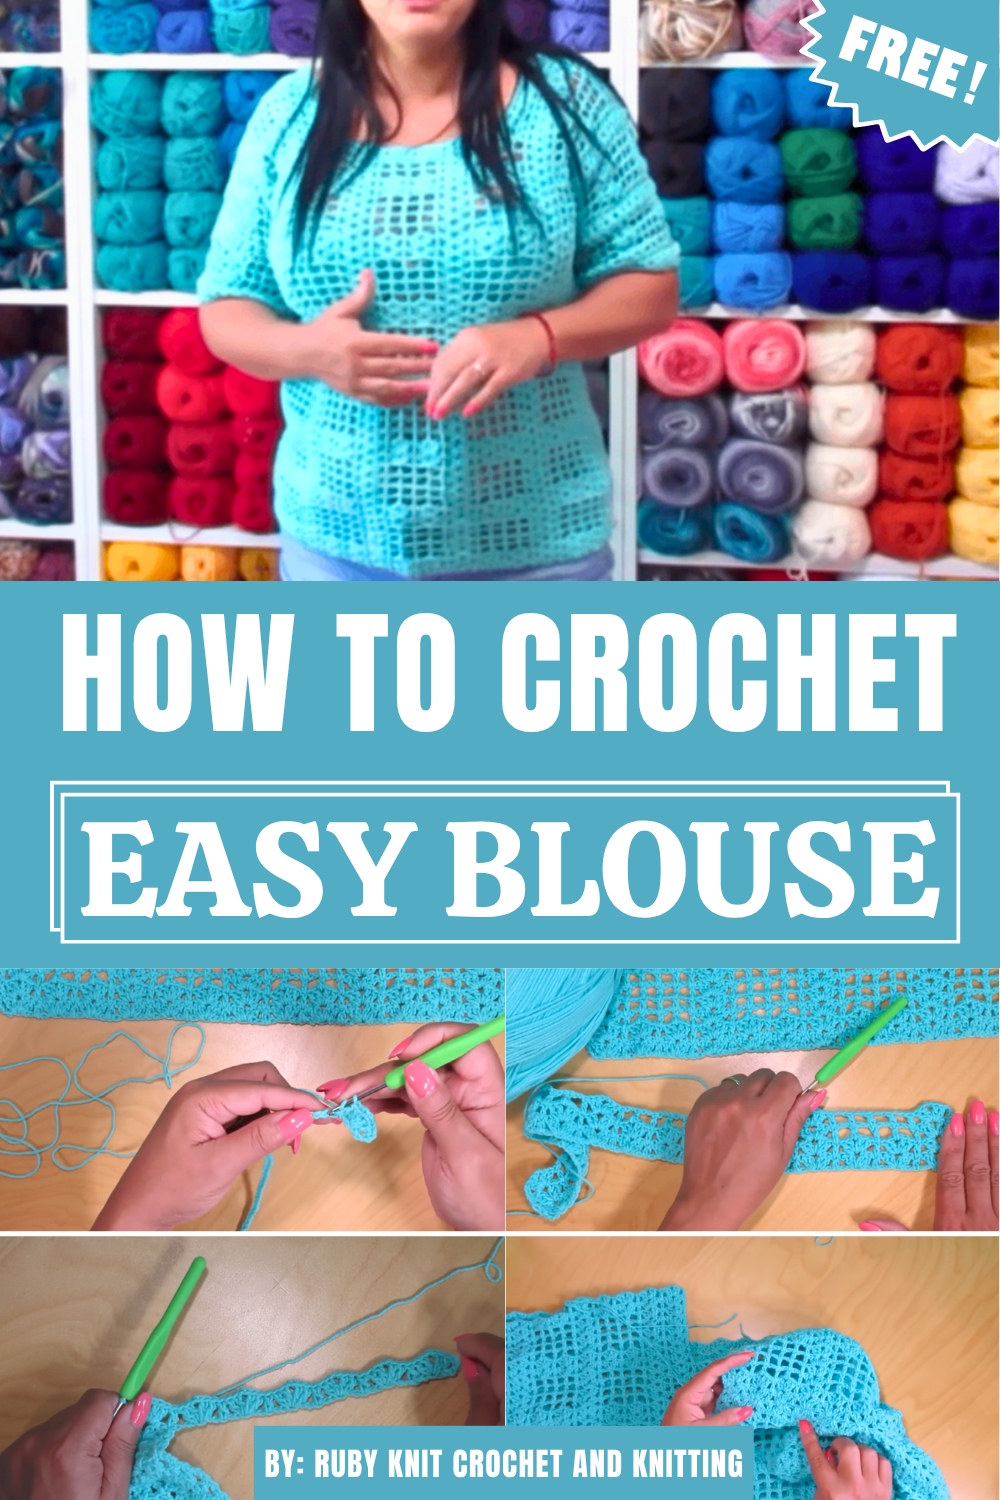
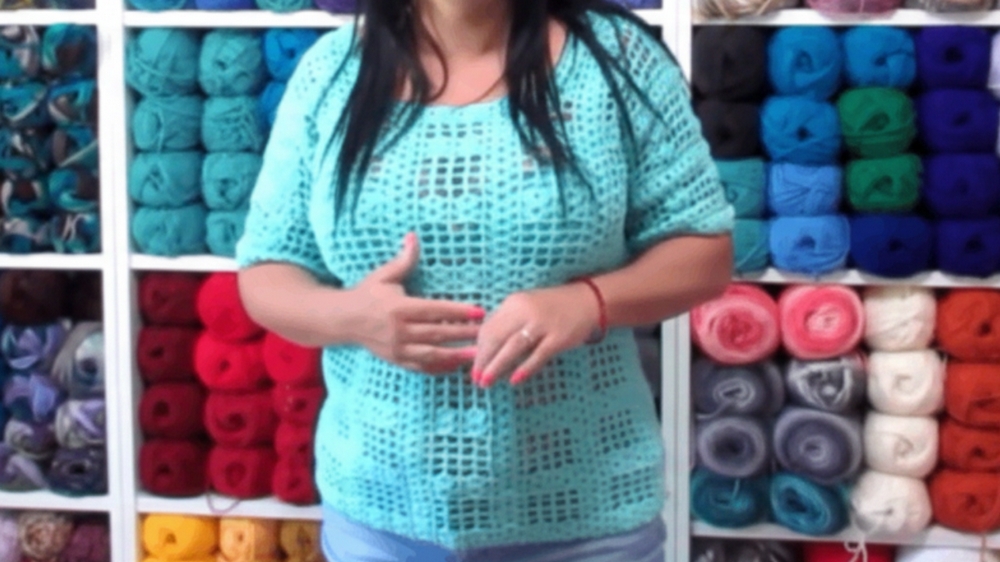
Step into handmade elegance with the Free Crochet Blouse Pattern, a stylish and versatile piece that adds charm, texture, and effortless fashion to any wardrobe.
On a quiet rainy day, immerse yourself in the soothing rhythm of creating a handmade crochet blouse a project as calming and enjoyable to crochet as it is fulfilling to wear. This blouse is not just a garment but a versatile addition to any wardrobe. Whether styled casually, layered over a dress, or extended into a breezy beach cover-up, it adapts beautifully to your needs.
How To Crochet Blouse Pattern Adds Style to Any Outfit

About the Yarn
Using fine-weight yarn, a 3.5 mm hook, and basic tools like a tapestry needle and scissors, this blouse takes shape quickly without overwhelming the creator. By following Ruby’s thoughtful guidance and recommendations, like checking measurements at each stage, you’ll achieve a wearable masterpiece. This project invites calm precision while leaving room for creativity—a balance that’s truly satisfying.
Finished Size
- Approximate Bust Width: 48 cm (19 in)
- Approximate Length: 44 cm (17 ½ in) (underarm to bottom hem).
Adjustments can be made based on your personal measurements.
Gauge
- 6 rows of double crochet motifs = 10 cm (4 in).
- Always check your gauge before starting. Adjust hook size if needed to match gauge.
Skill Level
Intermediate – Familiarity with basic crochet techniques, shaping, and garment assembly is required.
Materials
- Yarn:
- Loops & Threads Cambria (or fine-weight yarn).
- Fiber Content: 100% Acrylic.
- Thickness: Approx. fine weight (category 2).
- Color: Mint (but any color of your choice).
- Loops & Threads Cambria (or fine-weight yarn).
- Crochet Hook: 3.5 mm.
- Additional Supplies:
- Tapestry Needle (blunt).
- Scissors.
- Button(s) (optional for the sleeve closure).
Abbreviations (US Terminology)
- ch: Chain.
- sc: Single Crochet.
- dc: Double Crochet.
- sl st: Slip Stitch.
- sp: Space.
- st(s): Stitch(es).
- hdc: Half Double Crochet.
- yo: Yarn Over.
Step-by-Step Pattern Instructions
Step 1: Measure and Create the Chain
- Measure from one side seam (under the arm) to the opposite side seam across your chest. This measurement determines the width of the chain foundation.
- Example: For a width of 48 cm (19 in), make 100 chains.
- Foundation Chain Formula:
- Multiple of 18 + 25, plus 3 chains to turn your work.
- For example:
- Start with 97 chains for the pattern motifs.
- Add 3 chains to turn your work.
- Total Chains: 100.
- Adjust the number of chains according to your measurement, rounding to the nearest appropriate multiple of 18 + 25.
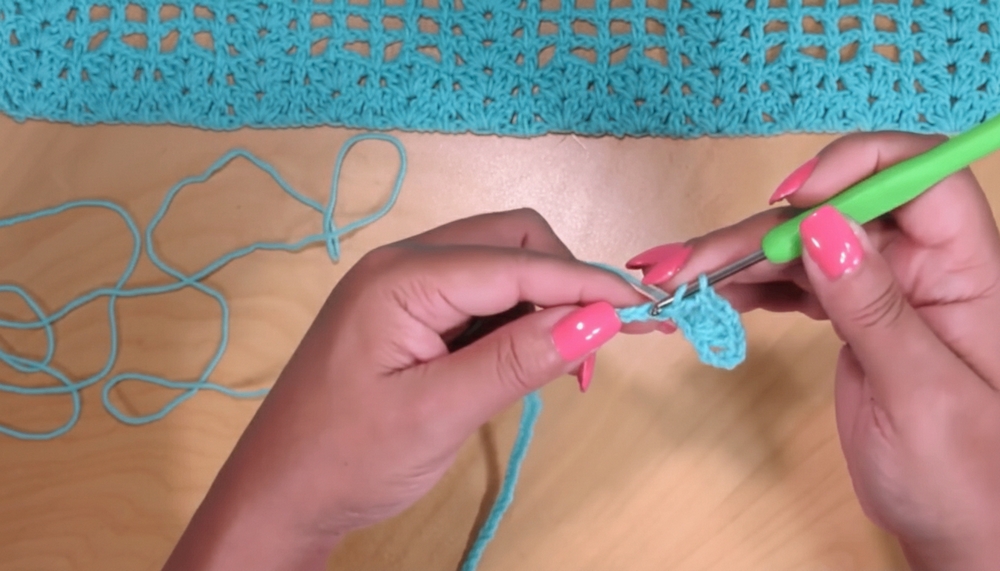
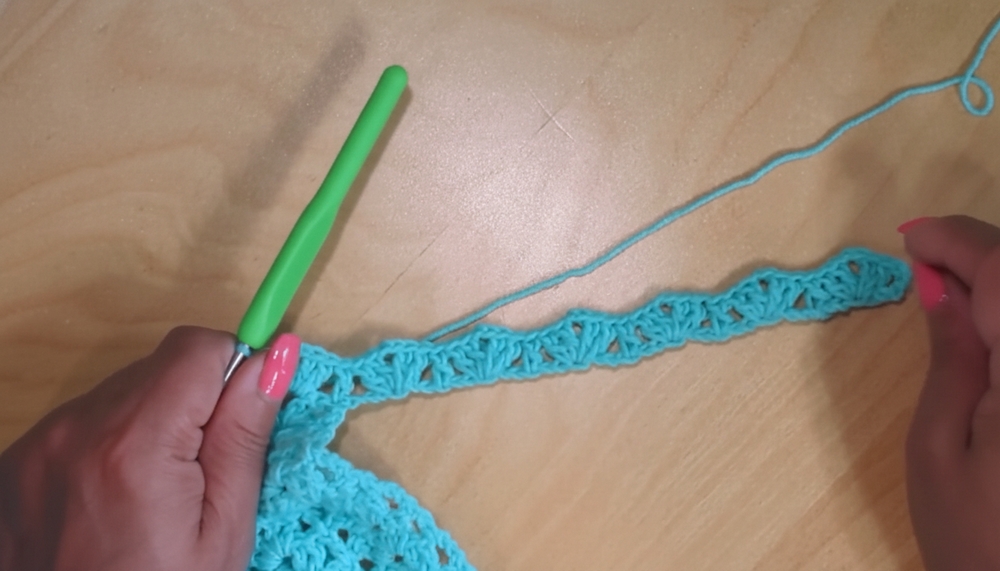
Step 2: Begin the Stitch Pattern
Row 1 (Base Row):
- Work the Foundation Stitch:
- Starting in the 6th chain from the hook, crochet:
- 2 dc, ch 2, 2 dc (this forms the first motif).
- Starting in the 6th chain from the hook, crochet:
- Skip 2 chains. In the 3rd chain, work:
- 1 dc.
- Skip 2 chains. In the 3rd chain, work:
- 2 dc, ch 2, 2 dc (another motif).
- 2 dc, ch 2, 2 dc (another motif).
- Repeat steps 2-3 all the way across. End with:
- 1 dc in the last chain.
- Turn your work, ch 3.
Row 2:
- Create the Border Motifs:
- In the first ch-2 space of the previous row:
- 2 dc, ch 2, 2 dc.
- In the first ch-2 space of the previous row:
- Work the Middle Motifs:
- Ch 2, 1 dc in the top of the next dc.
- Repeat this pattern (ch 2, dc into next dc).
- Work the Next Border Motif:
- In the next ch-2 space, crochet:
- 2 dc, ch 2, 2 dc.
- In the next ch-2 space, crochet:
- End by crocheting 1 dc in the top of the turning ch-3.
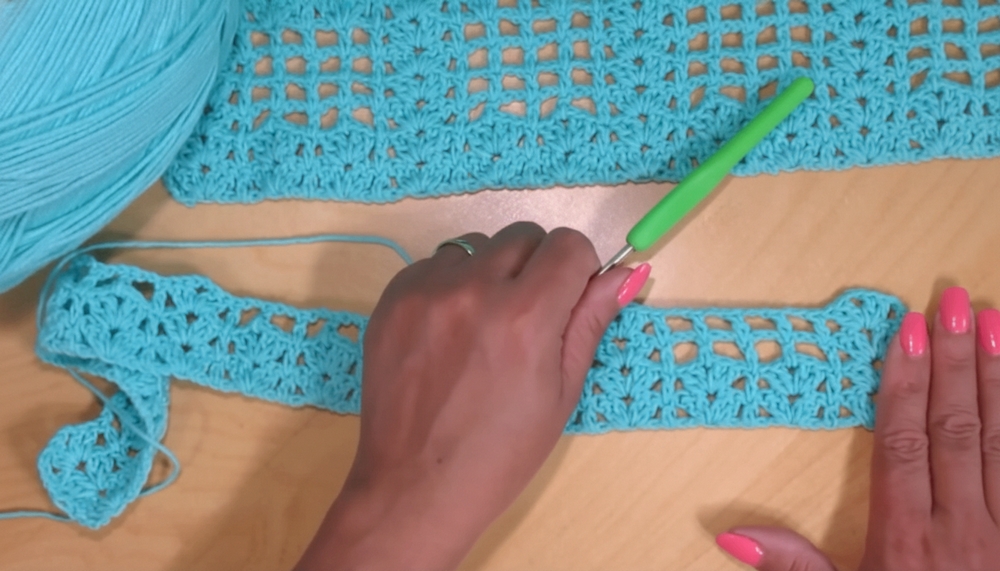
Rows 3 – 8:
Repeat Rows 1-2, following the same motif and stitch patterns outlined above. Each complete motif consists of 4 rows:
- Rows 1 and 2 establish the base motifs.
- Rows 3 and 4 create an intermediate design.
Step 3: Customize Length
- After completing motifs that measure underarm to hem length, the desired blouse length is achieved. Example: 6 motifs of 4 rows each = 44 cm (17 ½ in).
- After reaching the desired length, begin shaping for sleeves and front/back neckline.
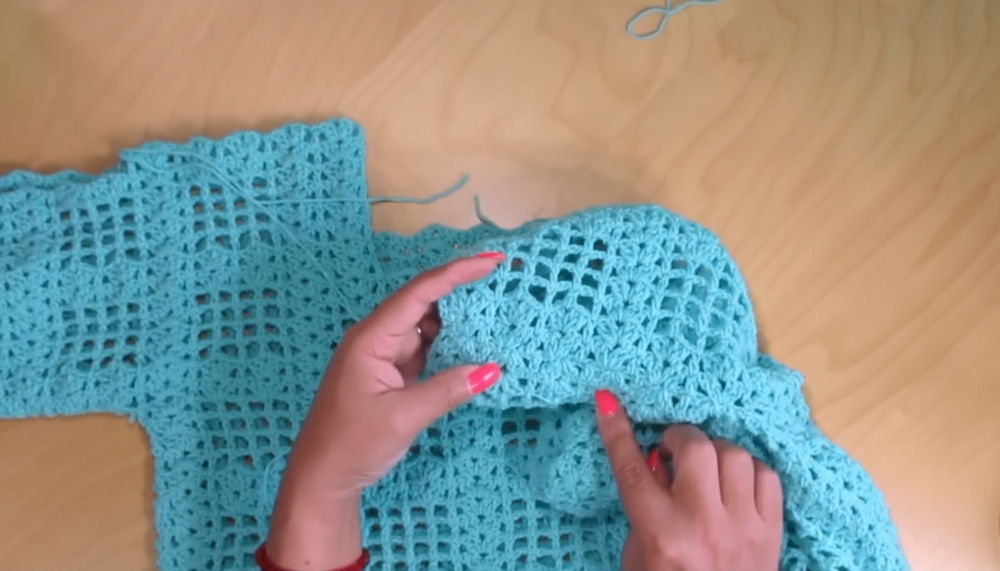
Step 4: Shaping Sleeves
- Increase for Sleeves:
- Attach yarn and create 36 chains on both sides of the last row (this adds fabric for sleeves).
- In the first chain (on both sides):
- Crochet: 2 dc, ch 2, 2 dc. This begins new motifs for the sleeve edges.
- Continue working the stitch pattern established in Rows 1–8, including motifs where the sleeve chains are added.
Step 5: Front/Back Neckline Adjustments
- Back Neckline:
- Work a full motif on the back panel. This includes extending the pattern by one motif’s height, ensuring the back neckline is higher than the front.
- Front Neckline:
- Stop one motif short compared to the back neckline to create a lower neckline (this prevents the blouse from falling off your shoulders).
Step 6: Assembly
- Sew the Pieces:
- Use a tapestry needle and leftover yarn to sew:
- Shoulders: Connect front and back panels at the top.
- Sides: Seam the sides of the blouse, leaving space for armholes if desired.
- Use a tapestry needle and leftover yarn to sew:
- Sleeves Options:
- Open Sleeves: Leave sleeve edges open for a breezy look.
- Buttoned Sleeve Closure: Attach buttons at sleeve seams for adjustable closures.
Tips for Customization
- Length:
- If you want a longer garment, repeat motifs to the desired length. This piece can be extended into a beach cover-up or mini dress.
- Yarn Weight:
- Experiment with lighter yarns for summer wear or thicker yarns for cooler seasons.
- Color Stripes:
- Use leftover yarns in different colors to create stripes in each row of motifs.
- Sleeves:
- For longer sleeves, add rows beyond the motif repetitions described.
Conclusion
Your blouse is now complete! With its airy design and crisp stitch definition, this piece is perfect for casual summer outings or layering with a liner dress.
Final Remarks
- Pattern Adjustments:
- Ensure the neckline, sleeve width, and garment length are tailored to your body for a perfect fit.
- Mistake Prevention:
- Double-check motif counts as you work to prevent uneven panels.