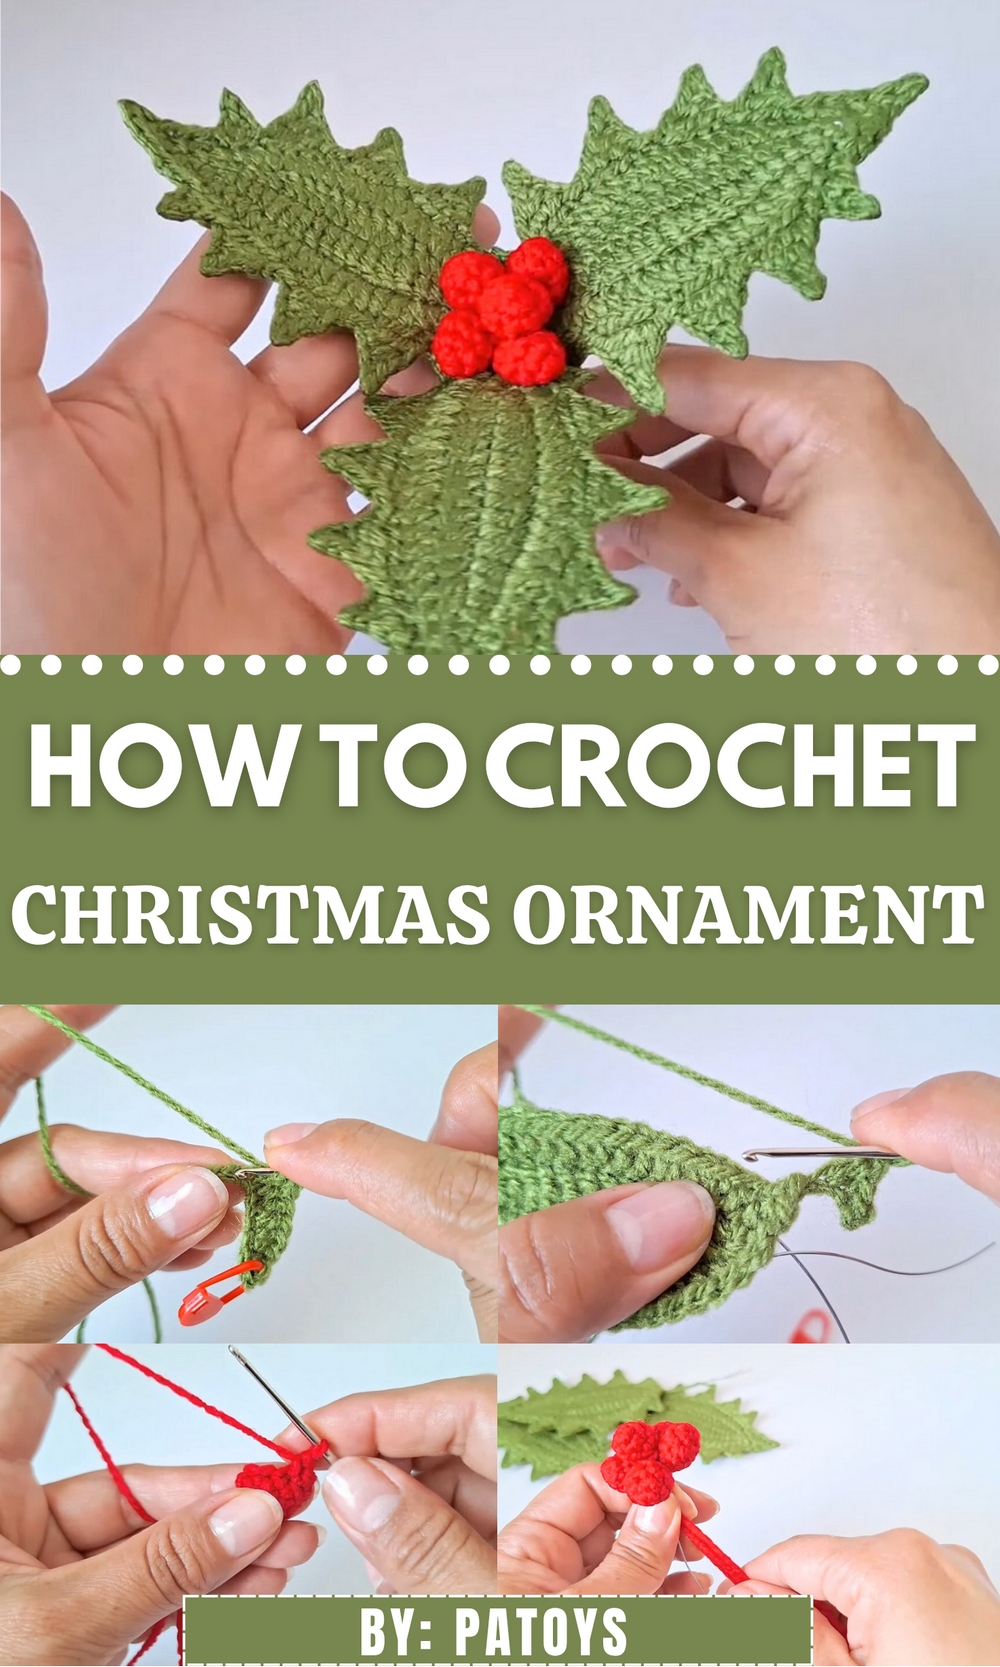
Celebrate festive charm with the Free Crochet Christmas Holly Ornament Pattern, adding timeless beauty and handmade warmth to your holiday décor.
Glimmering like a festive accent nestled among evergreen branches, this little handmade gem brings cheerful sparkle to any holiday setting. The Free Crochet Christmas Holly Ornament Pattern guides you through creating a charming hanging décor piece that pairs vibrant green holly leaves with bright scarlet berries, perfect for adorning tree limbs, gift packages, or winter table centrepieces. The general features include two textured leaves worked in round or semi-round fashion to form the recognizable holly shape, a small cluster of three berries crocheted separately, and a simple loop or chain to let the ornament hang effortlessly.
Crochet Christmas Holly Ornament Pattern for Elegant Tree Styling
Use this ornament to elevate your seasonal flair: hang it from a branch, tie it to a wrapped present, or thread a strand to create a festive garland. With straightforward construction and minimal materials required, this pattern offers a delightfully quick yet impactful way to add handmade charm to your holiday décor.

Skill Level
Intermediate to Advanced
Materials List
- Yarn:
- 100% acrylic yarn, 2 mm thickness.
- Required Colors: Olive Green (leaves) and Red (berries).
- Crochet Hook: Size 4 mm metal hook.
- Wire:
- 22-gauge wire measuring approximately 1 mm thick.
- Pieces needed:
- 3 pieces, each 30 cm long (for leaves).
- 1 piece, 20 cm long (for berries).
- Additional Supplies:
- A tapestry needle (blunt) for weaving ends and sewing parts together.
- Scissors.
- Floral tape (green or brown is optional).
- A lighter or candle to seal yarn fibers.
- Wire cutters for cutting excess wire.
- Hair straightener or iron to improve the holly’s appearance.
Key Abbreviations (US Terminology)
- ch: Chain.
- sc: Single crochet.
- hdc: Half double crochet.
- dc: Double crochet.
- tr: Treble crochet.
- sl st: Slip stitch.
- inc: Increase (work 2 stitches into the same stitch).
Special Notes
- Wire Placement: Wire runs through the center of the leaves to make them adjustable and sturdy.
- Shaping: The yarn fibers are lightly sealed with heat for a polished finish using a lighter/candle.
- Assembly: Floral tape is optional for clean wrapping around the stems.
Step-by-Step Pattern
Step 1: Crochet the Leaves
- Start with olive green yarn.
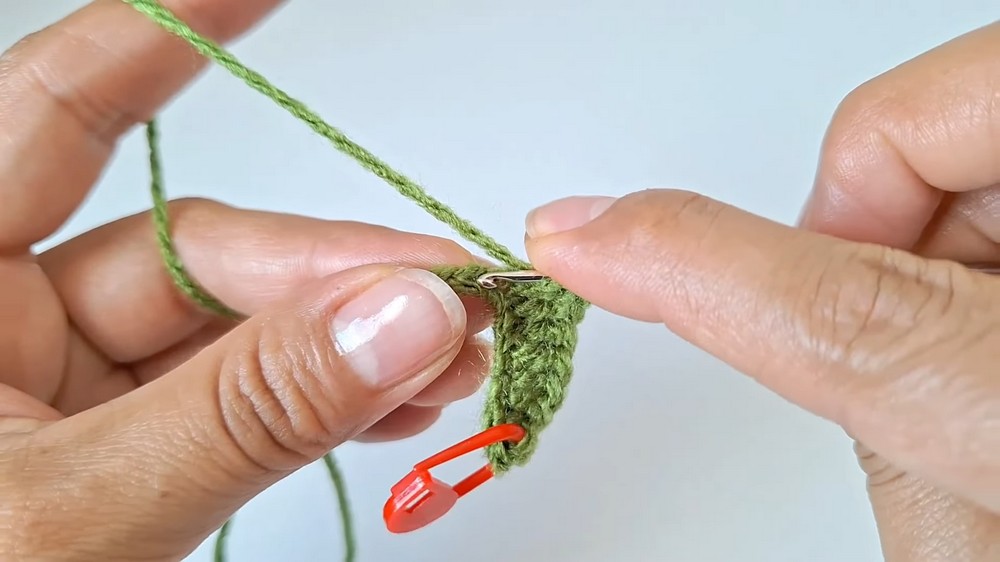
- Foundation Chains:
- Make 20 chains and mark the last chain with a stitch marker.
- Row 1:
- In the second chain from the hook, crochet 1 sc.
- In the next chain, work 1 sc.
- Crochet 2 hdc, one in each of the next chains.
- In the next 10 chains, work 1 dc in each chain.
- Continue with 3 hdc, one in each of the next chains.
- In the next chain, work 1 sc.
- In the last chain, crochet 1 sc, ch 1, and 1 sc.
- Turn Work:
- Rotate your work to crochet along the opposite side of the foundation chain.
- Opposite Side (Row 2):
- In the first chain, crochet 1 sc.
- Crochet 3 hdc, one per stitch.
- Work 10 dc, one in each chain.
- Continue with 3 hdc, one in each chain.
- Finish with 2 sc, working into each chain until the stitch marker.
- Slip stitch into the marked stitch to finish the round.
- Add Wire:
- Insert a 30 cm wire doubled in half into the chain where the slip stitch was made.
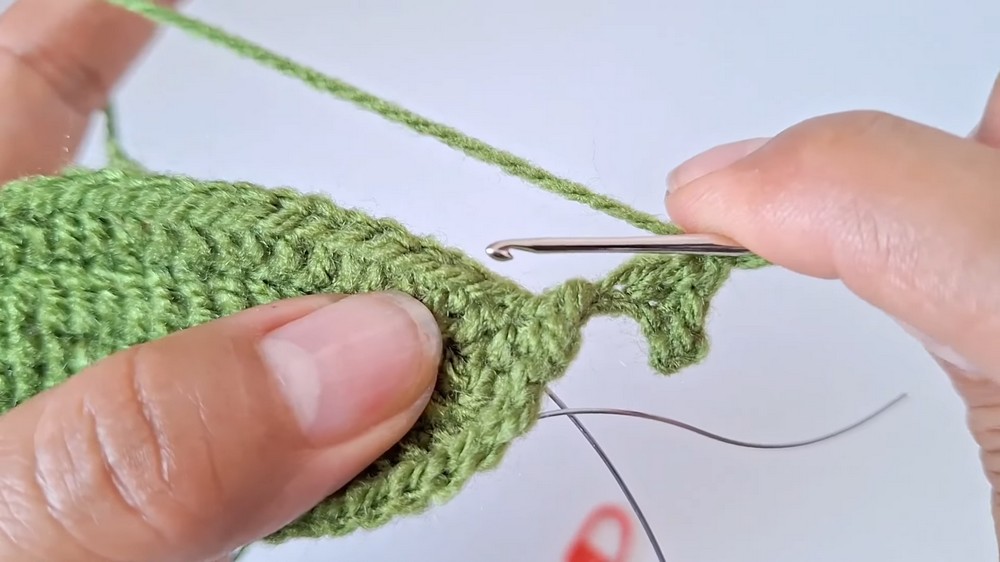
- Row 3:
- Work over the wire to securely encase it within the yarn stitches:
- At the wire insertion point, crochet 1 sc.
- Work 3 hdc, one in each stitch.
- Crochet an increase of 2 hdc in the next stitch.
- Continue with 2 hdc.
- Work another increase (2 hdc) in the next stitch.
- Continue with 2 hdc.
- Crochet 1 increase of 2 hdc followed by 6 hdc, one in each stitch.
- Work 2 sc and pass over the point created by the chain stitch in Row 1 (skip the chain stitch).
- Continue with 1 sc, ch 1, and 1 sc.
- Work over the wire to securely encase it within the yarn stitches:
- Reverse Side:
- Rotate work and mirror the stitches on the reverse side of the leaf:
- Work 2 sc, 6 hdc, 1 hdc increase, 2 hdc, 1 hdc increase, 2 hdc, 1 hdc increase, and 3 hdc until reaching the taper at the end of the wire.
- Finish with 1 sc and sl st into the marked stitch to end the leaf.
- Rotate work and mirror the stitches on the reverse side of the leaf:
- Shaping:
- Cut and secure yarn.
- Stretch and adjust the leaf shape by bending the wire.
- Repeat:
- Create 2 more leaves using the same pattern.
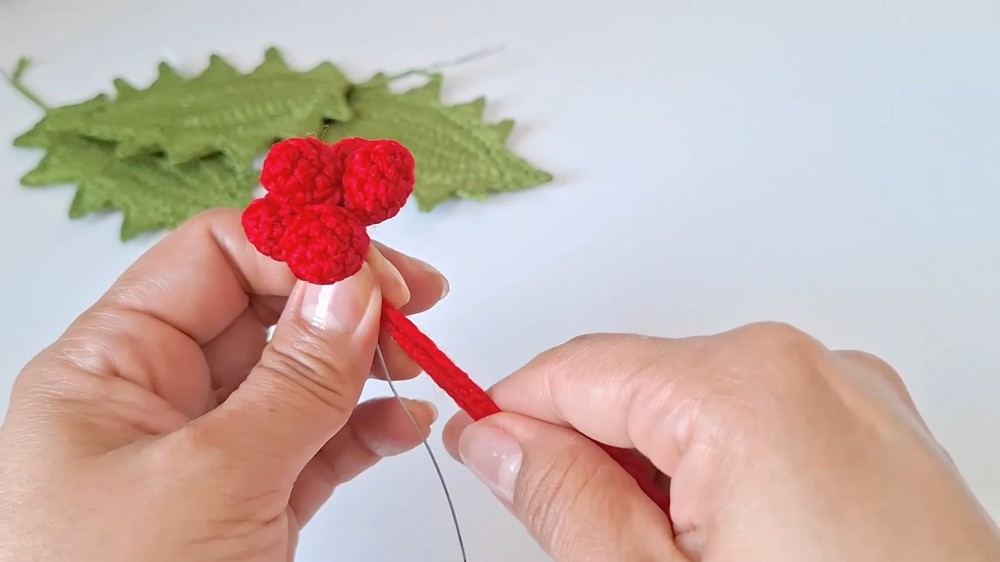
Step 2: Crochet the Berries
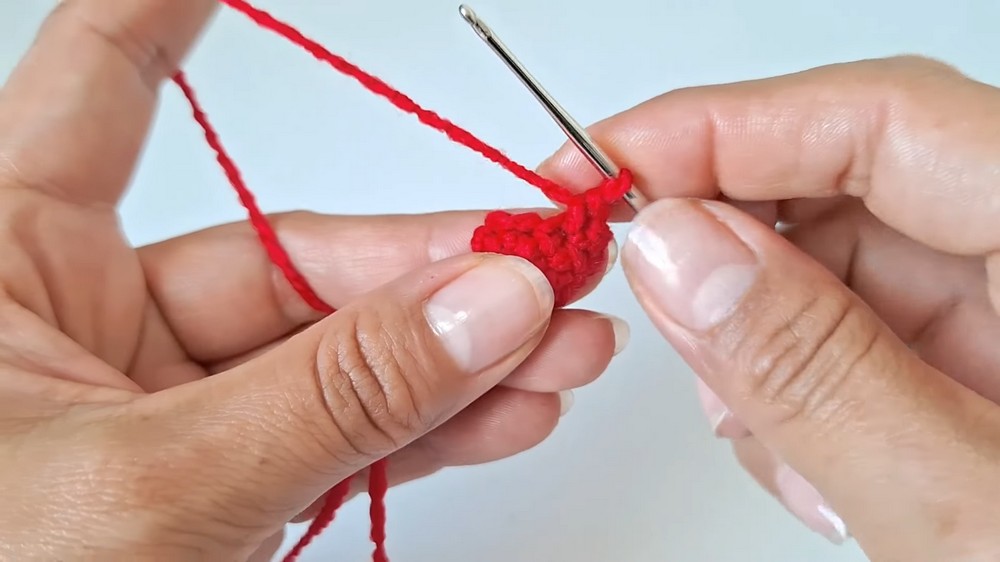
- Start with red yarn.
- Magic Ring:
- Make a magic ring and crochet 4 sc into the ring.
- Pull to close the ring.
- Row 2:
- Work 2 sc into each stitch (inc stitch in every stitch).
- At the end, you will have 8 sc.
- Rows 3-4:
- Work 1 sc in each stitch, maintaining 8 sc total.
- Finish:
- Slip stitch into the next stitch.
- Leave a long yarn tail for sewing.
- Tighten the ring and cut off excess yarn.
- No Filling:
- Use the yarn ends as stuffing for the berries instead of synthetic fiber filling.
- Assembly:
- Thread the yarn ends using a tapestry needle.
- Weave along the outer edge of the berry, pulling to close the circle neatly.
- Tie a tight knot and trim excess yarn.
- Repeat:
- Make 4 more berries following the same pattern.
- Make 4 more berries following the same pattern.
Step 3: Finishing & Shaping with Heat
- Burn Fibers:
- Using a lighter/candle, carefully burn the acrylic yarn fibers for a smoother finish.
- Be cautious to avoid excessive burning and maintain distance (about 3-4 cm).
- Straighten Leaves:
- Use a flat iron or straightener on the leaves to flatten them and improve their final stiffness.
Step 4: Assembly
- Join Berries:
- Gather all berry strands together at the base.
- Tie them securely to form a cluster.
- Attach Wire (20 cm):
- Insert the wire into the base of the berry cluster.
- Wrap yarn tightly around the wire to secure it in place.
- Add Leaves:
- If using floral tape:
- Place one leaf at the base of the berry cluster and wrap it with tape.
- Repeat for each subsequent leaf, attaching them one at a time and rolling the tape down the wire stem.
- If using floral tape:
- Final Touches:
- Adjust wire stem length based on the intended use (short for small decor, long for garlands).
Conclusion
Your holly sprig is complete! This beautiful decoration is perfect for accentuating holiday displays. Its wire-reinforced leaves allow for shape adjustment while the berries add a festive pop of color. Use it in wreaths, garlands, as table centerpieces, or even gift-wrap embellishments.
Pattern Correction & Tips
- Correction:
- Ensure stitches are balanced along the leaf edges by counting correctly. A skipped stitch may misalign the symmetry.
- Tips:
- Use heat carefully for a polished finish without damaging your yarn.
- If floral tape isn’t available, wrap the wire with yarn for blending purposes.
- To create a more elaborate piece, increase the number of holly clusters and attach them to a longer garland wire.