Carry elegance in every stitch with the Free Crochet Drawstring Pouch Pattern, ideal for storing treasures or gifting with handmade charm.
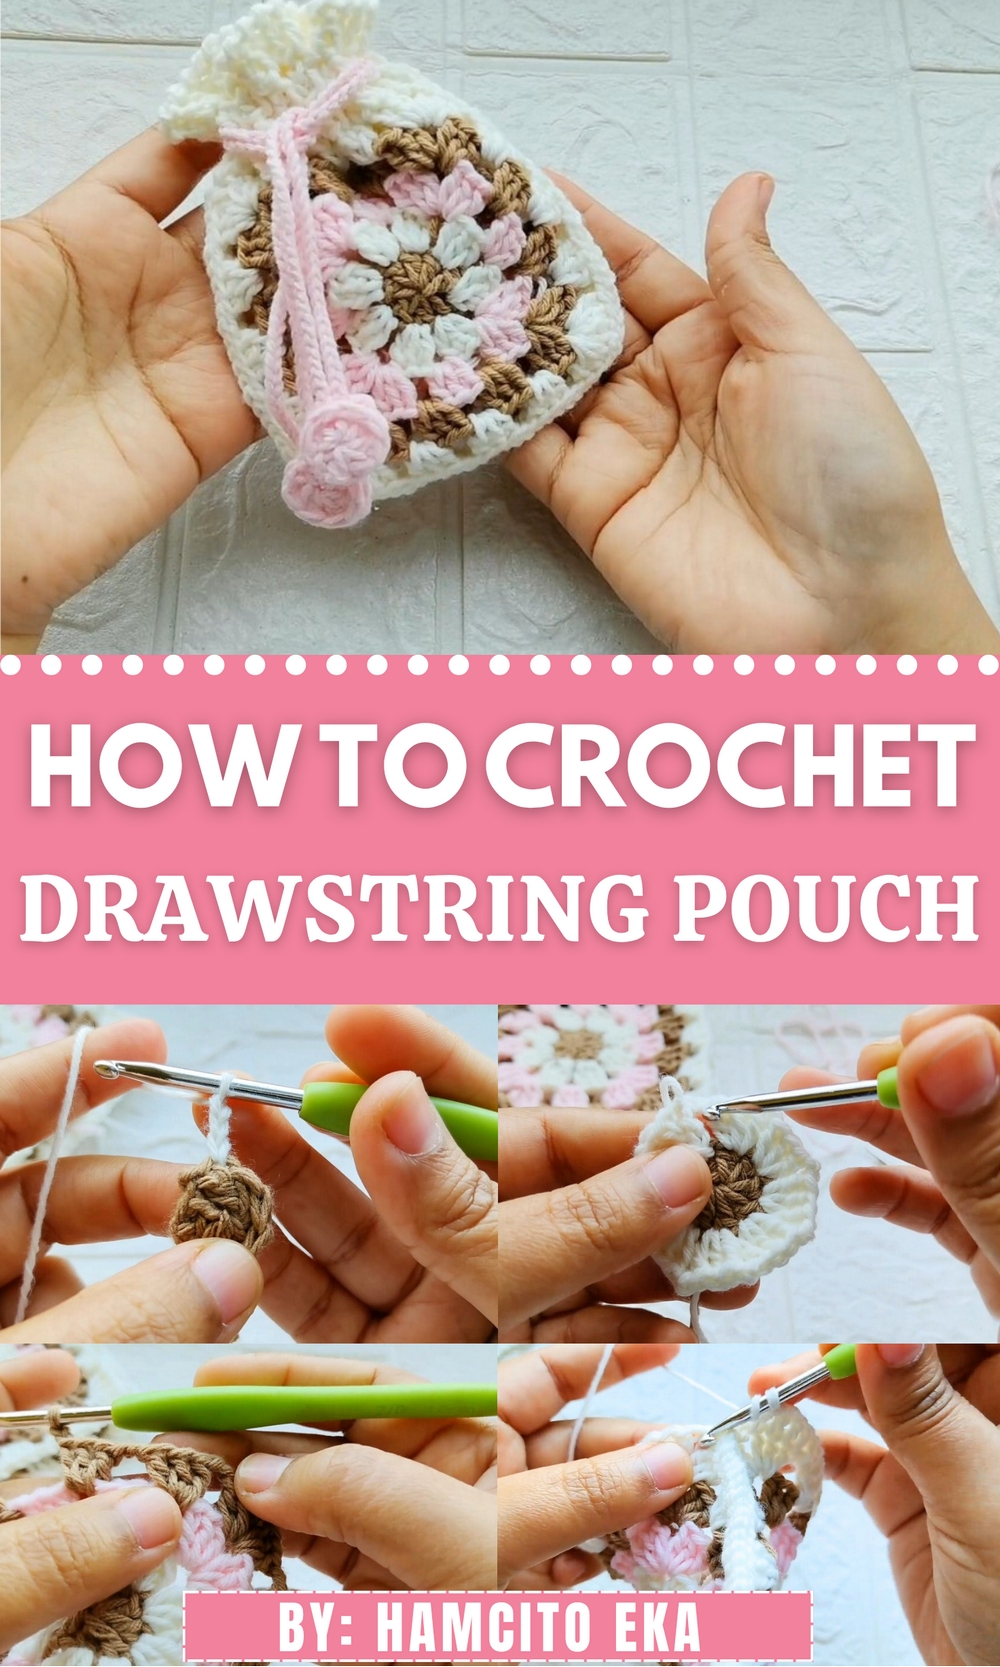
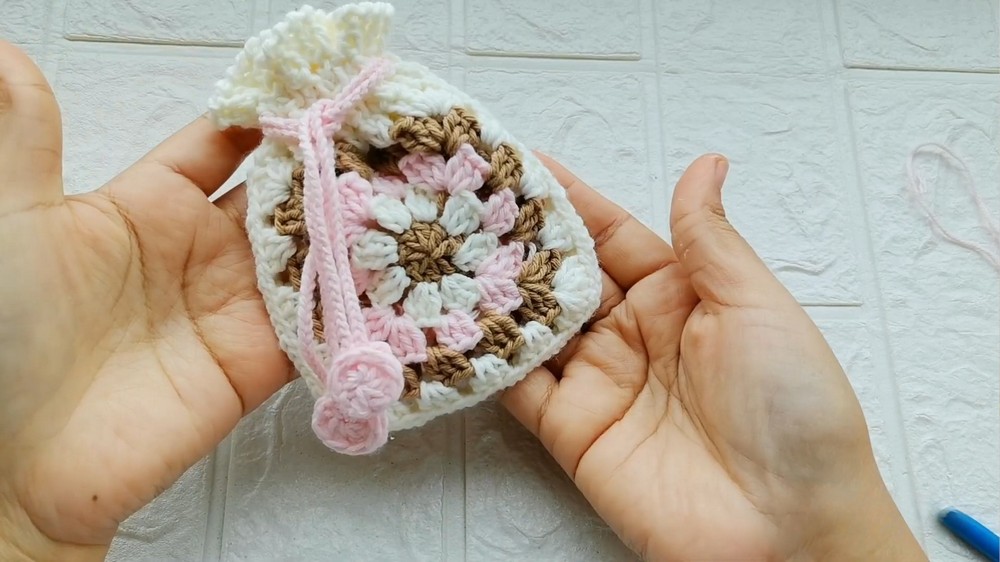
Sunlight seems to dance on this little handmade treasure: a charming drawstring pouch that balances practicality with textile delight. The Free Crochet Drawstring Pouch Pattern leads you step-by-step through creating a versatile storage pouch, ideal for holding jewellery, trinkets, favourite accessories, or even serving as a gift bag that carries its own handcrafted charm. The pattern’s general features include a sturdy base worked in the round, an upright body built with textured stitches for structure, and a neat top tunnel through which a cord is threaded to cinch the pouch closed.
Free Crochet Drawstring Pouch Pattern for a Chic Touch
the pouch can be used as a stylish travel companion, a sweet keepsake holder, or a compact organizer that adds handmade warmth wherever it goes. With beginner-friendly construction and minimal supplies, this pattern offers a delightful little project with practical results, small in size but big in charm.
Granny Square Bag Crochet Pattern
Finished Size:
The finished bag is approximately 15 cm x 15 cm (6 inches x 6 inches) (depending on yarn weight and tension).
Materials Required:
- Yarn:
- Three Colors (Light Brown, White, and Pink are used in the example, but feel free to customize based on your preferred palette).
- Medium-weight yarn for a sturdy bag.
- Crochet Hooks:
- 4.0 mm hook for the granny squares.
- 3.0 mm hook for the smaller decorative details.
- Tapestry Needle: For sewing pieces and finishing touches.
- Scissors.
- Liquid Cold Silicone Glue (Optional): For attaching decorative details.
- Stuffing material (Optional): If making the decorative additions puffy.
Gauge:
Gauge is not critical for this project but ensure consistent stitch tension for uniform granny squares.
Special Techniques Used:
- Magic Ring: Allows easy start for circular crochet.
- Slip Stitch (SS): Used for joining rounds seamlessly.
- Single Crochet (SC): A basic tight stitch for finishing and details.
- Double Crochet (DC): Used for creating the granny squares’ texture.
- Reverse Crochet (Crab Stitch): Adds a decorative edging to the bag.
For visual clarification, consider accessing crochet tutorials for techniques like the magic ring or reverse crochet stitch, as they form integral parts of this pattern.
Step-by-Step Pattern Instructions
Part A: Make Granny Squares
Granny Square Setup:
-
Starting with Color #1 (Light Brown):
- Create a magic ring.
- Round 1:
- Chain 3 (counts as the first double crochet).
- Crochet 7 DCs into the magic ring (for a total of 8, including the chain 3).
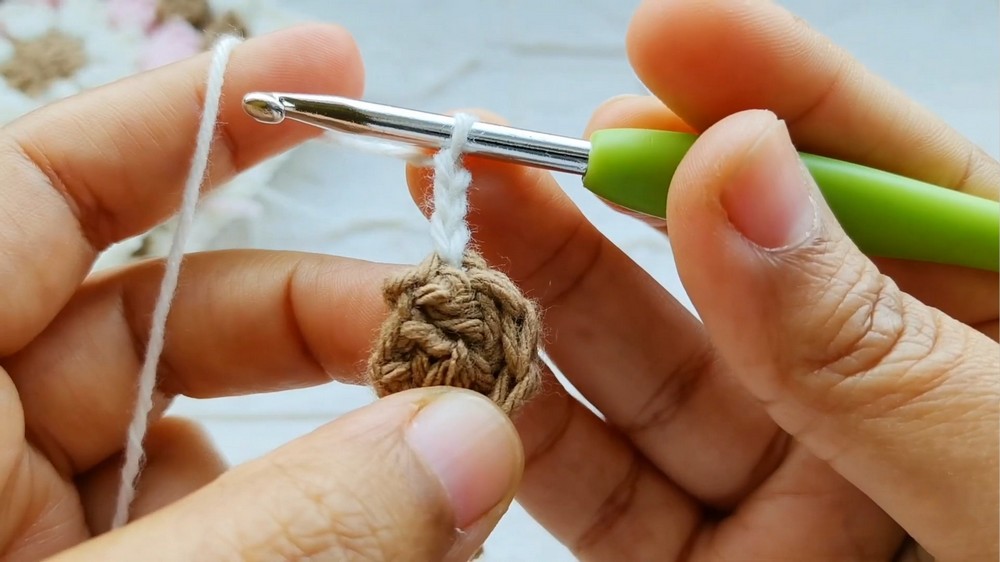
- Pull the magic ring tight to close the center and slip stitch into the third chain to end the round.
-
Switch to Color #2 (White):
- Attach the new yarn to any stitch of the circle with a slip stitch.
- Round 2:
- Chain 3 (this counts as the first DC).
- Crochet 2 more DCs into the same stitch (a group of 3 DCs).
- Chain 2 (to create a corner).
- Skip to the next stitch group and repeat:
- Crochet 3 DCs in one stitch and chain 2.

- Continue until you complete 8 groups of 3 DCs separated by chain 2 spaces.
- Crochet 3 DCs in one stitch and chain 2.
- Slip stitch to the third chain of the first stitch to close the round.
-
Switch to Color #3 (Pink):
- Attach the new yarn to a corner stitch space (chain 2 space).
- Round 3:
- Chain 3 (counts as the first DC) and crochet 2 DCs into the same corner space, forming a group of 3.
- Chain 2 and make another 3 DCs into the same corner space.
- Chain 2 to transition.
- In the next chain space (between groups):
- Crochet 3 DCs. Do not add extra groups in non-corner spaces.
- Chain 2.
- Crochet 3 DCs. Do not add extra groups in non-corner spaces.
- Repeat the pattern of corners having two groups of 3 DCs and intermediate spaces having one group of 3 DCs until the round is complete. Slip stitch to the third chain at the start to close the round.
-
Switch Back to Light Brown (or Color #4):
- Attach the light brown yarn to any corner space.
- Round 4:
- Chain 3 and make 2 DCs into the same corner space.
- Chain 2 and make another 3 DCs in the same corner space.
- In each intermediate space: Crochet 3 DCs per space, followed by chaining 2.
- Continue across the round, maintaining the corner structure (two groups of 3 DCs) and intermediate structure (one group of 3 DCs). Slip stitch to close the round.
Part B: Join the Granny Squares
- Create two granny squares following Part A.
- Position squares inside-to-inside (wrong sides facing inward).
- Align corners perfectly and begin joining with slip stitches.
- Join exclusively through inner loops:
- Insert the crochet hook through the inner back loops of both granny squares.
- Slip stitch to join each corresponding stitch. Leave one edge open (this will be the bag’s opening).
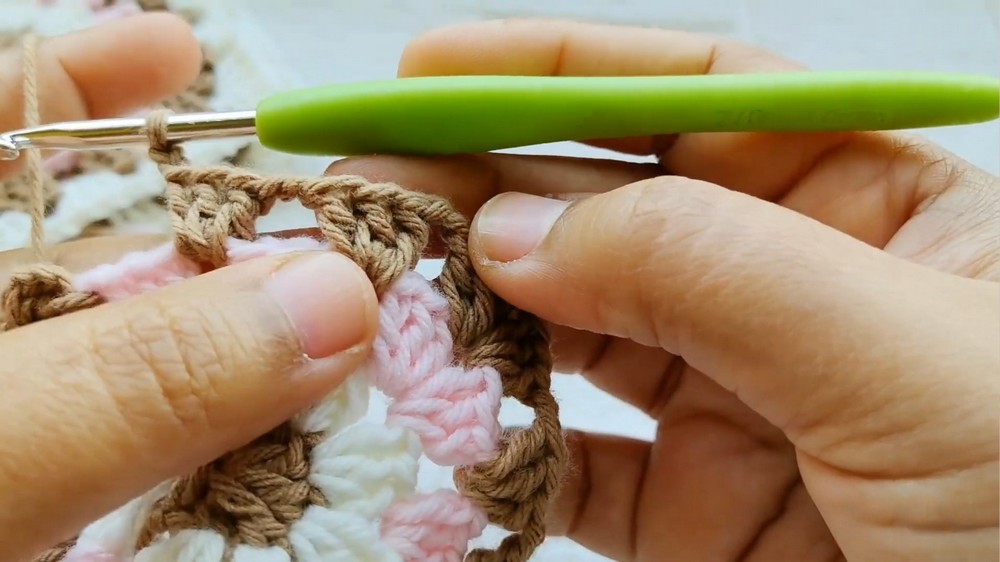
Part C: Add Height to the Bag
- At the edge of the open side (top of the bag):
- Round 1:
- Chain 3 and begin crocheting one DC over each stitch around the edges.
- In corner spaces, crochet one DC directly in those gaps.
- Repeat for 3 total rows of DCs to add vertical height to the bag.
- Round 1:
Part D: Decorative Finishing
- Reverse Crochet Edge (Crab Stitch):
- Chain 1 at the last DC row, and crochet SCs backward (reverse direction) around the entire top edge for a polished finish.
- Fasten off and weave in ends securely.
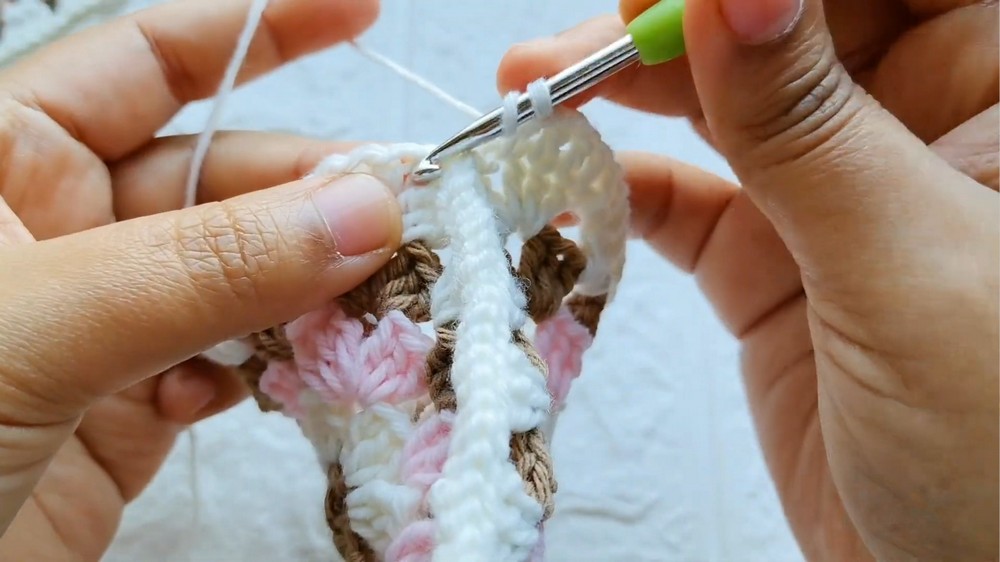
- Create Drawstrings:
- Use pink yarn and the smaller 3 mm hook.
- Crochet 100 chains each for two drawstrings.
- Insert Drawstrings:
- Using a tapestry needle, weave drawstrings around the openings, alternating through front and back two DCs per section.
Part E: Add Cute Button/Rosette Detail
- Rosette/Button Circles:
- With pink yarn, create small magic rings and crochet 7 DCs into the ring.
- Slip stitch and fasten off, leaving a long tail.
- Attach to Bag:
- Use cold silicone or sew these rosettes over the tied-off portion of the drawstrings to disguise knots neatly and add decorative flair.
Final Words & Tips:
This crochet granny square bag combines utility and charm, giving crocheters a simple yet stylish project.
Tips:
- Customize Colors: Pick shades that reflect your personality or match your wardrobe!
- Bag Size Adjustment: Add more granny squares or extend the vertical height for larger storage.
- Alternative Closure: Replace drawstrings with zippers or buttons for a different aesthetic.
- Practice Techniques: If unfamiliar with concepts like the magic ring or crab stitch, practice on scrap yarn before starting.