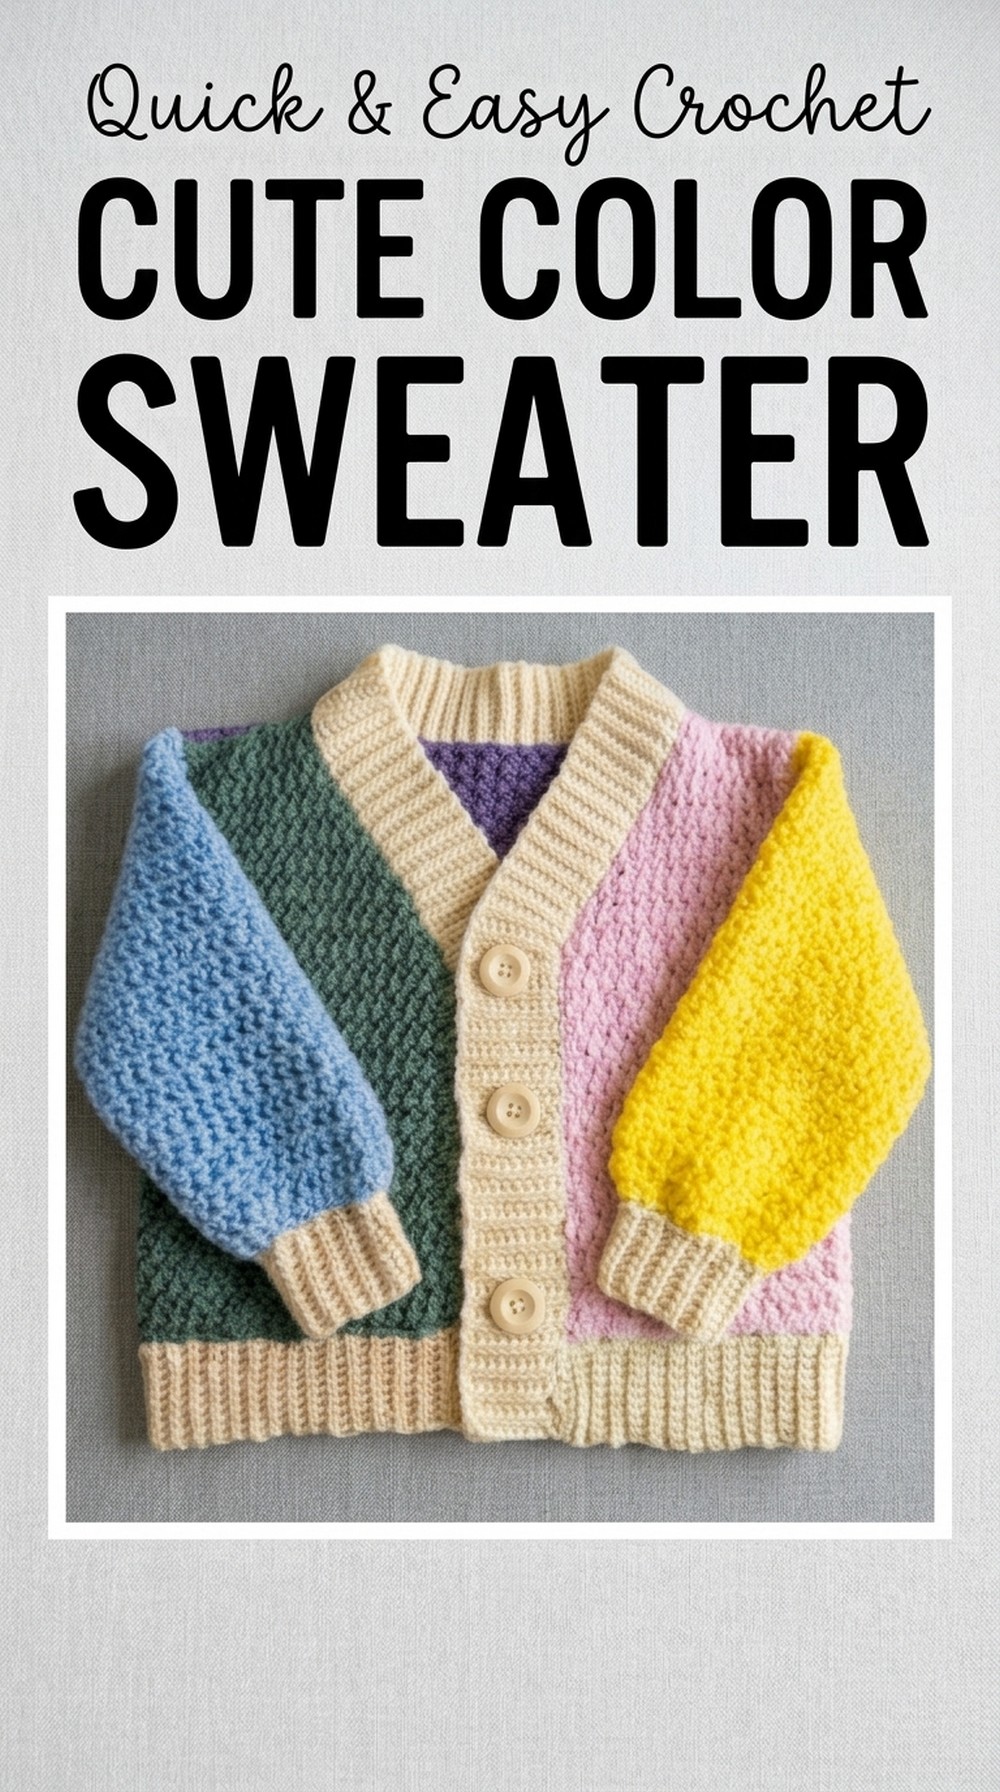
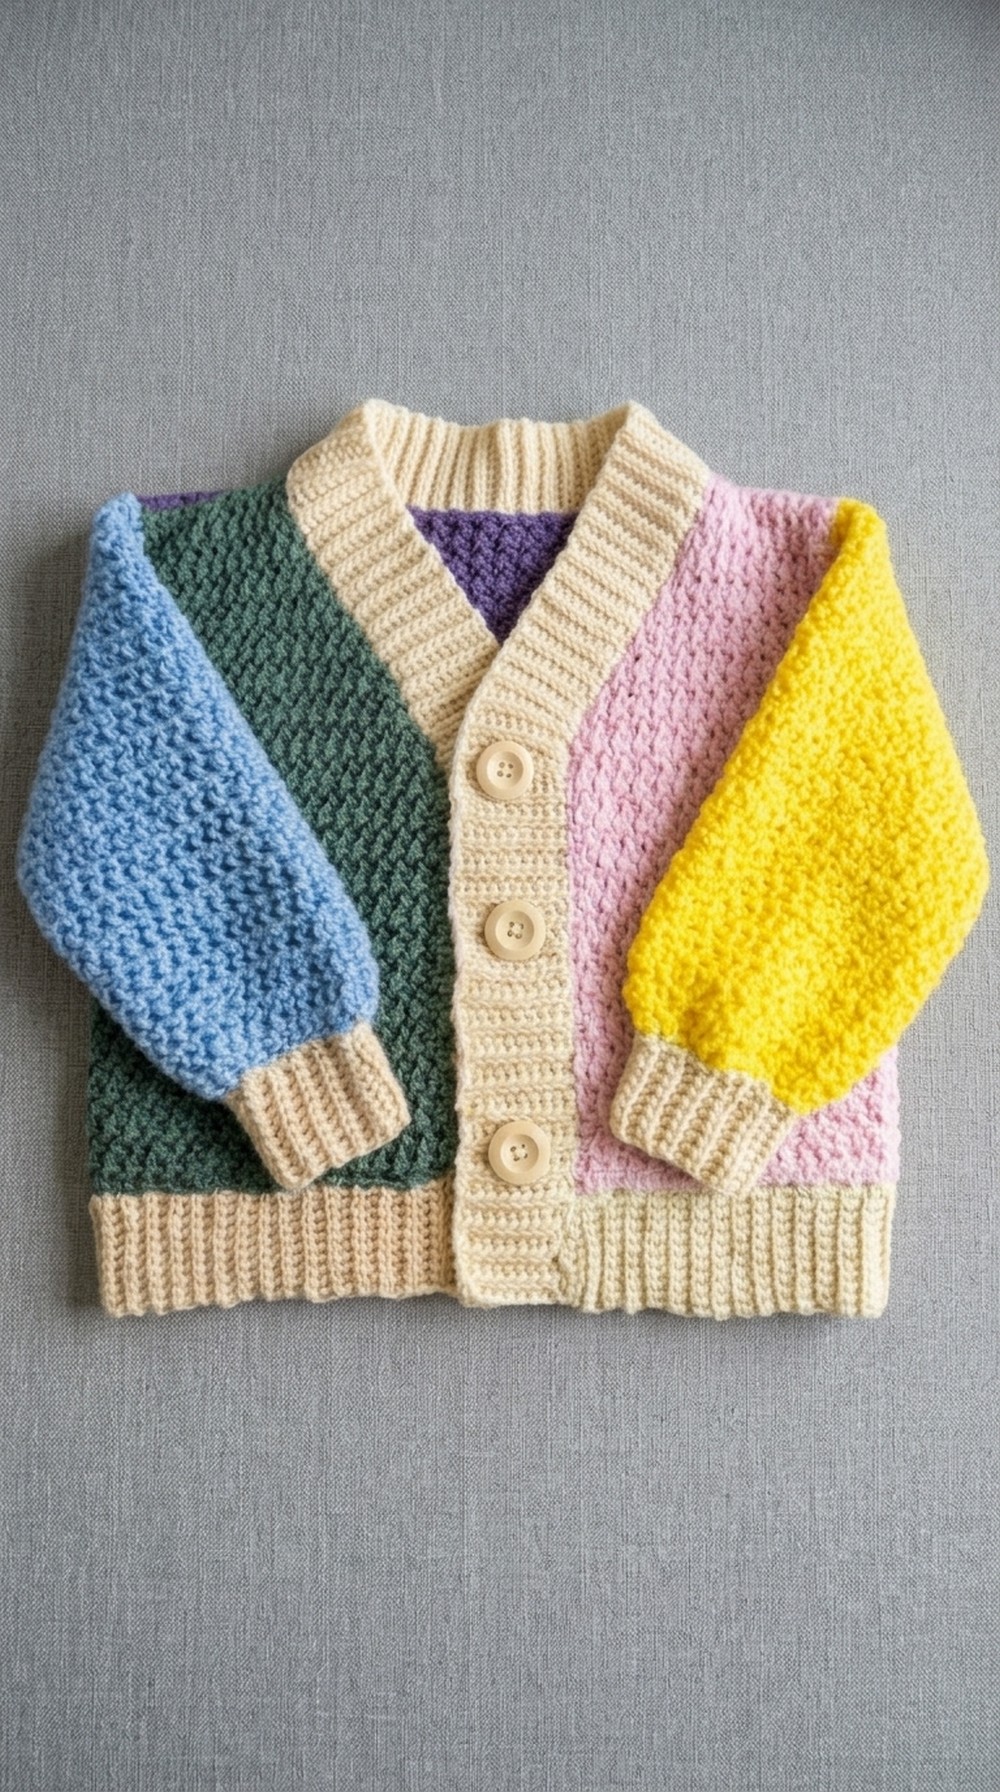
Unlock your creativity with this vibrant crochet color sweater pattern, perfect for showcasing personality and staying cozy in any season effortlessly.
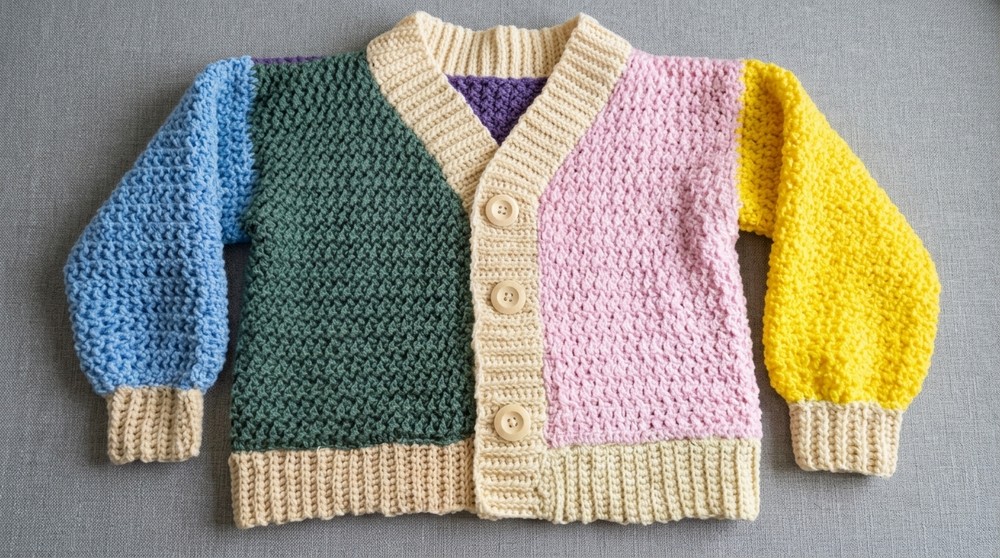
A cozy sweater that wraps you in warmth and charm, perfect for cooler days and casual gatherings. With its vibrant colors and soft texture, this crochet piece offers a unique look that stands out effortlessly. The sweater’s stripes or color combinations can match any personal style, whether you prefer bold shades for a playful vibe or neutral tones for a classic touch.
Free Crochet Color SweaterPattern to Keep You Warm
Its lightweight and airy feel make it comfortable to wear all day, while the intricate stitch work gives it a touch of elegance. This sweater is more than just a garment; it’s a versatile outfit suitable for staying cozy at home or stepping out in style. Its eye-catching appearance and practicality make it a must-have addition to any wardrobe. Whether paired with jeans, skirts, or layered over a top, it radiates a sense of individuality and warmth, perfect for chilly weather.
Materials
- Yarn: Various leftover worsted weight yarns. Example colors: Green, Pink, Yellow, Cream, Purple, Light Blue.
- Crochet Hook: Recommended 4.0mm (G) or 4.5mm, adjust as per yarn thickness.
- Tapestry Needle (large eye for seaming).
- Stitch Markers to mark key points such as edges.
- Buttons: 3 large buttons or adjust based on preference.
- Scissors
Gauge
- 10 stitches x 12 rows = 4″ (10 cm) using the textured stitch described below.
Finished Size
- Bust Circumference: Customized based on the measurement (half of bust circumference minus 10 cm).
- Sweater Length: 28 cm per side (can be customized).
- Sleeve Length: 20 inches (51 cm).
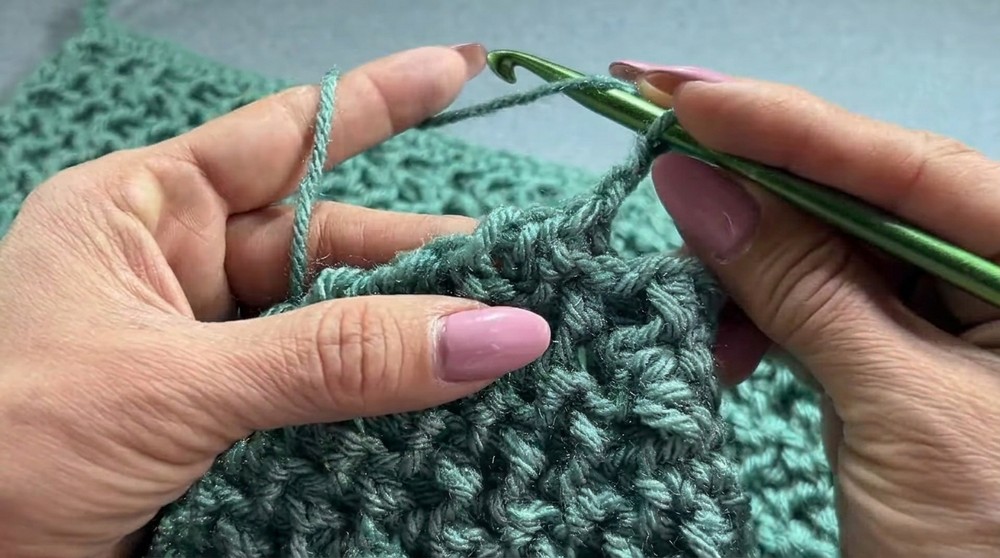
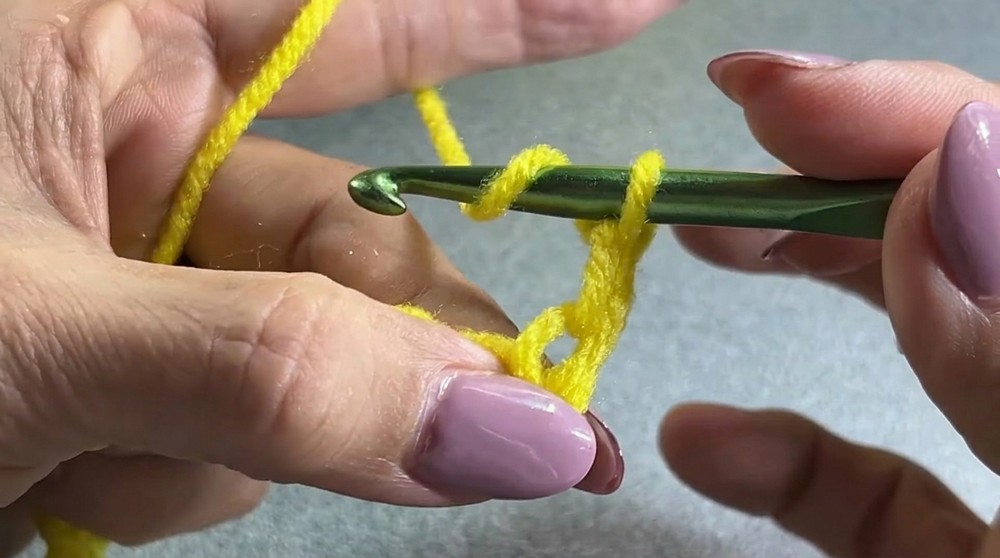
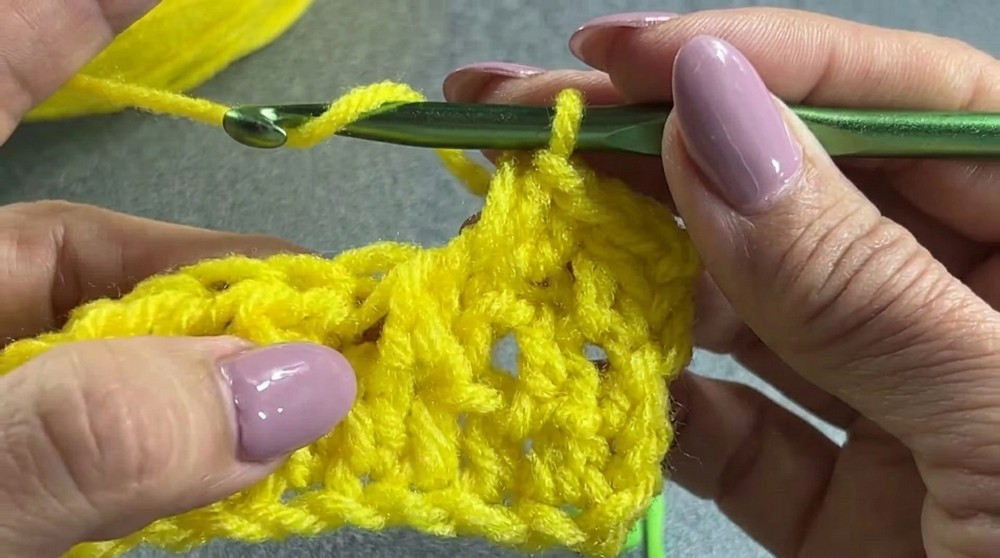
Special Stitch: Textured Stitch
- Stitch Description:
- Yarn over, insert hook into the designated loop, pull up a loop, yarn over and pull through all three loops on hook.
- Alternate between working in the front loop and back loop throughout the row.
- Multiple:
- Requires an even number of stitches (multiples of 2).
Pattern Instructions
Step 1: Back Panel
- Foundation Chain:
- Create an even number of chains to match half of your bust circumference minus 10 cm.
Example: For a 90 cm bust size → Chain 35-40 cm wide.
Example Total: 60-80 chains depending on size.
- Create an even number of chains to match half of your bust circumference minus 10 cm.
- Row 1:
- Start in the second chain from the hook, work 1 textured stitch in each chain across.
(Alternate between front loop and back loop stitches as follows).
- Start in the second chain from the hook, work 1 textured stitch in each chain across.
- Row 2 and Beyond:
- Chain 2, turn work, and continue textured stitch across.
Repeat these rows until the panel measures your desired length: 28 cm.
Step 2: Front Panels (2 Pieces)
- Foundation Chain:
- Create even-numbered chains for the panel: ¼ of your bust circumference per panel.
Example Total: 30-40 chains depending on size.
- Work Textured Stitch:
- Follow the textured stitch pattern across to match the same length as the back panel.
- Follow the textured stitch pattern across to match the same length as the back panel.
- Shape the Neckline:
- Once the fabric reaches the neckline’s start height, begin decreasing.
- At the start of the neckline row, skip the last stitch.
- Chain 2 to turn and work textured stitches for the next row.
- Decrease at the neckline every alternative row until desired neckline slope is achieved.
- Repeat:
- Create the second front panel identical to the first.
Step 3: Sleeves
- Foundation Chain and Base Row:
- Measure and mark your armhole length (28 cm or 11 inches).
- Chain enough to fit stitch count for this length: 60-80 chains depending on size.
- Measure and mark your armhole length (28 cm or 11 inches).
- Work in Rows:
- Row 1: Work the textured stitch across the chain.
- Row 2 and Beyond: Chain 2, turn work, and continue with the textured stitch.
- Length:
- Work until the sleeve is 20 inches (51 cm) long.
- Work until the sleeve is 20 inches (51 cm) long.
- Finish the Cuff Edge:
- Leave the cuff open for finishing later.
- Repeat:
- Create the second sleeve in the same way.
Step 4: Assemble the Sweater
- Seam Front Panels and Back Panel:
- Use a tapestry needle to sew the shoulder edges.
Make sure the neckline aligns well.
- Use a tapestry needle to sew the shoulder edges.
- Attach the Sleeves:
- Securely sew the sleeves into the armhole opening.
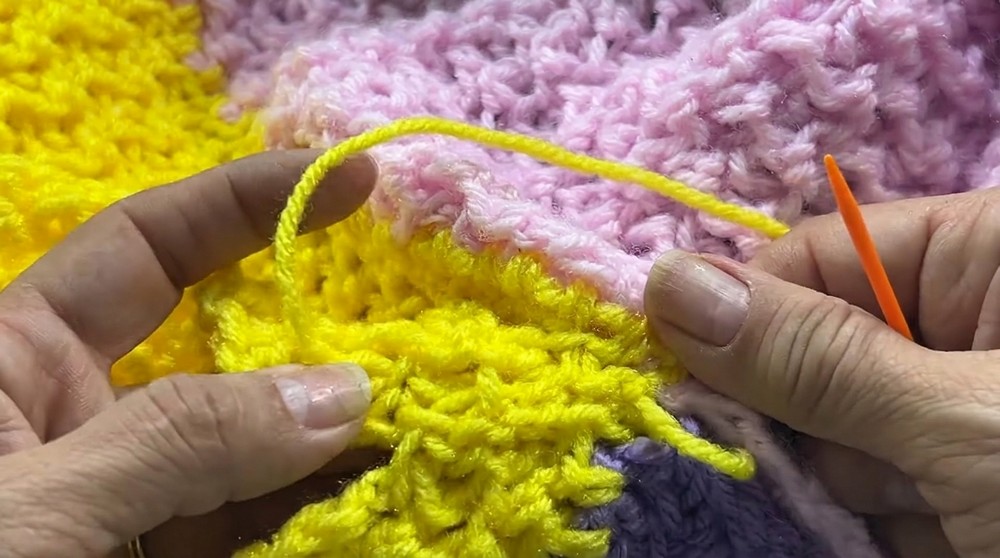
- Securely sew the sleeves into the armhole opening.
- Sew Side Seams:
- Fold the garment in half (front panels over the back panel).
- Sew from the bottom of the sweater up the side seam to the sleeve edge.
Step 5: Cuffs, Waistband, and Neckline
- Cuffs:
- Foundation Chain: Chain 10 for the cuff width.
- Work rows of textured stitch until the strip matches the sleeve opening.
- Use a tapestry needle to sew the cuff strip to the edge of the sleeve.
- Waistband:
- Use the same process as the cuffs and create a strip to fit the bottom hem of the sweater.
- Sew it securely to the bottom edge using a tapestry needle.
- Neckline:
- Measure the neckline opening and make a chain-based strip using 10 chains for the width.
- Work textured rows to cover the entire neckline edge.
- Sew the strip around the neckline for a clean, finished look.
Step 6: Add Buttons and Buttonholes
- Button Placement:
- Mark 3 equidistant points on the front panel edge for the buttons.
- Example: If the front edge is 25 inches, mark button positions at 3″, 12″, and 20″.
- Creating Buttonholes:
- On the row where buttonholes are needed, replace 2-3 stitches with chains.
- Example: If the button is larger, skip 3 stitches and chain 3 in their place.
- Sew on the Buttons:
- Align buttons with the buttonhole row on the opposite panel and sew them securely.
- Align buttons with the buttonhole row on the opposite panel and sew them securely.
Customization Ideas
- Color Blocking:
- Create stripes or blocks of color by alternating yarn every few rows.
- Length Adjustments:
- Extend or shorten sweater length, sleeve length, or cuff width.
- Add Texture:
- Edge the hem, neckline, or cuffs with decorative crochet stitches (e.g., picot edging).
Tips for Success
- Always use stitch markers to keep track of the edges of your rows, especially when working the neckline shape.
- Ensure consistent tension for smooth seams.
- Always double-check the placement of your buttons and buttonholes to avoid misalignment.
Conclusion
This colorful sweater, crafted with your leftover yarns, features a reversible texture and striking patterns. The use of the textured stitch, color combinations, and practical assembly methods offer an opportunity to crochet a garment tailored perfectly to your size and style.