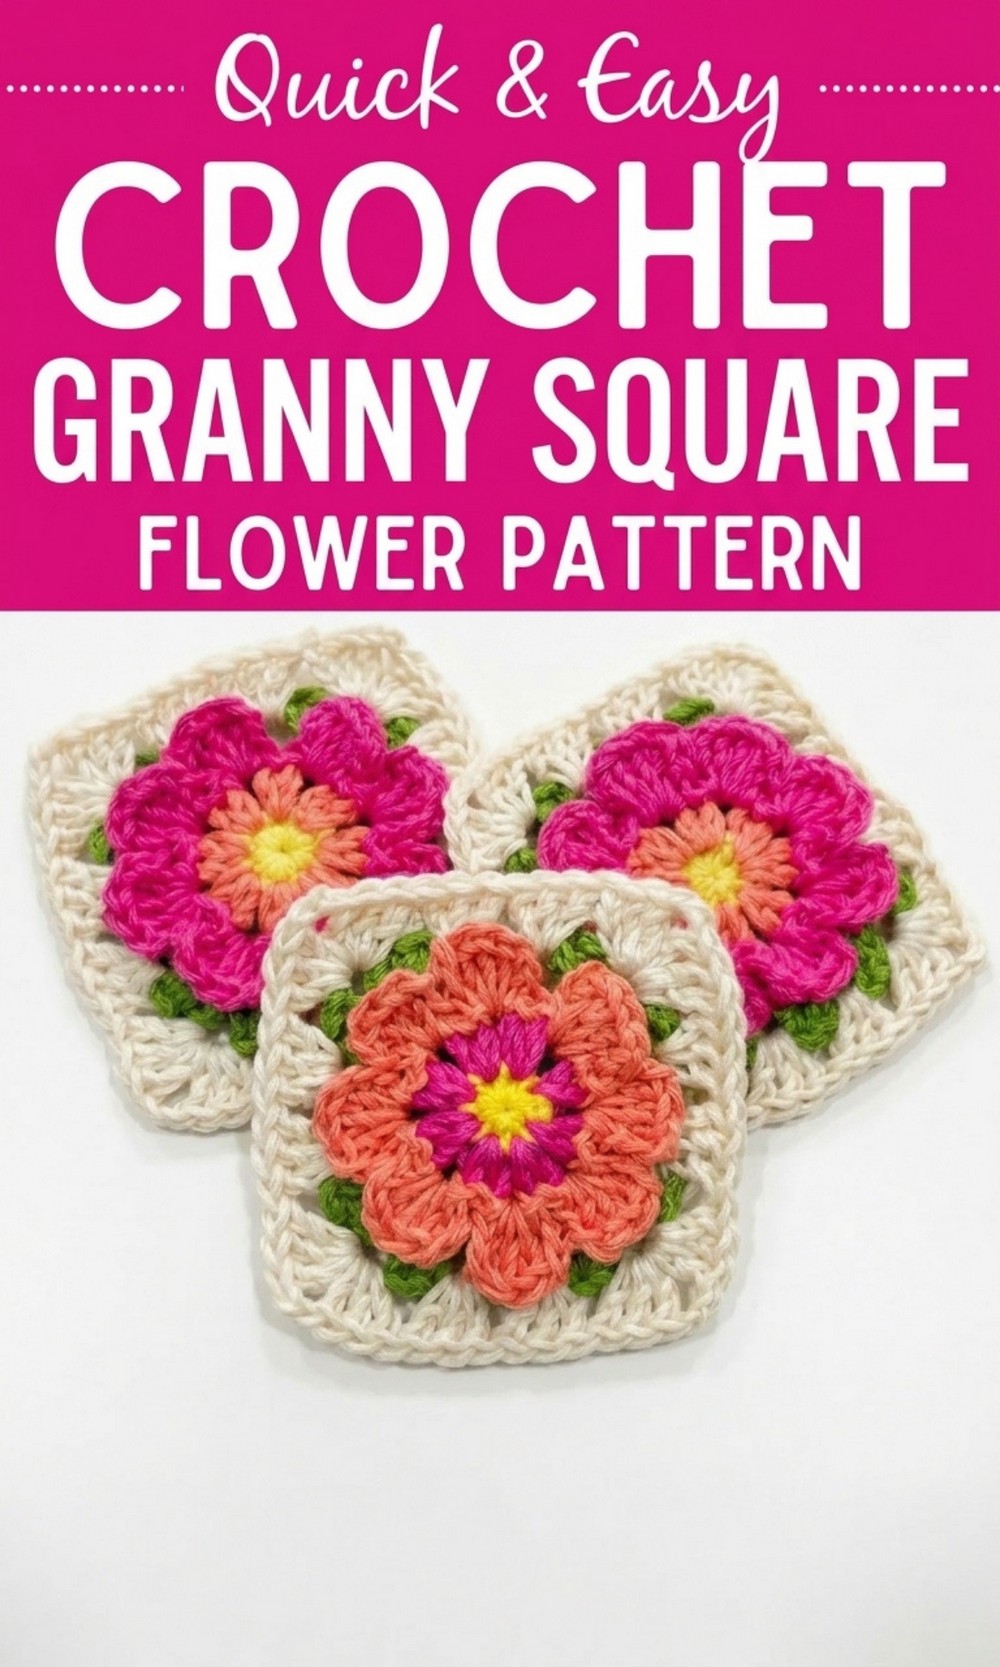
Turn colorful yarn into gorgeous Crochet granny square flower using this free pattern that is perfect for bringing your creative ideas to life.
Your Ultimate Guide to Free Crochet Granny Square Flower
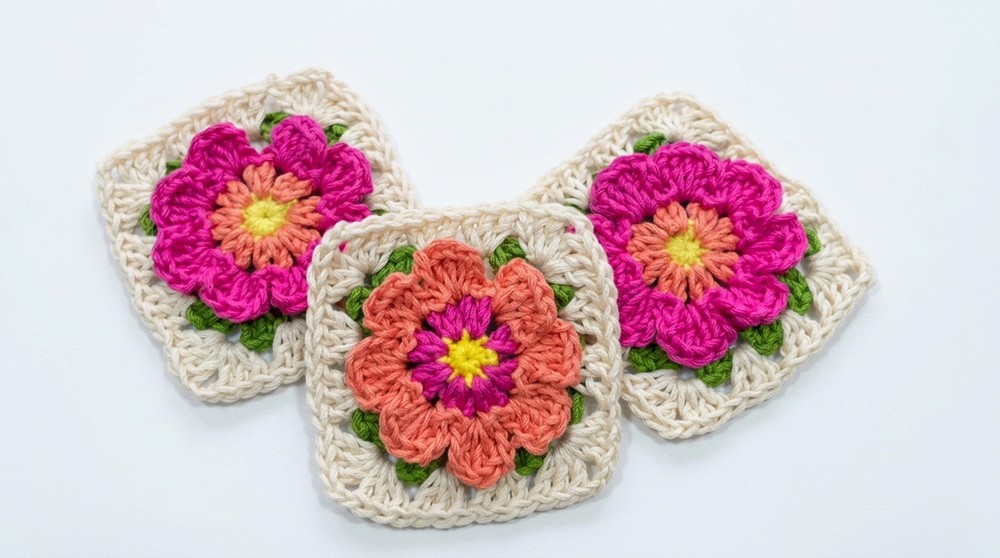
Crocheting a granny square with a raised flower design is a fun and creative way to brighten up your projects. This Free Crochet Granny Square Flower Pattern is simple to follow and perfect for all skill levels. The centerpiece of this pattern is a beautiful flower that pops out in a raised, 3D design, adding charm and elegance. Each square is colorful, soft, and eye catching, making it a wonderful addition to any handmade project.
You can use these delightful floral granny squares to craft many things, like cozy blankets, stylish cushion covers, tote bags, or even wall hangings to decorate your home. The combination of vibrant colors and a textured flower makes this pattern special and unique. 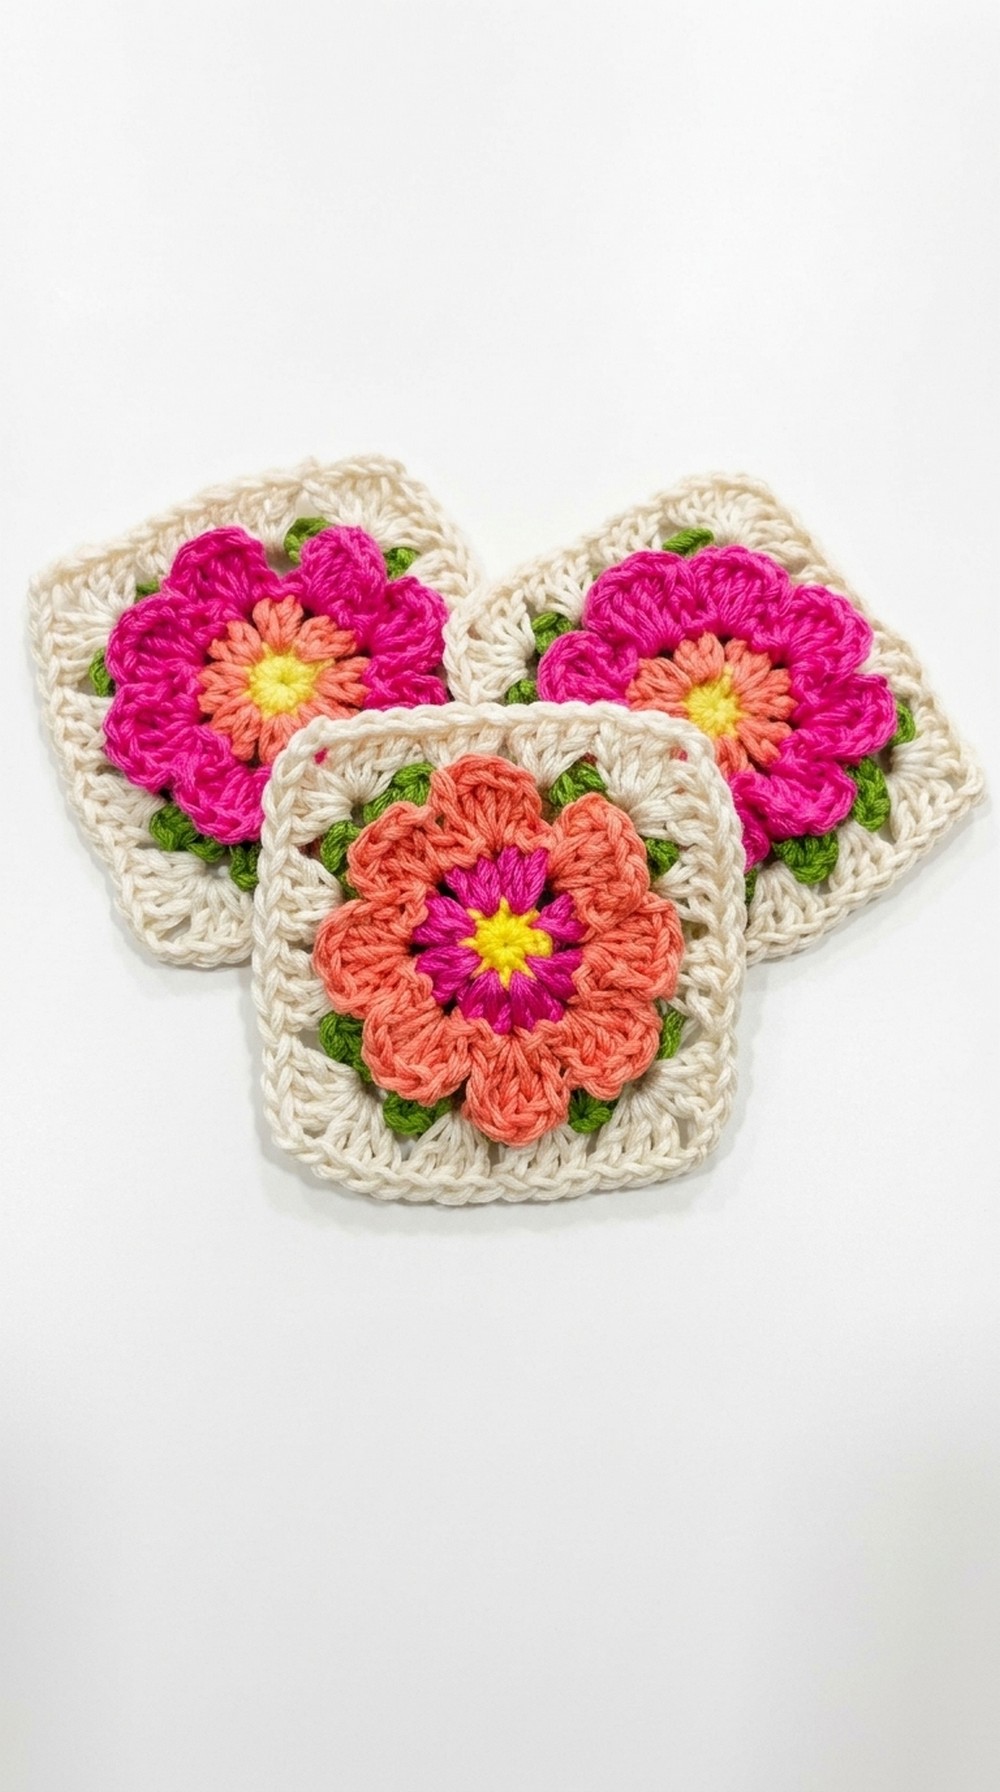 This pattern is not just a crochet project—it’s a way to bring your creativity to life. Gather your favorite colors of yarn, pick up your crochet hook, and start making these amazing floral designs today.
Colorful Crochet Granny Square Flower Pattern
Materials Needed
- Cotton yarn with approximately 2 mm thickness in five different colors (yellow for the center, pink for the base, a color of choice for the petals, green for the leaves, and another color for the border).
- Crochet hook — size 3.5 mm.
- Scissors.
- Yarn needle for weaving in ends.
Special Techniques
- Magic Ring: Used to start the centerpiece of the flower.
- Slip Stitch (SS): To close rounds.
- Chains (CH): Used to create spaces and start rows.
- Single Crochet (SC): Used for creating the base round.
- Double Crochet (DC): Used for clusters and petals.
Pattern Instructions
Round 1: Center of the Flower
- Use the yellow yarn to form a magic ring.
- Work 1 chain (CH) into the magic ring.
- Inside the ring, make 8 single crochets (SC).
- Pull the tail of the magic ring tightly to close the circle.
- Complete the round by making a slip stitch (SS) into the first single crochet (SC).
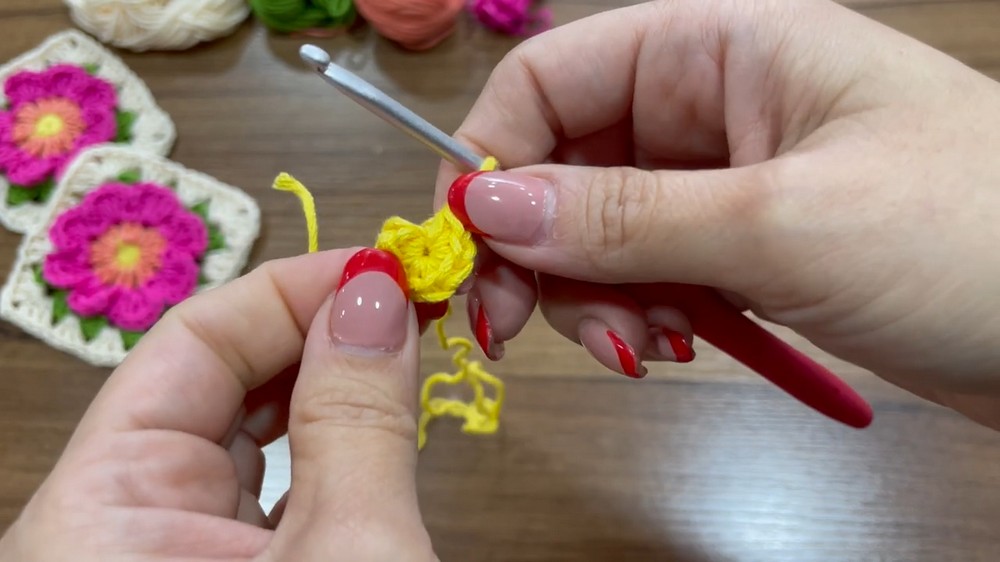
- Cut the yellow yarn, pull through, and secure the ring tightly. Make a knot at the back to prevent loosening.
Round 2: Base for Flower in Pink
- Attach pink yarn into any single crochet stitch from Round 1.
- Start by chaining 3 CH (counts as the first double crochet, DC).
- Make another double crochet (DC) in the same stitch — forming two DC stitches in one space.
- Chain 1.
- Move to the next stitch and make two DC stitches in the same space.
- Repeat the sequence (Chain 1, 2 DC) across all 8 stitches.
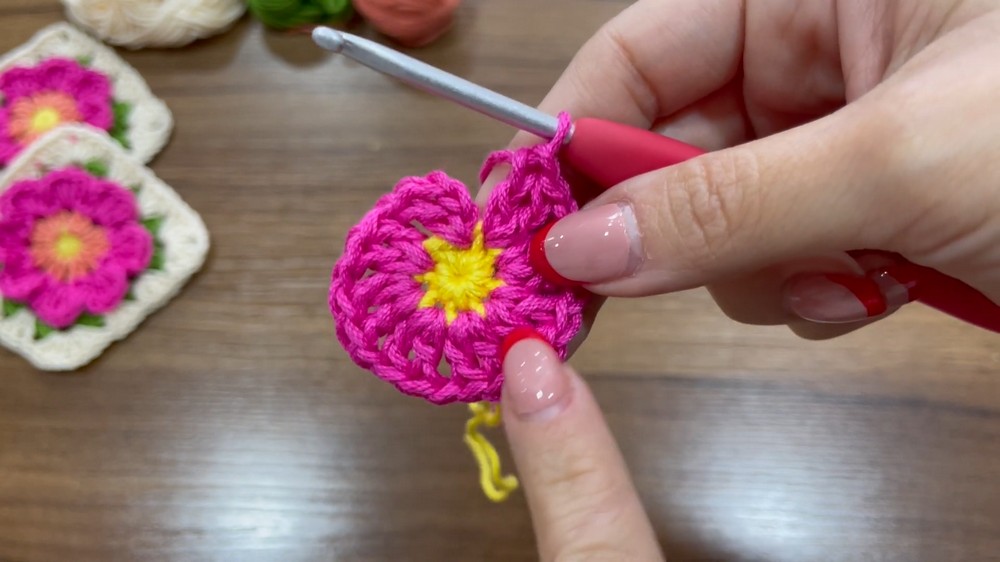
- Close the round by making a slip stitch (SS) into the third chain of the starting CH 3.
- Cut the yarn and pull through to secure.
Round 3: Crochet Petals
- Use a color of your choice for the petals. Attach the yarn to any chain 1 space from Round 2.
- Begin with 3 CH.
- Inside the same chain 1 space, make 3 DC, followed by 3 CH, and complete the petal with a slip stitch (SS) into the same space.
- Skip to the next chain 1 space and make a slip stitch (SS).
- Repeat the sequence (3 CH, 3 DC, 3 CH, SS) in every chain 1 space across the round — forming a total of 8 petals.
- Finish the round with a slip stitch in the first CH 1 space. Cut the yarn and secure.
Round 4: Backing for Petals
- Use the same color as the petals. Work from the back of the flower.
- Attach the yarn behind a petal, inserting the hook into the stitch behind the slip stitch from Round 2.
- Chain 3.
- Work a slip stitch (SS) in the next stitch behind the petal. Repeat the sequence (Chain 3, SS) around all petals.
- You should have 8 chain 3 spaces formed behind the petals at the end of the round.
- Complete by slip stitching into the first chain. Cut the yarn and secure.
Round 5: Leaves
- Attach green yarn into any chain 3 space formed in Round 4.
- Begin in the first chain 3 space by making 3 DC.
- Chain 2 and make 3 more DC into the same space to create the first corner.
- Move to the next chain 3 space and make 3 DC only — these are regular sides.
- Alternate between corners (3 DC, 2 CH, 3 DC) and sides (3 DC) for all chain 3 spaces.
- Slip stitch into the starting chain. Cut and secure.
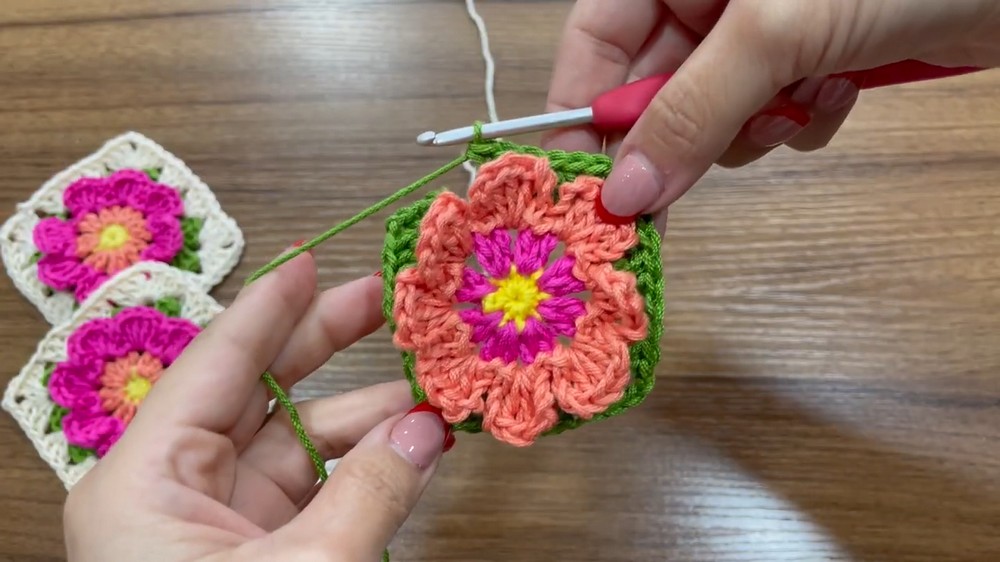
Round 6: Final Border
- Attach your chosen border color to any corner space (chain 2 space) from Round 5.
- In the corner space, work 3 DC, 2 CH, 3 DC to create the corner.
- Move to the next space (between two groups of 3 DCs) and make 3 DC — these are regular sides.
- Repeat the pattern (corner: 3 DC, 2 CH, 3 DC; sides: 3 DC) across all spaces.
- Slip stitch to the beginning chain to close the round. Cut the yarn and secure.
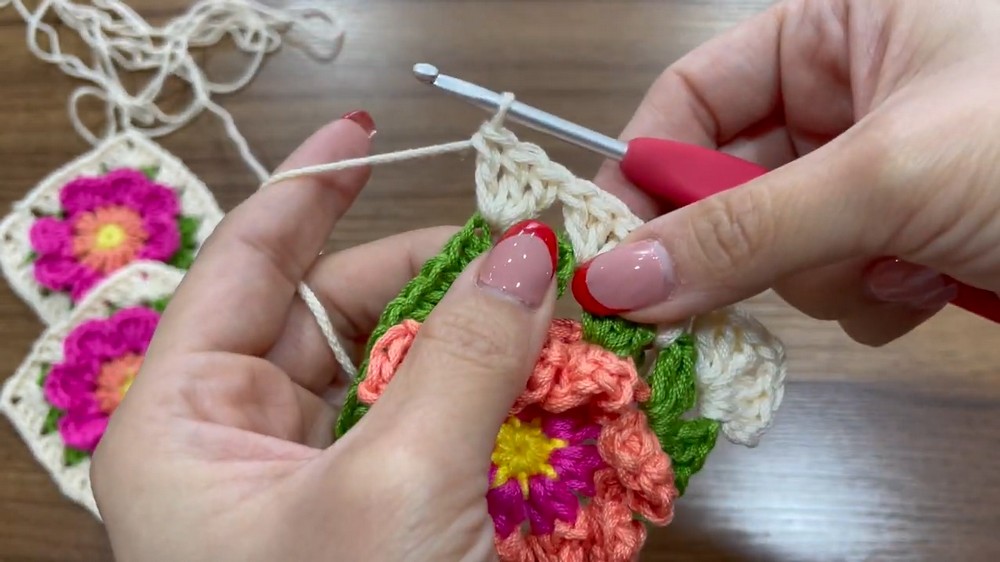
Finishing the Granny Square
- Use a yarn needle to weave in all the loose ends neatly.
- Block the granny square if necessary to flatten and align the stitches.
Final Words
This vibrant granny square with its raised flower design brings dimension and elegance to your crochet projects. Use it to replace traditional granny squares in bags, blankets, cushions, or other craft projects for a unique style.
Tips for Maintaining the Pattern
- Proper Tension: Keep your tension uniform for consistent stitches.
- Color Changes: Always join and weave new yarn at the back of the work neatly.
- Blocking: To maintain its shape, gently block your granny square using a damp cloth or pin it down evenly while drying.
- Experimentation: Customize colors to match your project theme or use gradient yarn for a unique look.