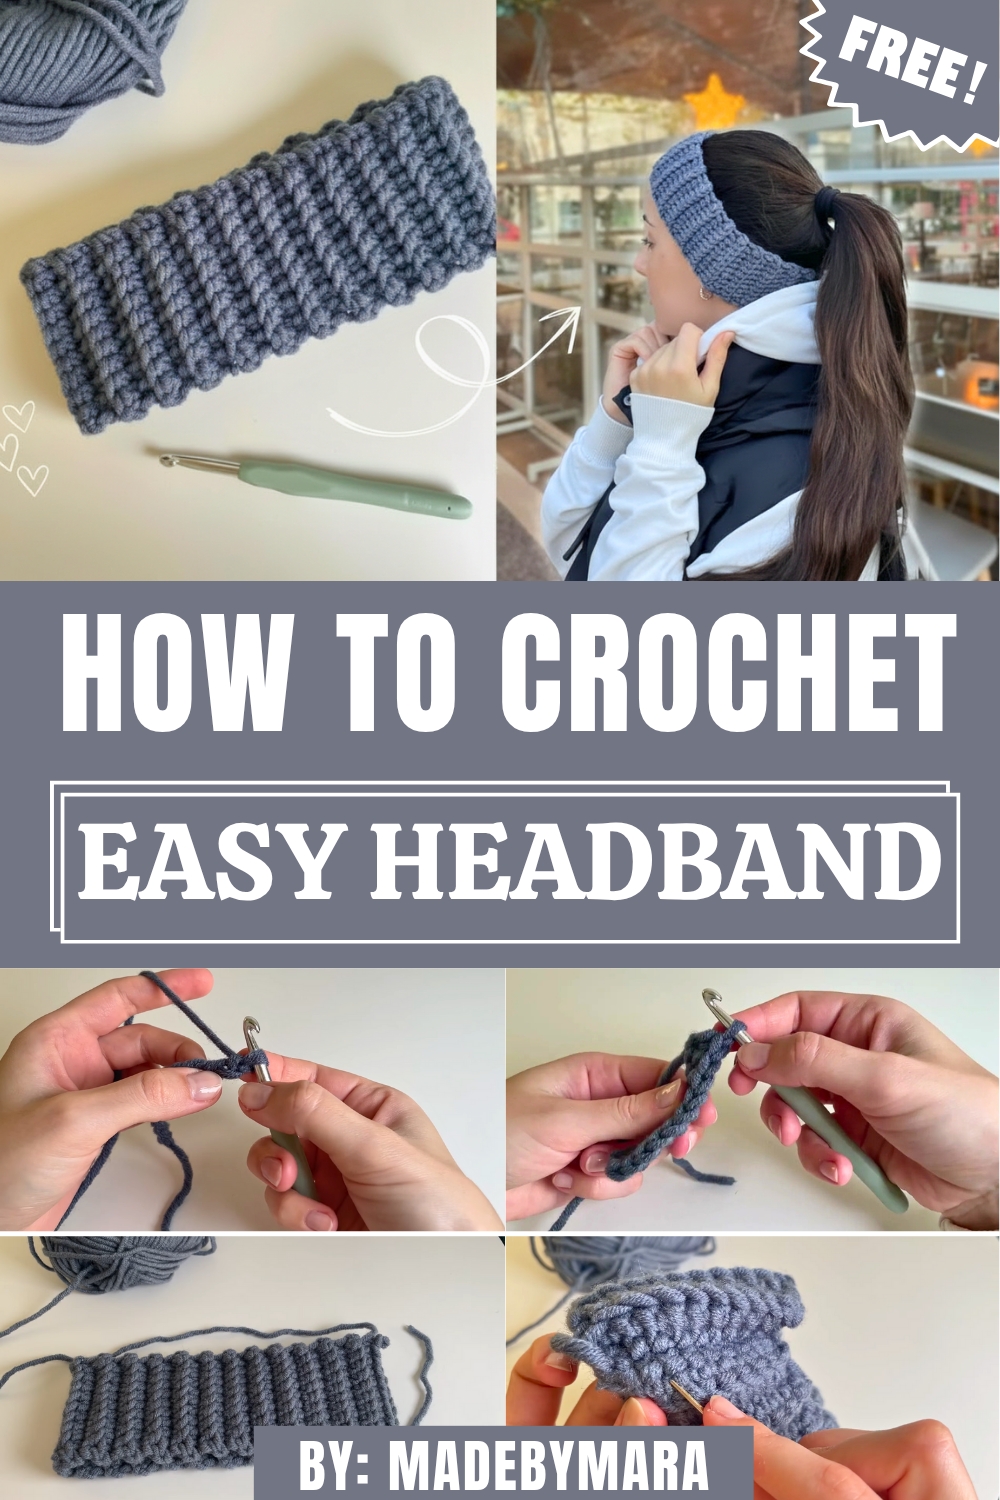
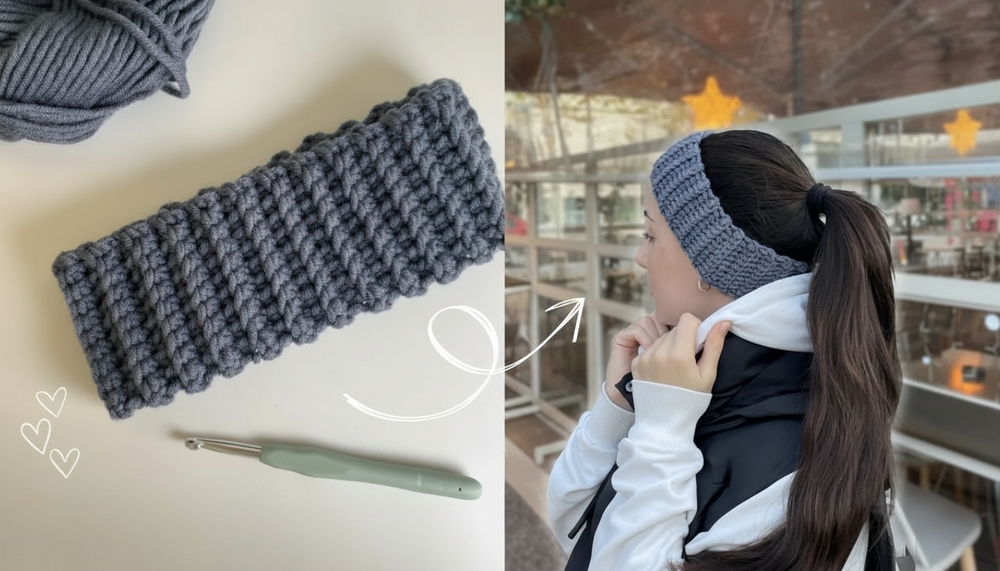
Stay stylish and cozy with the Free Crochet Headband Pattern, a trendy handmade accessory that adds warmth, texture, and charm to any outfit.
On a chilly morning, there’s nothing quite like slipping on an accessory that feels both cozy and stylish. This crochet headband offers just that, a practical solution to keep your hair tidy while adding a subtle touch of elegance to your outfit. Easy to make and beginner-friendly, it uses basic materials including bulky yarn, a size six crochet hook, scissors, and a yarn needle. Its textured ridged appearance, achieved by working stitches into the back loop only, lends a unique finish that stands out without being overly intricate.
How To Crochet Headband Pattern Adds Personality to Your Look
The lightweight, portable nature of this project makes it not only a quick creative outlet but also perfect for crocheting on the go. Easy to make and beginner-friendly, it uses basic materials including bulky yarn, a size six crochet hook, scissors, and a yarn needle.
Adjust the width and length to match your preferred fit, ensuring it sits snugly on your head. The headband’s measured dimensions in the tutorial—approximately 21 centimeters long and 7.5-8 centimeters wide—can serve as a helpful reference.
Whether you’re heading out for errands or styling up for a casual day, its versatility and durability make it a great option.
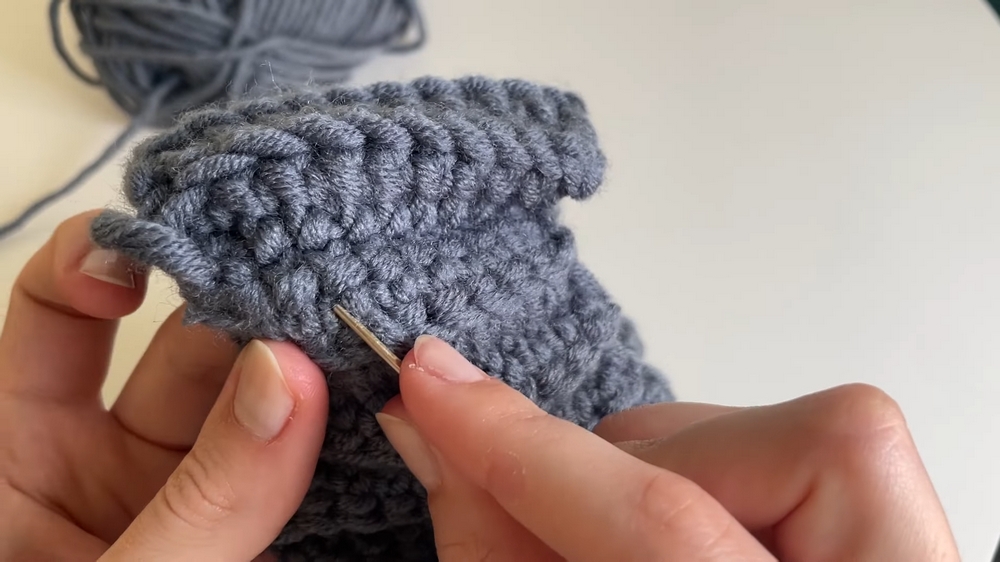
Seamless slip stitches bring the two edges together for a polished finish, while woven-in tails keep it neat and secure. With every stitch handled intentionally, this headband becomes more than just an accessory; it’s a functional yet fashionable piece you’ll want to use every day.
Crochet Headband Pattern
Materials Needed
The materials for this project are straightforward and beginner-friendly. You’ll need:
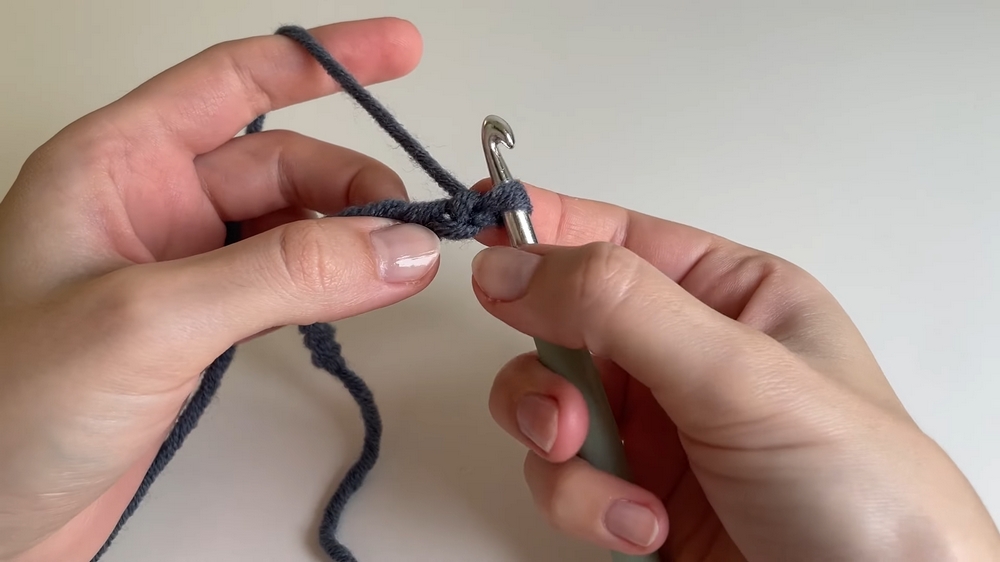
- Yarn of your choice: The tutor uses bulky yarn (size 5) for a textured look.
- Crochet hook: A size 6 hook is recommended for this yarn type.
- Pair of scissors
- Yarn needle
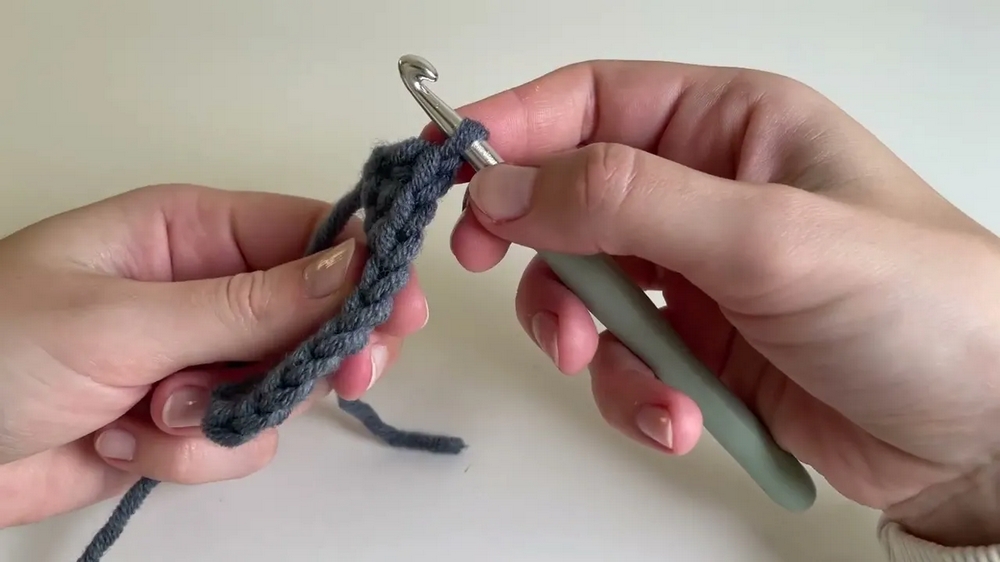
Step-by-Step Instructions
Crocheting a headband is a fast and rewarding project perfect for beginners and seasoned crocheters alike. This tutorial walks you through the step-by-step process of creating a simple and stylish crochet headband using basic stitches. You’ll love how versatile and functional this accessory is for everyday use or gifting. Let’s dive into the process!
Special Features
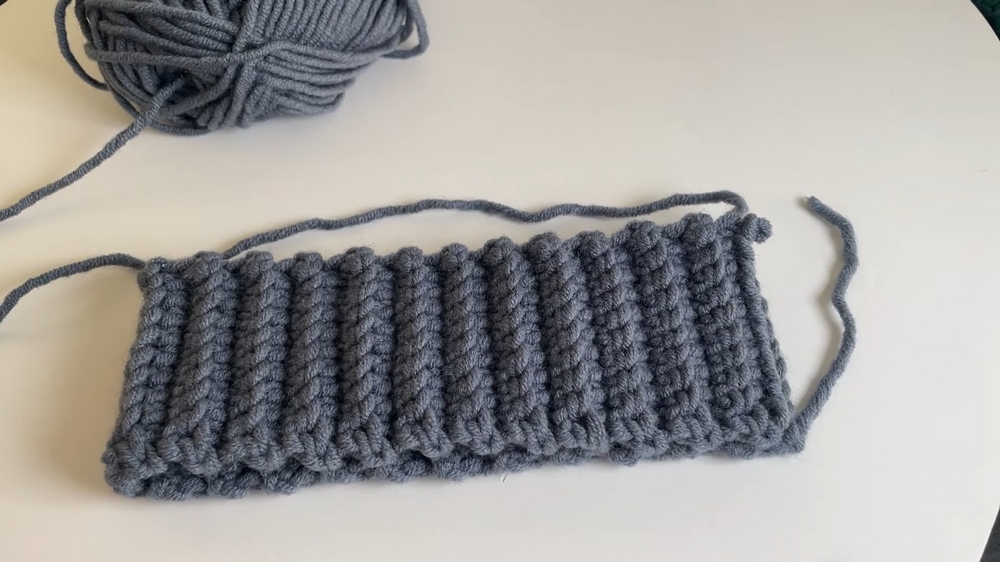
- The headband has a ridged texture created by working in the back loops only, adding a visual and tactile appeal.
- This accessory is customizable—adjust the width and length to suit your preferences or yarn thickness.
- The project is lightweight and easily portable, making it ideal for learning or quick crafting.
Level of Difficulty
- Beginner-friendly: Only basic stitches, such as chaining and single crochet, are used.
- Techniques remain simple, but beginners should pay attention to back-loop-only stitching and edge stitches for accuracy.
Tutor’s Suggestions
- Ensure the headband fits snugly around your head, as yarn tends to stretch slightly during wear.
- Always count stitches at the end of each row (10 stitches) to double-check consistency.
- Use measurements similar to the tutor’s (21 cm length) for reference, but adjust for your head size.
Uses of the Headband
- It’s a stylish accessory to keep hair in place.
- Perfect for casual wear, outdoor activities, or gifting.
- You can customize it by using different yarn colors and textures.
Tip
When weaving in the loose ends, skip the very last stitch to prevent the piece from unraveling over time. Always work on the back side of the headband while hiding the yarn ends for a polished appearance.
Conclusion
This crochet headband project is an enjoyable way to enhance your skills while creating something practical and beautiful. With just yarn, a hook, and a bit of patience, you’ll create a versatile accessory that fits your personal style—and a sense of accomplishment alongside it!