
Give bird lovers a thoughtful handmade surprise with this Crochet Parrot Keychain Free Pattern that is perfect as a charming keyring or bag charm.
Bright, colorful, and full of personality, this tiny tropical bird keychain adds a cheerful touch to your everyday items. The Crochet Parrot Keychain from the channel Любовь Вязание offers a warm and simple way to bring this lively accessory to life. I was instantly drawn to the parrot’s vivid hues and playful design.
Cute Crochet Parrot Keychain Free Pattern For Bird Lovers
This keychain is a small, charming piece that easily attaches to keys, backpacks, or purses. Its vibrant greens, yellows, and coral shades give it a joyful appearance that stands out. The delicate wings and thoughtful details add a delightful character that brightens any space or item it decorates. It’s an easy way to add a splash of personality wherever you use it.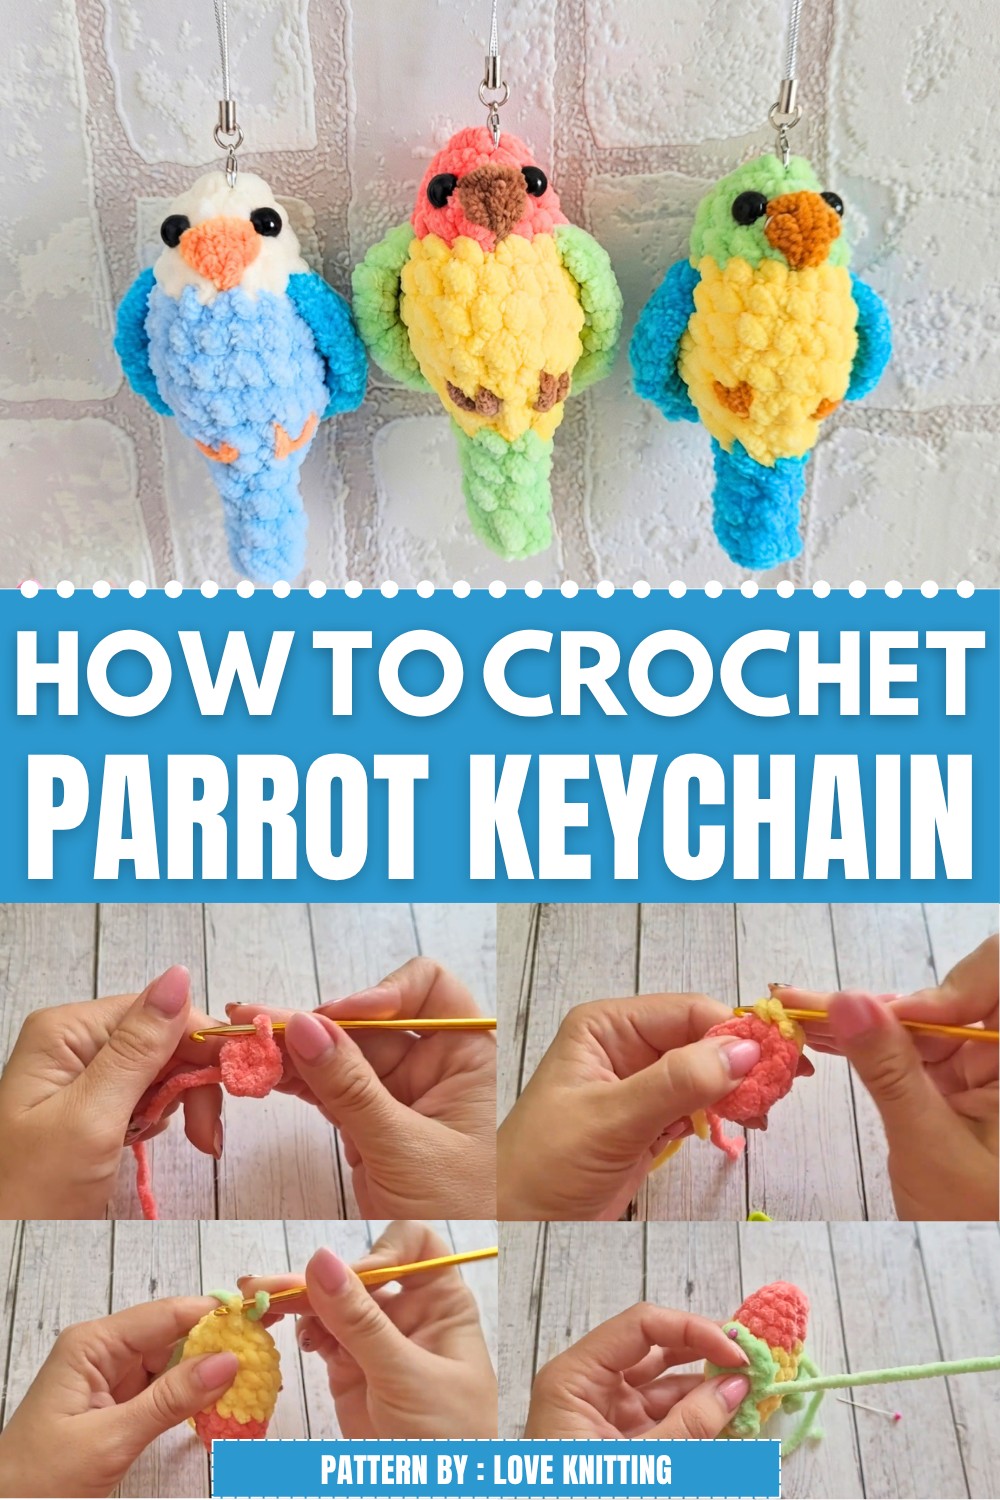
One of the best qualities is how well this parrot works as a gift. The size and style make it a sweet, meaningful present for friends, family members, or coworkers. Whether for a simple surprise or a special occasion, this keychain offers a warm and personal touch that’s hard to find in typical store-bought items.
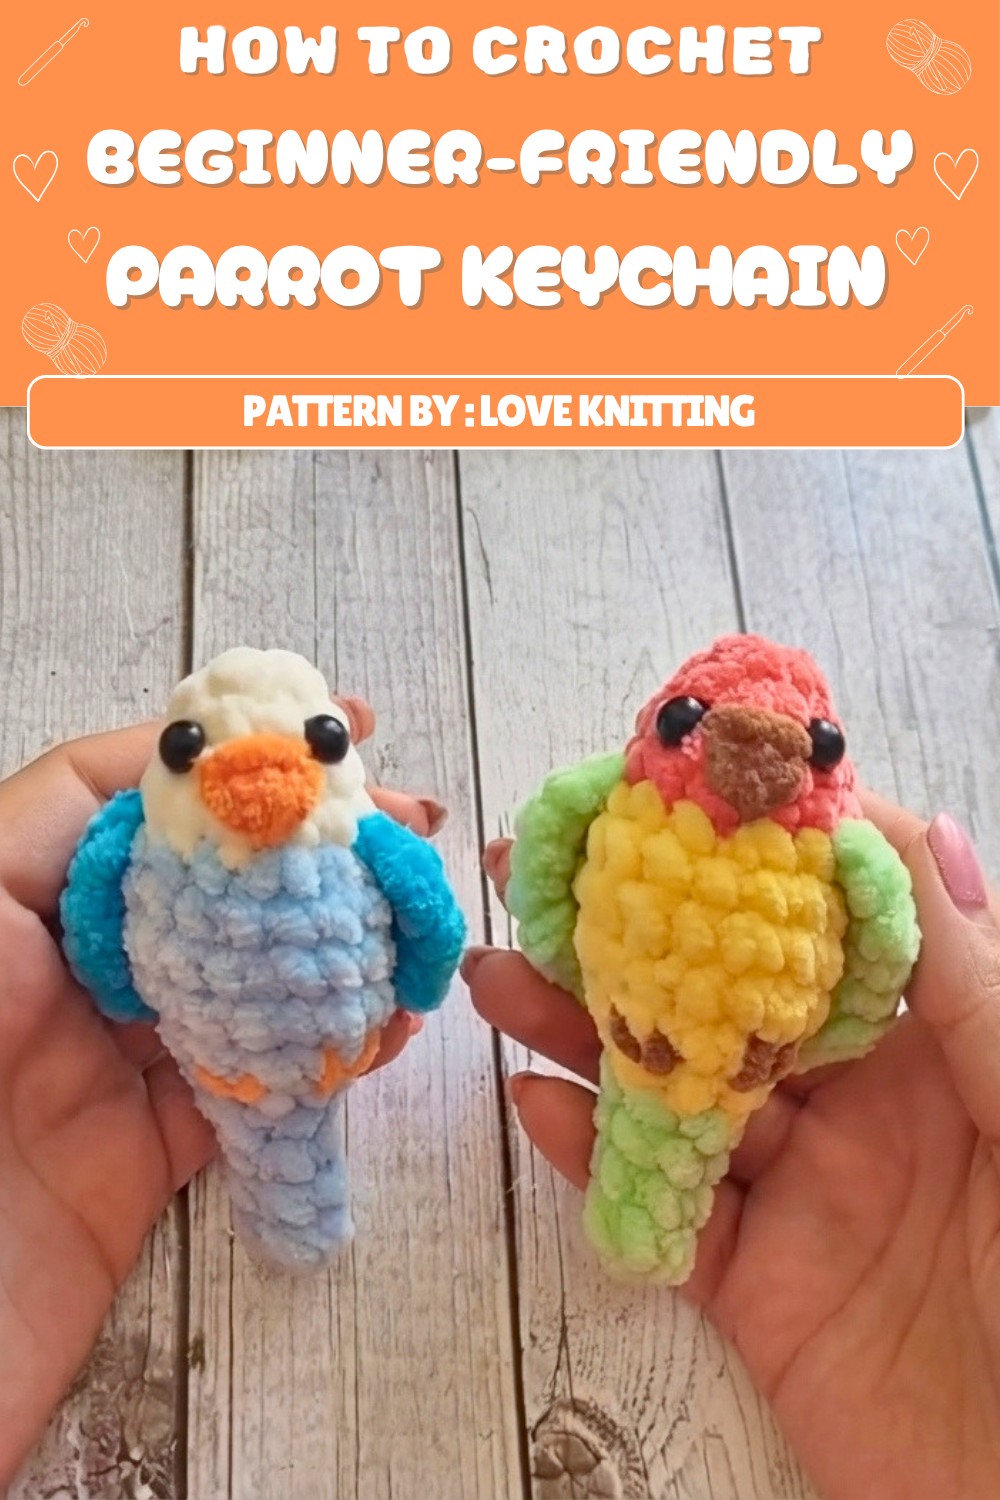 With its cheerful looks and versatile uses, the Crochet Parrot Keychain is both fun and handy. For a cozy little project and a heartfelt gift idea, take a moment to check out the free pattern on the channel Любовь Вязание and carry a bit of tropical charm with you.
Plush Mini Parrot Amigurumi Pattern
The plush mini parrot is a quick, charming, and colorful amigurumi project. This design features a seamless construction from head to tail, finished with sewn wings, an embroidered beak, glued eyes, and optional embroidered feet. It is perfect for keychains, bag charms, or as a delightful desk companion. The small stature makes this pattern ideal for rapid, multiple creations or for using up plush yarn scraps.
Pattern Basic Points
- Worked in Continuous Rounds: The entire parrot body (head, torso, and tail) is crocheted in a single piece in the round for seamless color transitions and a smooth finish.
- Strategic Increases and Decreases: Shaping is achieved through simple increase and decrease rounds, aiding in creating recognizable head, belly, back, and tail curves.
- Color Changes for Realism: Carefully timed color changes (coral to yellow to green) add a lifelike gradient reminiscent of real parrots.
- Separate, Simple Wings: Wings are crocheted independently and stitched to the body for a three-dimensional effect.
- Minimal Detailing: Eyes are glued on, and beak and paws are embroidered, making assembly quick and giving an adorable hand-crafted style.
Special Notes
- Use plush, velvety or chenille yarn to achieve softness, structure, and visual appeal.
- When changing colors, finish the last stitch of the old color with the new yarn for a smooth transition.
- The parrot is worked in continuous rounds; a stitch marker is recommended to mark the beginning of each round.
- Do not overstuff the tail to preserve shape.
- Securely glue eyes and embroider details for a safe and durable finish, especially if intended for children.
- All yarn ends should be carefully woven inside the body for a polished look.
Skill Level
Beginner to Lower Intermediate.
Techniques required: magic ring, single crochet, increases, decreases, color change, sewing, embroidery.
Materials
- Plush yarn: 100g/120m skein, coral, yellow, and green
- Crochet hook: 4 mm
- Tapestry needle: for sewing and embroidery
- Scissors
- Fiberfill or stuffing
- Safety or craft eyes: approx. 7–8 mm (to be glued)
- Small amount of embroidery thread or thin yarn: orange for beak, brown for feet (optional)
- Stitch marker
Measurements / Sizing
- Total length (with tail): ~10 cm
- Height (excl. tail): ~5.5–6 cm
- Wingspan: each wing ~3.5–4 cm (from edge to edge)
Gauge
- Gauge is not critical. Stitches should be tight enough to prevent stuffing from showing.
- 9 sc around ≈ 2.5 cm diameter in plush yarn.
Stitch Abbreviations
- MR: Magic Ring
- sc: single crochet
- inc: increase (2 sc in one stitch)
- dec: decrease
- sl st: slip stitch
- ch: chain
- st(s): stitch(es)
Special Stitches
- Invisible Decrease (for amigurumi): Insert hook through front loops only of next two stitches, yarn over, pull through both loops, yarn over, pull through two loops on hook.
Pattern Instructions
MAIN BODY (Head to Tail, Worked in One Piece)
With coral yarn (head):
Round 1:
- MR, 3 sc into ring (3)
Round 2:
- 1 sc, inc x 3 – (sc in next st, 2 sc in next st), repeat 3 times (6)
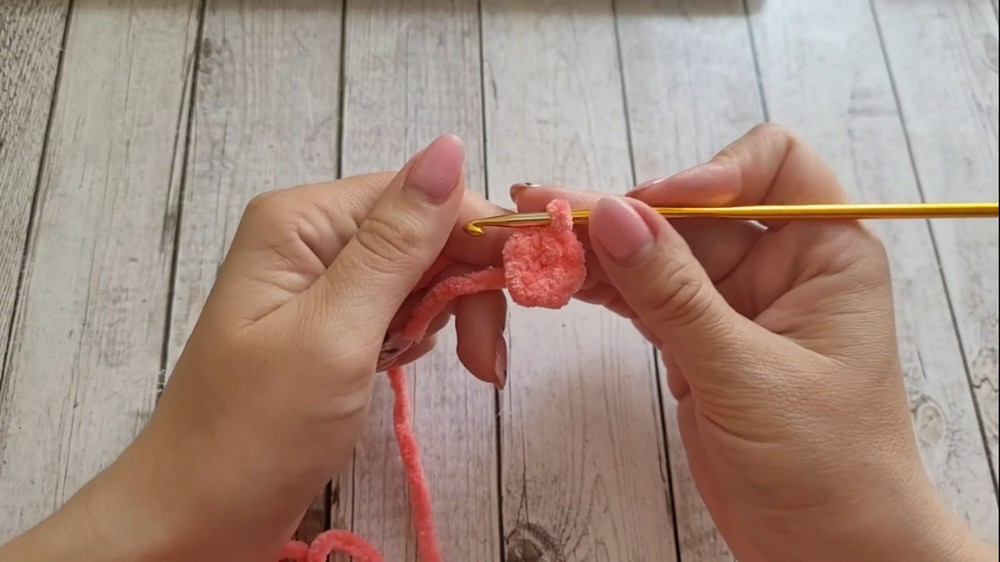
- (1 sc, inc) x 3
Round 3:
- 2 sc, inc x 3 – (2 sc, 2 sc in next st) x 3 (9)
- [Place marker at beginning of round]
Round 4:
- 3 sc, inc x 3 – (3 sc, 2 sc in next st) x 3 (12)
Round 5:
- Change to yellow at final st of round: 4 sc, inc x 3 – (4 sc, 2 sc in next st) x 3 (15)
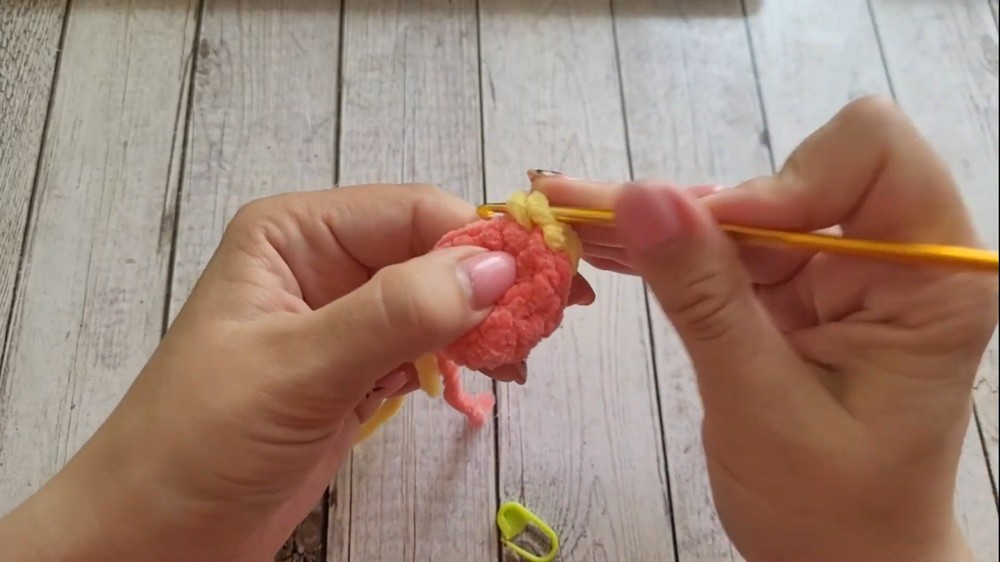
- Tie off previous color’s tails with a couple knots inside.
Round 6:
- Sc in each st around (15)
Round 7:
- 4 sc, inc x 3 (18)
(4 sc, 2 sc in next st, repeat)
Round 8:
- 4 sc, dec x 3 – (4 sc, dec, repeat)
- After each set of 4 sc: decrease the next two stitches. Repeat 3 times.
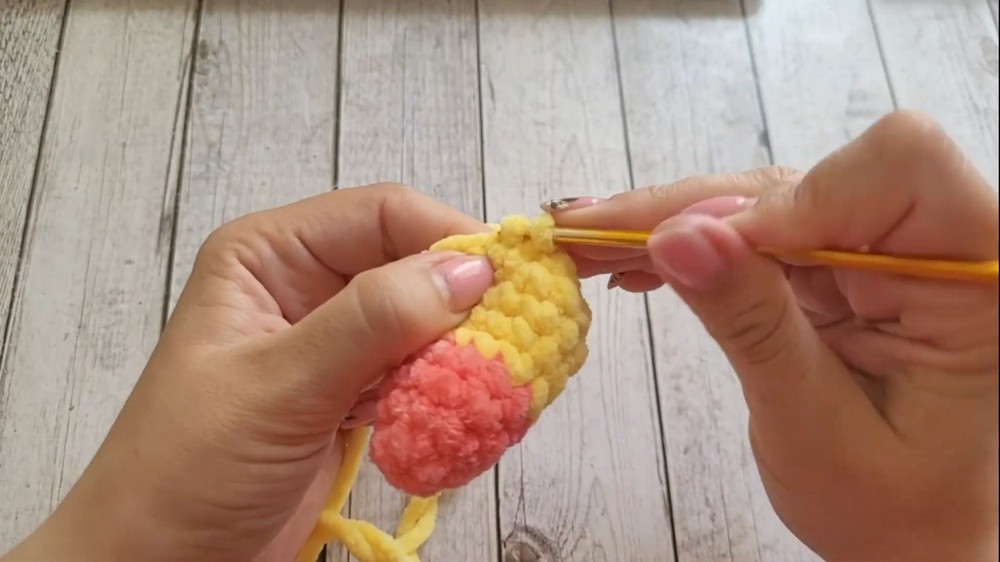
- (15)
- Note: Where decreases are made, the belly forms.
- Additional shaping: After first 4 sc, (dec, 2 sc) x 2
- End with 4 sc at end of round.
Round 9:
- 2 sc, dec x 3, 2 sc (11)
- (2 sc, dec) three times, finish with 2 sc
Round 10:
- 3 sc, dec x2, 3 sc (9)
Stuff the head and body at this stage, being sure to shape the belly area. Finish stuffing before the tail narrows.
Change to green at end of final yellow round:
Round 11:
- (1 sc, dec) x 3 (6)
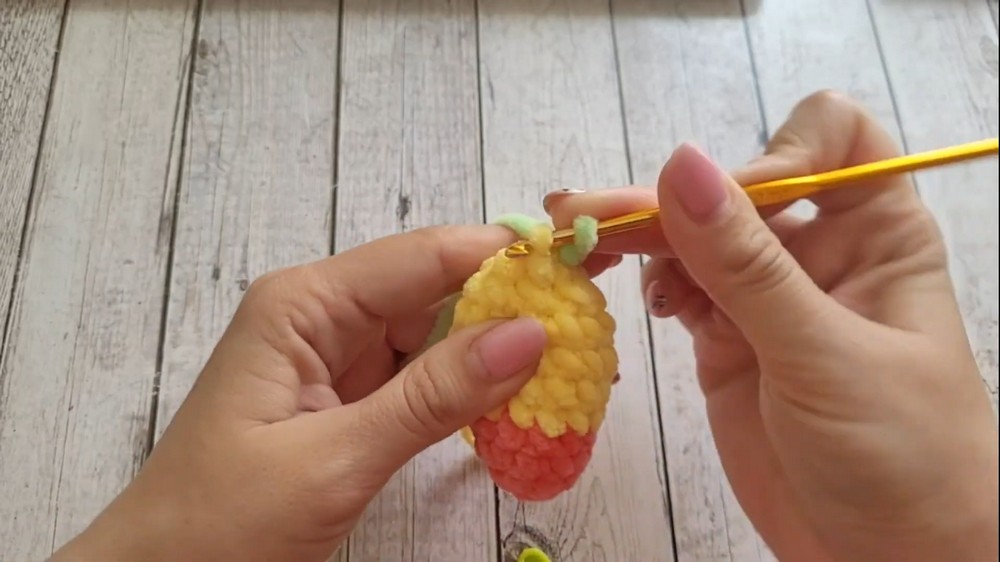
- (1 sc, dec) three times
Rounds 12–14 (tail):
- Sc in each st around (6) for 3 rounds
- Minimal stuffing in first round of tail; leave last 2 rounds unstuffed.
Round 15 (Finish):
- Sl st in next st, fasten off, leave long yarn tail.
- With a tapestry needle, weave through the front loops of remaining sts, pull tight to close, and bring yarn out the side to trim. Hide leftover tails inside the body as needed.
WINGS (Make 2; Green Yarn)
- MR, ch 2, work 4 sc into ring. Tighten loosely.
- In each st: inc (2 sc in each st) around (8).
- Make 2 ch, turn work.
- Sl st in next 3 sts (to shape tip), cut yarn leaving a long tail for sewing.
ASSEMBLY & FINISHING
- Pin wings to body symmetrically on each side, just behind the head and along the upper body.
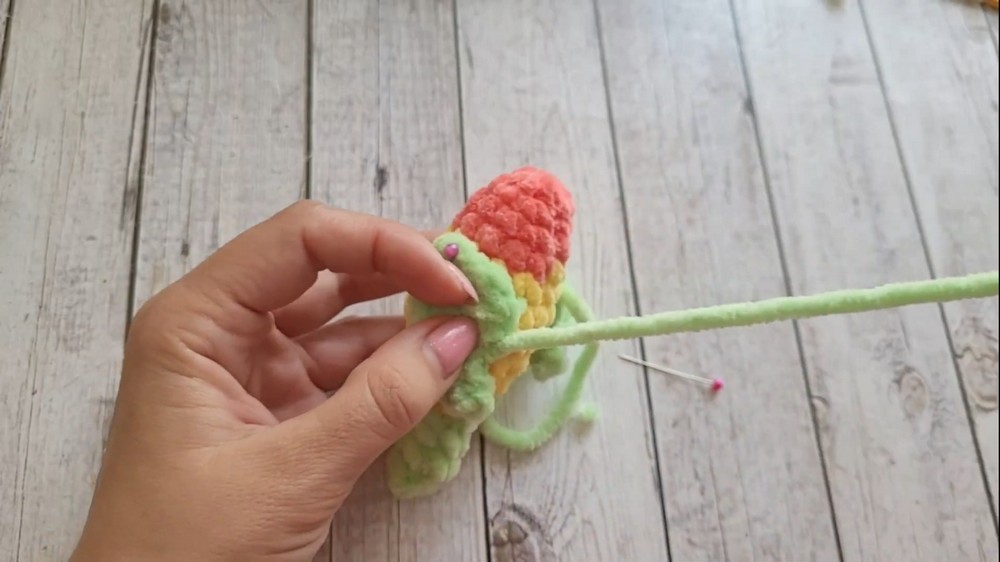
- Sew on carefully with matching yarn, anchoring at the base and top.
- Hide ends inside body.
Embroider Beak (Orange or Yellow Yarn):
- Mark beak between the eyes, slightly below the “face”.
- Using embroidery or tapestry needle, make a small triangular shape (two diagonals, fill with horizontal or vertical stitches).
- Tie off ends and hide inside.
Glue Eyes:
- Attach 7–8 mm craft or safety eyes above the beak, with glue if not using safety eyes.
Embroider Feet (Optional):
- Stitch two small triangles at the base (belly side) using brown or dark orange yarn for claws.
Finished Size
- Parrot is approx. 10 cm from head to tip of tail.
- Each wing spans approx. 3.5–4 cm; body width (excluding wings) is ~3–3.5 cm.
Conclusion
This plush parrot pattern is built for simplicity and speed, yielding small, bright, and expressive birds perfect for keychains, desk decor, or children’s toys. Color changes are minimal, details are easy, and no advanced shaping is required. Thoughtfully placed increases and decreases form lifelike curves. Minimal assembly and finishing foster creative variation and efficient batch-making—ideal for gifting, craft fairs, and playful decorations. All features are soft, sturdy, and secure when glued and stitched well, making the finished piece suitable for all ages and uses. This project highlights the fun of plush amigurumi with personality, color, and irresistible charm.
