Freshen your routine with this Free Crochet Circular Washcloth Pattern, perfect for gentle cleansing, daily use, and simple handmade care at home.
Lovely Crochet Circular Washcloth Pattern for Quick Projects

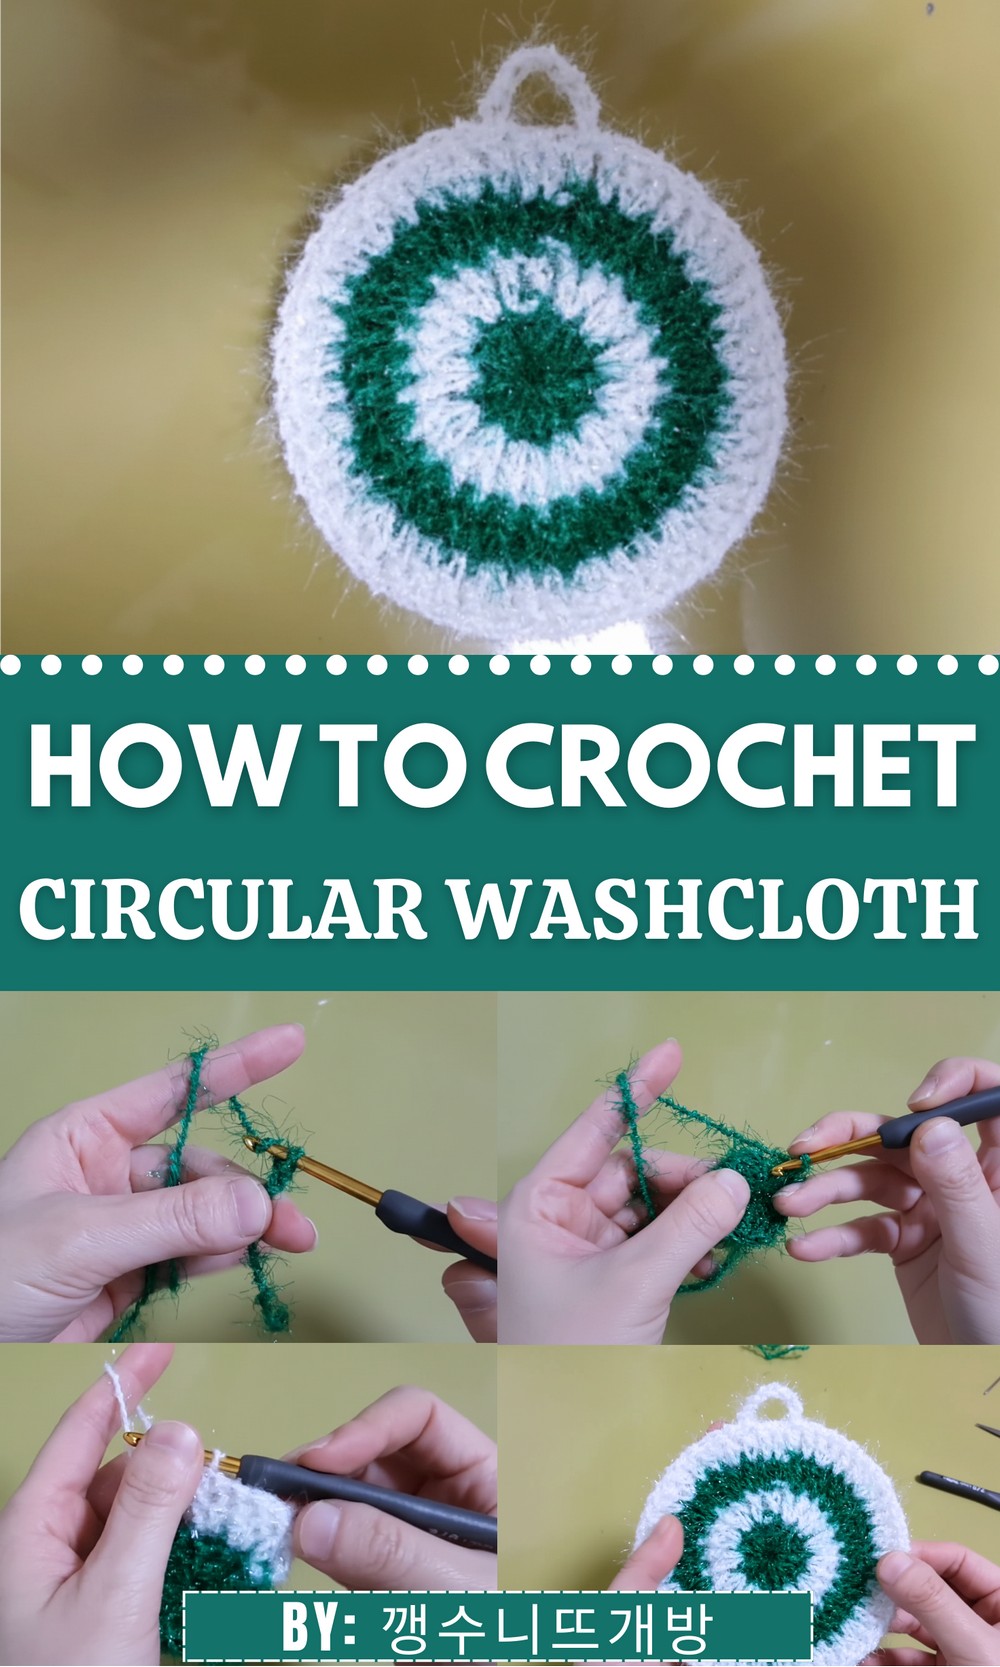
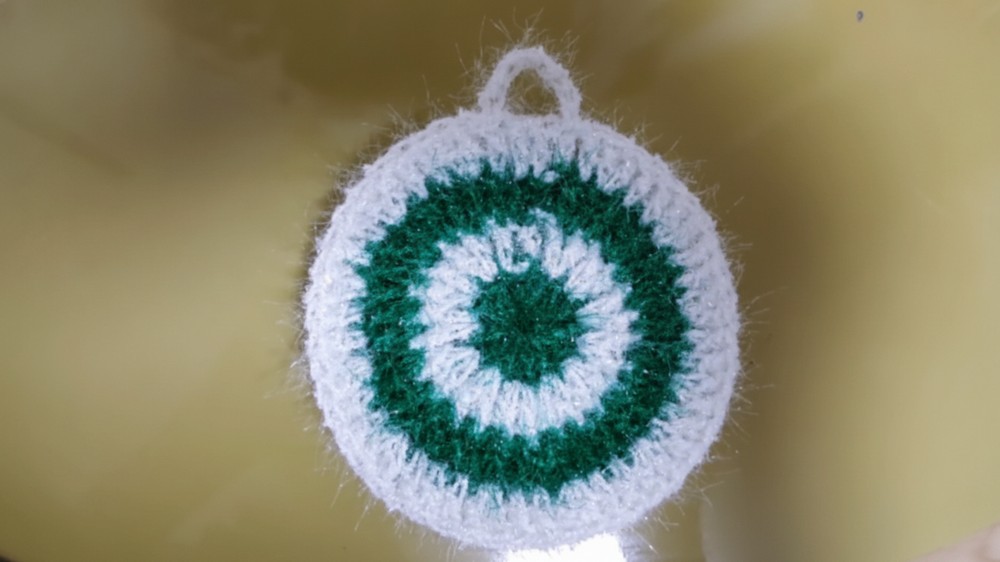
This round crochet creation looks cheerful and bright, adding a homemade and practical touch to your kitchen or bathroom items. Its perfectly circular shape makes it stand out from ordinary cloths, giving your space a bit of charm and personality.
It’s soft yet textured, it’s gentle on hands but effective at scrubbing dishes, washing up, or cleaning surfaces a balance of beauty and usefulness in one simple piece. The pattern helps you make a neat circular cloth that’s both attractive and easy to handle every day.
Making this washcloth by hand also brings several benefits. Working with cotton yarn creates a cloth that’s naturally absorbent and comfortable to use, and doing it yourself lets you pick colors and sizes that suit your style or match your home décor.
Crochet Circular Washcloth Pattern
Skill Level
- Intermediate
This pattern assumes a basic understanding of circular crochet, magic ring creation, and working with increases.
Materials
Yarn
- Dishcloth/Scouring Pad Yarn:
- Recommended types: Polypropylene, nylon, or polyester dishcloth yarn for durability and scrubbing properties.
- Thickness: Thin yarn often requires two strands held together for proper density.
Hook
- Hook Size: 6.0 mm (adjust based on yarn thickness).
Additional Supplies
- Scissors
- Tapestry Needle: For weaving in ends and securing stitches.
- Stitch Markers: Optional, to mark the beginning of each round for accuracy (especially for beginners).
Gauge
Gauge is not required for this project. However, for scouring pads with proper density:
- 10 stitches x 10 rows = ~5 cm x 5 cm (using 6.0 mm hook and two strands held together).
Finished Size
- Approximate diameter: 10–12 cm (can be adjusted by adding rounds for larger pads or stopping early for smaller sizes).
Key Abbreviations (US Terminology)
- ch: Chain
- sc: Single Crochet
- dc: Double Crochet
- sl st: Slip Stitch
- 2 sc in next st: Single crochet increase (two single crochets into the same stitch).
- magic ring: Adjustable loop to create a tight circle at the center of your work.
Special Notes
- Double Strand Usage:
- Use two strands of yarn held together to form a sturdy pad capable of effective scrubbing.
- Single-strand yarn can create a thinner pad, ideal for light cleaning or aesthetic purposes.
- Color Blocking:
- You can switch yarn colors at the beginning of any round for added visual appeal.
Step-by-Step Pattern
Step 1: Create the Magic Ring
- Wrap the yarn around your fingers to form a loop.
- Insert the hook into the loop and pull up a loop.
- Chain 1 to secure the ring.

Step 2: Round 1 (Foundation Round)
- Ch 1, then work 7 sc into the magic ring.
- Pull the tail of the yarn tightly to close the ring.
- Sl st into the first sc to join the round.
- (7 stitches total)
Step 3: Round 2 (Increase Round)
- Ch 1, then work 2 sc in each stitch around.
- Sl st into the first sc to join the round.
- (14 stitches total)
Step 4: Round 3
- Ch 1.
- Work 1 sc in the next stitch, then 2 sc in the following stitch. Repeat this pattern (1 sc, 2 sc) around.
- Sl st into the first sc to join.
- (21 stitches total)
Step 5: Round 4
- Ch 1.
- Work 1 sc in each of the next 2 stitches, then 2 sc in the next stitch. Repeat (1 sc in next 2 stitches, 2 sc) around.
- Sl st into the first sc to join.
- (28 stitches total)
Step 6: Round 5
- Ch 1.
- Work 1 sc in each of the next 3 stitches, then 2 sc in the next stitch. Repeat (1 sc in next 3 stitches, 2 sc) around.
- Sl st into the first sc to join.
- (35 stitches total)

Step 7: Round 6
- Ch 1.
- Work 1 sc in each of the next 4 stitches, then 2 sc in the next stitch. Repeat (1 sc in next 4 stitches, 2 sc) around.
- Sl st into the first sc to join.
- (42 stitches total)
Step 8: Round 7 (Optional: Color Change)
Switch yarn colors here for color-blocking, if desired.
- Attach the new yarn to the last stitch of Round 6.
- Ch 1, then work the same pattern as earlier:
- 1 sc in each of the next 5 stitches, then 2 sc in the next stitch. Repeat (1 sc in next 5 stitches, 2 sc) around.
- Sl st into the first sc to join.
- (49 stitches total)
Step 9: Additional Rounds
Continue working rounds with increasing space between the stitches:
- Round 8: (1 sc in next 6 stitches, 2 sc) (56 stitches total).
- Round 9: (1 sc in next 7 stitches, 2 sc) (63 stitches total).
Stop increasing when the pad reaches your desired diameter.
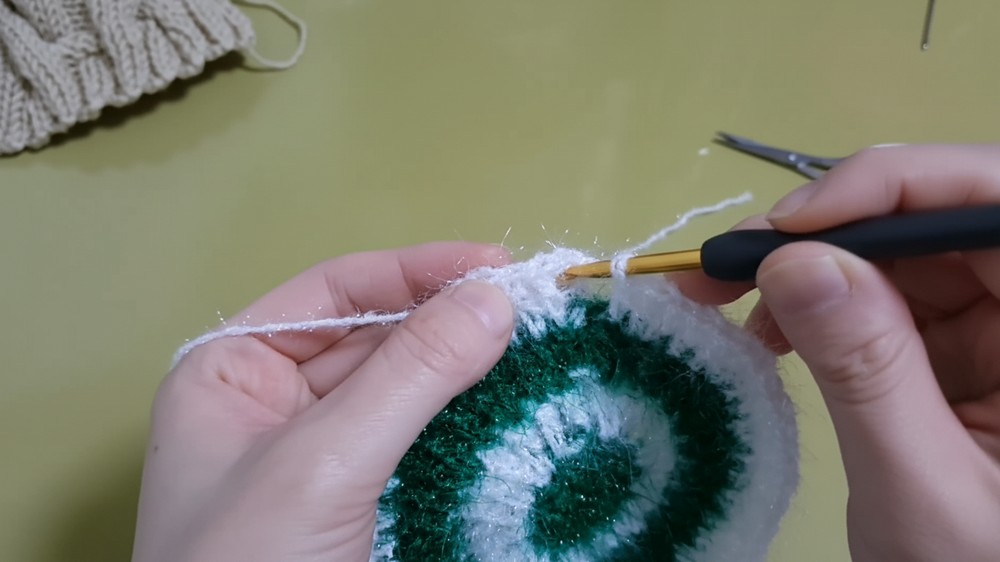
Step 10: Final Round (Straight Edge Without Increases)
Work 1 sc in each stitch around without increasing. This creates a clean edge, preventing further expansion of the pad.
Finishing
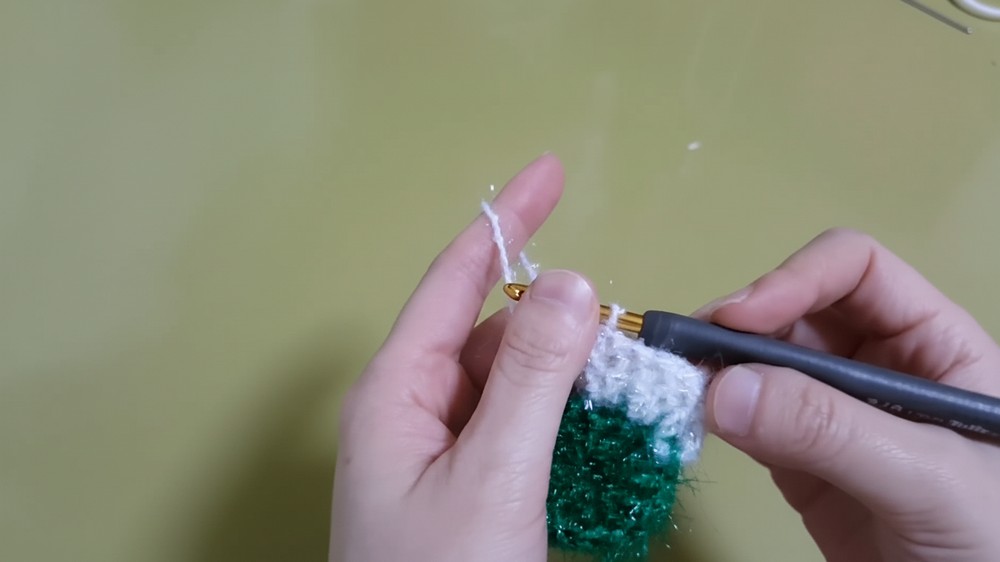
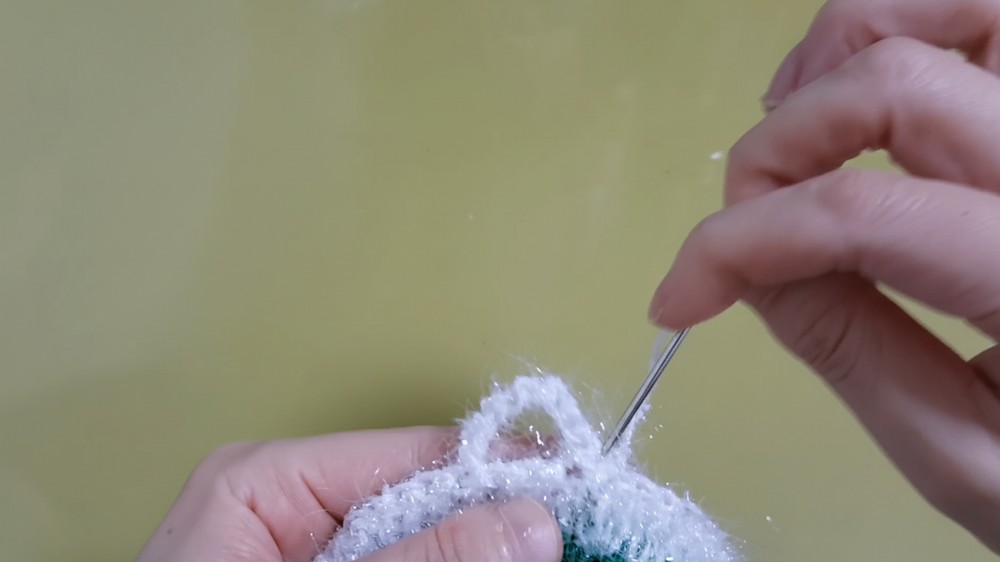
- Fasten Off: Cut the yarn, leaving a 6–8 cm tail.
- Weave in Ends: Using a tapestry needle, weave the tail into the stitches at the back of the scouring pad to secure.
- Trim excess yarn to clean up.
Conclusion
This basic ocean scouring pad combines functionality and style with its durable structure and optional color-blocking. The pattern is easy to customize for different sizes or shapes (e.g., squares or hexagons). With practice on foundational stitches and increases, crocheters can create practical household cleaning tools that are both eco-friendly and reusable.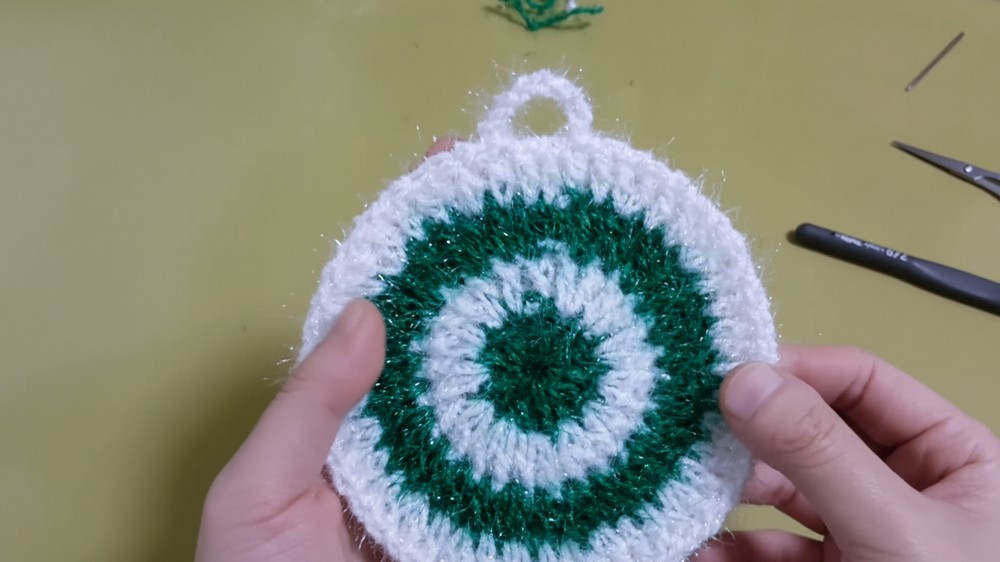
Pattern Corrections
- Avoid Tight Stitches: Ensure consistent tension to avoid puckering or curling of the pad. Adjust hook size if needed.
- Proper Tail Weaving: When changing colors, weave in the tails securely to prevent unraveling during use.
Tips
- Use Bright Colors: Choose vibrant yarn colors to make the scouring pad visually appealing.
- Double Strand Technique: For thin yarn, crocheting with two strands held together improves thickness and durability.
- Shape Adjustment: Stop increasing earlier for a smaller scouring pad or continue for larger sizes.
- Gift Idea: Create sets of scouring pads in various colors for gifting.