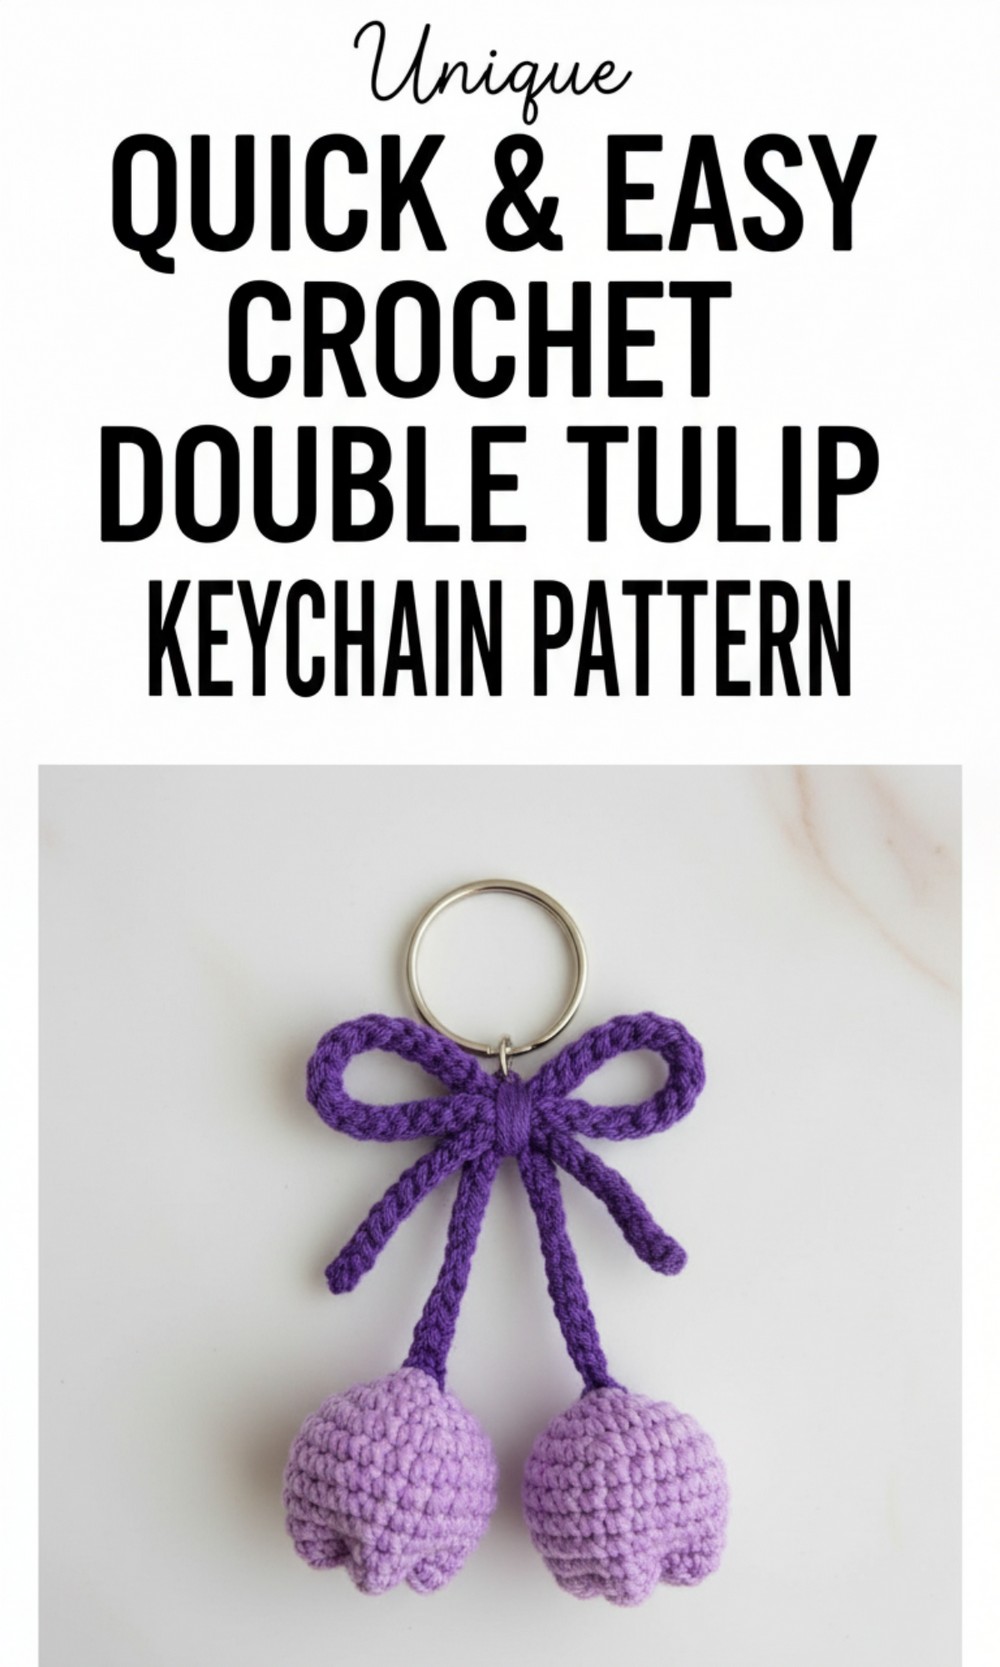
Make two soft tulips in one design with this free crochet double tulip keychain pattern that looks sweet anywhere you keep it.
Fun Free Crochet Double Tulip Keychain Pattern for Everyday Style
Would you like to carry two beautiful flowers that stay bright and colorful forever so you can decorate your favorite bag with a soft touch of spring. This cheerful and colorful Crochet Double Tulip Keychain Pattern is soft, lightweight, and easy to carry, making it perfect for sprucing up your keys, bags, or even as a thoughtful handmade gift for loved ones. The tulip flowers are bright and puffy, giving a unique and playful look that instantly catches attention.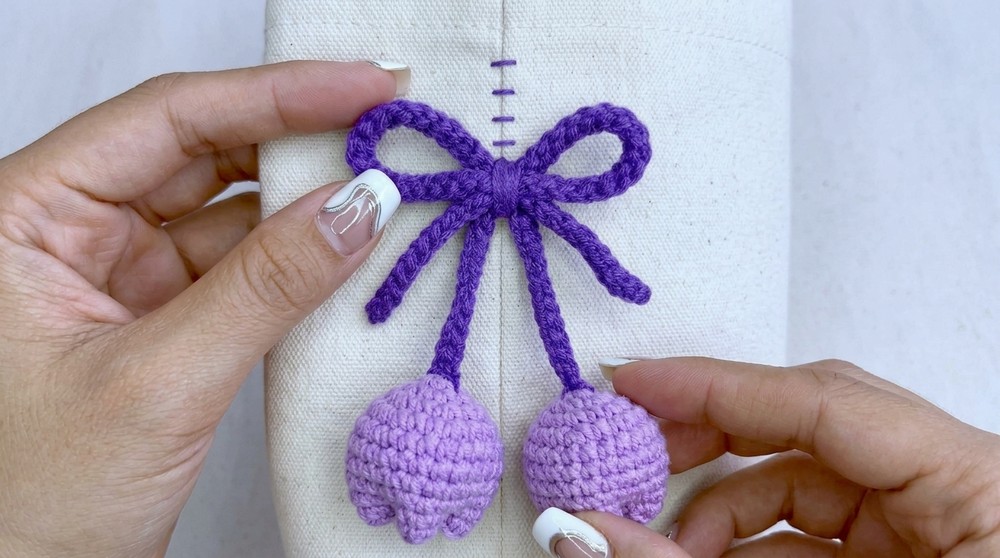
This project is simple to follow even for beginners, and requires just a few basic supplies like yarn, stuffing, and a crochet hook. The finished tulips are small yet full of detail, offering a fun way to add some personality to your belongings. Try this cute and quick crochet idea, and enjoy a little handmade charm everywhere you go.
Crochet Double Tulip Keychain Pattern
Materials Needed:
- Yarn: Milk Cotton Yarn (5 ply), 125g.
- Hook: 3mm crochet hook.
- Tools:
- Scissors
- Yarn needle
- Stitch marker
- Cotton stuffing
Techniques to Know Before Starting:
- Magic Ring (Magic Circle)
- Slip Knot
- Chain (Ch)
- Single Crochet (SC)
- Increase Crochet (Inc.C)
- Slip Stitch (Sl St)
Pattern Instructions:
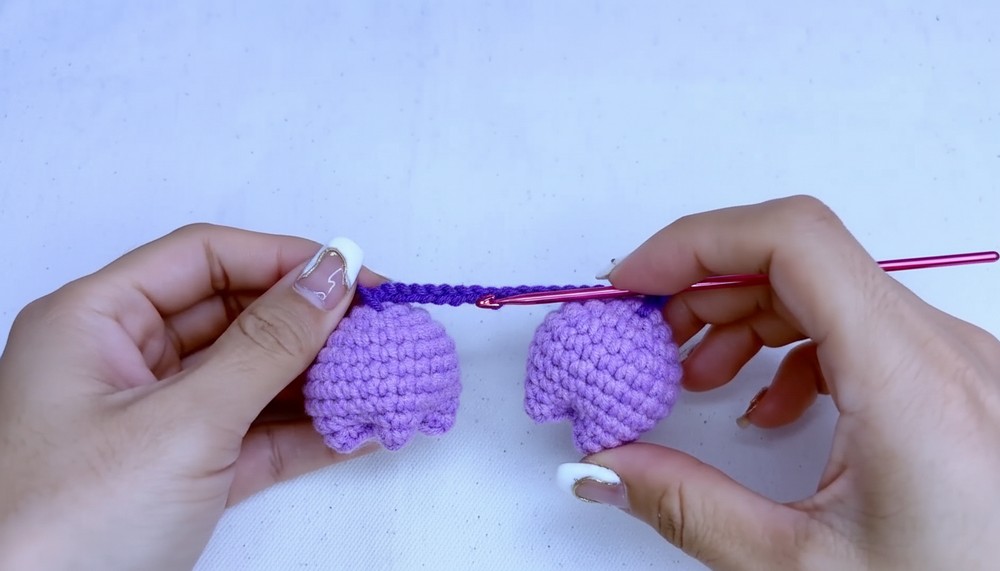
Part 1: Crochet the Tulip
- Round 1:
- Start with a magic ring.
- Chain 1 (Ch1).
- Make 6 single crochet (SC) into the ring.
- Slip stitch (Sl St) to close the round. (6 stitches).
- (Optional) Use a stitch marker to mark the slip stitch point for better tracking.
- Round 2:
- Chain 1 (Ch1).
- Make an increase single crochet (Inc.C) in each stitch.
- Slip stitch to close the round. (12 stitches).
- Round 3:
- Chain 1 (Ch1).
- Make 1 single crochet in the first stitch, then increase single crochet (Inc.C) in the next stitch.
- Repeat this process 6 times around.
- Slip stitch to close the round. (18 stitches).
- Round 4:
- Chain 1 (Ch1).
- Make 1 single crochet in the next 2 stitches, then increase single crochet (Inc.C) in the next stitch.
- Repeat this process 6 times around.
- Slip stitch to close the round. (24 stitches).

- Rounds 5 to 10:
- Chain 1 (Ch1).
- Make 1 single crochet in each stitch around.
- Slip stitch to close each round. (24 stitches for all rounds).
- After completing Round 10, chain 1 and cut off the yarn.
- Stuffing and Closing:
- Fill the tulip with cotton stuffing.
- Use a yarn needle to sew the top closed securely.

Repeat the above steps to create a second tulip.
Part 2: Create the Stem
- Attach green yarn to the bottom of one tulip.
- Chain 62 chains (you may adjust the length according to your preference).
- Attach the chain securely to the second tulip.
Part 3: Bow Decoration
- Use your yarn to create a bow by following these steps:
- Make a slip knot.
- Chain 72 chains.
- Starting from the second chain, slip stitch (Sl St) in each chain across.
- Chain 1 and cut off the yarn.
- Attach the bow to one of the tulips using your yarn needle.

Finishing the Keychain
- Use the yarn needle to securely sew all parts, ensuring they are tightly attached, especially at the connecting points.
- Add a keyring to the chain if desired.
Final Words and Tips:
This crochet pattern is simple and beginner friendly, making it a delightful project for anyone. Here are some tips:
- Customization: Use different colors for the tulips and bow to suit your style or match your decor.
- Tidy Finish: Weave in all loose ends neatly to give your keychain a polished look.
- Care and Maintenance: Gently hand wash your keychain if needed, and air dry to maintain its shape.

Now you have a cute, handmade double tulip keychain that’s not just a perfect gift but also a stylish decorative piece.