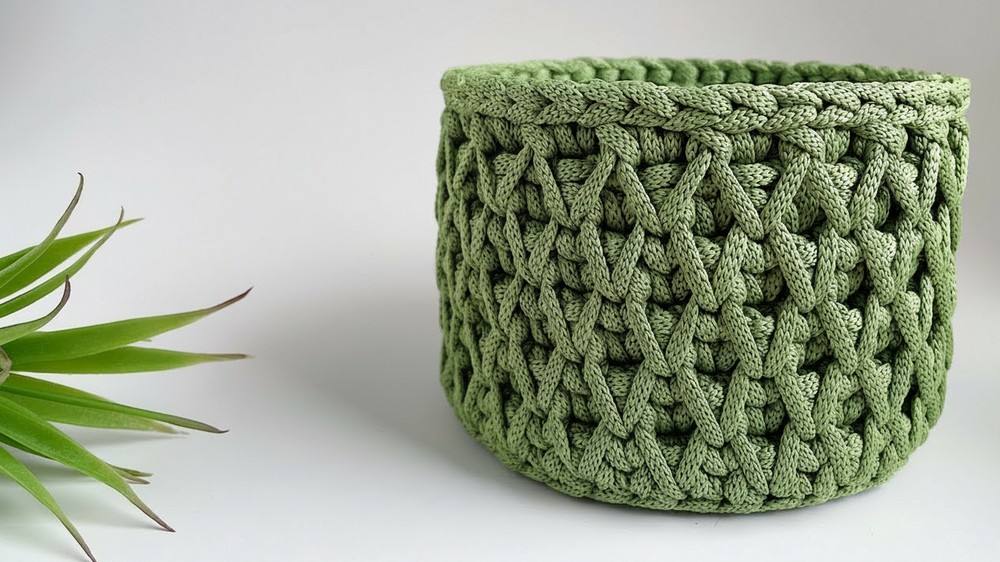
Organize in style with the Free crochet Honeycomb basket Pattern for sturdy, storage that adds charm, texture, and warmth to any space.
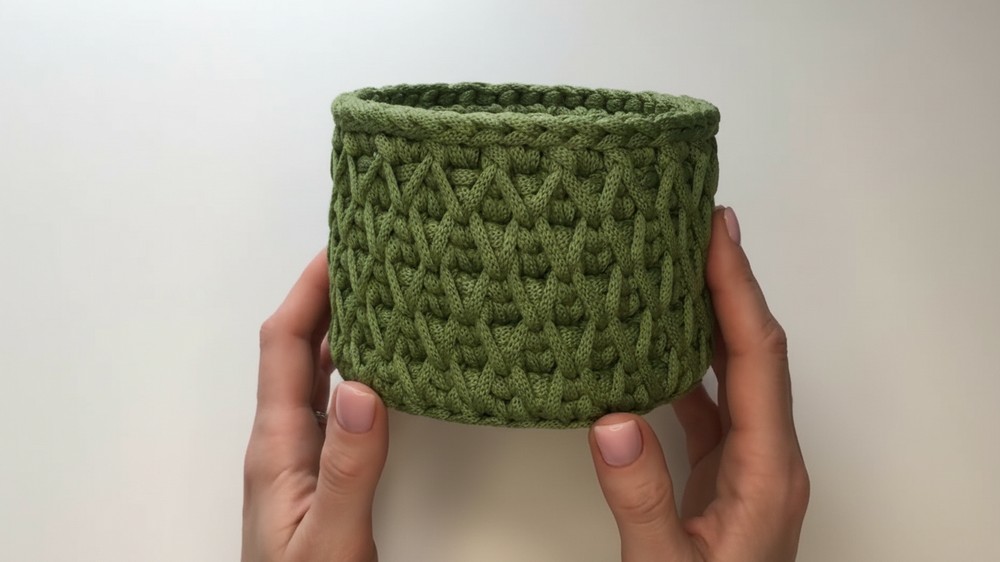
Beautiful texture and eye-catching structure make this basket a lovely addition to any home space. Its raised, honeycomb-style surface gives it a cozy handmade feel while also making it strong enough for everyday use. Whether placed on a shelf, desk, or table, it works well for holding small items like yarn, cosmetics, craft tools, or accessories while adding a warm decorative touch.
Fun Crochet Honeycomb Basket Pattern for Home Decor
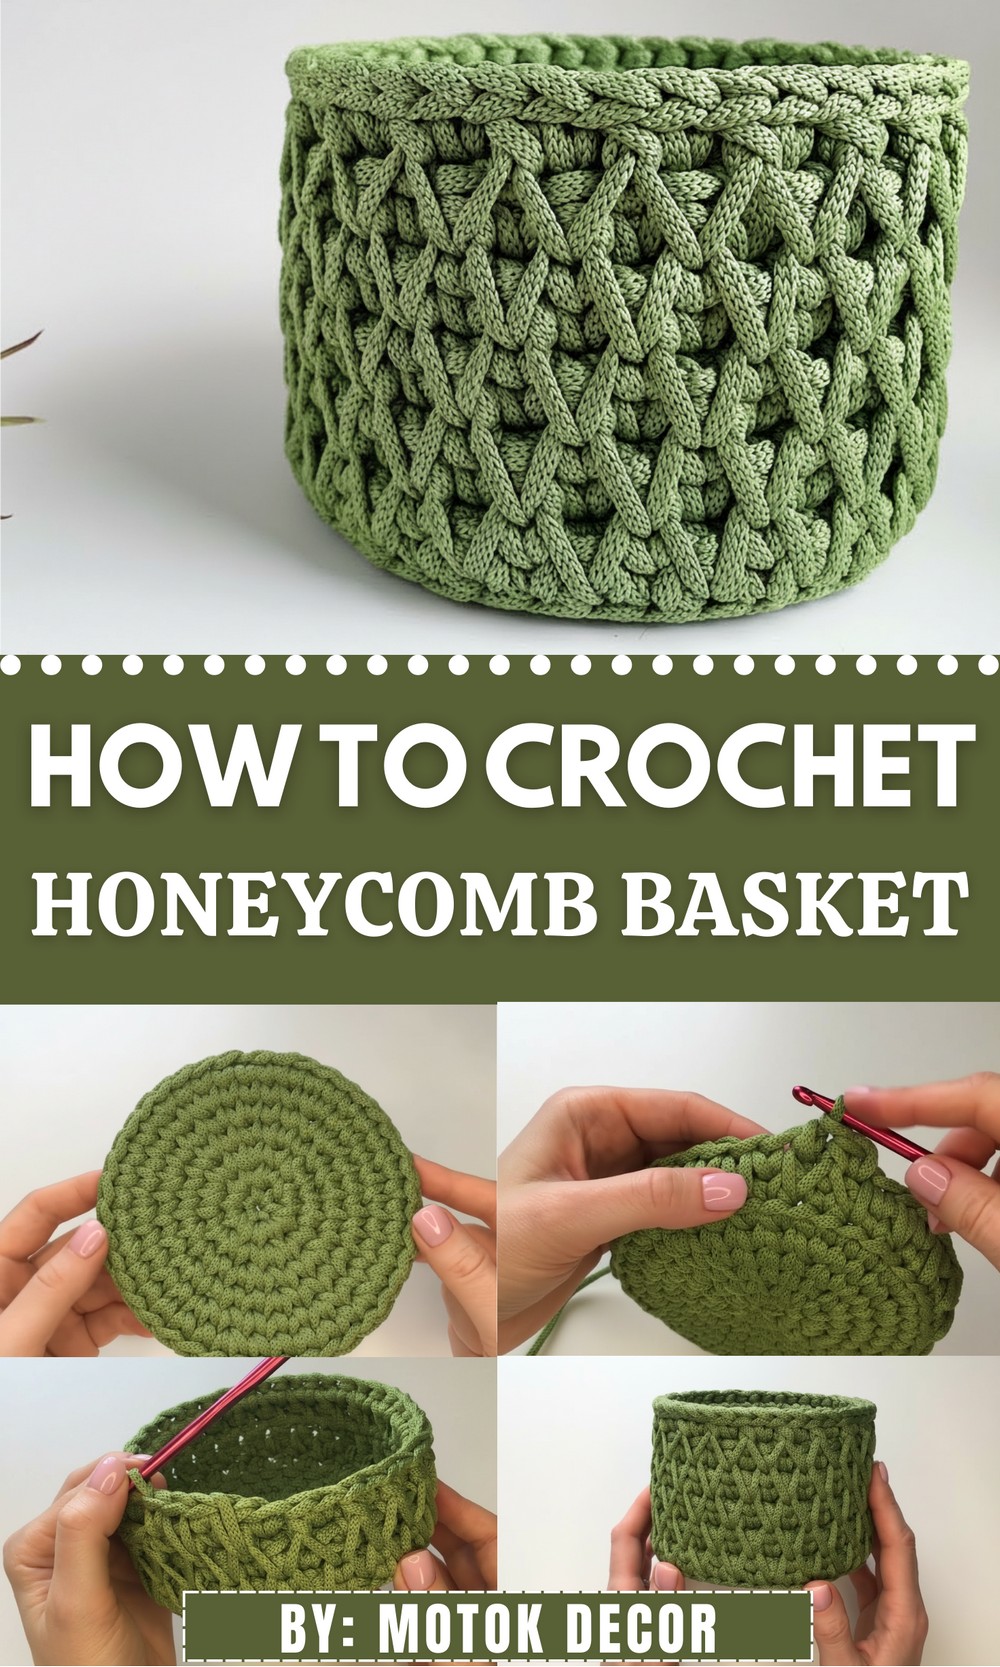
This crochet honeycomb basket pattern focuses on building a thick and structured fabric using repeating textured stitches. The design usually combines simple techniques such as single crochet, extended stitches, and special stitch placements that form the signature honeycomb effect.
Crochet Honeycomb Basket Pattern
Materials Needed
- Yarn: Polyester cord, 5mm thick, no core (approximately 70 meters, in a preferred color like “Pear”).
- Hook: Size 6mm crochet hook.
- Needle: Large-eye tapestry needle for weaving ends and edge binding.
- Scissors: For cutting yarn.
- Optional: Stitch markers for tracking the start/end of rows.
Finished Size
- Diameter of the Basket’s Bottom: ~13 cm.
- Height: ~9 cm.
Skill Level
Intermediate to Advanced – Requires working in the round, creating post stitches (relief stitches), transitioning rows seamlessly, and completing a decorative edge.
Key Abbreviations (US Terminology)
- CH: Chain
- SC: Single Crochet
- SS: Slip Stitch
- YO: Yarn Over
- FPDC: Front Post Double Crochet (Relief Double Crochet Stitch)
- Split Legs: Working into the space between post stitches or legs.
Special Notes
- Honeycomb Texture: Achieved by alternating long and short stitches that mimic the look of honeycomb cells.
- Seamless Transitions: Each row is joined with an invisible method that avoids a visible seam.
- Customizable Size: To make a bigger basket, continue increasing the size of the bottom before moving to the walls.
- Non-Twisted Cord: Ensure the cord is kept straight and untwisted for clean, uniform stitching.
Pattern Instructions
Step 1: Creating the Basket Bottom
The bottom of the basket is worked in the round to create a sturdy base.
- Start with a magic ring. Make CH 3, which counts as the first stitch, and work clockwise into the ring.
- Work DC stitches in the round, increasing evenly in each row to maintain a flat, circular shape.
Follow the Perfect Circle Pattern provided in the referenced video master class to complete 7 rows of the base.
Patterns for a Perfect Circle:
For each row, the number of DC between increases grows by one.
- Row 1: Start with 12 DC in the magic ring.
- Row 2: Work 2 DC in each stitch (24 DC total).
- Row 3: Alternate 1 DC, INC (36 DC total).
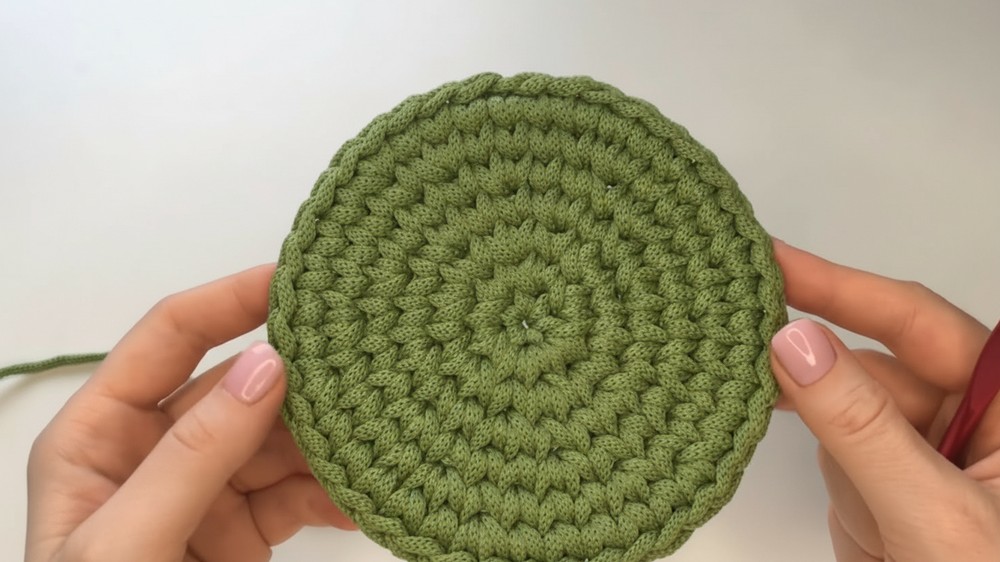
- Row 4: Alternate 2 DC, INC (48 DC total).
- Row 5: Alternate 3 DC, INC (60 DC total).
- Row 6: Alternate 4 DC, INC (72 DC total).
- Row 7: Alternate 5 DC, INC (84 DC total).
Step 2: Transitioning to the Basket Walls
Once the bottom is complete, move to the basket walls.
Wall Transition – Row 1:
- Work SC stitches in the far loop and jumper of each DC stitch from the last row of the bottom.
- Far loop refers to the back loop of the stitch.
- Jumper refers to the bar connecting the stitch to its neighboring stitch.
- Continue working SC around, pushing the stitches upward to create a perpendicular rise to the base.
- Finish the row by pulling the loop to the back using the invisible joining technique.
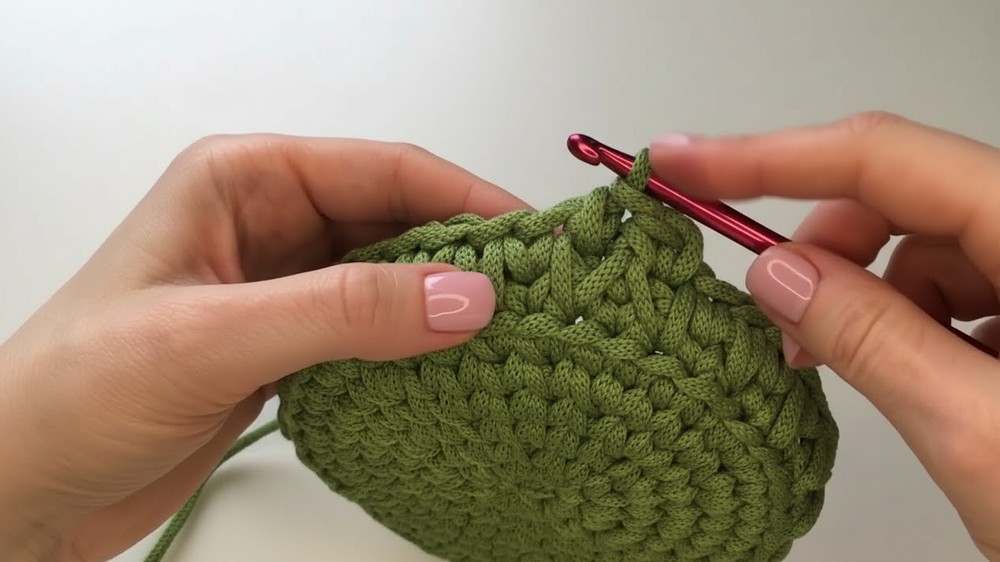
Step 3: Building the Basket Walls with Honeycomb Pattern
The honeycomb pattern alternates short checkmarks and long checkmarks to create the textured appearance.
Row 2 – Establishing the Honeycomb Pattern:
- Start with a short checkmark (SC):
- Work into the split of the ticks (space between legs of post stitches from the previous row).
- Then move to a long checkmark:
- Insert the hook into the base of the column, creating long legs that mirror the previous row’s height.
- Pull the working yarn evenly to avoid uneven lengths.
Alternate the following:
- Short checkmark: Work SC into the split space between post stitches.
- Long checkmark: Work SC into the base of the column created in the bottom rows.
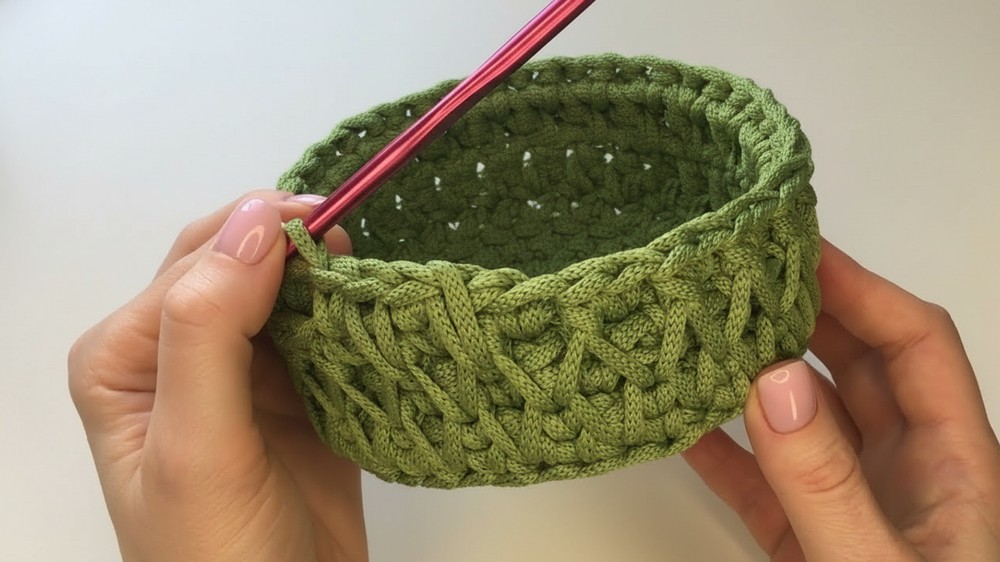
Row 3 – Adding Relief Columns:
- Start the row with a long checkmark, inserting the hook into the split under the relief column.
- Work short checkmarks between the relief stitches, inserting the hook into the split space between post stitches.
- Alternate between short and long checkmarks around the row.
Repeat Rows 2–3, alternating long checkmarks and relief columns until the desired height (~9 cm) is achieved.
Step 4: Binding the Edge
To securely bind the basket’s edge:
Binding Instructions:
- Cut a cord tip approximately 4 times the circumference of the basket.
- Pull through the last loop and use a tapestry needle to create an edge imitation loop:
- Dive through the first lying pigtail and return through the same loop.
- Work SS stitches around the edge, inserting the hook under both braids of each stitch and pulling through the loop on the hook.
Ensure the SS stitches are even in length to maintain a clean and uniform edge.
Step 5: Finishing Touches
- Weave in all ends using the tapestry needle, hiding them under the legs of adjacent stitches to secure the neat finish.
- Trim any excess cord and lightly steam the basket (if desired) to shape it further.
Conclusion
Congratulations! You’ve completed your honeycomb basket. Its structured sides, durable base, and decorative edge make it both practical and eye-catching. This project is perfect for storing small items like toiletries, makeup, or knitting supplies.
Pattern Corrections and Adjustments
- If the basket walls flare outward, ensure your tension is consistent, especially with the relief stitches (long checkmarks).
- For larger baskets, continue increasing the base evenly before transitioning to the walls.
Tips for Maintaining Your Basket
- Cleaning: Spot clean with mild soap and warm water. Polyester cord baskets are usually resistant to stains but avoid soaking them for long periods.
- Shaping: Stuff the basket lightly with paper or soft fabric when storing to retain its shape.