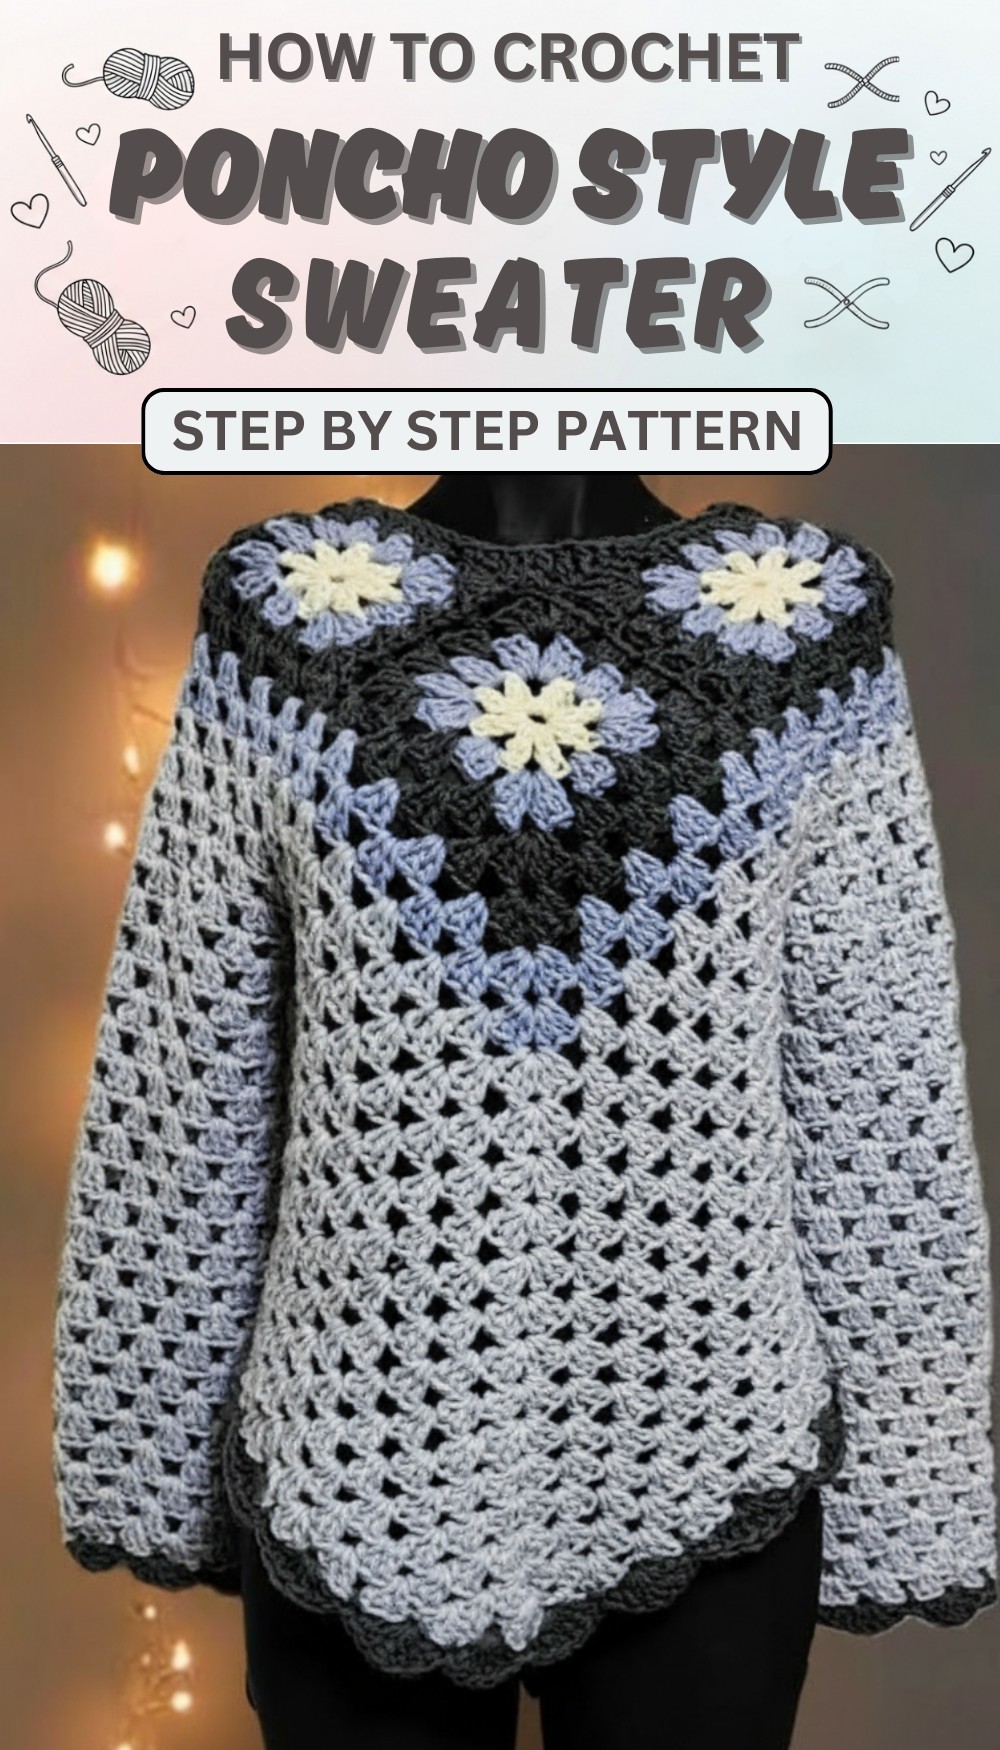
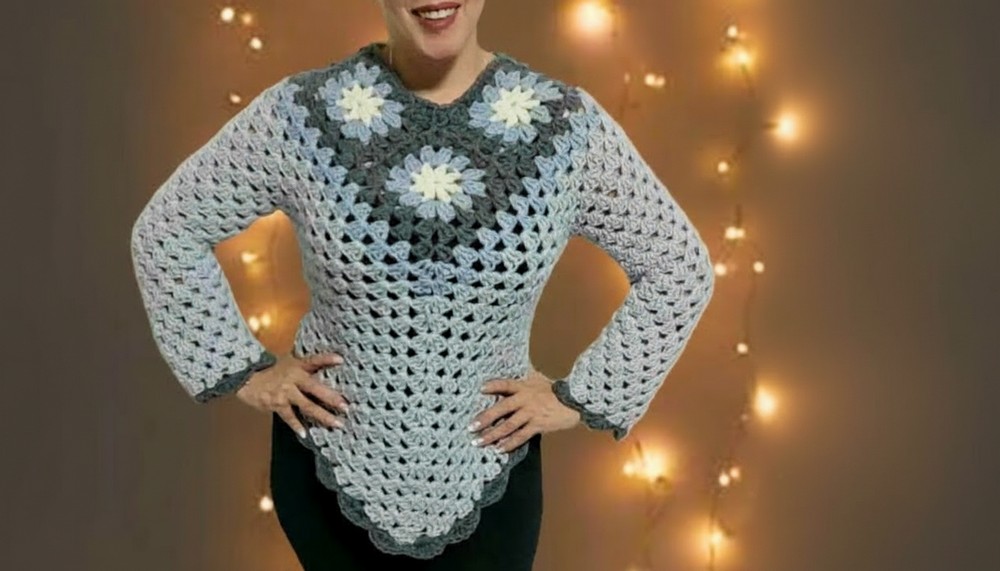
Wrap yourself in style and comfort with this simple crochet poncho-style sweater pattern that brings warmth and charm to any outfit easily.
This stylish garment offers a perfect blend of warmth and freedom. Its loose, flowing shape resembles a poncho, making it easy to wear and move around comfortably. The crochet design adds a charming handmade touch with gentle textures that feel nice against your skin. It’s ideal for cool days, keeping you snug without feeling heavy or tight.
Chic & Comfy Crochet Poncho-Style Sweater Pattern to Try Now
Worn over simple clothing, it adds a splash of color and a unique look to any outfit. The open weave lets air flow freely, so you remain comfortable both indoors and outside. This sweater brings a relaxed and joyful feel, perfect for casual outings or quiet moments at home. Its distinctive style catches the eye, while the yarn wraps you in gentle warmth. It’s a wonderful choice to stay warm and look fashionable effortlessly.
Poncho-Inspired Crochet Poncho-Style Sweater Pattern
Special Features
- Combines poncho design with sweater sleeve function.
- Structured peak detail at neckline with no increases on sides (straight fit).
- Worked in modular granny squares for easy sizing.
- Customizable neckline shape: V-neck or round neck.
- Uses classic granny square motifs joined seamlessly.
Level of Difficulty
Intermediate: Requires knowledge of granny squares, joining techniques, and color changes.
Materials Needed
- Yarn “Alaska” (or similar worsted weight yarn).
- Three complementary colors (1 main color + 2 contrast colors recommended).
- Crochet hook 7 mm.
- Scissors.
- Yarn needle for weaving ends and joining squares.
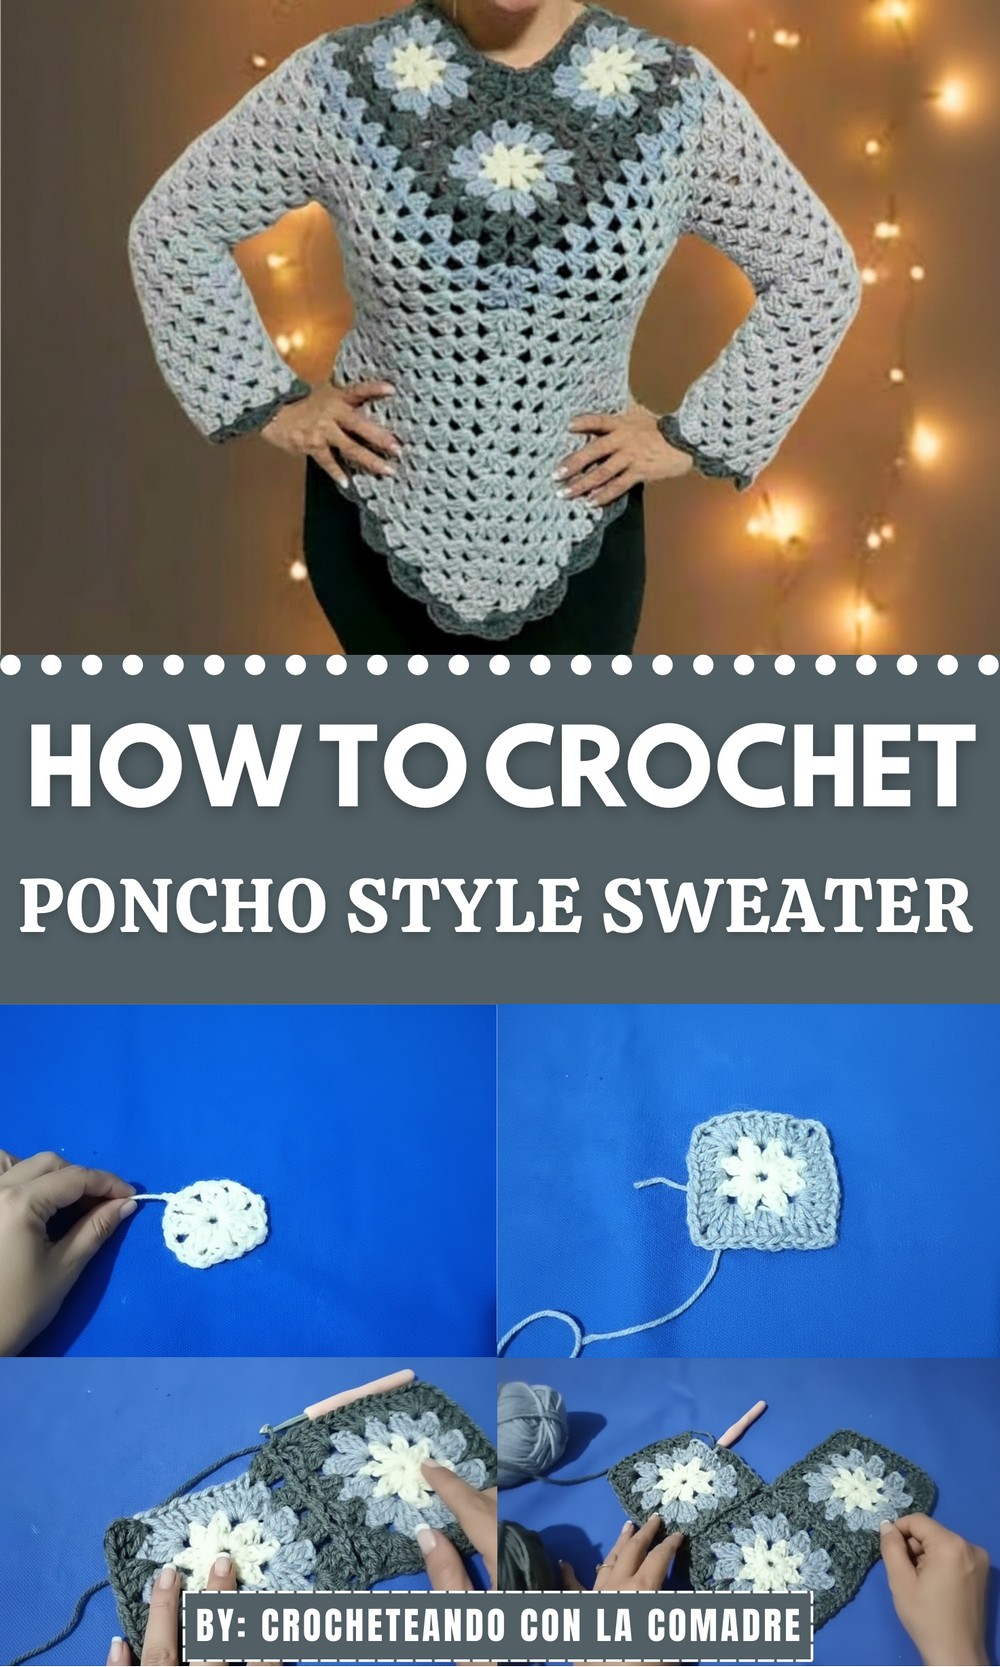
Step-by-Step Crochet Pattern
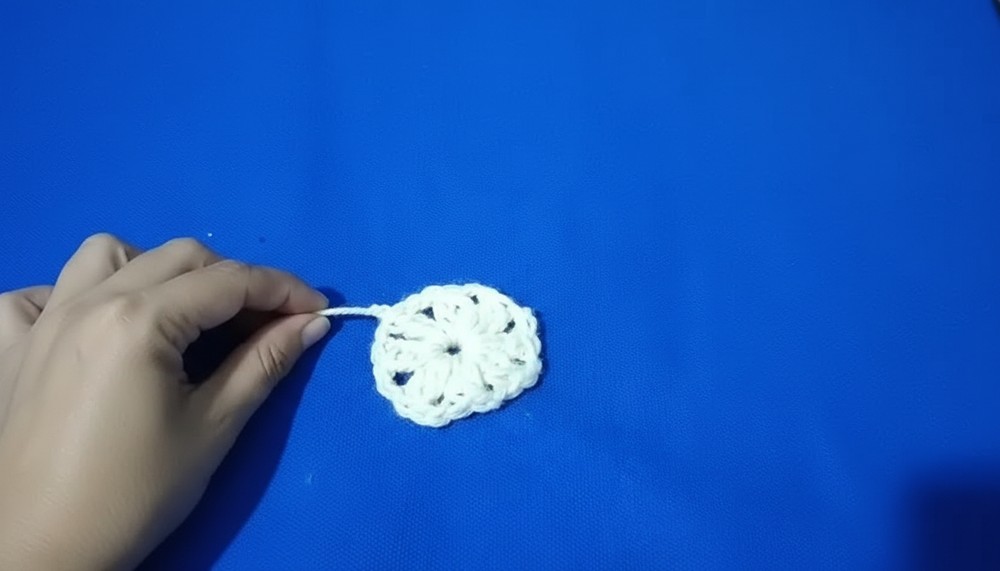
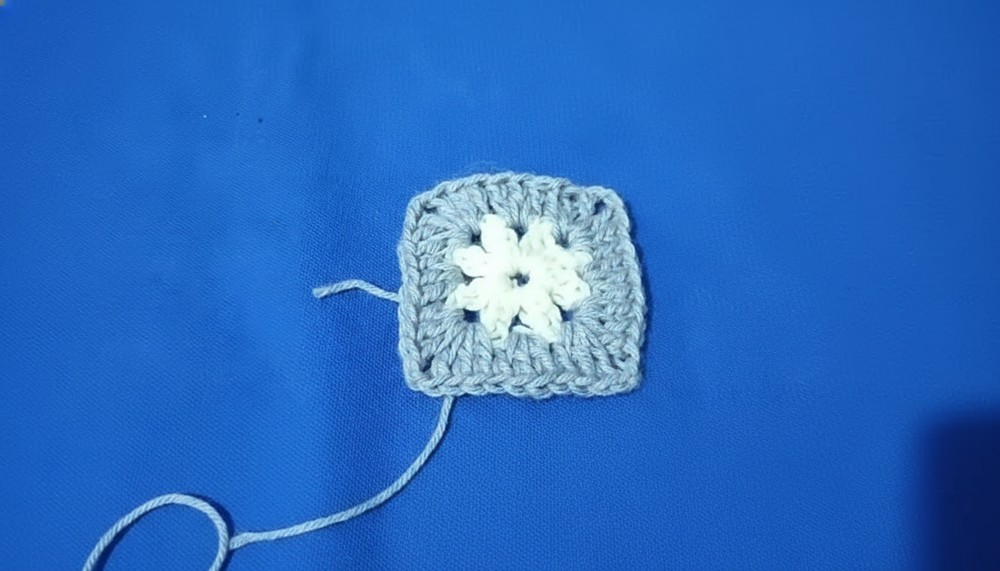
Step 1: Make the Granny Squares (Motifs)
- Round 1:
- Make a slipped knot and chain 5. Join with a slip stitch to form a ring.
- Chain 3 (counts as first dc), then work 2 dc into the ring.
- Chain 2 (this is a corner space).
- Repeat 3 dc, chain 2 three times more to form four groups of 3 dc separated by chain 2 corners.
- Join with slip stitch to top of chain 3.
- You should have 4 corners with chain-2 spaces.
- Round 2:
- Slip stitch into next two dc and into the corner chain-2 space. Chain 3 (counts as first dc).
- Work 2 dc, chain 2, 3 dc all into the same corner chain-2 space (a corner shell).
- Chain 1 (space between shells).
- In the next chain-2 corner space, work another corner shell: 3 dc, chain 2, 3 dc.
- Chain 1.
- Repeat around until 4 corner shells with chain 1 spacing between them.
- Join with slip stitch to top of chain 3.
- Round 3:
- Slip stitch to the next corner chain-2 space. Chain 3 (counts as dc). Work 2 dc, chain 2, 3 dc in the same space (corner shell).
- Chain 1.
- In the chain-1 space from previous round, work 3 dc.
- Chain 1.
- At the next corner chain-2 space, work 3 dc, chain 2, 3 dc.
- Repeat (3 dc in chain-1 spaces, corners with corner shells) around.
- Join with slip stitch to top of chain 3.
- This round will enlarge the square.
Step 2: Make a Total of Six Granny Squares
- For a medium size, make 6 squares: 3 for the front, 3 for the back.
- Adjust quantity for size: add 1 square per side for wider necklines as explained in tutor’s demonstration.
- Consider adding rounds to the square if you want bigger motifs before joining.
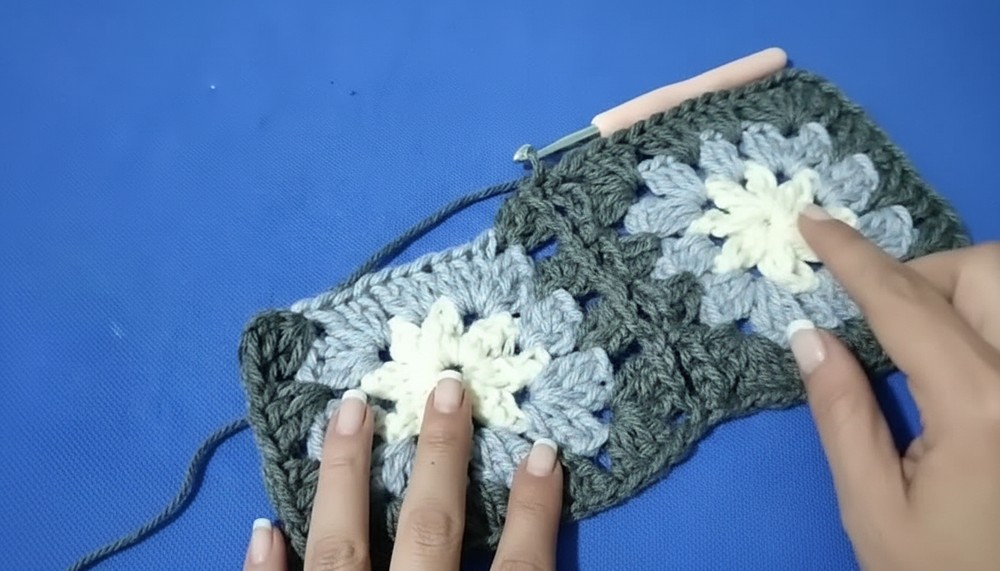
Step 3: Join Granny Squares for Sweater Body
- Lay squares in desired order (3 front squares and 3 back squares).
- Seam the squares horizontally using single crochet (sc) joins:
- Insert hook through corner chain spaces of two squares, sc together, chain 1 for flexibility.
- Continue joining corresponding stitches across squares with sc and chain 1.
- Join the front 3 squares in a row and separately the back 3 squares similarly.
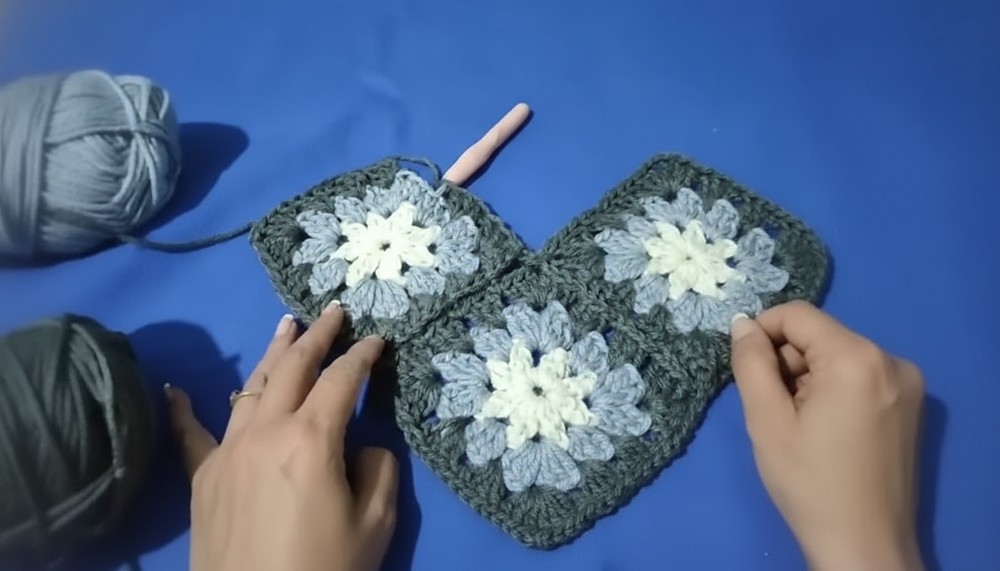
Step 4: Join Front and Back Panels at Shoulders and Sides
- Join front and back rows at shoulder points, leaving space for the neck opening (V or round).
- Join side seams by sewing or single crochet, leaving armholes open (space between bottom and sleeve join).
- The neck peak forms naturally due to construct of motif arrangement.
Step 5: Adding Sleeves and Side Growth (Optional)
- The sweater is designed to grow straight sides without increases to keep poncho shape with sleeves.
- To lengthen body or sleeves, add rounds to the granny squares before joining or add granny squares at sides.
- Sleeves can be added by crocheting additional rows or motifs attached at armholes based on your preferred sleeve length.
Step 6: Final Edging (Optional)
- Crochet a neat border around the neckline, sleeve edges, and bottom hem.
- Suggested border: alternating half double crochet (hdc) and chains to form scalloped edges for a clean finish.
Tutor’s Suggestions
- Hide your yarn ends as you change colors to maintain neatness.
- Use two knots to secure color changes and avoid unraveling.
- Adjust hook size if needed for your tension (recommend 7 mm for worsted weight yarn).
- Use stitch markers for armhole, shoulder, and neck points during joins.
- Try fitting the sweater after joining squares to adjust width or length.
Uses
- This poncho-sweater hybrid is ideal for casual wear in spring and fall.
- Versatile layering piece that combines style and comfort.
- Customizable for various sizes and color combinations.
- Perfect for gifting or personal projects.
Helpful Tip
When joining granny squares, ensure you align corners and shell stitches perfectly to avoid puckering. Gently block squares before joining if needed to even out stitches.
Conclusion
This poncho-inspired crochet sweater is a fun and stylish project that lets your creativity shine through color choices and finishing touches. Its modular granny square design makes it easy to customize size and shape, with a comfortable fit and elegant peak neck detail.