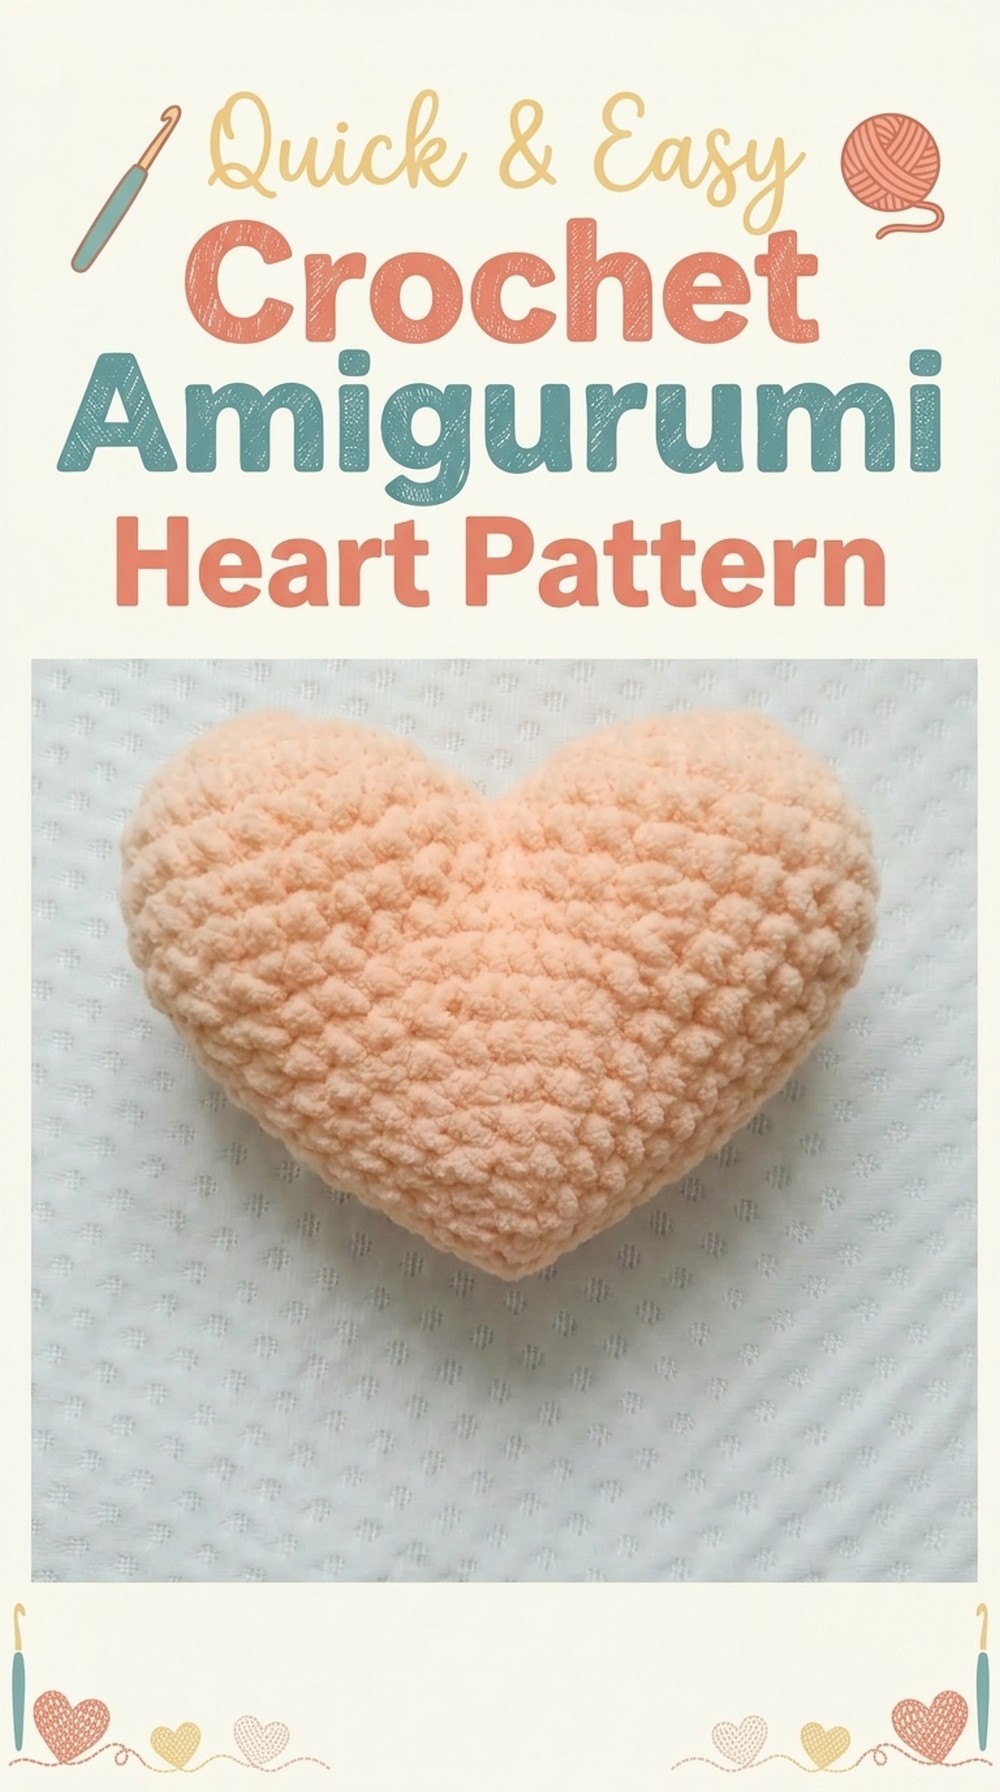
Turn yarn into something special with this Free Crochet Amigurumi Heart Pattern, perfect for sharing love or adding charm to any celebration.
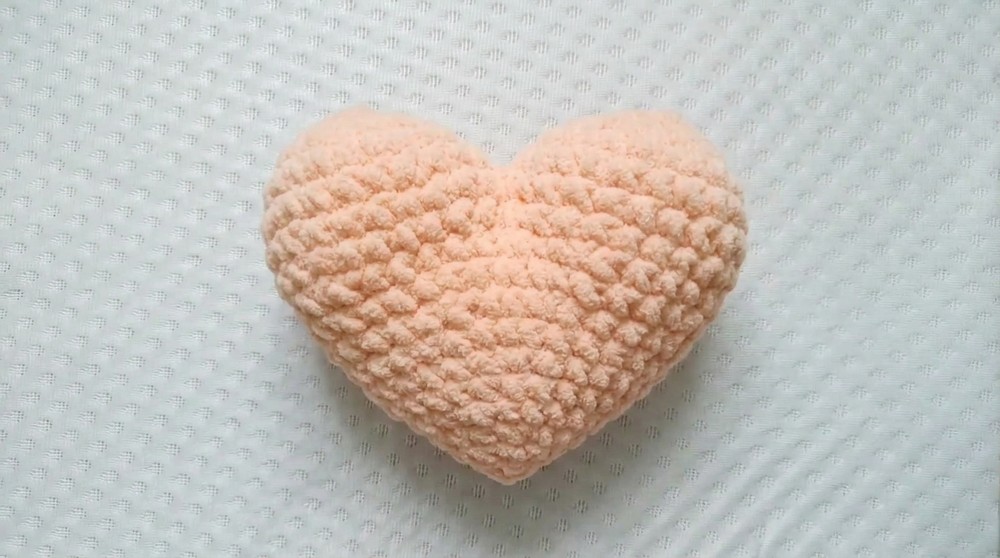
Crocheting a heart is like creating a tiny piece of love with your own hands. Its soft curves, vibrant colors, and cute design make it a charming creation that can melt anyone’s heart. A crochet amigurumi heart is not just beautiful to look at; it is also a thoughtful gift for loved ones or a unique decoration to brighten up your space. Whether it’s hung on a wall, sewn onto a bag, or used as a keychain, its charm lies in its simple yet heartfelt appearance.
Free Crochet Amigurumi Heart Pattern for Spreading Joy
Made with soft yarn and shaped carefully, the heart is stuffed gently to give it a perfect 3D look. It’s versatile in its uses that’s for Valentine’s Day, birthdays, or just a surprise for someone special. Its handcrocheted beauty, combined with its emotional essence, makes it a little token of love that catches attention and brings smiles everywhere it goes.
Crochet Heart Amigurumi Pattern
Skill Level
Beginner – Familiarity with basic stitches and working in rounds is enough to crochet this heart.
Finished Size
- Approximate Size (Using Medium Cotton Yarn and 3mm Crochet Hook):
- Width: Approximately 2 inches.
- Height: Approximately 2 inches.
Note: Adjust based on yarn weight and hook size for smaller or jumbo-sized hearts.
Materials
- Yarn:
- Cotton yarn (preferably medium-weight).
- For larger hearts, consider super bulky or jumbo yarn.
- For smaller hearts, opt for lightweight yarn.
- Hook:
- Recommended: 3mm crochet hook.
- Adjust hook size based on yarn thickness (use larger hooks for thicker yarn).
- Additional Supplies:
- Stuffing: Fiberfill or scrap yarn for shaping the heart.
- Stitch marker: To track the beginning of each round.
- Tapestry needle: For sewing and weaving ends.
- Scissors: For cutting yarn.
Key Abbreviations
- ch – Chain
- sc – Single Crochet
- sl st – Slip Stitch
- inc – Increase (2 stitches worked into 1 stitch)
- dec – Decrease (crochet two stitches together)
- st(s) – Stitch(es)
- BLO – Back Loop Only
Techniques Used
- Magic Circle: Creates a closed, tight center without gaps.
- Increase Stitch Pattern: Expands the circular base evenly.
- Decrease Stitch Pattern: Shapes and tapers the heart.
- Front Loop Slip Stitch: Produces a clean edge to finish the project gracefully.
Pattern Instructions
Step 1: First Half of the Heart
- Magic Circle:
- Make a small circle with yarn, leaving a 2–3 inch tail.
- Insert hook into the circle, yarn over, and pull through.
- Ch 1 to secure the circle.
- Round 1:
- Work 8 sc into the magic circle.
- Pull the tail tightly to close the circle.
- Place a stitch marker in the first sc of the round.
- Do NOT join; work in continuous rounds.
- Total stitches: 8 sc.
- Round 2:
- Inc in each stitch (2 sc per stitch).
- Total stitches: 16 sc.
- Round 3:
- Work 1 sc in the first stitch, inc in the next stitch (repeat pattern: 1 sc, inc).
- Total stitches: 24 sc.
- Rounds 4–5:
- Sc in each stitch around (no increases).
- Use a stitch marker to track the beginning of the round.
- Total stitches each round: 24 sc.
- Finish First Half:
- After completing 5 rounds, cut the yarn and fasten off.
- Leave a tail for sewing.
Step 2: Second Half of the Heart
- Repeat Steps 1–5.
- Make a matching second half using the same instructions.
- Do NOT cut the yarn after completing the 5th round.
- This tail is used to join the two halves.
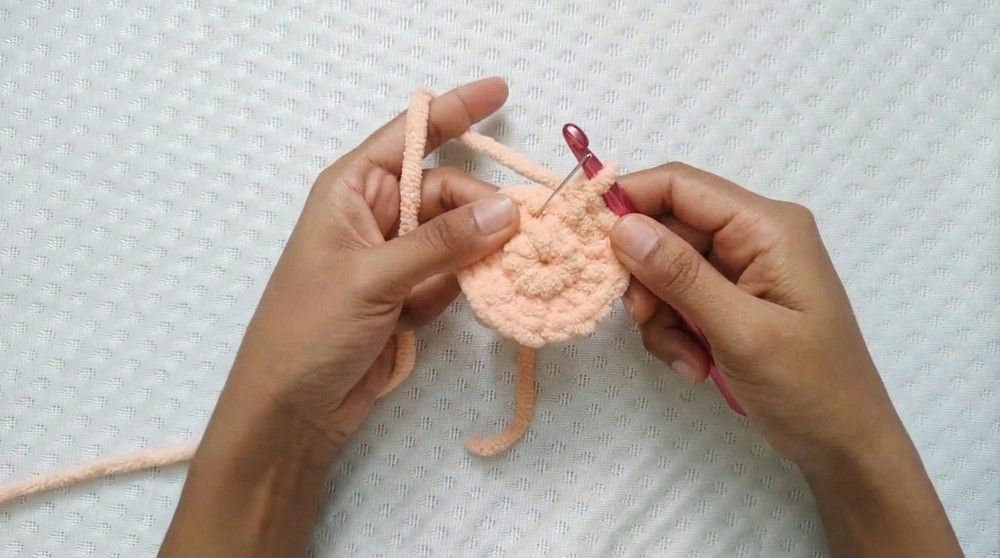
Step 3: Joining the Two Halves
- Place both halves side by side with the magic circle edges touching.
- Ensure the right sides (color sides) are facing outward.
- Begin working Round 6:
- Start with the second piece (the half still attached to the yarn).
- Work 12 sc into its stitches.
- Switch to the first piece:
- Pull the tail from the first piece through the first stitch to secure.
- Work 24 sc across the stitches of the first piece.
- Return to the second piece:
- Work 12 sc into its remaining stitches.
- Total stitches for Round 6: 48 sc.
- Close the gap between the two halves securely by using any loose yarn tails.
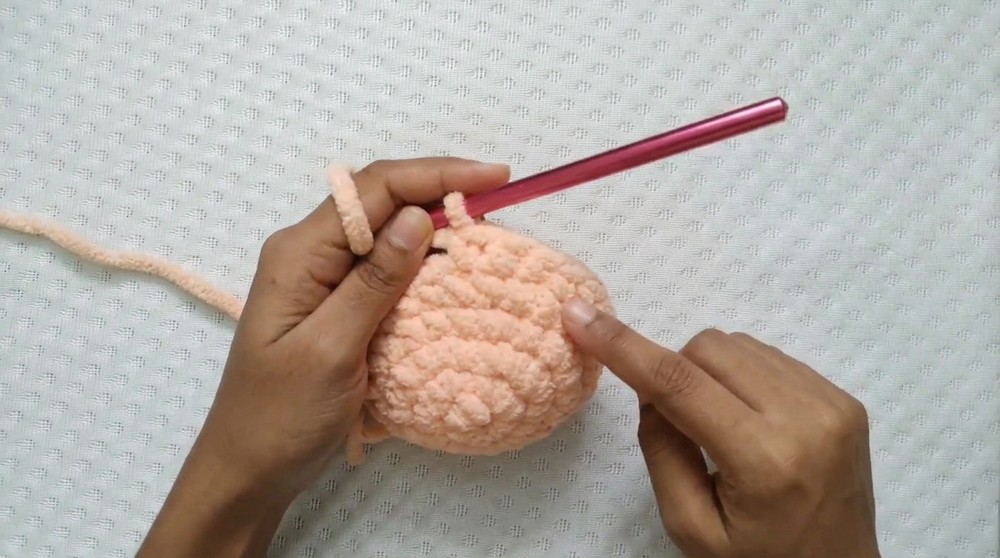
Step 4: Body of the Heart
- Round 7:
- Sc in each stitch around (48 sc total).
- Round 8–9:
- Begin tapering by decreasing stitches:
- Work 3 sc, then 1 dec (repeat pattern: 3 sc, 1 dec).
- Total stitches after Round 9: 40 sc.
- Begin tapering by decreasing stitches:
- Round 10:
- Repeat the decrease pattern:
- Work 2 sc, 1 dec (repeat pattern: 2 sc, 1 dec).
- Total stitches after Round 10: 32 sc.
- Repeat the decrease pattern:
- Round 11:
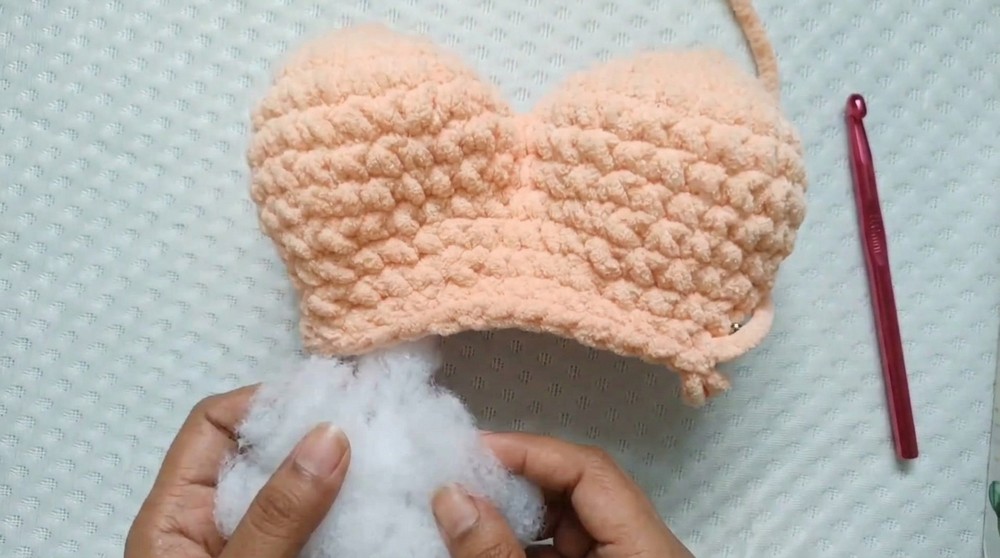
- Add some stuffing before continuing.
- Work 1 sc, 1 dec (repeat pattern: 1 sc, 1 dec).
- Total stitches after Round 11: 16 sc.
- Round 12:
- Add final stuffing.
- Dec across all stitches (reduce in every stitch).
- Total stitches: 8 sc.
Finishing
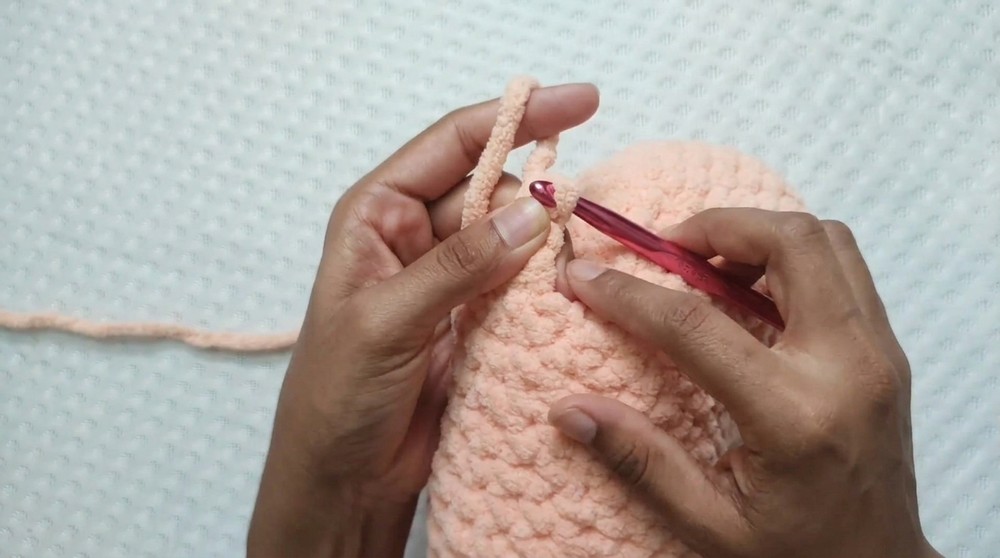
- Round 13:
- Work sl st into each front loop only of the remaining stitches to close the top neatly.
- Fasten Off:
- Cut the yarn, leaving a 2–3 inch tail.
- Using a tapestry needle, sew the tail securely through the top stitches.
- Weave Ends:
- Insert the needle through some nearby stitches in random directions to secure the yarn tail.
- Trim excess yarn.
- Insert the needle through some nearby stitches in random directions to secure the yarn tail.
Final Words
Your crochet heart is now complete! This versatile design is perfect for gift embellishments, home decor, or simple craft therapy. Adjust the size, color, and weight of the yarn for added customization.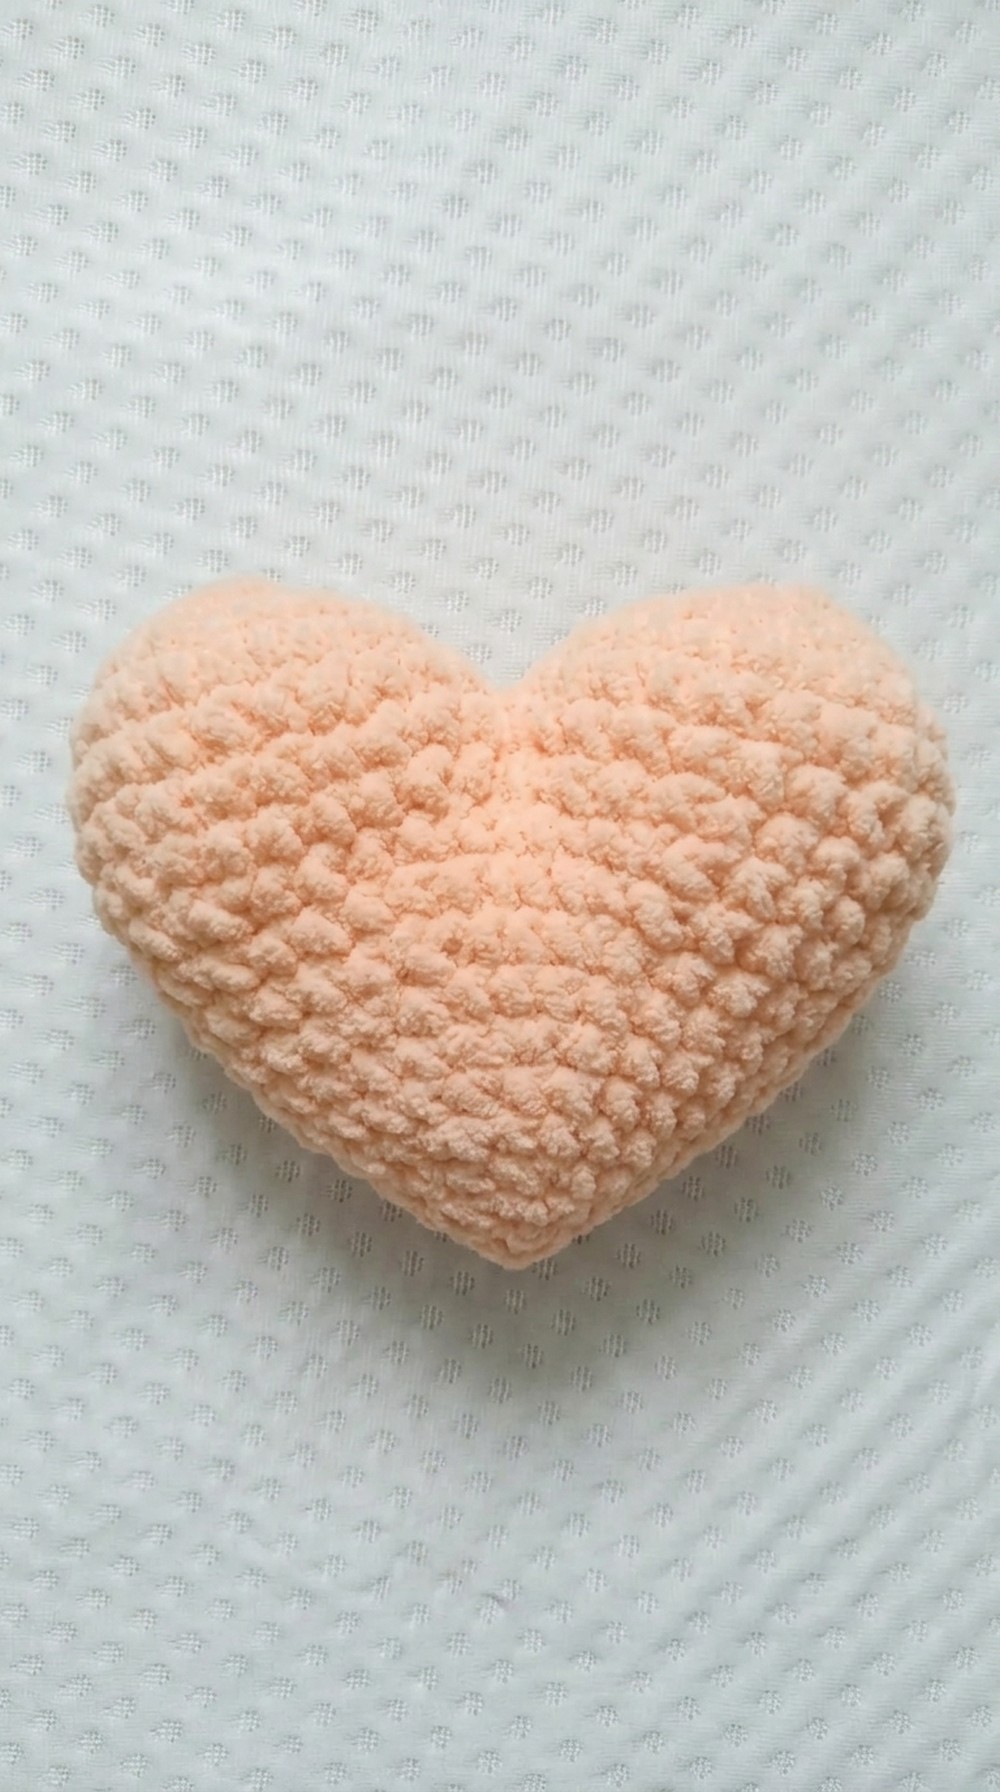
Tips to Maintain the Pattern
- Track Rounds Precisely with a Stitch Marker: Especially for rounds involving increases or decreases.
- Even Stuffing: Distribute stuffing evenly to avoid bulges or gaps in the heart shape.
- Experiment with Yarn Types: Use variegated yarn for a textured effect or sparkly yarn for festive designs.
- Create Sets: Make hearts of different sizes and colors for use in garlands or decor bundles.