Brighten up your room with an easy crochet doily and table mat pattern, perfect for creating handmade decorations that impress every guest.
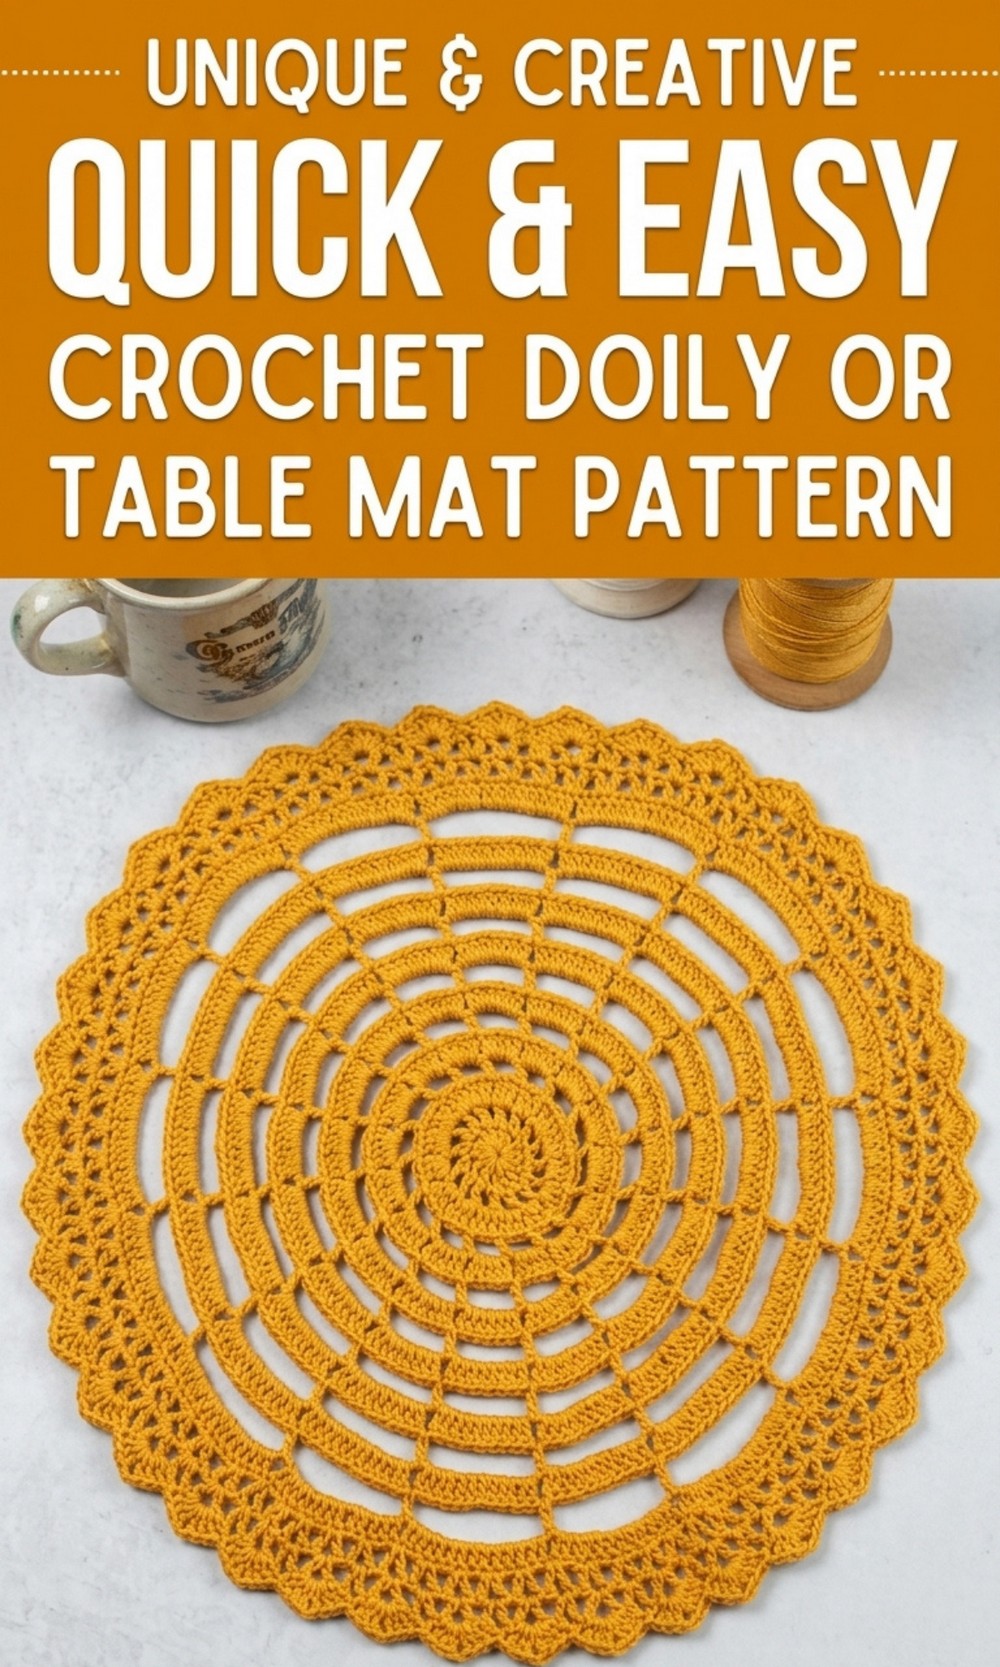
Add Charm to Your Home with Free Crochet Doily and Table Mat Pattern
Crocheting a doily or table mat is a fun and creative way to add beauty to your home. A free crochet pattern gives simple steps to help you create a stunning design, even if you’re new to crochet. It is a delicate decoration that can brighten up any table, shelf, or corner of your house. It can be small or large, colorful or neutral, depending on your style.

This crochet pattern helps you make something truly unique with your hands. A crochet doily or mat makes a perfect gift or decoration for special occasions like family dinners or celebrations, or it can simply add charm to your everyday space.
Elegant Crochet Doily and Table Mat Pattern
Materials Required:
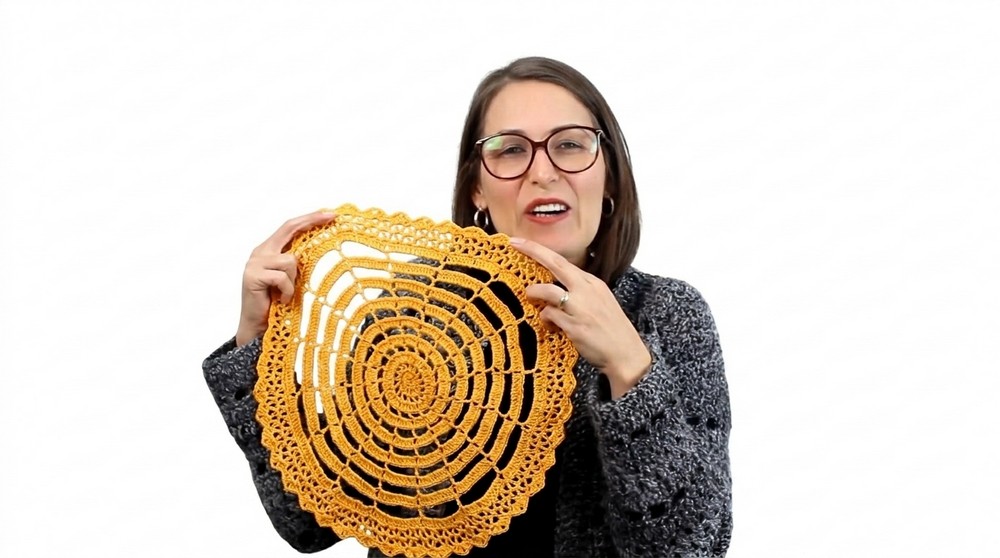
- Yarn: 100% polypropylene yarn (e.g., yellow gold color 05).
- Hook: 2 mm crochet hook.
- Tapestry needle: For weaving in ends and securing the finishing touches.
- Lighter: To melt the yarn ends (specific to polypropylene yarn) for a secure finish.
- Optional: Scissors for cutting the yarn.
Special Techniques:
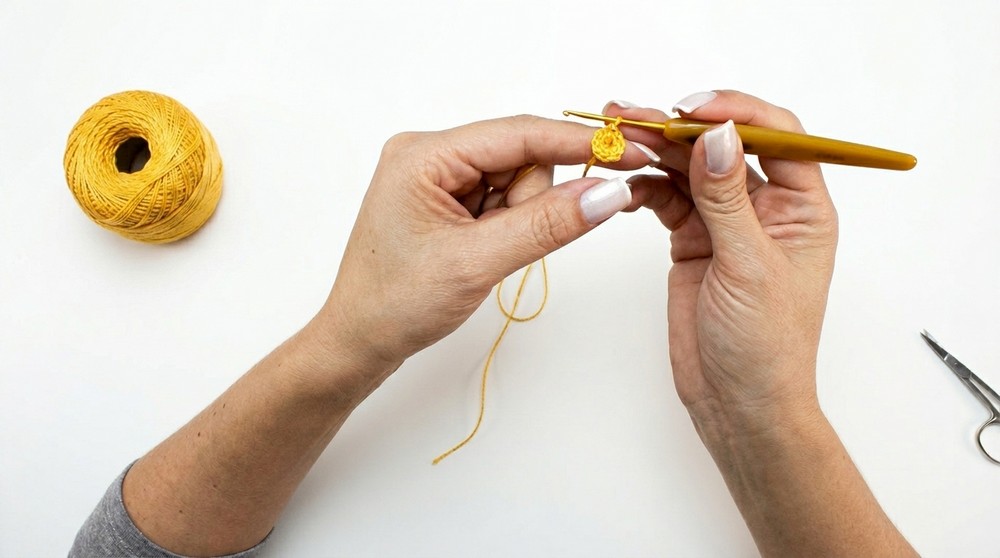
- Magic Ring: Used to begin the pattern in the center.
- Arremate Technique (Melting): Necessary to secure yarn ends when working with slippery polypropylene yarn.
- Increasing Proportions: Explained throughout to maintain a consistent round shape with staggered increases.
Pattern Instructions:
1. Start the Centerpiece:
- Create a magic ring by looping the yarn and securing it with a single chain.
- Work 8 single crochet (sc) stitches into the magic ring.
- Pull the ring tightly to close and join with a slip stitch in the first stitch.
2. First Round of Increases:
- Chain 3 (acts as the first double crochet).
- Work another double crochet (dc) in the same stitch.
- Continue by making 2 dc in each stitch from the first round.
- You should have 16 dc when the round is complete.
- Join with a slip stitch in the third chain of the starting chain 3.
3. Begin Open Spaces:
- Chain 3 (acts as the first dc), and add 2 additional chains for the space.
- Skip to the next stitch and make a dc. Chain 2.
- Continue this pattern, working 1 dc with 2 chains in between in every stitch.
- Join with a slip stitch at the top of the starting chain 3.
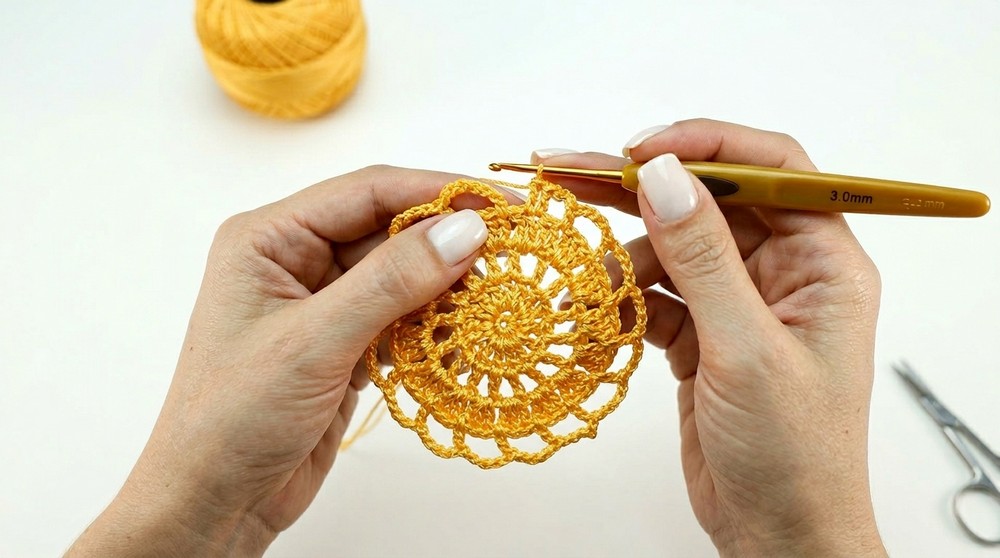
4. Filling the Spaces (Solid Rows):
- Slip stitch into the first open space.
- Chain 3 (counts as the first dc) and add 2 more dc in the same space.
- Move to the next open space and work 3 dc.
- Continue this pattern, filling each open space with 3 dc.
- End by joining with a slip stitch in the starting chain.
5. Open Space Alternation:
(Switching between rounds of open spaces and solid stitches)
- Round 1 of Open Spaces:
- Slip stitch to the next space to start.
- Chain 3 for the dc. Chain 4 for space.
- Place a dc in the next space, followed by 4 chains.
- Continue this pattern of 1 dc + 4 ch in all spaces around the row.
- Round 2 of Solid Stitches:
- Slip stitch to the first space.
- Chain 3 for the first dc and work 4 more dc in the same space (totaling 5 dc).
- In the next open space, work 5 dc.
- Continue this pattern until the round is complete.
6. Increasing and Alternation Logic:
Each round alternates between more open spaces or more solid stitches.
For open spaces:
- Add 2 extra chains in each space for every new open-space round (e.g., 4 chains, then 6, then 8, etc.).
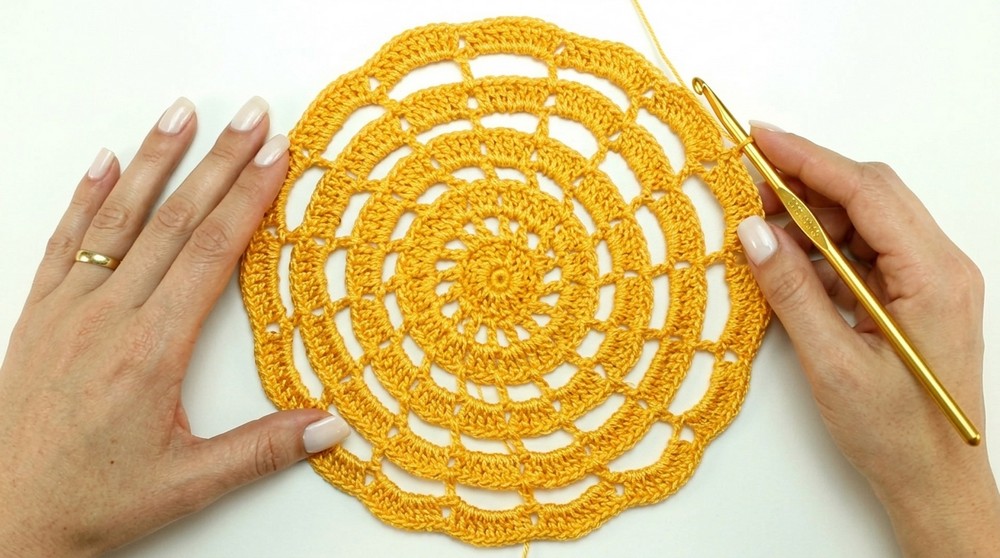
For solid stitches:
- Add 1 extra dc in each filled space for every new solid stitch round (e.g., 5 dc, then 6, then 7, etc.).
Repeat this alternating pattern until the desired size is reached.
7. Final Decorative Round (V Stitch and Leveled Finish):
- On the final row, apply V stitches for a neat, decorative frame:
- Chain 3 (acts as the start of the V stitch) and add 2 chains for the space, followed by another dc in the same stitch.
- Skip 2 stitches and repeat the pattern in the next stitch.
- After completing the V stitch round, finish the pattern with a decorative leaf like leque (fan stitch):
- In each open space of the V stitch, work 3 dc, 2 chains, and another 3 dc.
- Add a sc in each V stitch to anchor the pattern in between the fans.
Finishing the Pattern:
- Final Join: Secure the final round with a slip stitch into the third chain of the first starting chain.
- Weaving the Ends: Use the tapestry needle to weave the loose ends of the yarn securely into the back of your work.
- Burning/Melting Ends (with Polypropylene Yarn):
- Trim the excess yarn, leaving about 1 to 2 cm.
- Lightly burn the yarn end using the base flame of a lighter (avoid direct contact with the flame to prevent black marks).
- Gently press the melted yarn against the back of the work to secure it.
Final Measurements:
- The finished piece, after following the above pattern, should measure approximately 37 cm in diameter (or according to your preference).
Tips for Working with Polypropylene Yarn:
- Handle with Care: Polypropylene yarn can be slippery; keep a firm grip while crocheting.
- Test with Cotton Yarn: If planning to use a different yarn type (e.g., cotton), adjustments may be required for spacing and increases.
- Keep Edges Flat: To maintain a flat, round shape, consistently follow the increase patterns.
- Avoid Burning Excessively: When melting the ends, ensure you only use the flame’s base to prevent discoloration or damage.
Final Words:
Congratulations on completing your crochet round centerpiece/placemat. This stunning design showcases the unique shine and texture of polypropylene yarn, making it perfect for decorative or functional use. Experiment with different color combinations and sizes to create personalized sets for your home or as thoughtful gifts.