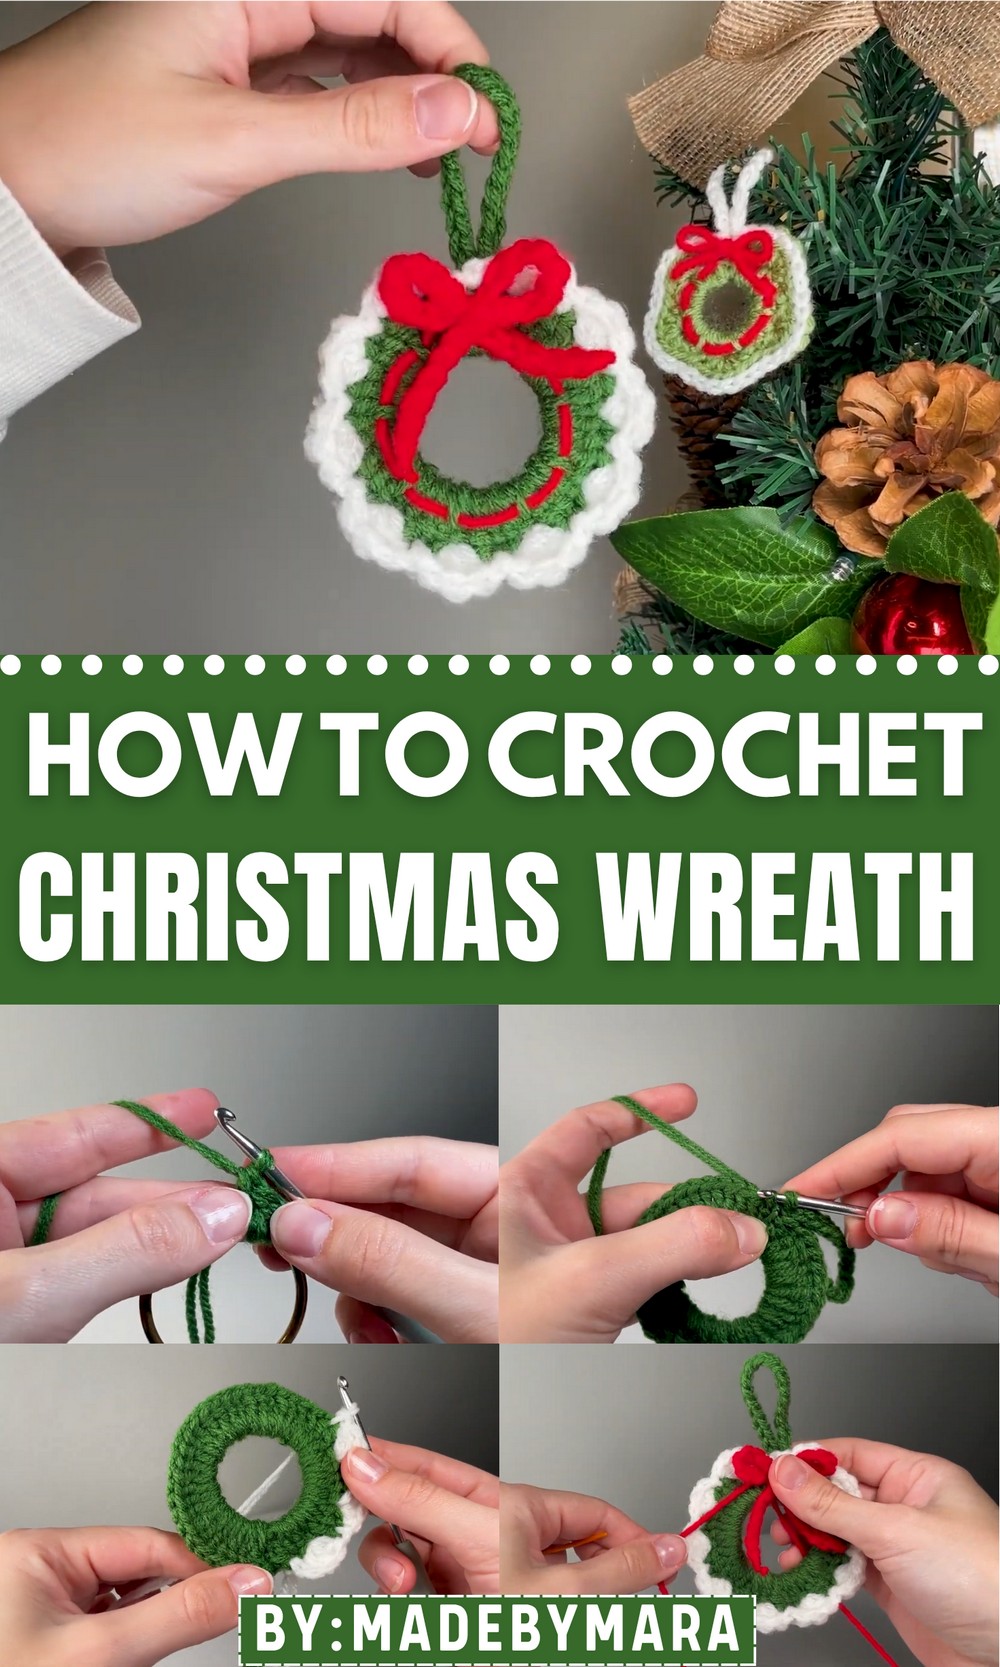
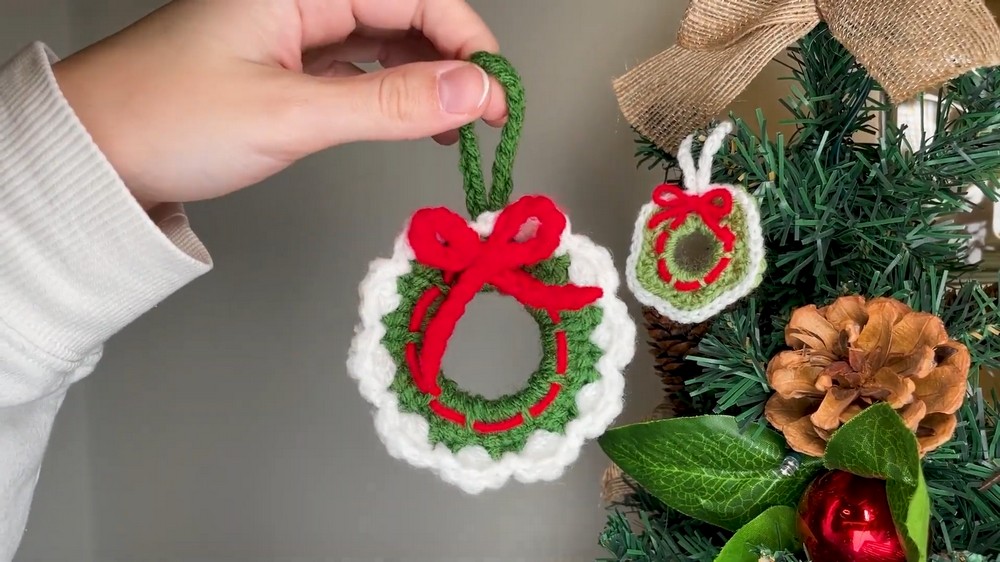
Bring festive beauty to your home with the Free Crochet Christmas Wreath Pattern and design a cozy handmade piece filled with holiday warmth.
Soft yarn loops shaped into a beautiful wreath instantly capture the warmth and spirit of the holidays. The rich texture, cozy greens, and festive accents make it a stunning handmade piece that draws attention wherever it hangs. The Free Crochet Christmas Wreath Pattern provides simple steps to create this eye-catching decoration using basic stitches that are easy to follow and enjoyable to work with.
Handmade Magic with This Crochet Christmas Wreath Pattern
From forming a sturdy circular base to layering lush yarn leaves and finishing with a bow or small ornament, every part of the process feels rewarding and fun. This pattern stands out for its versatility, it can be customized in endless ways using different yarn textures, shades, or decorative touches.
Whether styled in classic red and green or modern neutrals, the finished wreath adds charm to doors, walls, or mantels. Its quick construction and minimal materials make it a perfect weekend project for anyone who enjoys adding handmade beauty to their festive décor. Elegant yet simple, this crochet wreath brings the joyful essence of Christmas into every corner of your home.
Free Crochet Christmas Wreath Pattern
Skill Level
- Beginner to Intermediate: Basic crochet stitches and techniques including double crochet, slip stitch, and chain creation.
Finished Size
- Approximate size is 4-6 inches in diameter, depending on the type of ring/circle and yarn used. Adjust size by choosing thicker/thinner yarn or rings.
Gauge
Gauge is not critical for this project; however, ensure consistent tension throughout the stitches for uniform results.
Materials Needed
- Yarn:
- Various yarn types/colors: Green (for wreath base), White (for scalloped edge), and Red (for bow).
- You may use 2 strands of yarn simultaneously for a thicker finish. Adjust strand count based on the yarn thickness.
- Crochet Hook:
- Size 4 mm (G-6) hook.
- Notions:
- Metal Ring (or substitute with hair ties or keychain rings, depending on availability). Approximately 3-4 inches in diameter.
- Scissors.
- Yarn Needle (for weaving in ends and attaching bow).
Key Abbreviations (US Terminology)
- sl st: Slip Stitch.
- ch: Chain.
- dc: Double Crochet.
- sc: Single Crochet.
Special Techniques
- Slip Knot & Magic Ring: To neatly begin your work.
- Double Crochet (dc): The primary stitch used for the wreath base and scalloped edges.
- Creating Scalloped Edge: Combining double crochet clusters with slip stitches for decorative detail.
- Adjustable Bow: Forming a bow from chains for customization.
Pattern Instructions
Step 1: Wreath Base
Ring Setup
- Prepare your Yarn and Ring:
- Use two strands of green yarn simultaneously for thickness.
- Create a slip knot and insert it onto your hook.
- Attach Yarn to Ring:
- Insert the hook into the ring and pull the slip knot through.
- Tighten to secure.
- Chain 1 (ch 1).

Covering the Ring
- Begin Double Crochet:
- Yarn over and insert your hook into the ring.
- Yarn over, pull up a loop (3 loops on the hook).
- Yarn over, pull through the first two loops.
- Yarn over, pull through remaining two loops to complete the double crochet (dc).
- Continue Working Around the Ring:
- Repeat dc stitches around the entire ring, sliding completed stitches along to crowd the ring and lay flat.
- Push stitches closer together as you go to avoid any gaps.

- Number of Stitches:
- The number of double crochet stitches may vary depending on the ring size; approximately 40 dc stitches should cover the ring.
- Finish the Round:
- Once you reach the starting point, insert your hook into the second chain from the start, yarn over, and pull through to make a sl st to close the round.
Step 2: Hanging Loop
- Create Chain Loop:
- Chain 20 (or adjust to desired loop length).
- Insert your hook back into the same stitch (where the round was closed) and make a sl st.
- Fasten Off:
- Chain 1, cut the yarn, and pull it through.
- Weave the yarn ends into the back of the stitches using a yarn needle.

Step 3: Scalloped Edges
Attaching White Yarn
- Create a slip knot with white yarn and attach it to the wreath:
- Insert hook into first chain stitch of the wreath, pull the slip knot through, and tighten.
- Chain 1 (ch 1).
Creating Scallops
- Cluster of Double Crochets:
- Skip 1 stitch, then work 3 dc in the next stitch.
- Skip 1 stitch and make a sl st into the next stitch.
- Repeat:
- Skip 1 stitch, work 3 dc into the next stitch, then sl st into the following stitch.
- Continue this pattern (creating scalloped edges) all the way around the wreath.
- Finish Scallops:
- If space allows, work your final scallop cluster and close the round with a sl st back into the very first chain stitch.
Fasten Off:
- Chain 1, cut the yarn, pull it tight, and weave loose ends into the back of the scalloped edges.
Step 4: Bow
Creating Chains
- Slip Knot: Create a slip knot using red yarn.
- Chain 35: Adjust the number to make the bow larger or smaller as desired.
- Fasten Off: Cut yarn, tighten the last chain, and use yarn ends to tie the chain into the shape of a bow.
Attaching Bow
- Use Yarn Needle: With a yarn needle, secure the bow to the front of the wreath.
- Insert the yarn needle through the back, catching the center of the bow.
- Go back through a few stitches on the wreath to secure the bow.

- Repeat until the bow is firmly attached.
- Weave and Trim: Weave any leftover yarn into the edges at the back of the wreath and trim excess ends.
Customization Ideas
- Color Options: Experiment with non-traditional colors such as pastel shades or metallic yarns for a modern look.
- Decorative Additions: Attach beads, miniature holiday ornaments, or glittery elements to the wreath for added flair.
- Size Variation: Use larger rings or adjust the yarn thickness for a bigger wreath.
Conclusion
Your festive crocheted wreath is complete! Its scalloped edges, decorative bow, and hanging loop make it versatile for various holiday decorations, from tree ornaments to door hangers. Customize it further to suit your creative vision for the season.
Pattern Corrections
- Slipping Stitches: Ensure slip stitches around the ring are smooth and not overly tight to avoid deformation.
- Scallops: If gaps appear, adjust stitch spacing or add extra dc clusters.
Tips
- Consistent Tension: Maintain even tension for uniform scalloped edges and overall neatness.
- Avoid Overcrowding: If stitches around the ring feel bunched, adjust spacing slightly.
- Blocking: To flatten the scalloped edges, lightly block the wreath using steam or damp cloth.