
Make a unique and charming Crochet Miffy Keychain with this easy and fun pattern that adds a personal touch to your accessories and gifts.
When I first saw the cute little bunny on YouTube, I really liked how simple and nice it looked. The Crochet Miffy Keychain shows the famous Miffy character as a small, soft, and easy-to-carry keychain. I found a helpful video tutorial from Divine Crochet that explains how to make it step by step.
Sweet Crochet Miffy Keychain Free Pattern with a Tiny Bunny Look
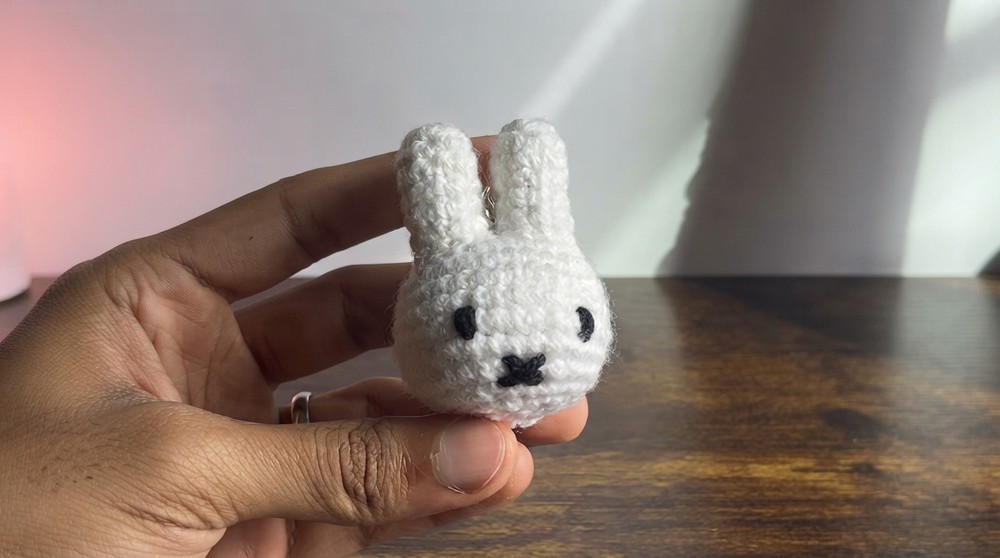
This little keychain is not only cute but also a great gift for friends or family who like handmade things. You can put it on your keys, backpack, or purse, or just use it as a small decoration. The keychain is mostly white with simple black eyes and soft ears, which makes it look just like Miffy. It is small and light, so you can carry it with you everywhere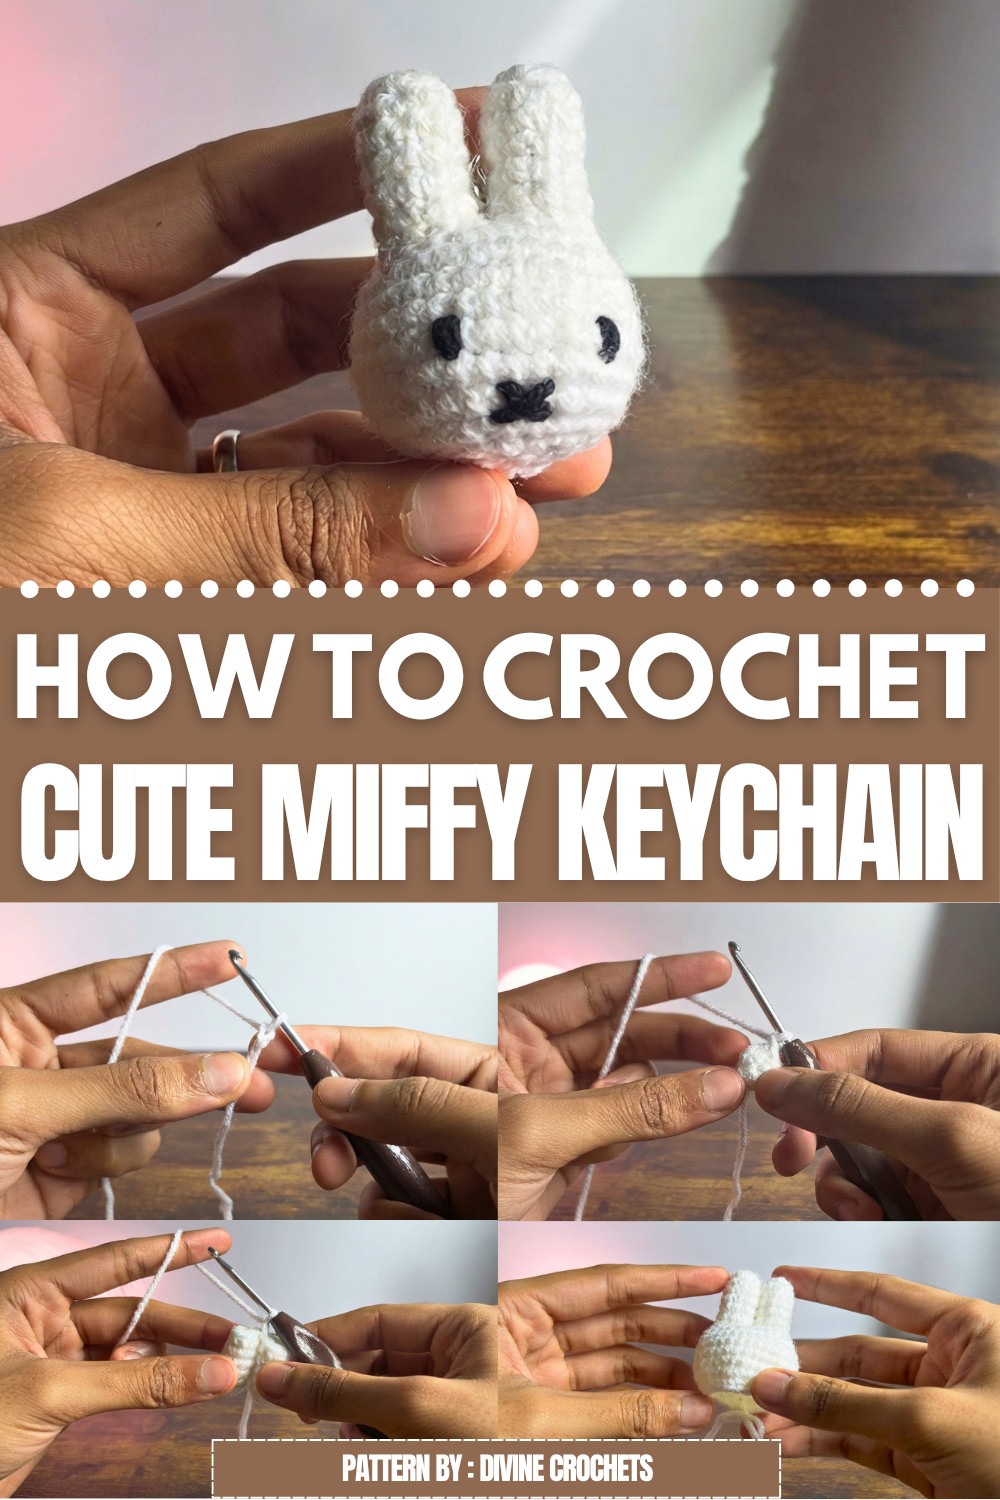 What I liked most is that the tutorial is easy to follow, even if you are a beginner. The video shows every step clearly, so you won’t get confused. Making this Crochet Miffy Keychain is fun and makes a nice little toy or gift. You can learn important crochet skills while working on this project. It uses simple stitches that help you practice and improve.
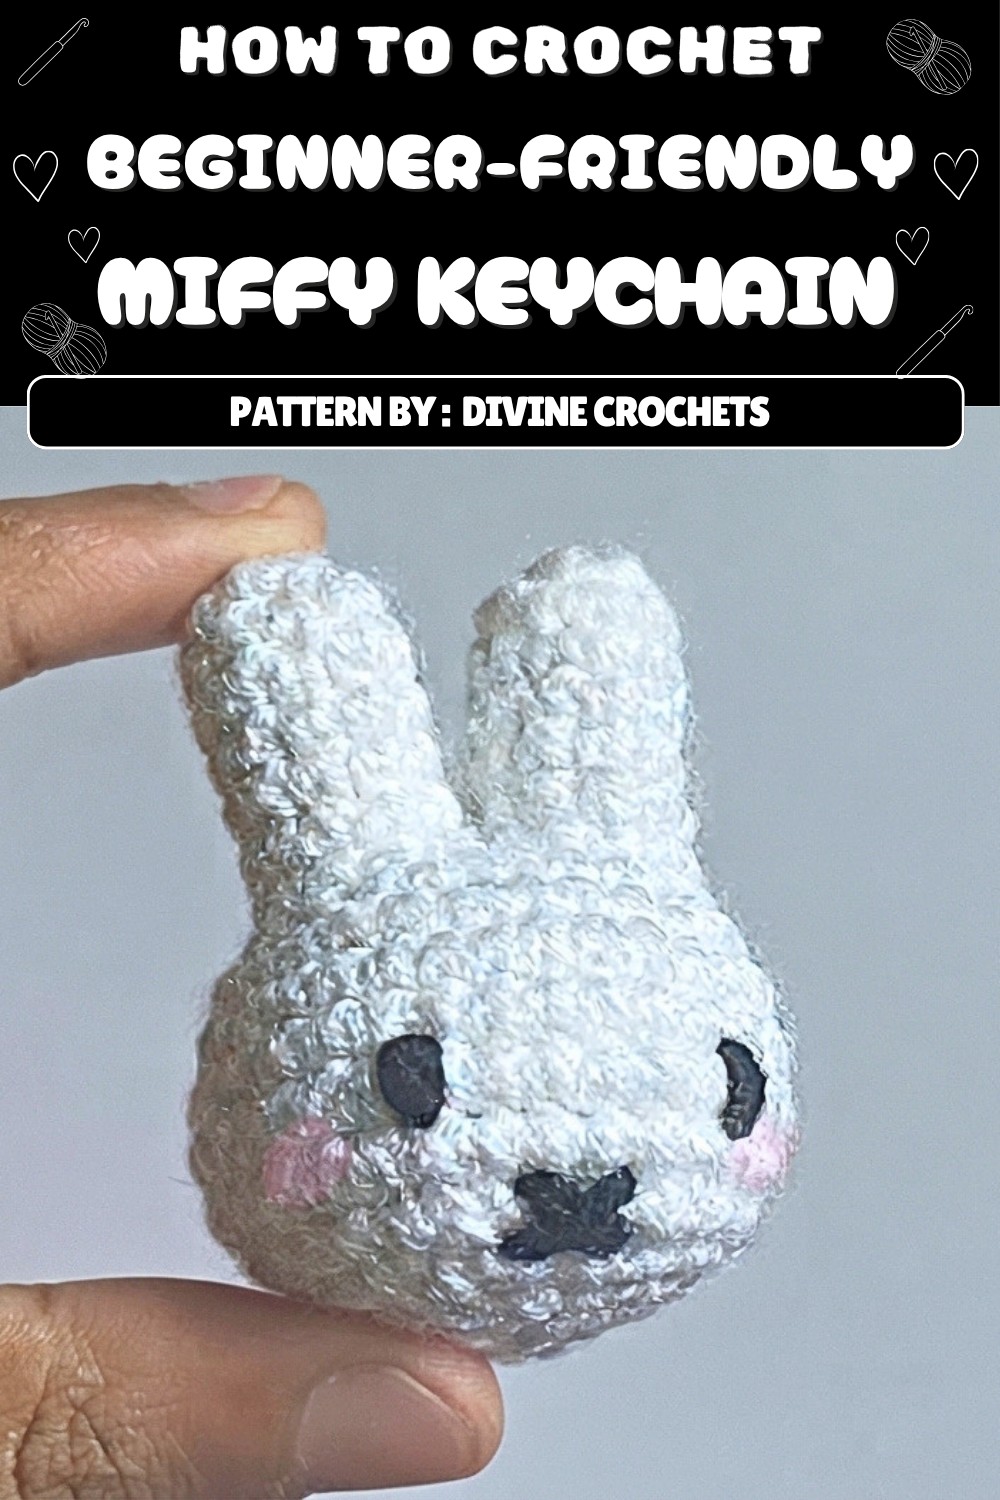 If you want to try crocheting, this free tutorial is a great place to start. It’s a fun way to make something cute and handmade. At the end, you will have a lovely keychain to keep or give to someone special. Making this little bunny is a small but joyful project anyone can enjoy.
Adorable Amigurumi Miffy Crochet Pattern
This amigurumi Miffy crochet pattern guides you through making a charming bunny keychain, inspired by the classic character. Using basic stitches and clear, gradually progressing rounds, the instructions support absolute beginners or those new to amigurumi. Essential shaping techniques, simple colorwork for details, and thoughtful instruction about holding yarn and hook make the process accessible and rewarding. Add a keyring for a practical accessory or use your finished Miffy as a bag charm, ornament, or cute soft toy. This crochet project is approachable, manageable in size, and offers a wonderful introduction to both amigurumi and the world of crochet toys.
Pattern Basic Points
Key Features
- Step-by-step construction of the head and ears as one piece
- Shaping through basic stitch increases and decreases
- Embellished with simple facial embroidery
- Blush and keyring details for personalization
Highlights
- Minimal sewing: ears are attached as you crochet
- Guided tips for holding yarn and crochet hook for best results
- In-the-round continuous crochet for seamless shaping
- Methodical marking of stitches ensures easy tracking even for first-timers
Special Notes
- Consistent tension throughout the project ensures neat stitches and professional-looking results.
- Using a stitch marker is highly recommended; makes tracking rounds and stitches simple and stress-free.
- For assembly and finishing touches, such as facial features and blush, embroidery with yarn is suggested for safety and a soft appearance.
- If desired, swap out the keyring step for another attachment, such as a zipper pull, bag charm, or leave as a standalone plush.
- Stuff the piece gradually, particularly in the head and ears, to maintain shape and prevent lumps.
Skill Level
Beginner
The pattern is written for those new to crochet and amigurumi. Each technique— from slip knot to increasing and decreasing— is methodically explained. No previous experience with toys required.
Materials
- Weight 4 yarn, main color (e.g. white)
- Small amounts of pink and black yarn (for blush and facial features)
- 3.5 mm crochet hook
- Scissors
- Stitch marker (or substitute: bobby pin, paper clip)
- Yarn needle (tapestry needle)
- Polyester stuffing or yarn scraps
- Key ring (optional)
Measurements / Sizing
- Finished height: Approximately 3.5–4 inches (9–10 cm), depending on yarn, tension, and stuffing.
- Sizing may vary slightly with choice of yarn/hook; this project is intended to be a compact accessory.
Gauge (and Stitch Pattern if Applicable)
- Gauge is not critical for this amigurumi project. Aim for tight, consistent stitches so stuffing does not show through.
- Stitch pattern: Worked in single crochet (sc) continuously in the round, aside from some rows of increasing and decreasing for shaping.
Stitch Abbreviations
| Abbreviation | Meaning |
|---|---|
| sl st | slip stitch |
| ch | chain |
| sc | single crochet |
| inc | increase (2 sc in one stitch) |
| dec | decrease (inv. sc2tog) |
| st(s) | stitch(es) |
Special Stitches
- Magic Ring (Beginner Version using Chains):
- Chain 4, slip stitch into first chain to form a ring. Work first round into the center.
- Single Crochet Increase (Inc):
- 2 sc in one stitch.
- Single Crochet Decrease (Dec):
- Insert hook through front loop only of next two stitches, yarn over and pull through both loops, yarn over and pull through two loops on hook.
- Embroidery for Eyes, Mouth, Blush:
- Use yarn needle to weave yarn through desired spots for features.
Preparation
- Prepare all materials. Having a stitch marker (or suitable alternative) will keep rounds tidy.
Holding Yarn and Hook
- Tailor the grip: knife or pencil grip for the hook, whichever feels natural.
- Maintain slight tension on yarn with fingers.
Beginning with Slip Knot and Chain Ring
- Start with a slip knot on your hook.
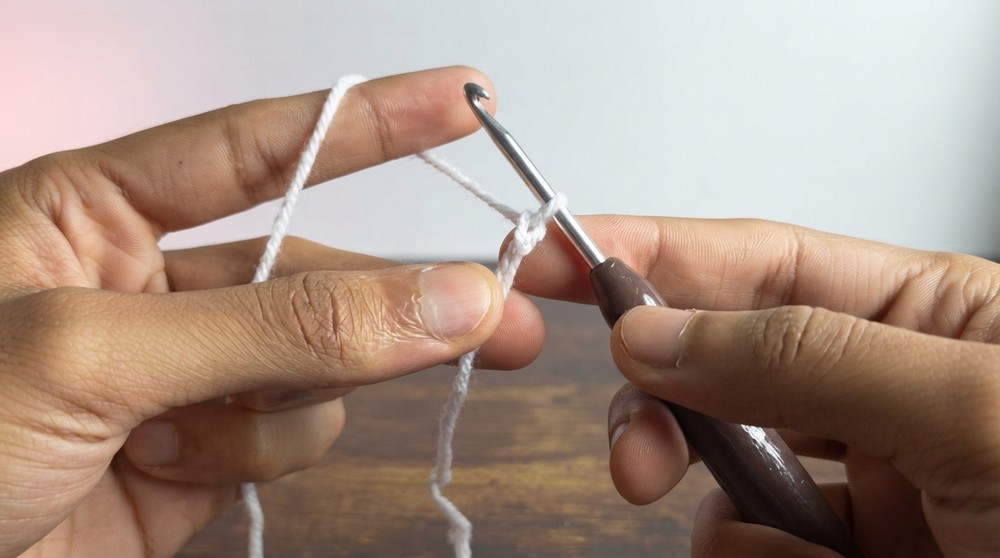
- Ch 4, sl st in first ch to form a ring.
Ears (Make 2—worked in one piece)
- Round 1:
- 6 sc in ring. Place marker in first stitch.
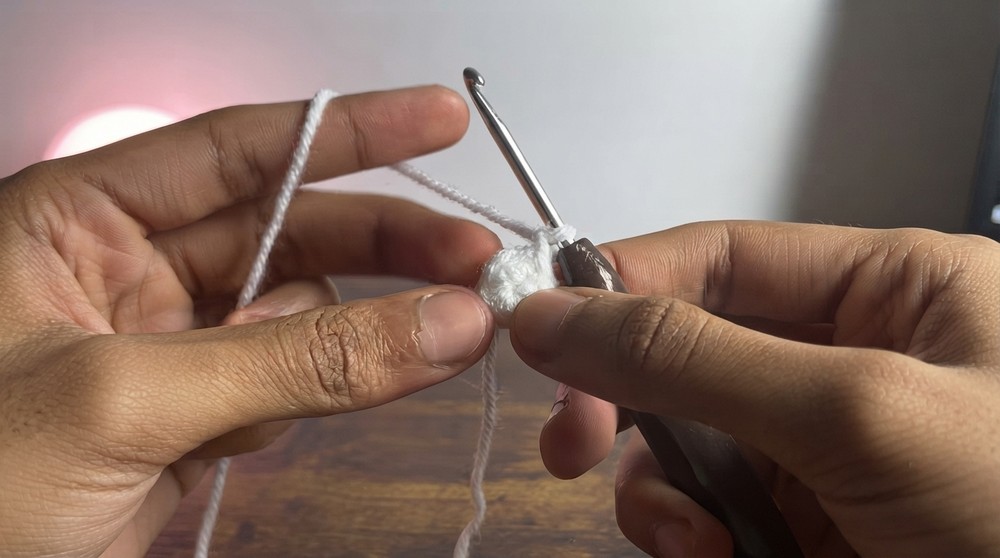
- 6 sc in ring. Place marker in first stitch.
-
Round 2:
- 1 sc in first st, inc in next st; repeat around. (9 sts)
-
Rounds 3–6:
- 1 sc in each st around. (9 sts per round)
- After finishing first ear, fasten off and set aside.
- Repeat for second ear, but do not fasten off after finishing round 6.
-
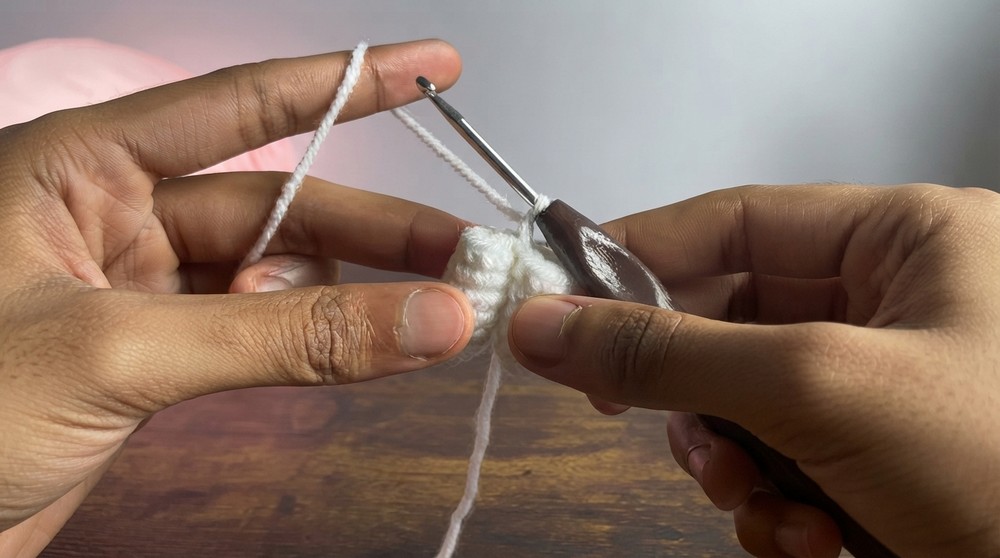
Join Ears:
- Tuck in any yarn tails from the ring.
- Lightly stuff both ears.
- Slip stitch through the stitch you ended on in ear one to the corresponding stitch in ear two, then ch 1 to secure.
Head
-
Round 7:
- 1 sc in each st around both ears, joining them into one round (18 sts in total: 9 per ear).
-
Round 8:
- Sc in next 2 sts, inc in next st; repeat around. (24 sts)
-
Round 9:
- Sc in next 3 sts, inc in next st; repeat around. (30 sts)
-
Rounds 10–13:
- 1 sc in each st around. (30 sts per round)
-
Round 14:
- Sc in next 3 sts, dec over next 2 sts; repeat around. (24 sts)
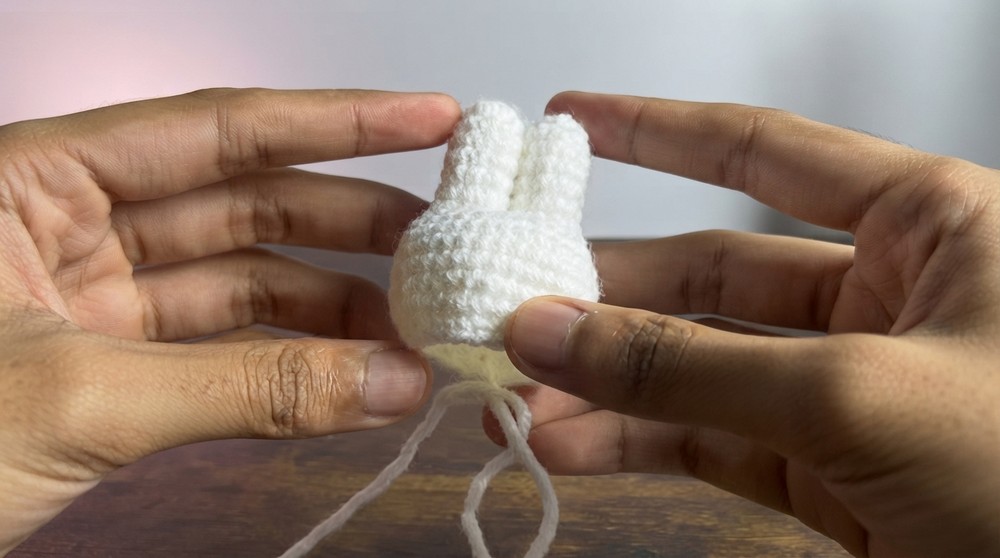
- Sc in next 3 sts, dec over next 2 sts; repeat around. (24 sts)
-
Round 15:
- Sc in next 2 sts, dec over next 2 sts; repeat around. (18 sts)
- At this stage, begin stuffing the head firmly.
-
Round 16:
- Sc in next st, dec over next 2 sts; repeat around. (12 sts)
- Add more stuffing as needed for full head shape.
-
Round 17:
- Dec in every st around. (6 sts)
- Fasten off, leaving a long tail.
- Thread tail on yarn needle, weave through front loop of each remaining st, pull tight to close.
- Secure by weaving needle through the top and out the side, knot yarn, and hide tail inside body.
Facial Embroidery
- Eyes:
- Thread black yarn onto yarn needle.
- Position eyes on round 12, six stitches apart.
- Stitch above and below the round for an oval (Miffy’s classic look). Secure and hide tails inside head.
- Mouth (X Shape):
- Using black yarn, stitch an “X” centered two rounds below the eyes.
- Blush:
- With pink yarn, stitch a small patch under each eye, one stitch long.
Adding Keyring (Optional)
- Position key ring between the ears.
- Use white yarn and needle to secure: sew through ring and firmly attach to the top of Miffy’s head with multiple passes.
- Knot and hide all yarn tails within the plush.
Conclusion
Making this amigurumi Miffy offers both a gentle learning experience and an opportunity to practice essential crochet techniques. The pattern’s structure, from the construction of ears and seamless shaping of the head to the finishing touches of embroidered facial details, helps reinforce foundational skills for anyone delving into the world of amigurumi. The project is intentionally crafted for accessible success, providing soothing repetition and clear milestones. The result is a charming, handheld bunny whose soft features and tidy construction reflect attention to detail and careful handiwork. Whether used as a keychain, bag charm, or a small plush, this Miffy adds a touch of sweetness and nostalgia to everyday life, showcasing the rewards of handwork through approachable steps and friendly techniques.