
Give your daily style a playful touch with a Free Crochet Strawberry Tote Bag Pattern that holds your things while showing a sweet fruit inspired look.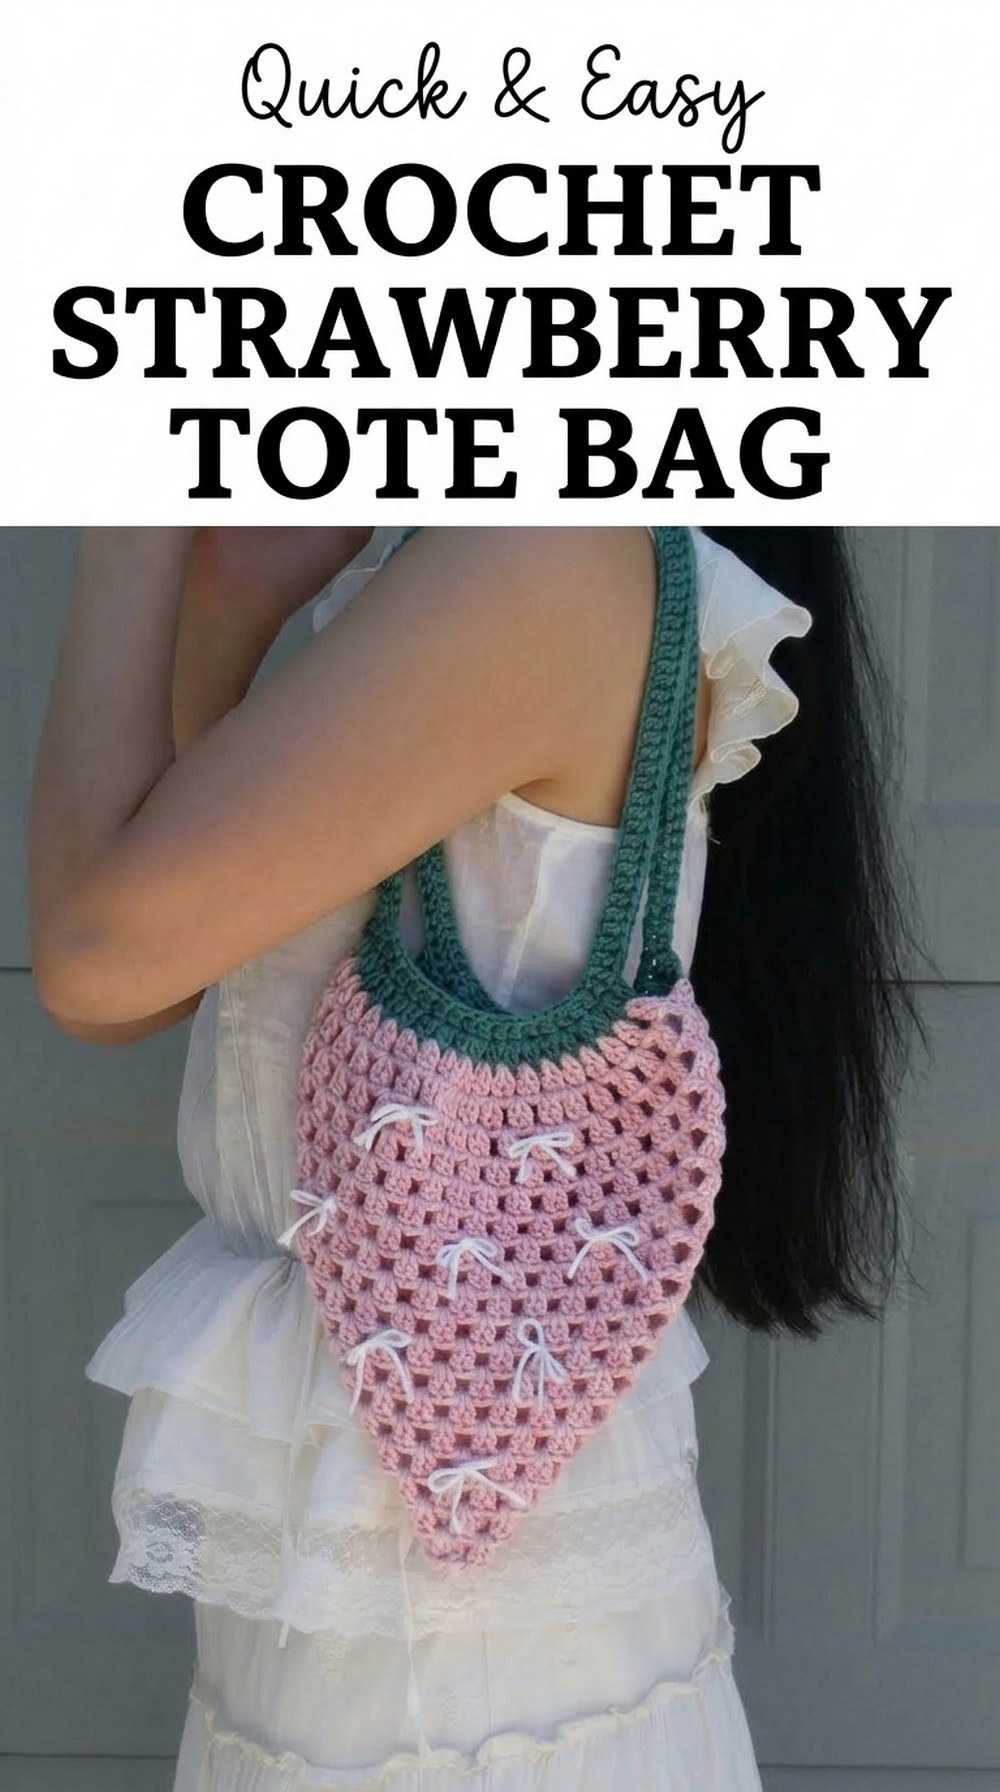
Perfect Free Crochet Strawberry Tote Bag Pattern for groceries, books, or fun
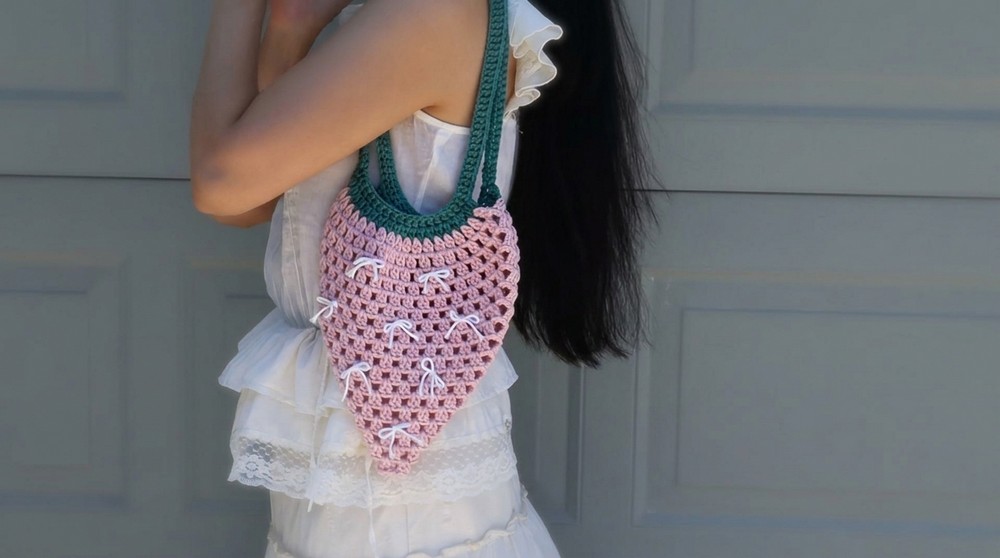
Turn your love for strawberries into a cute and stylish crochet project, The Free Crochet Strawberry Tote Bag Pattern lets you make a beautiful bag that looks just like a giant, juicy strawberry. With its soft pink body, green leafy straps, and small white seed like details, this tote bag is the perfect mix of adorable and functional.
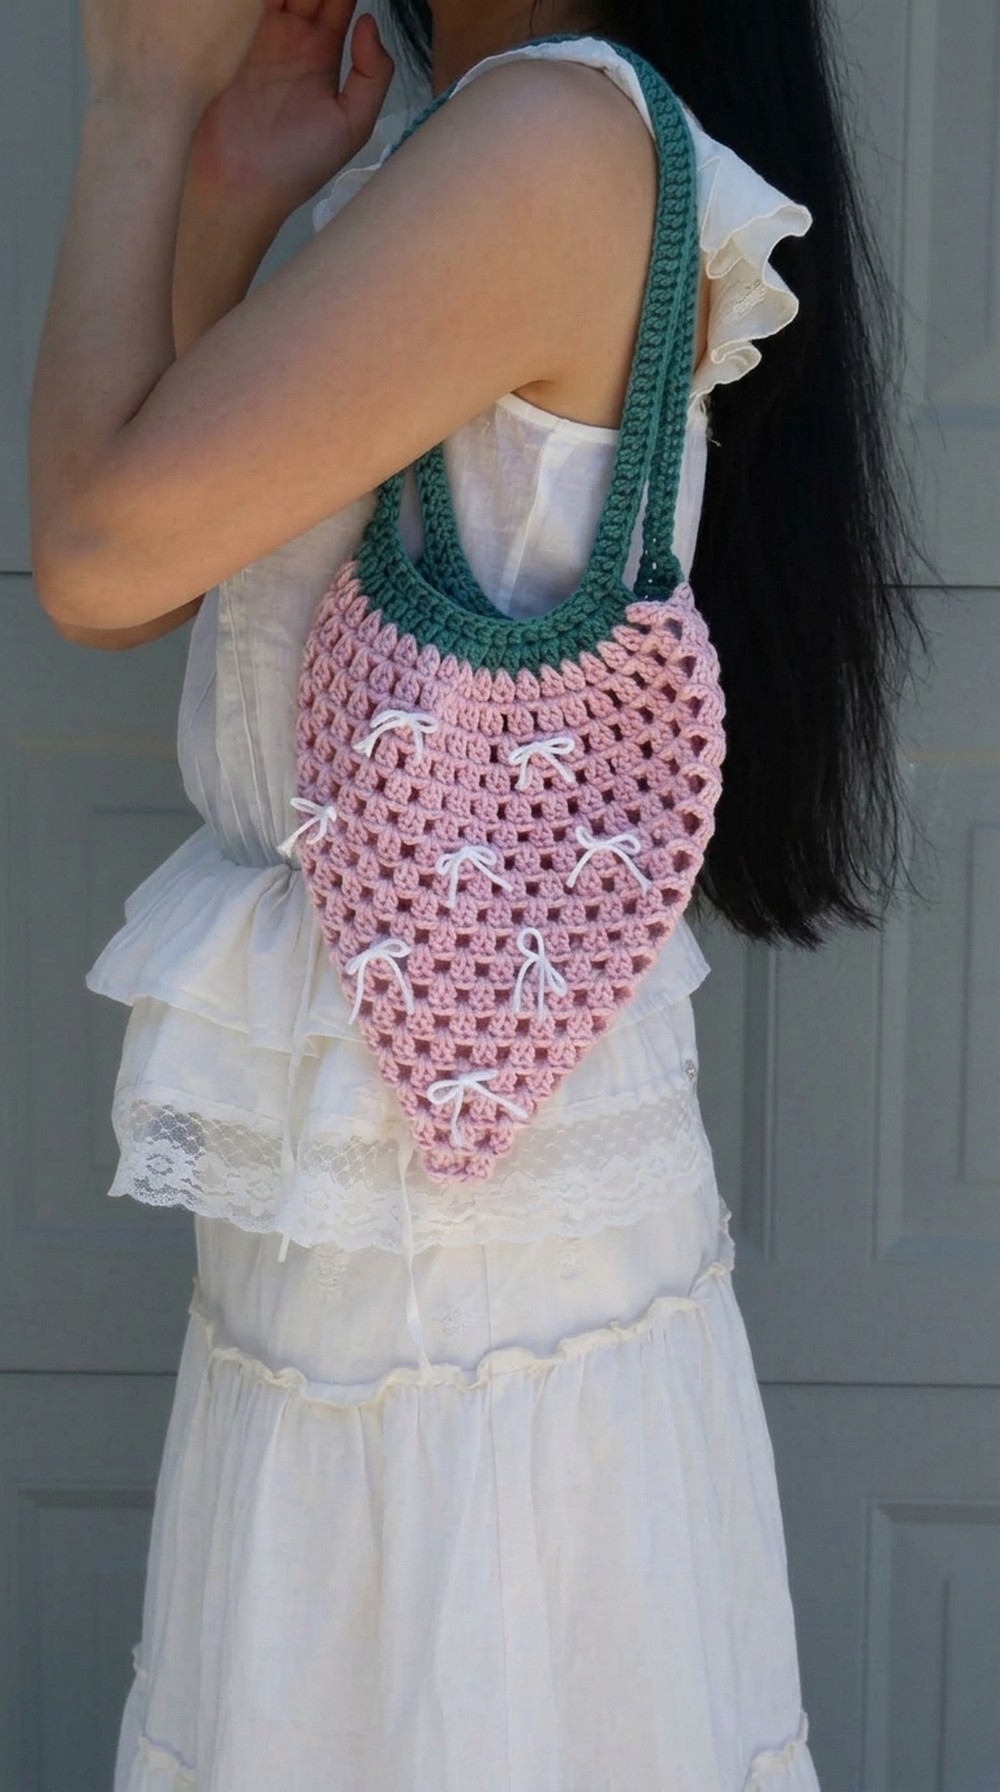
It’s lightweight and great for carrying books, snacks, or even as a thoughtful gift for someone special. You can make this bag your own by choosing different colors or adding extra decorations. This easy pattern is perfect for beginners and anyone who enjoys crafting. Whether for everyday use or special occasions, this strawberry inspired tote will add a touch of sweetness and charm to your life.
Bright Crochet Strawberry Tote Bag Pattern
Materials Needed
- Crochet Hook: 4.5 mm
- Yarn: Medium weight, 100% cotton yarn
- Green yarn (for the handle/stem)
- Pink yarn (for the body of the strawberry)
- White yarn (for seeds/ribbon decoration)
- Scissors
- Yarn needle
- Stitch markers (optional, for marking corners)
- Ribbon (optional, for decorative touches)
Gauge
- Gauge is not critical for this pattern.
- Use the same medium weight yarn for consistent texture and dimensions.
Finished Size
- Strap length: Adjustable, approximately 100 chains.
- Bag size: Customizable based on your desired dimensions (sample size ends up being tote size appropriate for everyday use).
Pattern Overview
This fun and adorable Crochet Strawberry Tote Bag is made using beginner friendly techniques such as chains, slip stitches, double crochets, and clusters. The project is worked in rows and rounds, starting with creating the two straps (or stems). These straps are later joined and crocheted into the body of the strawberry bag. White yarn or ribbons are used to add seed details for final decoration.
Pattern Instructions
Step 1: Create the Straps (Handles/Stem)
- Start with the Green Yarn:
- Create a slip knot and chain 100 chains. Keep the chain straight.
- Join the Chain:
- Slip stitch into the first chain to form a circle. Be careful to keep the chain straight.
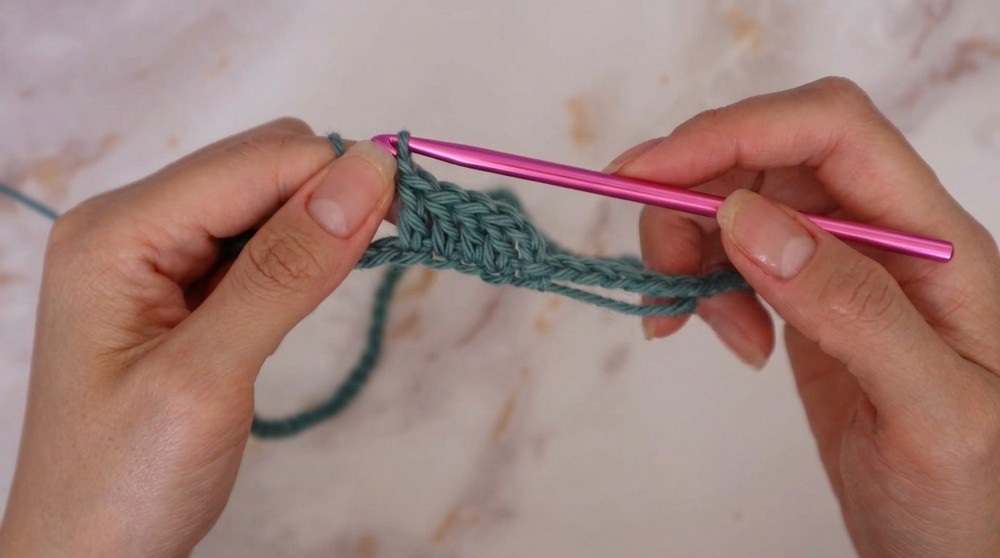
- Slip stitch into the first chain to form a circle. Be careful to keep the chain straight.
- Crochet the Strap:
- Chain 2 (this counts as the first double crochet).
- Double crochet into every single chain around.
- When reaching the start of the chain again, slip stitch into the top of the first double crochet chain to join.
- Repeat:
- Chain 1 and fasten off the yarn.
- Repeat steps 1–3 to create a second identical strap.
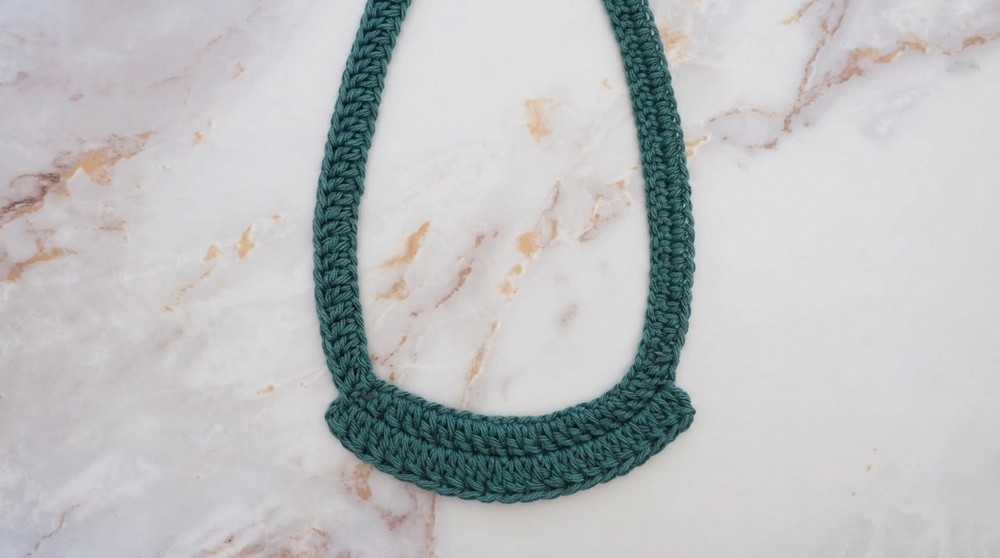
Step 2: Begin the Body of the Strawberry
- Attach the Pink Yarn:
- Lay the two straps side by side.
- Take the first strap and find a space between two clusters.
- Attach the pink yarn by creating a slip knot and chaining 3 (counts as the first double crochet).
- Work Across the First Strap:
- In the same space, place 1 more double crochet.
- Chain 1 and move to the next space between clusters. Place 2 double crochets.
- Repeat this pattern (2 double crochets, chain 1) until you reach the end of the first strap.
- Join the Second Strap:
- Without chaining 1, move directly to the first space between clusters on the second strap.
- Place 2 double crochets in the same space and continue the same pattern (2 double crochets, chain 1).
- Complete the First Row:
- Make sure both straps are connected as a single piece.
- Slip stitch to join at the end of the round, and slip stitch into the next chain space to start the next round.
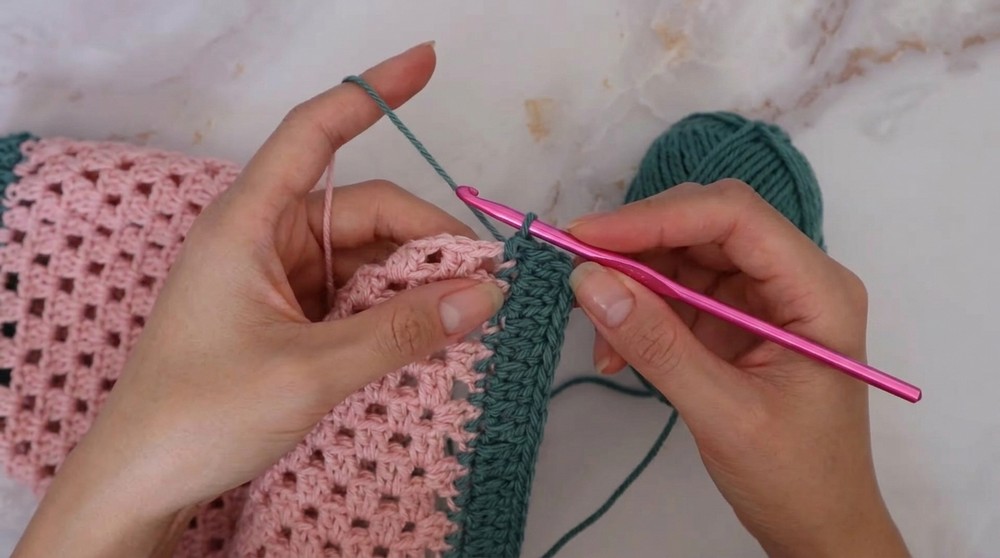
Step 3: Build the Strawberry Body
- Work Continuous Rows:
- For every new round, chain 3 (counts as the first double crochet), then repeat the pattern: 2 double crochets in one space, chain 1, move to the next chain space.
- Repeat this pattern all around, ensuring you do not chain between clusters at the corners for smoother tapering.
- As more rows are completed, the bag will start tapering to create the strawberry shape.
- Finishing the Body:
- Continue in rows as the pattern naturally decreases.
- When you have only 3 double crochets on each side of the strawberry, it’s time to close the bag.
Step 4: Closing the Bag
- Closing the Bottom:
- After completing the current row, press the front and back sides of the bag together so the chain spaces match up.
- Slip stitch into the chain space from both front and back to join them.
- Chain 3, make 2 double crochets into the final chain space, and slip stitch into the top of the chain from the row below.
- Repeat until the bottom of the bag is fully closed.
- Reinforce the Bottom (Optional):
- For extra sturdiness, slip stitch along the edges of the bottom row to make a firmer foundation for the tote.
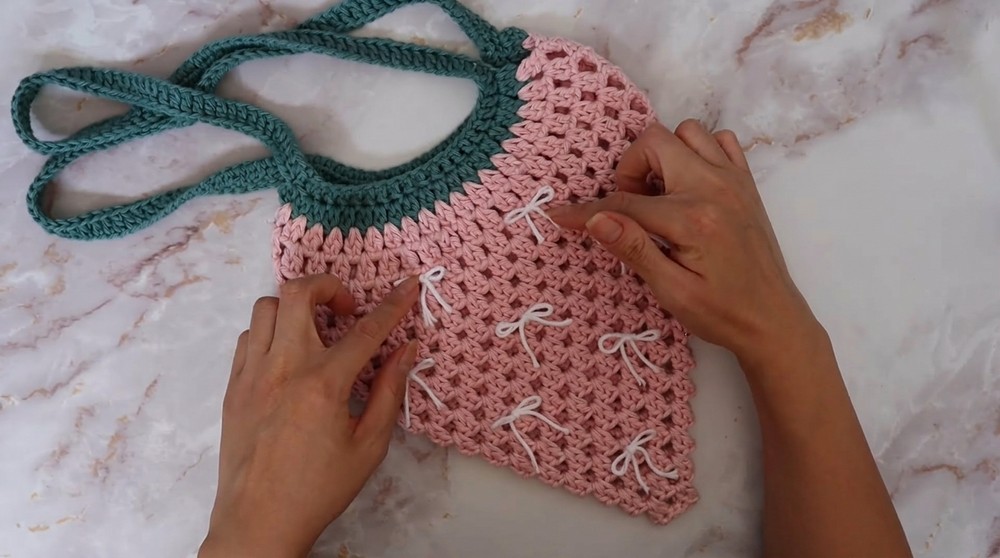
- For extra sturdiness, slip stitch along the edges of the bottom row to make a firmer foundation for the tote.
Step 5: Adding the Seed Decorations
- Measure and Cut White Yarn or Ribbon:
- Cut short strands of white yarn or ribbon (around 2–3 inches each, depending on your preference).
- Attach Seeds:
- Identify each round of clusters. Begin approximately 4 rows above the bottom of the bag.
- Thread a strand of ribbon or yarn and tie it onto a central double crochet stitch (you may use a yarn needle for this step).
- Skip 3–4 rows and attach another set of seeds in an alternating pattern. This will give the appearance of scattered strawberry seeds.
- Repeat this process across both sides of the bag.
Special Techniques
- Slip Stitch Join: Used to connect straps and rows seamlessly.
- Double Crochet Cluster: Yarn over, insert the hook into the specified space, pull up a loop, yarn over, and pull through two loops; repeat in the same space and pull through all remaining loops.
- Corner Decrease: Do not chain between clusters at corners to help shape the bag naturally.
Tips and Customization
- Adjust the Strap Length:
- Customize the straps by increasing or decreasing the number of initial chains (e.g., chain 80 for shorter straps or 120 for longer ones).
- Colors:
- Use different yarn colors to create unique variations like blueberries, raspberries, or other fruits.
- Alternative Seed Decoration:
- Substitute white yarn with beads or decorative buttons for a more unique and personalized look.
- Add a Lining:
- Sew a fabric lining to the inside of the bag for added durability and to prevent small items from falling out.
Summary & Final Thoughts
The Strawberry Tote Bag is a delightful project for crocheters of all skill levels. It creates a whimsical and practical bag that stands apart with its colorful design and adorable strawberry seeds. The finished tote is perfect for carrying small daily essentials like books, snacks, or even lightweight groceries.
By following this pattern and customizing colors or adding additional details, you can make a variety of fun fruit inspired bags. Whether you keep it for yourself or gift it to someone, the Crochet Strawberry Tote Bag is sure to bring a little joy and inspire creativity with its unique charm.
