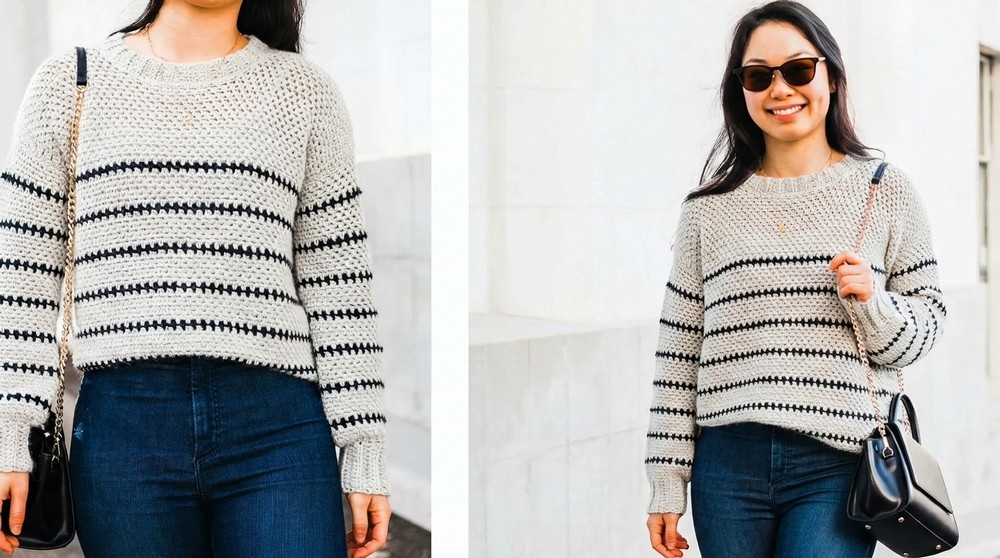
Make a cheerful and soft sweater with this free crochet striped sweater pattern that brings colors together for everyday wear.

Amazing Free Crochet Striped Sweater Pattern to Upgrade Your Wardrobe
This beautiful project uses cozy yarn to make a long shirt with colorful lines that wrap around your body like a friendly hug. It features a special linen stitch that makes the fabric feel very smooth and stretchy so you can move around easily while you walk to school.
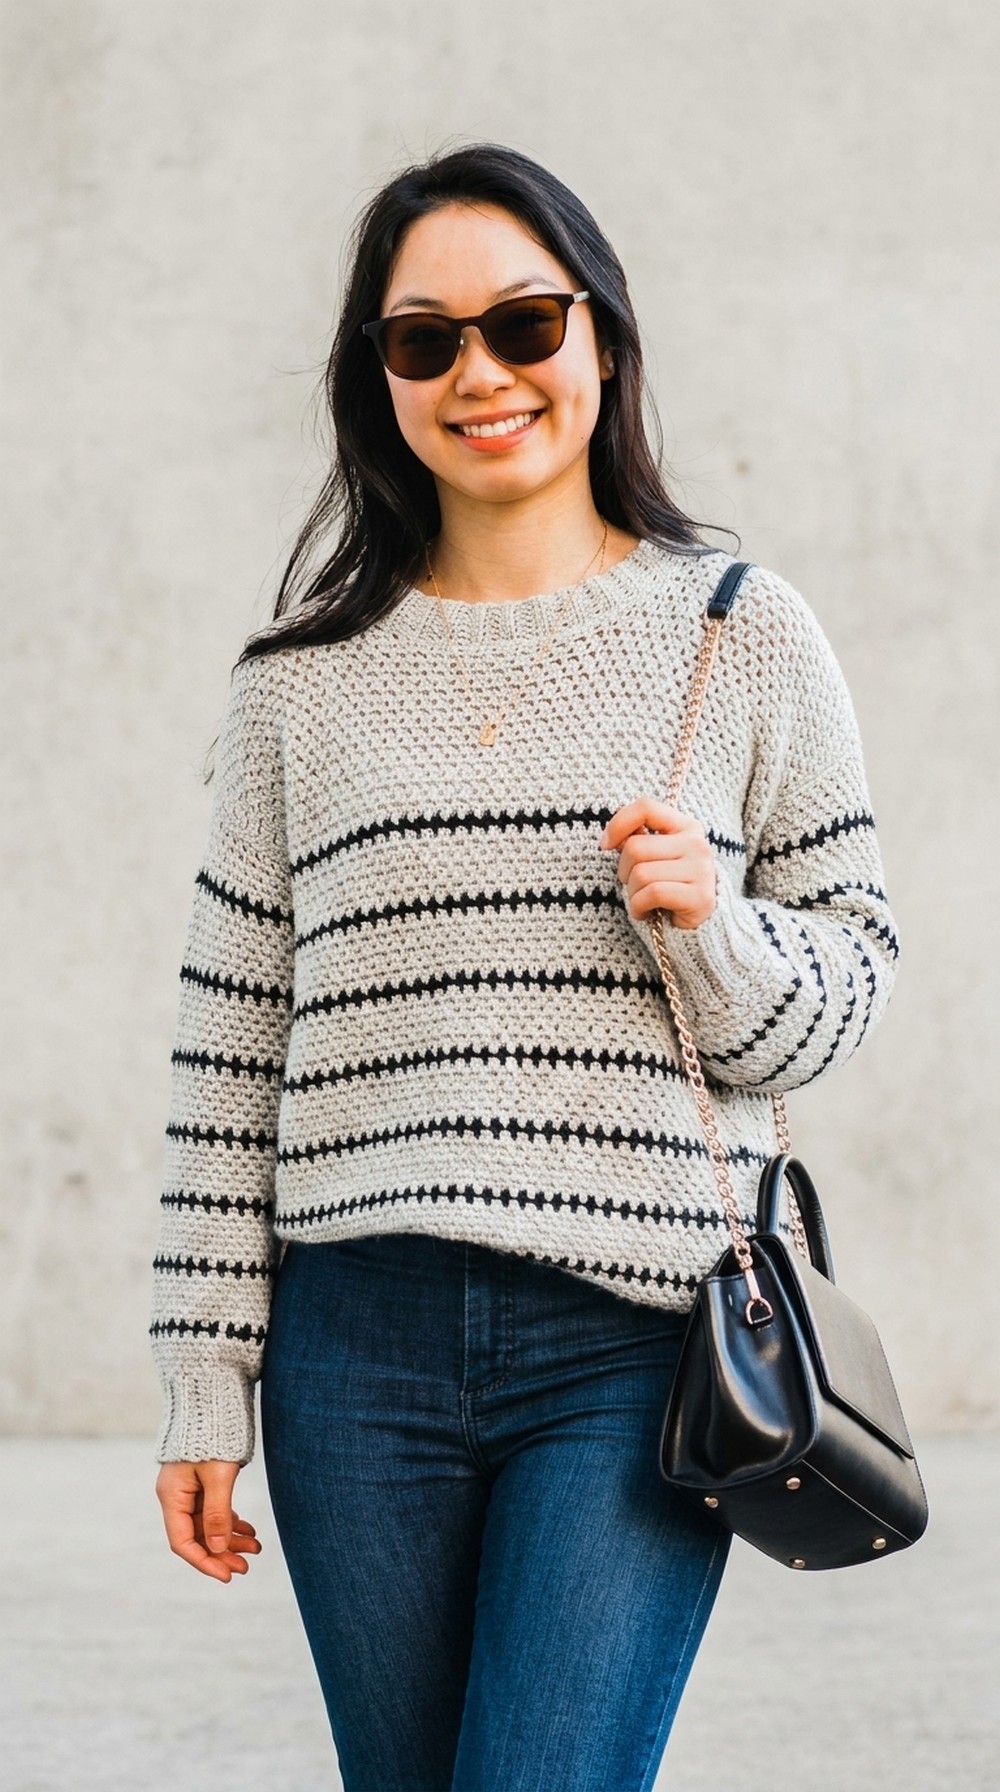
You can use this Free Crochet Striped Sweater Pattern to stay comfortable all winter or give it to someone you love as a very special handmade gift. The appearance is very unique because you can pick your own favorite colors for the stripes to make a treasure that is all your own.
Crochet Striped Sweater Pattern
Materials Needed
- Yarn: DK weight yarn
- Yarn amounts for sizes (XS to 5XL) are listed in the blog post linked in the video description.
- Hooks:
- 5.5 mm crochet hook
- 6 mm crochet hook
- Tools:
- Darning needle
- Scissors
- 2 stitch markers
Special Techniques Overview
- Half Double Crochet (HDC):
- Yarn over, insert hook, yarn over, pull up a loop, yarn over, pull through all three loops.
- Back Loop Half Double Crochet (BL HDC):
- Work into the back strand of the stitch only, furthest from you.
- Single Crochet (SC):
- Insert hook, yarn over, pull up a loop, yarn over, pull through two loops.
- Linen Stitch:
- Alternates between single crochet (SC) and chain 1, skipping one stitch, throughout the row.
Pattern Instructions
Step 1: Back Panel
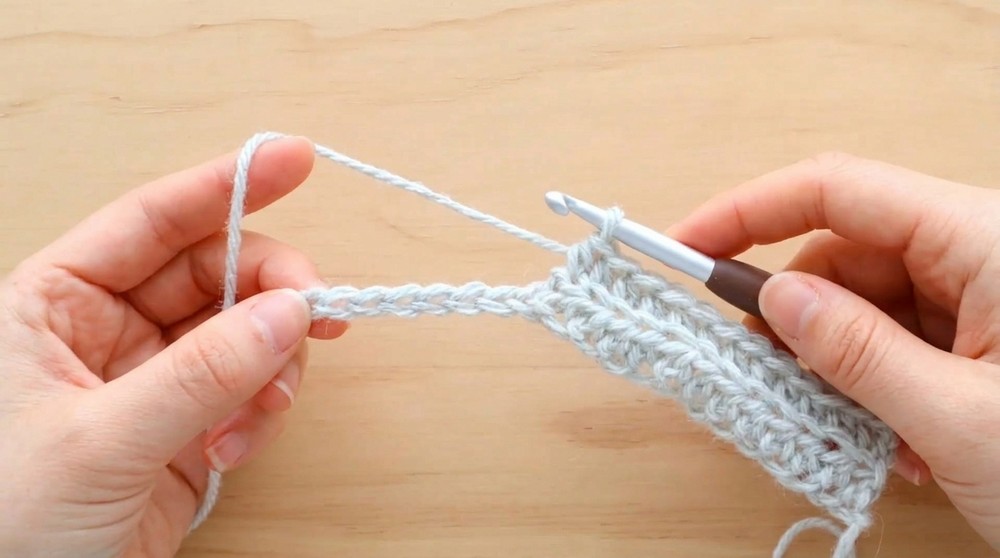
- Ribbing:
a. Using the main color and the 6 mm crochet hook, create a slip knot and chain 12.
b. HDC in the second chain from the hook, and HDC in each chain across (11 stitches). Turn.
c. From Row 2 until the end of Row 47, chain 1, BL HDC across, and HDC in the last stitch.
- Body Panel:
a. Switch to the 5.5 mm crochet hook.
b. Work along the long edge of the ribbing using SC and create the following:- One SC in the first three rows.
- Then alternate SC with chain 1 and skip one row until only two rows remain.
- Place 1 SC in each of the last two rows. There should be 89 stitches total.
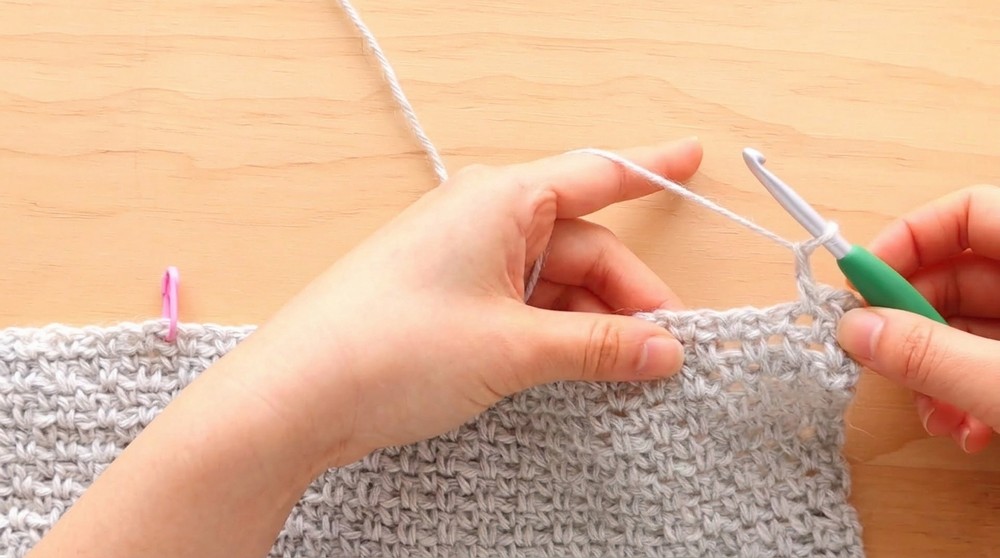
c. Linen Stitch Panel: - Row 1 (Linen A): Chain 1, SC in first 2 stitches, chain 1, skip 1 stitch, SC into the next stitch. Repeat to the end of the row.
- Row 2 (Linen B): Chain 1, SC in the first stitch, chain 1, skip 1, SC into the next. Repeat across.
- Alternate between the Linen A and Linen B rows. For solid colors, repeat the stitch for 100 rows. For striped patterns, switch to contrasting colors according to your desired stripe frequency.
- Complete the Back Panel: Continue the Linen Stitch until 100 rows are completed. Fasten off.
Step 2: Front Panel
- Follow the same instructions as the back panel up to Row 90.
- Shoulder Shaping:
- Skip 36 stitches and place a stitch marker.
- For the first shoulder section:
a. Continue SC and chain 1 pattern until two stitches before the marker.
b. SC 2 together and turn (35 stitches).
c. For Rows 2–7: Work rows as Linen A and Linen B, decreasing by SC 2 together at the appropriate points.
d. At Row 10, fasten off. - Repeat for second shoulder section, starting from the opposite side.
Step 3: Sleeves
- Cuff Ribbing:
a. Using the 5.5 mm hook, chain 12 and HDC along the chain (11 stitches). Turn.
b. Work BL HDC rows for 21 rows. - Sleeve Body:
a. Rotate work and SC along the edge (41 stitches).
b. Start Linen Stitch pattern as in the body.- Work Row (Linen A) with SC in first stitch, chain 1, SC in next stitch, and Row B skipping 1 stitch.
- For stripes, alternate colors every 7 rows of the main color and 1 row of the contrast color.
- Seaming the Sleeves:
- Fold the sleeve in half lengthwise and whip stitch the long edge together to form a tube.
Step 4: Assembly
- Shoulder Seaming: Place the front panel over the back panel and whip stitch the shoulder seams together.
- Side Seaming: Whip stitch the sides of the panels together, leaving a gap for the sleeves.
- Attach Sleeves: Align the sleeves to the armholes and whip stitch them to the body.
Step 5: Neckline Ribbing
- Using the 5.5 mm hook, chain 7. BL HDC for a narrow ribbing.
- Repeat rows until the length of the ribbing matches or is slightly smaller than the neck opening.
- Attach the ribbing to the neckline using whip stitches, ensuring it lays flat.

Finishing Steps
- Weave in all loose yarn ends using the darning needle.
- Block the sweater to smooth any uneven edges and enhance the stitch definition for a professional finish.
Final Words and Tips
- Customization: You can adjust the length of the panels or sleeves by adding or omitting rows but maintain proportions across both sides.
- Matching Stripes: Ensure consistent color changes for a balanced striped effect.
- Yarn Handling: When switching colors, tuck the tails and crochet over them for a clean finish.
- Blocking: Always block the sweater after completion to improve the overall appearance.
Enjoy your handmade striped sweater that’s not only stylish but also perfectly personalized.