Learn how to make a beautiful crochet rose with this easy free pattern, perfect for gifts, decorations, or fun projects using just yarn and a hook.
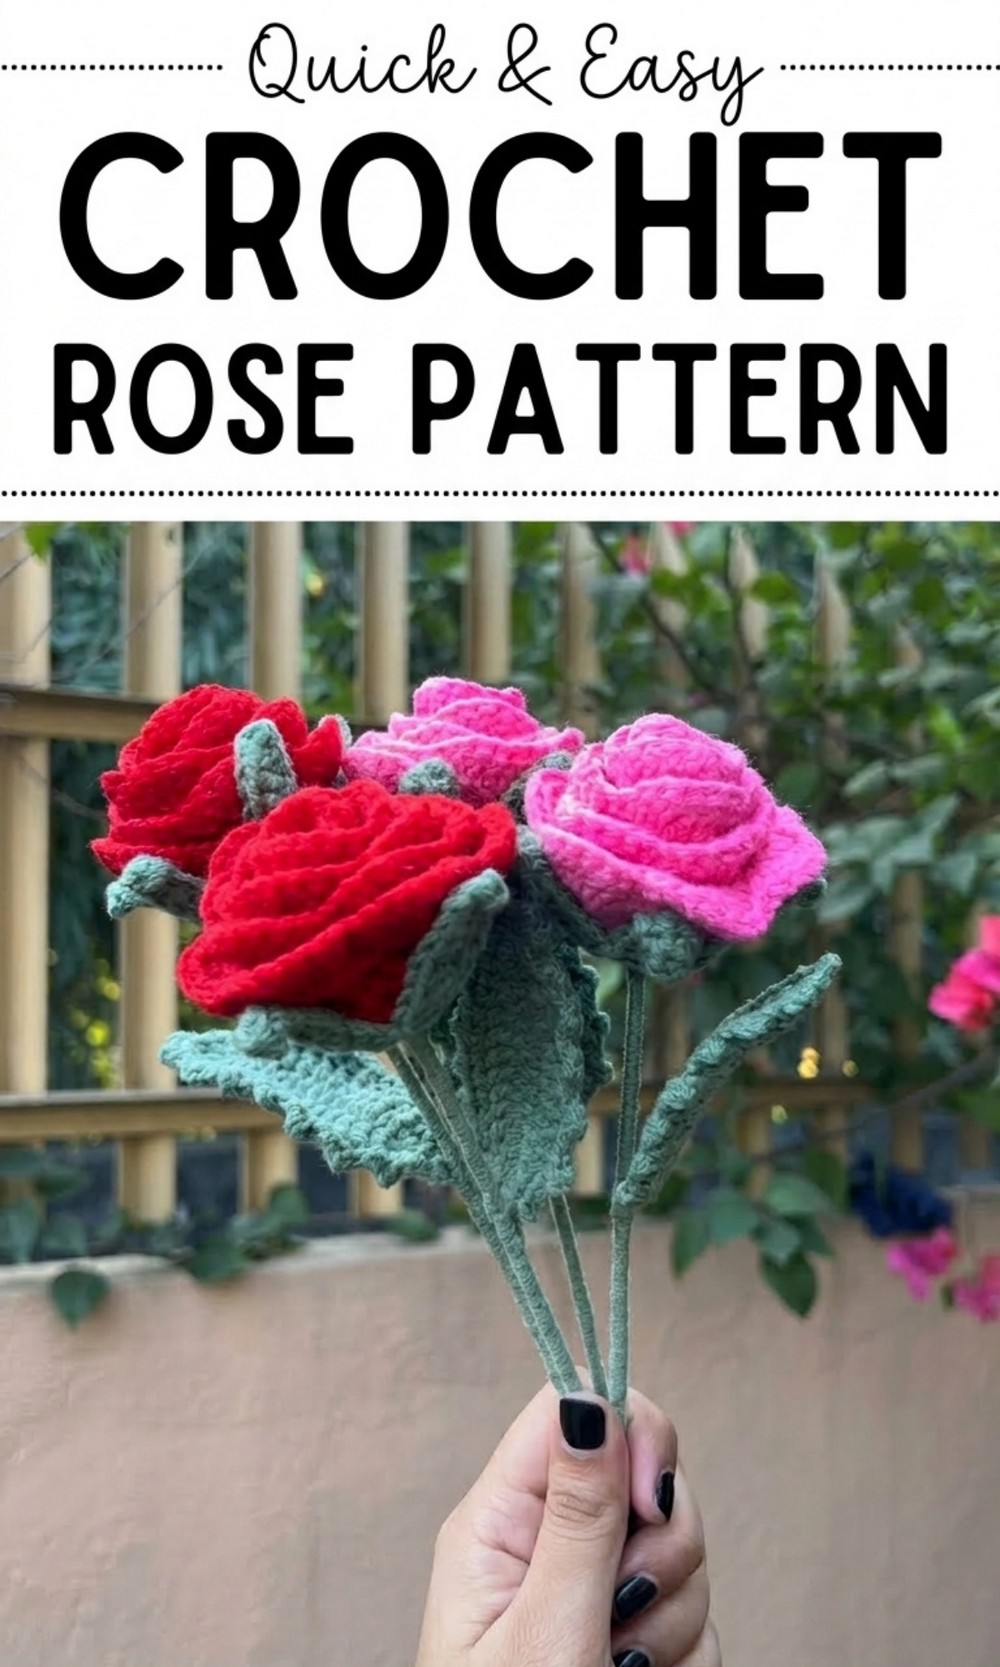
Stunning Free Crochet Realistic Rose Pattern Perfect for Bouquets or Gifts
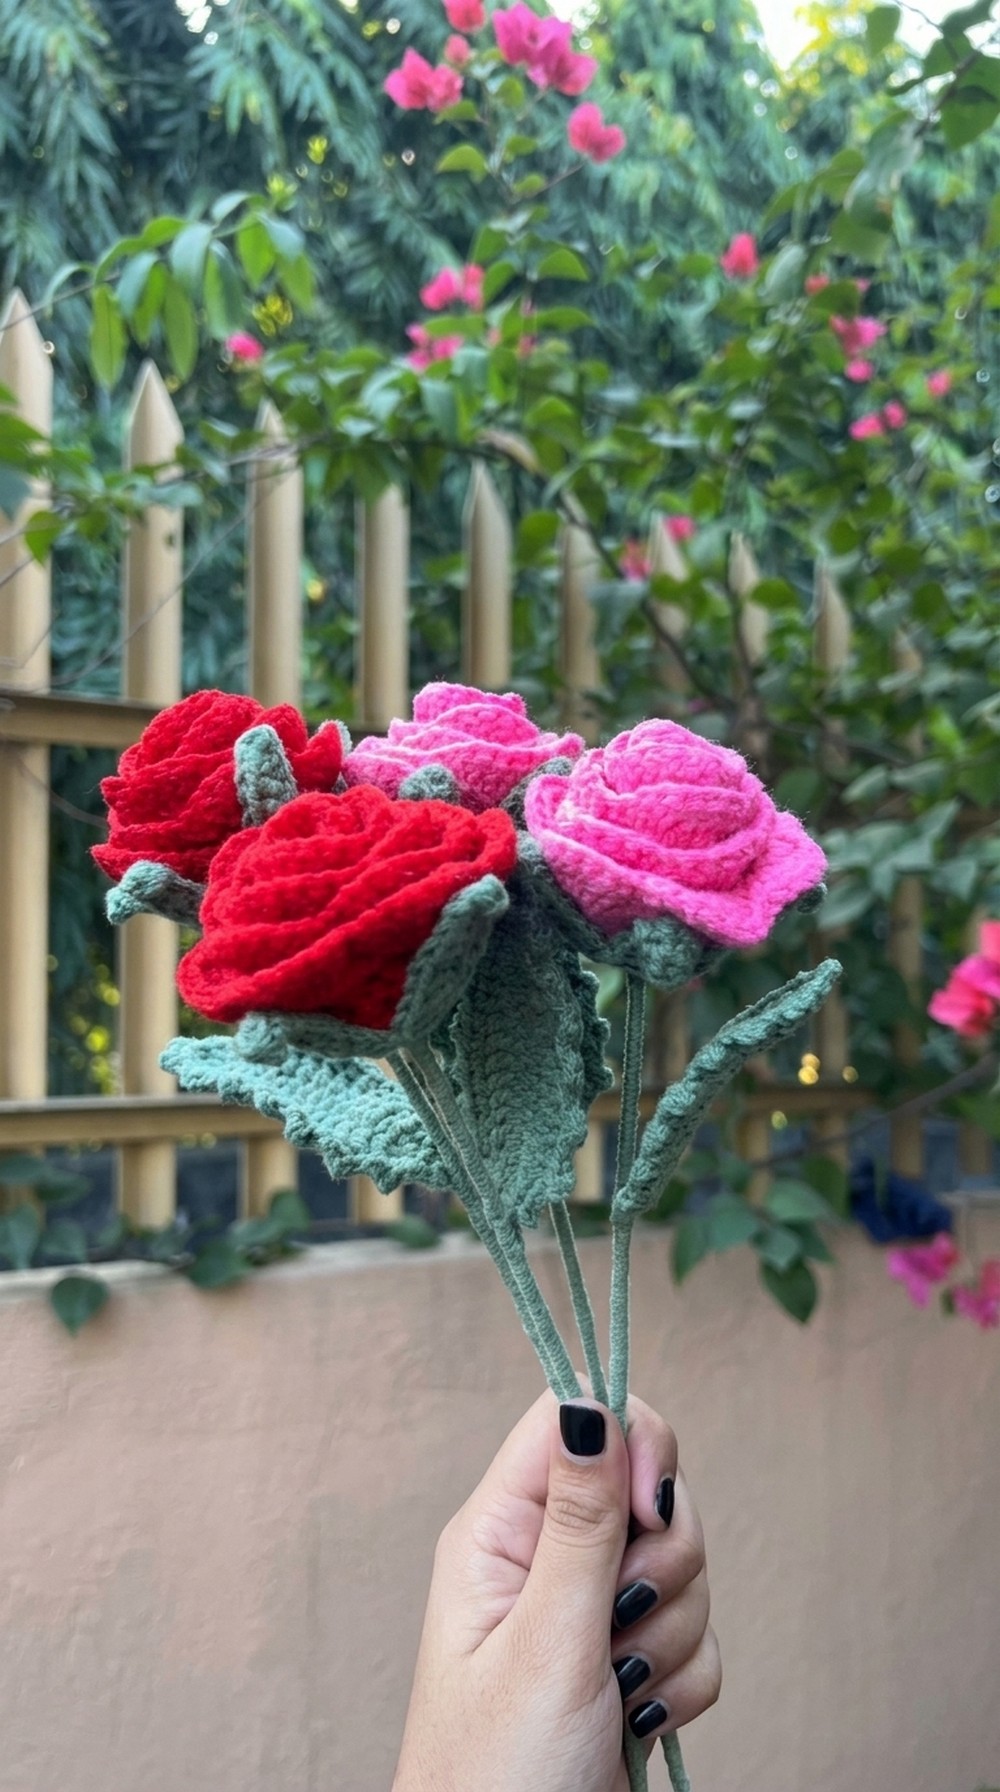
A rose is one of the most beautiful and loved flowers in the world, symbolizing love and beauty. With this free crochet rose pattern, you can create your own stunning, handmade rose using just yarn and a hook. The pattern uses simple stitches to shape soft, layered petals, making the rose look full and realistic. You can add a green leaf and a rosebud to make it even more lifelike. 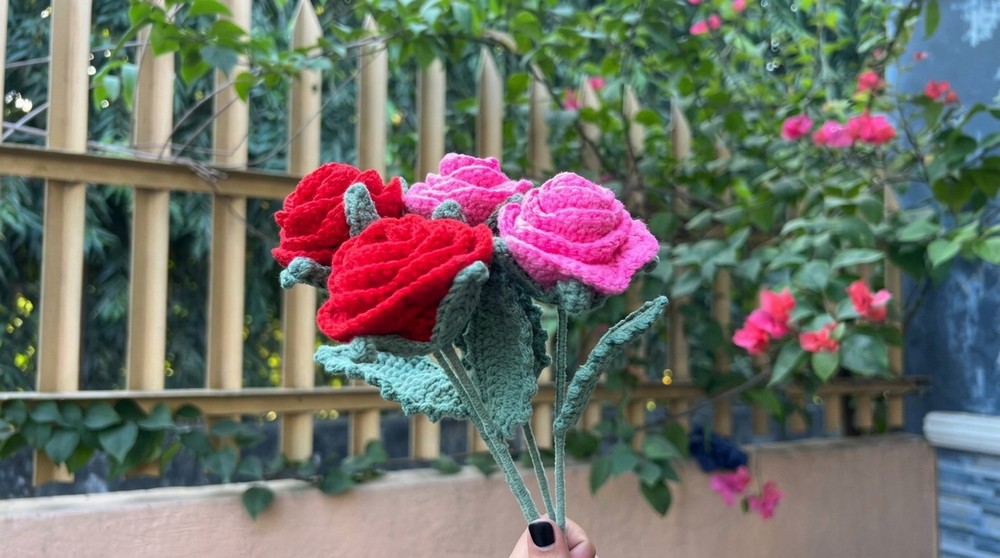
This crochet rose is perfect for decorating a hat, bag, dress, or for use in gifts, bouquets, and home décor. Lightweight and easy to make, this rose pattern is great for beginners and a fun, creative way to add beauty to your projects. It’s also a budget friendly way to create something lovely and unique.
Crochet Rose Pattern
Materials Needed
- Yarn: Milk cotton, 4 ply, or any worsted/DK lightweight yarn in red (for the rose) and green (for the leaf).
- Hook Size: 3 mm crochet hook.
- Other Tools:
- Thin floral wire
- Pliers
- Scissors
- Glue (fabric glue or hot glue)
- Yarn needle
- Optional: Stitch markers for tracking stitches.
Gauge
While gauge is not critical for this project, ensure your tension suits the thickness of the yarn and wire for optimal results.
Finished Size
The final size will depend on yarn thickness and tension. Typically, the rose measures about 2–3 inches (5–8 cm) in diameter, and the leaves are proportional.
Special Techniques
This pattern incorporates basic crochet stitches (slip knot, chain, single crochet, half double crochet, double crochet, treble crochet) and techniques like working through wire for stiffness.
Step by Step Instructions
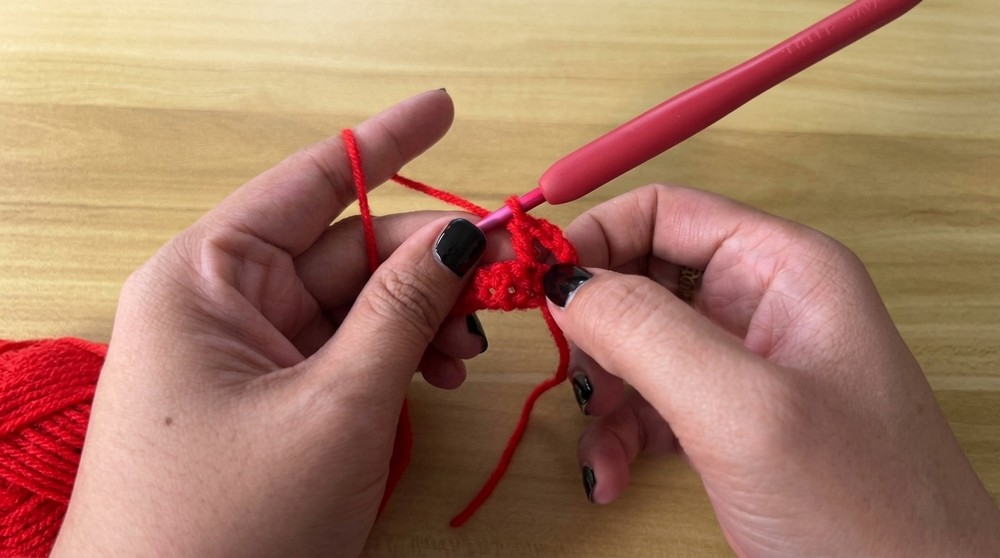
Part 1: Crochet the Rose
- Start the Base
- Begin with a slip knot.
- Chain 53 stitches and secure. This will form the base of your rose.
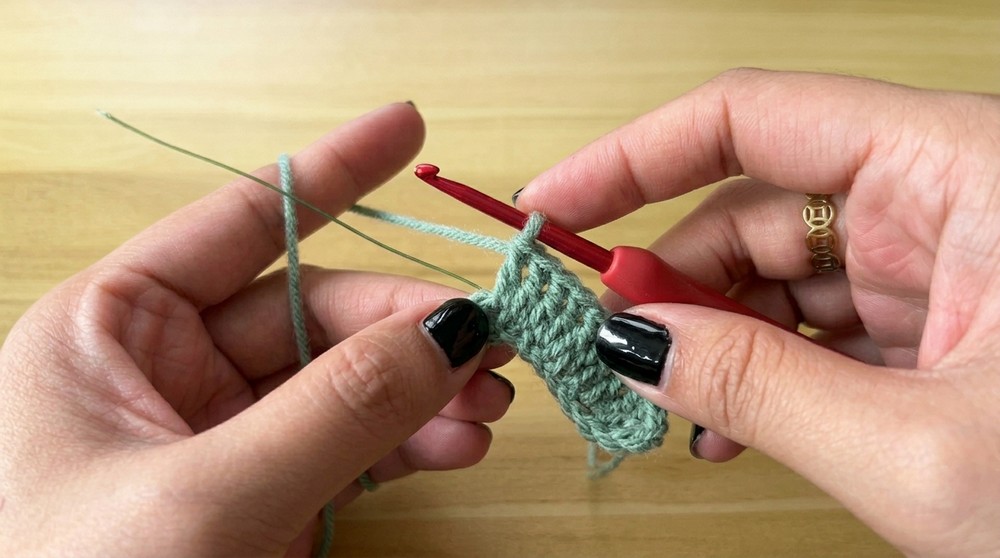
- Row 1: Single Crochet
- Make 1 single crochet in each stitch across, starting from the 2nd chain from the hook.
- Continue to the end of the row, resulting in 52 single crochets. Turn.
- Row 2: V Stitch Pattern
- Chain 5 (counts as 1 double crochet and 2 chain spaces). Turn.
- In the first stitch, make 1 double crochet to complete your V stitch.
- Skip 2 stitches, and in the 3rd stitch, make another V stitch (1 double crochet, chain 2, 1 double crochet in the same stitch).
- Repeat this V stitch pattern across the row until 3 stitches remain.
- In the last stitch, make 1 double crochet. Turn.
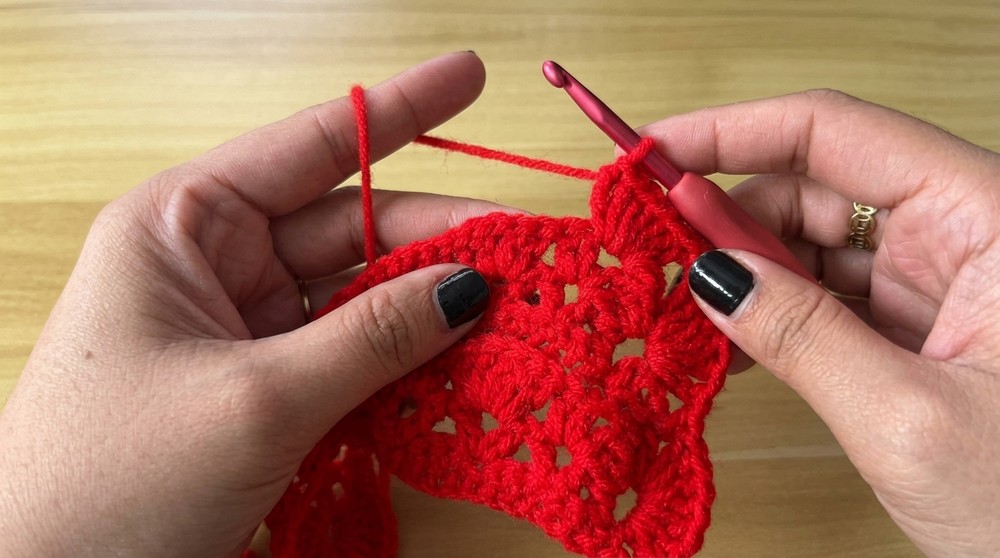
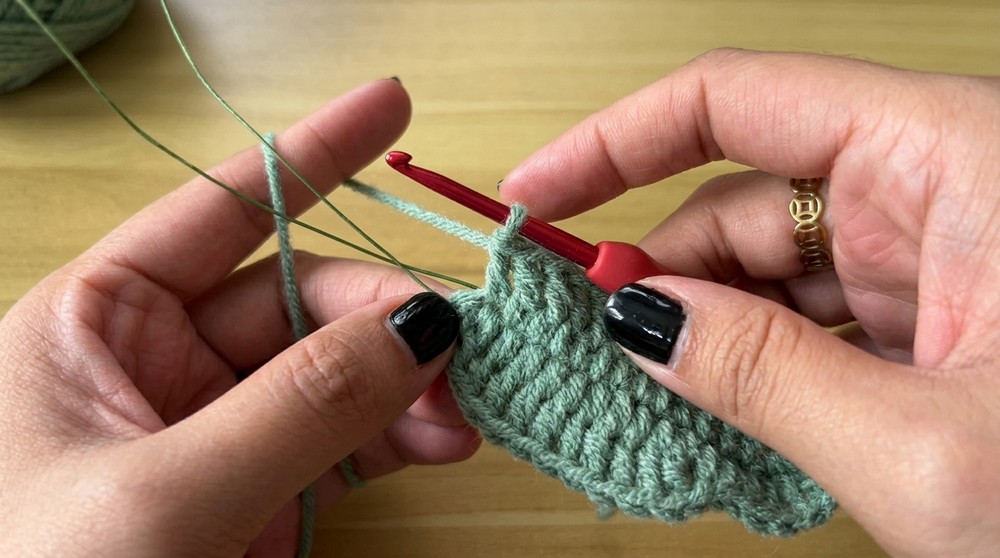
- Row 3: Build Petals
- Chain 3 (counts as 1 double crochet). Turn.
- In the V stitch space from the previous row, create another V stitch pattern consisting of:
- 2 double crochets, chain 1, 2 double crochets in the chain 2 space.
- Repeat this across the row to form the petal foundations.
- Row 4: Form Petals
- Chain 3, turn.
- In each chain 1 space from the previous row, crochet: 8 double crochets.
- Continue across until 1 space remains. In this final space, make 13 double crochets to form the center of the rose.
- Fasten off and leave a long tail for sewing.
- Assemble the Rose
- Starting at the end with 8 double crochets per cluster, roll the base tightly to shape the rose. Secure with stitches using the yarn needle and the long tail.
- For a polished look, use glue around the base of the rose after stitching for added security.
Part 2: Crochet the Rosebud
- Center of the Rosebud
- Using green yarn, create a magic circle. Inside the ring:
- Chain 2 (does NOT count as a stitch).
- Make 20 double crochets into the magic circle. Pull the tail tightly to close the center.
- Slip stitch into the top of the first double crochet to complete the round.
- Using green yarn, create a magic circle. Inside the ring:
- Form the Petals
- Chain 10.
- Starting from the 2nd chain from the hook:
- Make 2 single crochets in the first two chains.
- Make 2 half double crochets in the following two chains.
- Make 3 double crochets in the next three chains.
- Make 2 treble crochets in the last two chains.
- Skip 3 stitches on the base, then slip stitch into the 4th stitch.
- Repeat this pattern 5 times to form all petals.
Part 3: Crochet the Leaf
- Start the Base
- Chain 17, leaving a long tail of yarn for sewing later.
- Chain 17, leaving a long tail of yarn for sewing later.
- Create Leaf Shape
- On the 2nd chain from the hook:
- Make 1 single crochet.
- Make 1 half double crochet in the next stitch.
- Make 9 treble crochets in the next 9 stitches.
- Make 1 half-double crochet in the following stitch.
- Repeat this pattern in reverse along the other side of the chain (to mirror the shape).
- On the 2nd chain from the hook:
- Add Details with Wire
- Place wire along the edge of the leaf (inside the stitches). Work through the wire as you crochet to give structure to the leaf.
- Finish by securing the wire ends and shaping it to align with the leaf.
Tips and Customization Ideas
- Color Variations: Use different colors for a multi-toned rose effect.
- Size Adjustments: Adjust the chain length and stitch counts to create larger or smaller roses and leaves.
- Gifts and Decorations: Secure roses to headbands, bags, or create a bouquet by using floral stems.
- Add Texture: Consider using textured or sparkly yarn for added dimension.
Conclusion and Important Remarks
This crochet rose and leaf pattern is a delightful project that combines artistry with functionality. With its vibrant design and easy steps, it’s suitable for all crochet skill levels. The final product is a realistic and elegant rose perfect for gifting or personal use. Assemble with care to ensure the best results, and don’t hesitate to experiment with colors and yarn types to make the design your own.