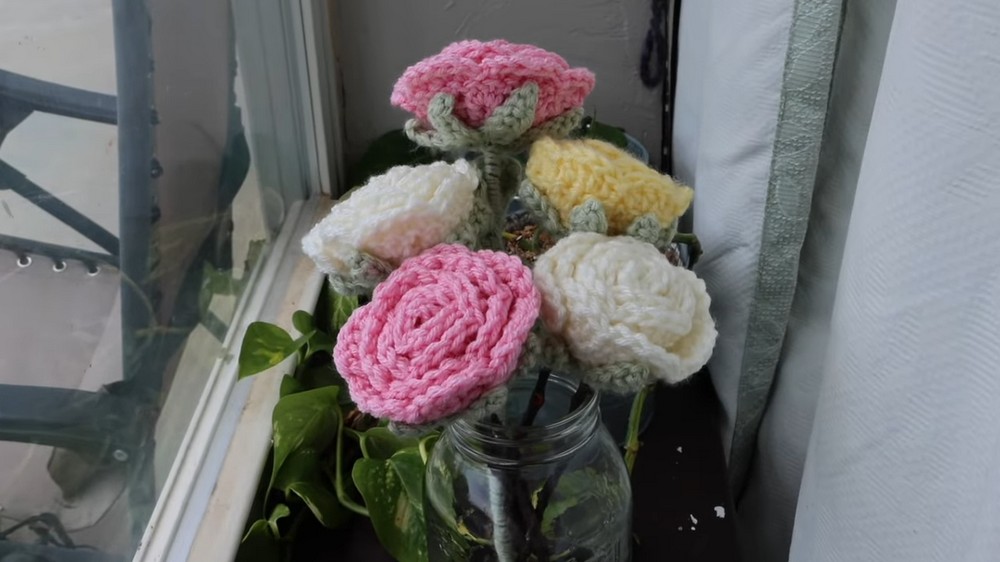
Bloom with elegance using this Free Crochet Roses Pattern, featuring delicate petals and a charming accent perfect for décor, gifts, or embellishments.
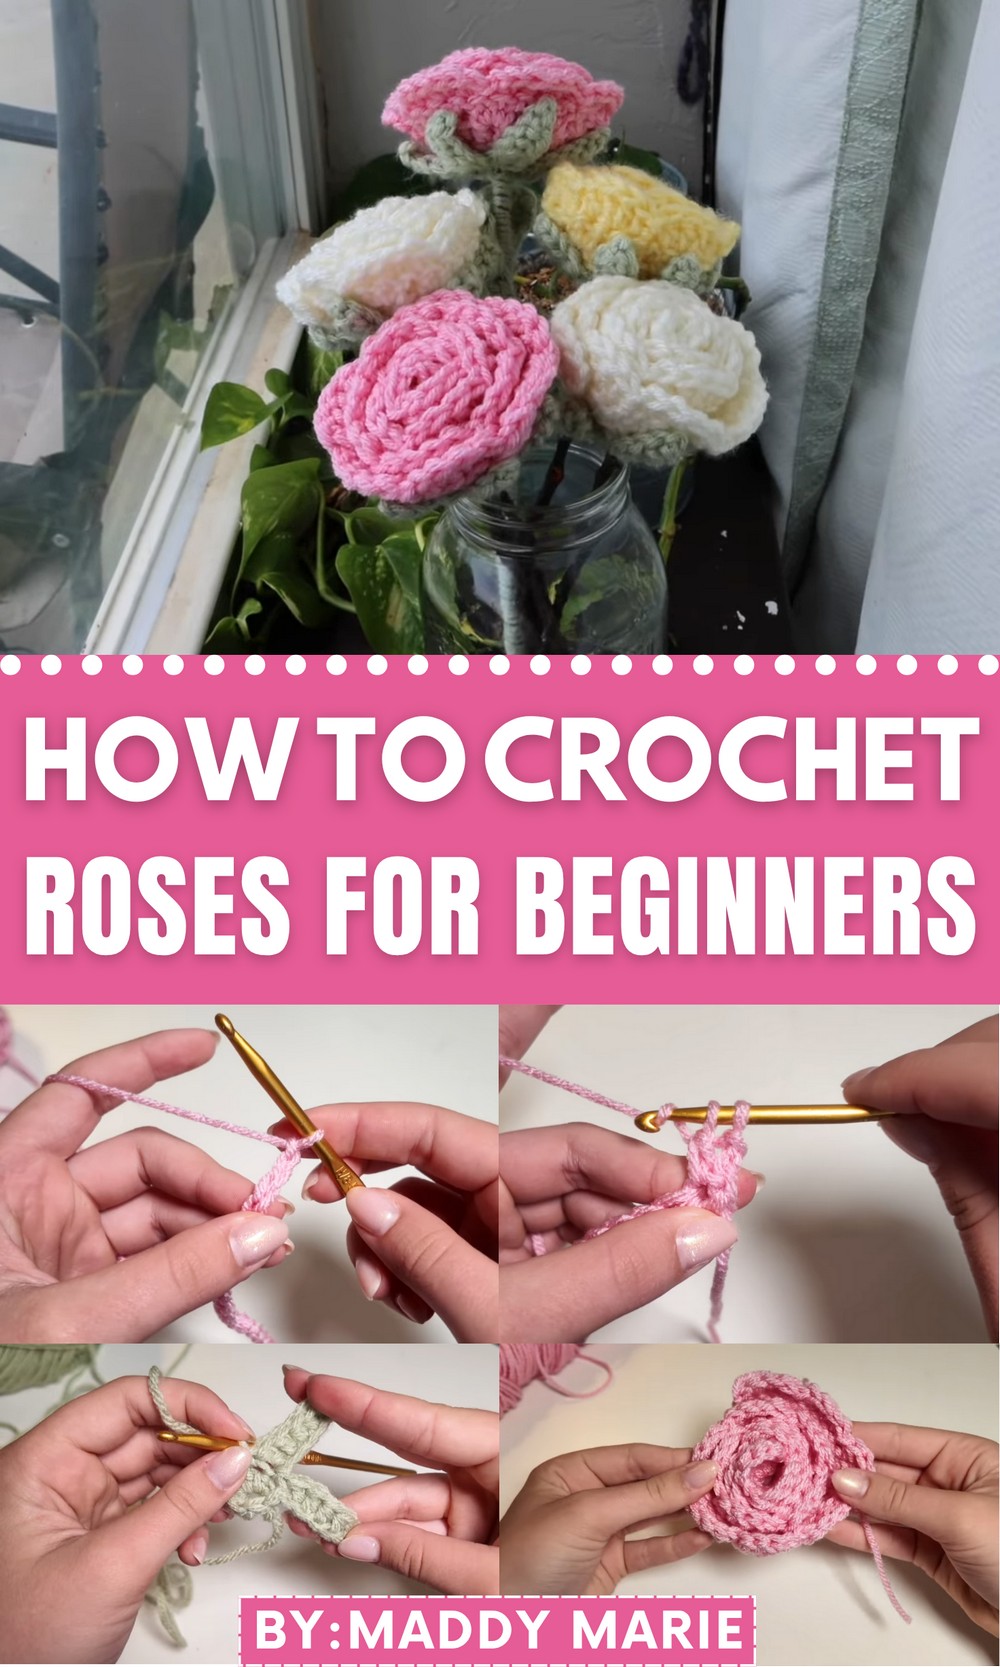
Lightweight yet visually striking, these roses are perfect for creating bouquets, centerpieces, wall hangings, or decorative accents that last far longer than fresh flowers. The pattern is approachable for beginners seeking a rewarding project while providing experienced makers the opportunity to experiment with colors, sizes, and arrangements to craft unique floral displays.
The Free Crochet Roses Pattern not only adds beauty to everyday items and special occasions but also provides a meditative and enjoyable crafting experience. Every finished rose carries a sense of charm, warmth, and artistry, turning simple yarn into memorable, decorative pieces that celebrate nature’s elegance and the timeless appeal of handmade flowers.
Materials Required
- Yarn:
- Medium weight acrylic yarn in the desired color for the roses (e.g., pink).
- Green-colored yarn for leaves.
- Crochet hook: 5mm size.
- Hot glue gun and sticks.
- Stick or dowel: Can be sourced from nature or store-bought for the stem.
- Scissors.
Special Features
- No sewing required: The entire project is assembled using hot glue.
- Durable design: Roses never wither and can be kept as long-lasting decor.
- Customizable: Play with different rose and leaf colors for unique combinations.
- Beginner-friendly: Simplified techniques and clear instructions make it accessible.
- Quick assembly: Once the pieces are crocheted, assembly is fast and easy.
Step-by-Step Instructions
1. Crocheting the Rose Ribbon
- Start with a slip knot and chain 48 stitches.

- For the first row, use half double crochet into the second chain from the hook and repeat this all the way down.
- Second row: Chain 2, turn the work, then crochet 3 double crochets in one stitch, skip the next stitch, and repeat this pattern across the row.

- Third row: Chain 2, turn the work again, and for each set of petals:
- 1 double crochet,
- 2 double crochets in one stitch (increase),
- 1 more double crochet,
- Followed by a slip stitch to finalize the petal.
- Repeat this pattern to complete the row, creating a ribbon-like structure.

2. Making the Leaves
- Use green yarn to begin with a magic ring.
- Chain one and create 6 half double crochets into the ring. Leave the ring partially open so it can slide onto your stick stem later.
- Slip stitch into the first half double crochet to close the loop.
- For each of the 6 stitches around the loop:
- Chain 6, then work as follows in each chain:
- Single crochet into the second chain,
- Half double crochet in the next two chains,

- Double crochet in the final two chains.
- Slip stitch back into the loop to complete one leaf.
- Chain 6, then work as follows in each chain:
- Repeat the process in each stitch around the loop to create 6 leaves in total.
3. Assembling the Rose
- Start by attaching one end of the rose ribbon to the stick stem using a blob of hot glue.
- Gradually wrap the ribbon tightly or loosely around the stick, using hot glue to secure it as you go. Adjust the tension of wrapping for your desired rose shape.
- Once the entire ribbon is wrapped, secure any loose ends with glue.
4. Attaching the Leaves
- Slide the magic ring of leaves onto the stick from the bottom of the rose. Tighten the ring for a snug fit.
- Arrange the leaves around the base of the rose, and glue each one halfway up its length to create a polished look.
5. Final Details
- Wrap the remaining tail of green yarn (from the magic ring) around the stick to mimic a more natural stem. Secure this with glue.
- Trim any remaining yarn and glue down loose ends for neat finishing.
Tutor’s Suggestions
- Don’t worry about achieving perfect symmetry: slight variations in petals or leaf placements enhance the realistic look of your rose.
- Choose contrasting yarn colors for vibrant appeal (e.g., red roses with dark green leaves).
- Use natural sticks for an organic feel but ensure they’re clean and smooth.
Uses
- Handmade gifts for friends and loved ones.
- Long-lasting home decor for vases and table arrangements.
- Event or party decorations for weddings, showers, or holidays.
- Compact and creative seller products for craft businesses.
Level of Difficulty
Beginner to Intermediate. The stitches used are simple (chains, half double crochet, double crochet, and slip stitches), and there’s no sewing involved. The hot glue assembly also simplifies the process for novice crafters.
Pro Tip
Tightly wrapping the rose ribbon will result in a neat and compact bloom, while a looser wrap creates a fuller, more open rose. Experiment with this technique to customize your bouquet.
Conclusion
Crocheting a bouquet of roses is not only a rewarding skill but also a fantastic way to add personal touches to your home or gift-giving. With Maddie’s tutorial, you can easily create stunning, everlasting roses without the hassle of sewing.