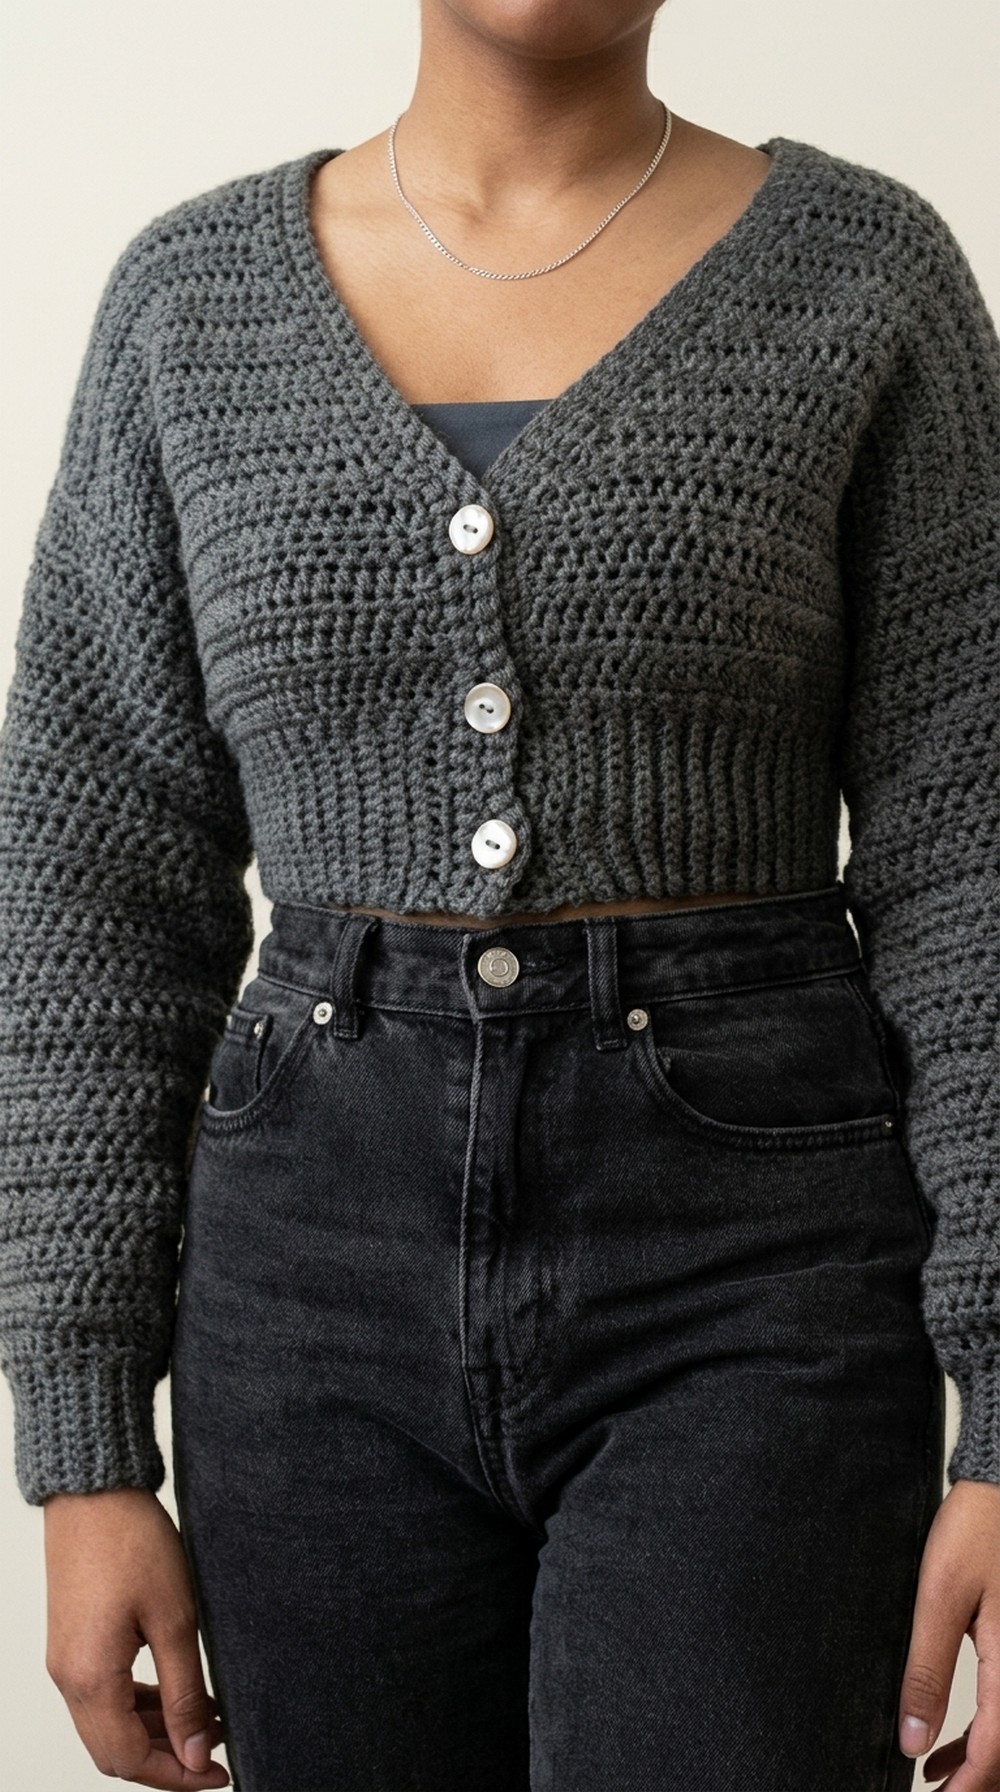
Refresh your look with a Free Crochet V Neck Cardigan Pattern that makes a soft, cozy cardigan perfect for cool weather outfits or daily wear.
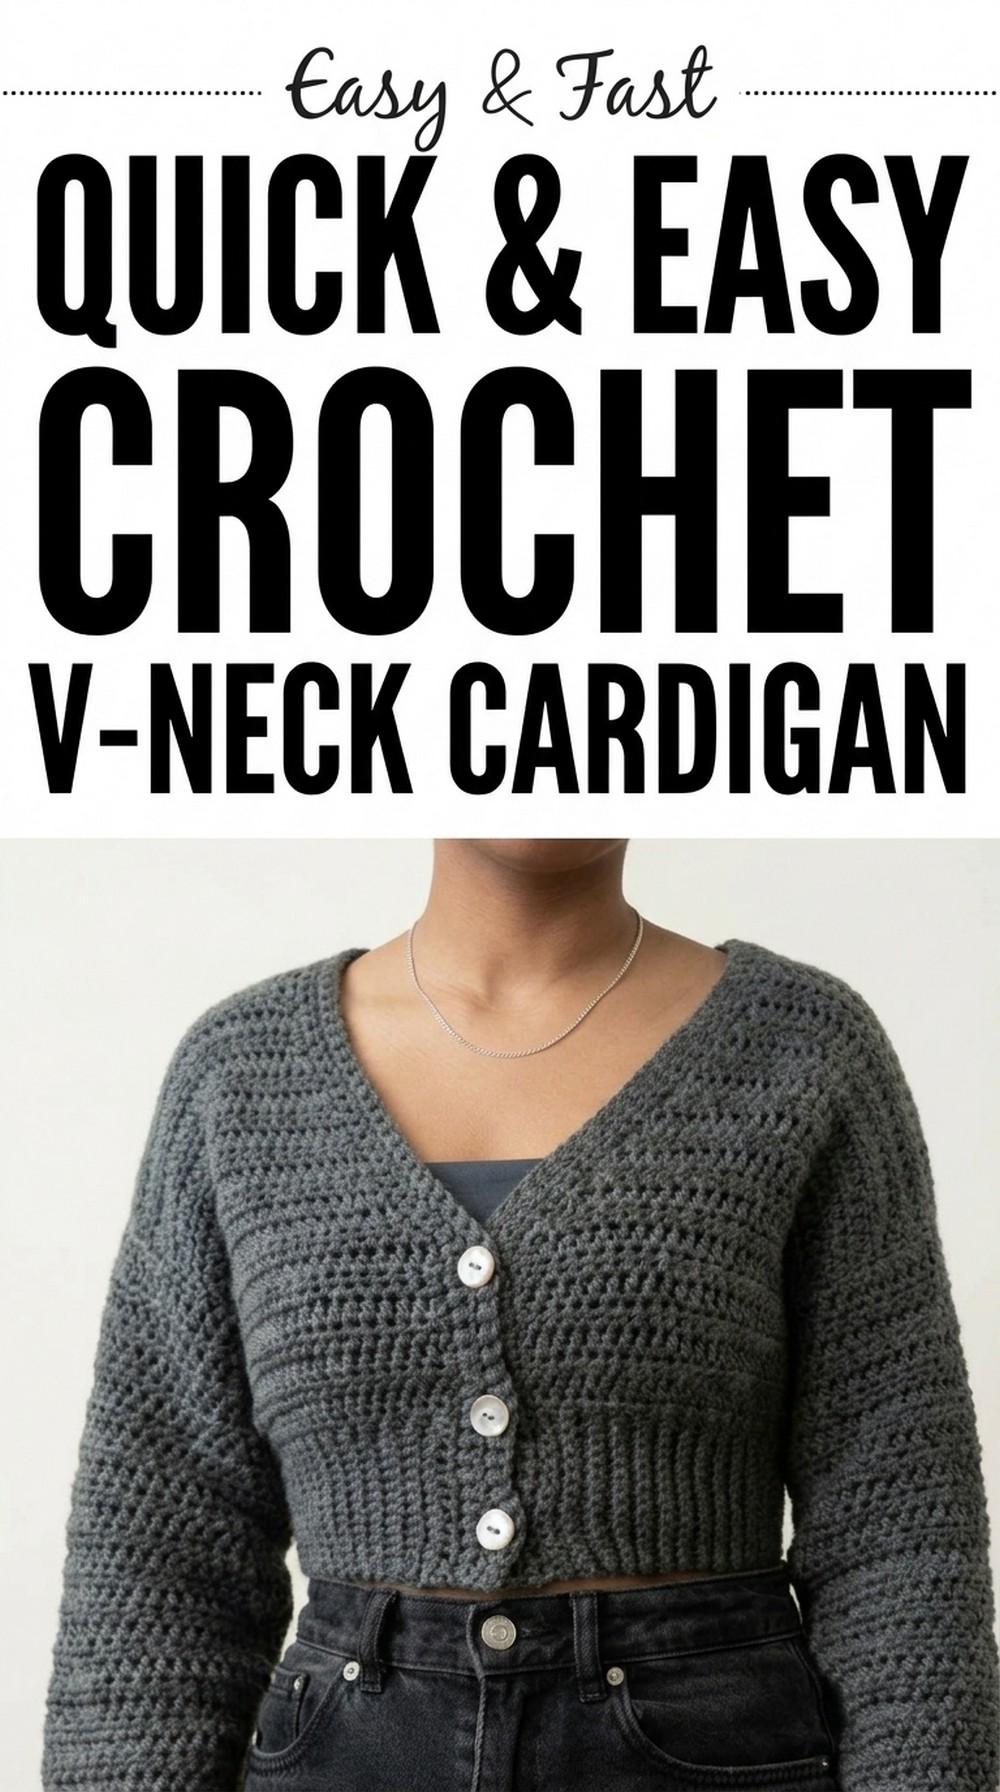
Learn How to make the coziest Free Crochet V neck Cardigan
If you love making stylish and comfortable clothing, this Free Crochet V Neck Cardigan Pattern is perfect for you. It is easy to make, even if you are new to crochet, and creates a beautiful piece that looks classy and cozy at the same time.
The cardigan features a V neck design that adds elegance and makes it suitable for any occasion. It has ribbed edges for a snug fit and long, soft sleeves that feel amazing to wear. This pattern allows you to create a cropped style, but you can easily make it longer if that’s what you prefer. 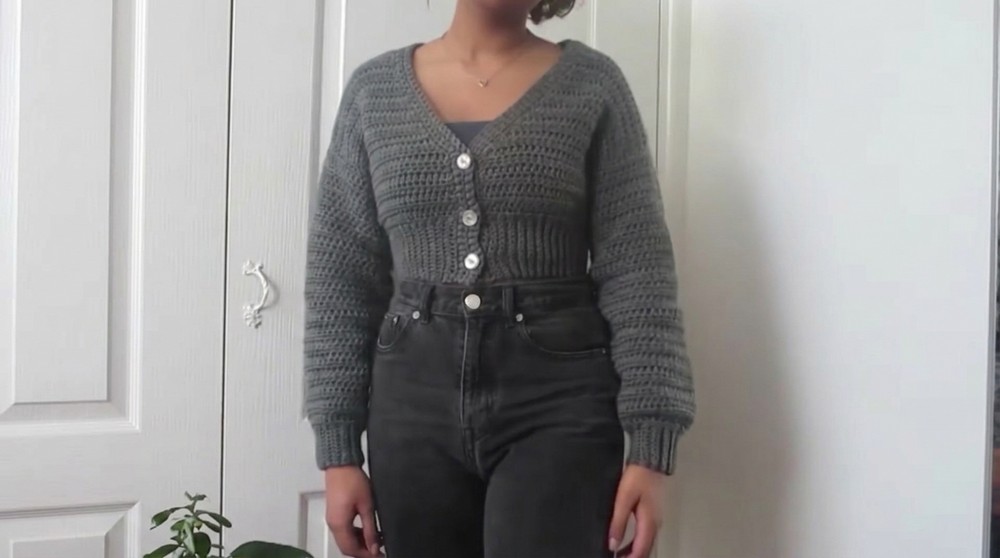
It wraps comfortably around the body, making it ideal for layering over any outfit. You will love its simple and timeless design, and it’s a fun and rewarding project to try. Start making your own unique cardigan today.
Classy Crochet V Neck Cardigan Pattern
Materials
- Yarn: Medium weight (Category 4) yarn of your choice
- Approx. 5 to 6 skeins depending on desired length and size.
- Hooks:
- 5.0 mm crochet hook (for ribbing)
- 6.0 mm crochet hook (for the body and sleeves)
- Notions:
- Stitch markers or safety pins
- Darning or tapestry needle for sewing
- Measuring tape
- Scissors
- Buttons (6 to 7, depending on size)
- Optional: Blocking tools, such as blocking mats and pins.
Gauge
- Ribbing: 14 back loop slip stitches x 10 rows = 5 cm x 5 cm (approximately 2 in. x 2 in.)
- Body: 10 half double crochets (HDC) x 7 rows = 10 cm x 10 cm (approximately 4 in. x 4 in.)
Finished Size
- Length: Cropped to your preference (following pattern gives approximately 50 cm or 19.5 in. length unstretched)
- Customization can be done for different sizes through adjustments, as outlined in the tips section.
Special Techniques Used
- Back Loop Only (BLO): Insert the hook into the back loop of a stitch rather than through both loops, giving your ribbing a textured look.
- Half Double Crochet (HDC) 2 Together: Used to decrease stitches gradually.
Pattern Instructions
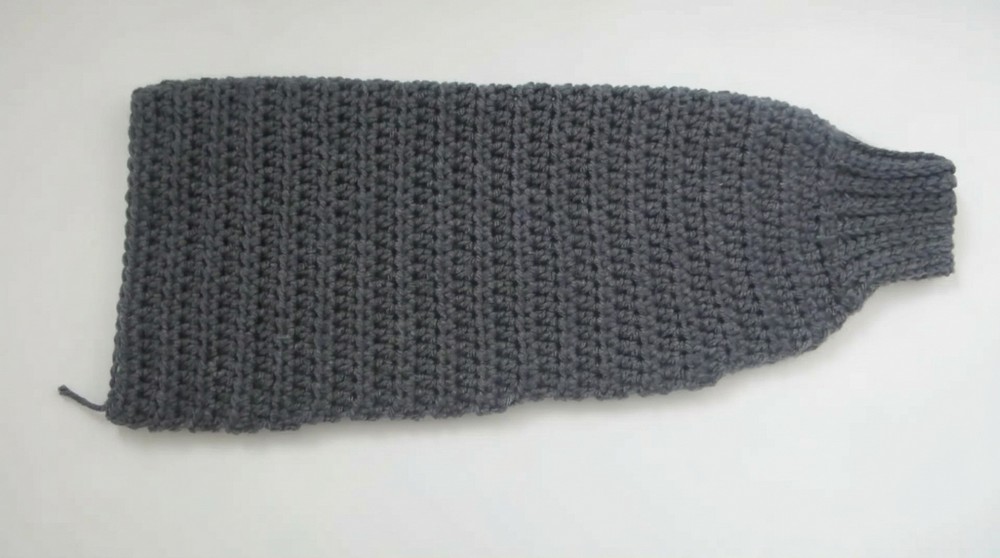
Step 1: Bottom Ribbing
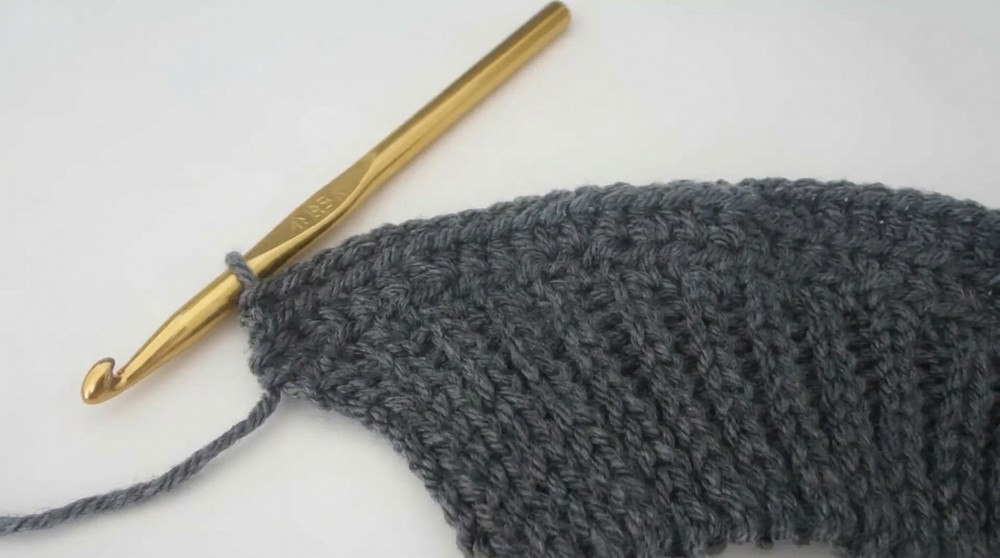
- Create Ribbing:
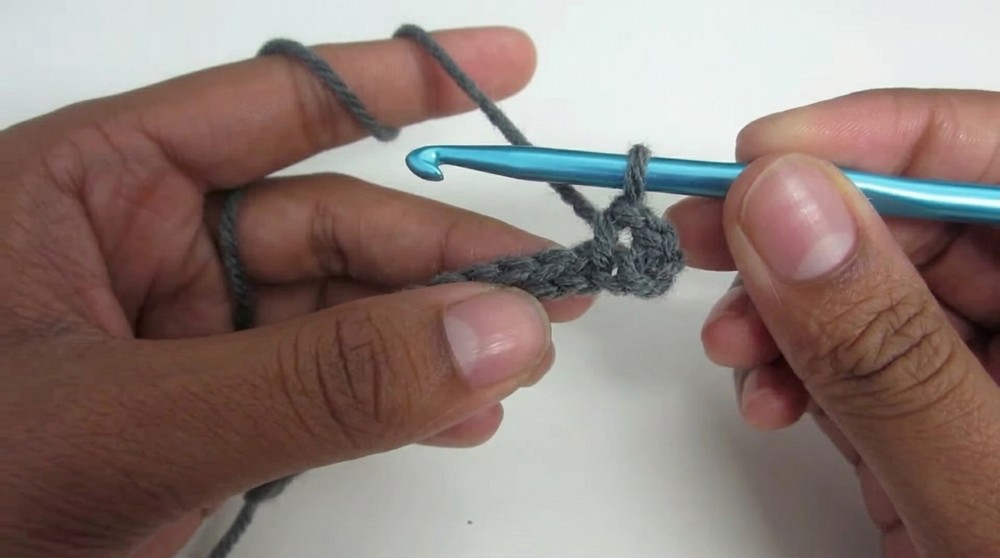
- With the 5 mm crochet hook, create a slip knot and chain (CH) 15.
- Turn your work and slip stitch (SL ST) into the back loop of each chain from the 2nd chain from the hook all the way across. You will end with 14 stitches.
- CH 1, turn, and repeat SL ST into the back loops for the entire row.
- Continue until you have 105 rows or enough length to wrap comfortably around your waist.
Tip: Measure the unstretched ribbing to ensure it comfortably wraps around your waist. Adjust the number of rows for your custom size.
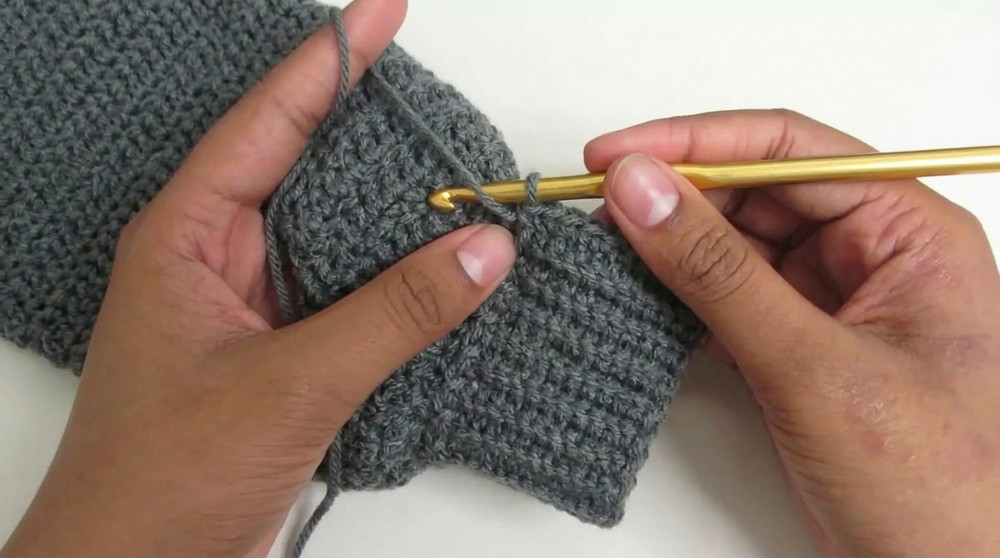
Step 2: Create the Body
- Attach Yarn for the Body:
- Switch to the 6 mm crochet hook.
- CH 1, turn ribbing 90 degrees, and work across the ribbing edges.
- Foundation HDC Row:
- Work 1 HDC into the top of each ribbing row (raised and indented rows).
- You should end with 105 HDCs (or the same number as your ribbing row count).
- CH 2 at the end of the row and turn your work.
- Continue Body Rows:
- Create rows of HDCs across for a total of 8 rows.
- If you prefer a longer cardigan, add more rows to this section.
Step 3: Shaping the Neckline
- Begin Neckline Shaping:
- CH 2 and turn.
- Start the row by working HDC 2 Together (HDC2TOG) in the first two stitches. Then, HDC across the row until you have 2 stitches remaining.
- Work HDC 2 Together (HDC2TOG) into the last 2 stitches.
- Repeat Row for Neckline:
- Repeat this neckline shaping row twice to begin.
- Splitting into Front and Back Panels:
- Count 24 stitches from one side of the neckline and place a stitch marker in the 25th stitch. Repeat on the opposite side. These are the divisions for the front and back panels.
Step 4: Front Panels
- Work on Front Panel 1:
- CH 2 and turn your work.
- Work HDC across until you reach the stitch marker.
- Continue with neckline shaping every other row by decreasing (HDC2TOG) at the start and end of rows, for a total of 6 shaping decreases (12 rows in total).
- Once shaping is complete, work 5 rows of HDCs to extend the panel.
- Work on Front Panel 2:
- The second front panel is made identically to the first.
- Attach yarn to the marked stitch on the opposite side and repeat the steps from Front Panel 1.
Step 5: Back Panel
- Create Back Panel:
- Attach yarn at the stitch marker on either side for the back panel.
- Work 17 rows of HDCs straight across without any shaping.
Step 6: Assembling Body
- Join the Shoulders:
- Match the front panels to the back panel along the shoulders.
- Use single crochet (SC) or a sewing stitch (like a whip stitch) to join the top edges of the front and back panels.
- Ensure stitches are aligned, and the seams are clean.
Step 7: Sleeves
- Make the Sleeve Ribbing:
- With the 5 mm hook, create a slip knot and CH 11.
- Work 10 BLO SL STs across the row. CH 1, turn, and repeat until the ribbing comfortably fits around your wrist (approx. 29 rows).
- Add Sleeve Body:
- Join the ribbing edges with SC to create a loop.
- Switch to a 6 mm hook, CH 1, turn the ribbing 90 degrees, and HDC across to the edges.
- Increase for Sleeve Width:
- Begin increase rows by working 2 HDC in the last stitch of row 1. Then, work 4 rows of normal HDCs.
- Repeat this sequence (1 increase row, 4 HDC rows) 7 times in total for the sleeve shape.
- Once the sleeve is complete, fold it lengthwise, sew the edges together, and attach it to the armhole.
Step 8: Neckline Finishing
- Work the Neckline:
- Attach yarn with SL ST at one corner of the front panel.
- Work SC evenly along the edge of the neckline until you reach the opposite side. Add an extra 3 SC at each corner stitch.
- Repeat for a total of 2 rounds.
Step 9: Adding Buttonholes
- Create Buttonholes:
- On the second round of neckline edging, after SC along until the desired button positions, CH 2, skip the next 2 stitches, and resume SC as normal. Repeat for all buttonholes.
- In the final round, SC evenly, working into the chain spaces as regular stitches.
Customization Tips
- Experiment with colors, or use multicolored yarn for a gradient effect.
- Add length to the body or sleeves to customize according to your preference.
- Try a decorative stitch for the bottom ribbing for unique texture.
Key Tips
- Block your finished cardigan for an even and smooth appearance.
- Avoid pulling too tightly on the neckline or buttonhole rows to maintain flexibility.
Conclusion
Congratulations on completing your stunning cropped crochet cardigan. This adaptable and stylish piece is perfect for layering during cool weather or dressing up a casual outfit. Enjoy the compliments and feel proud of your work. Remember to experiment with sizing, colors, and designs on the next one.