Upgrade your outfit with a Free Crochet Twist Top Pattern to create a trendy stylish top perfect for summer wear beach days or adding a fun look to your wardrobe.
Summer Must Have Free Crochet Twist Top Pattern You’ll Adore
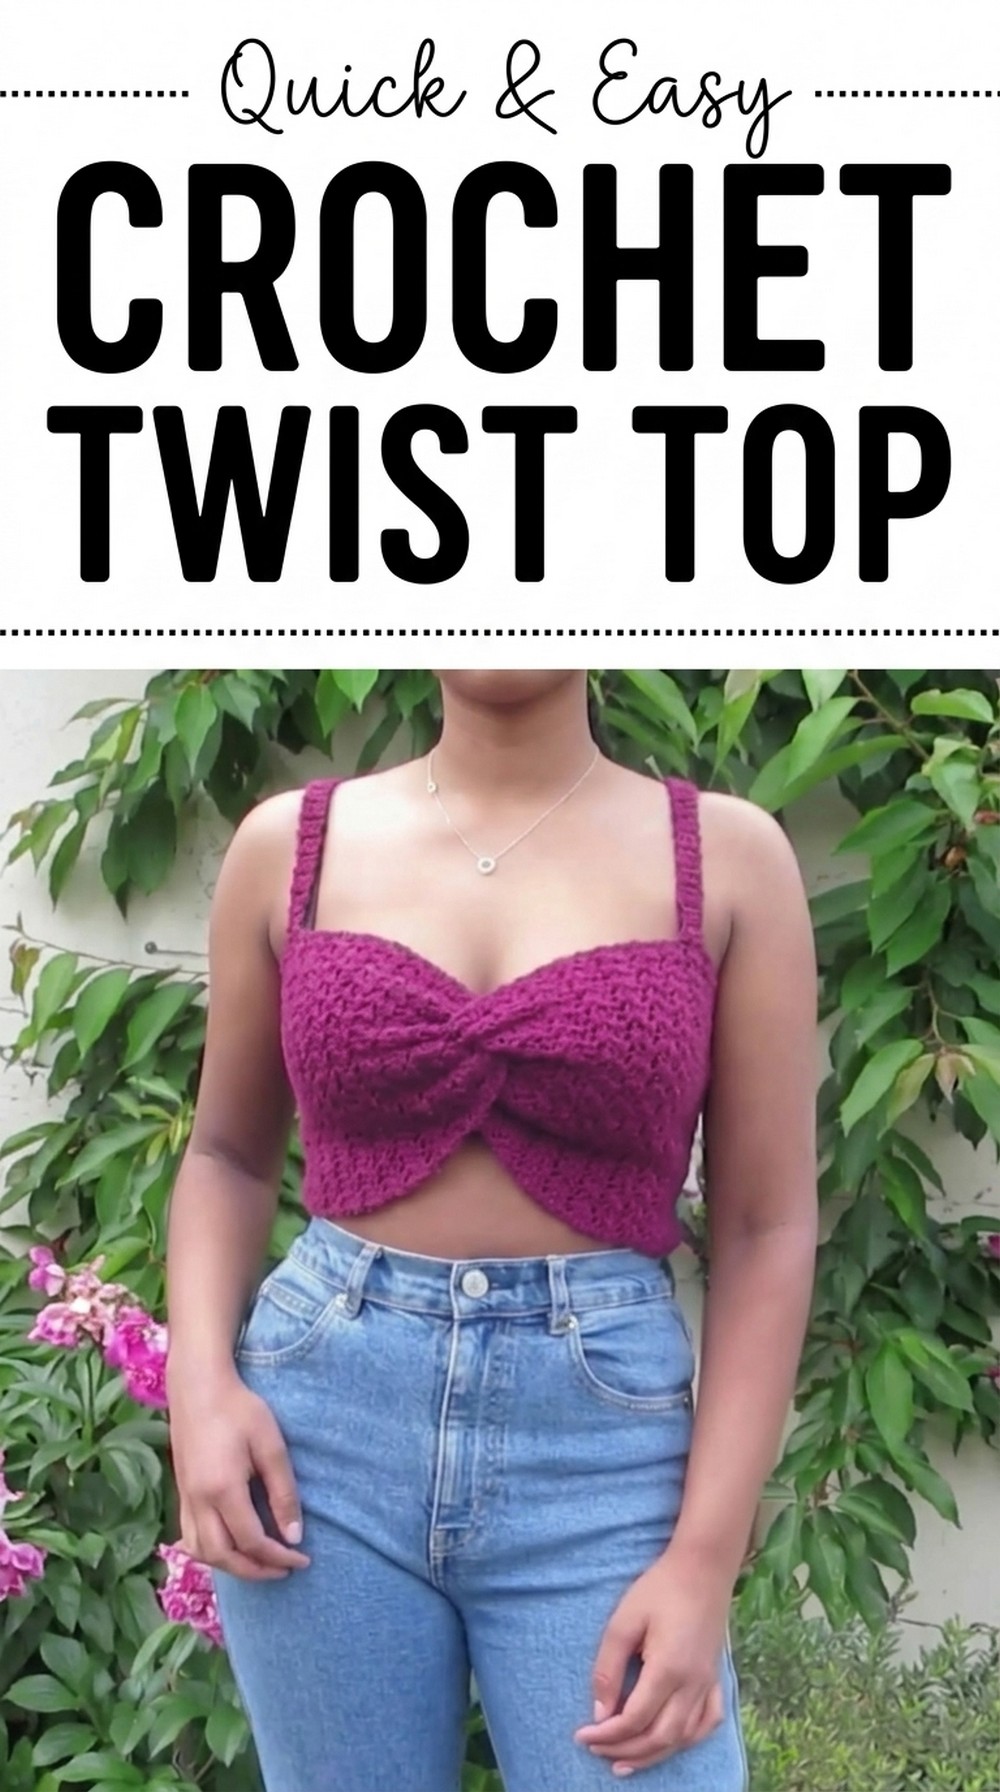
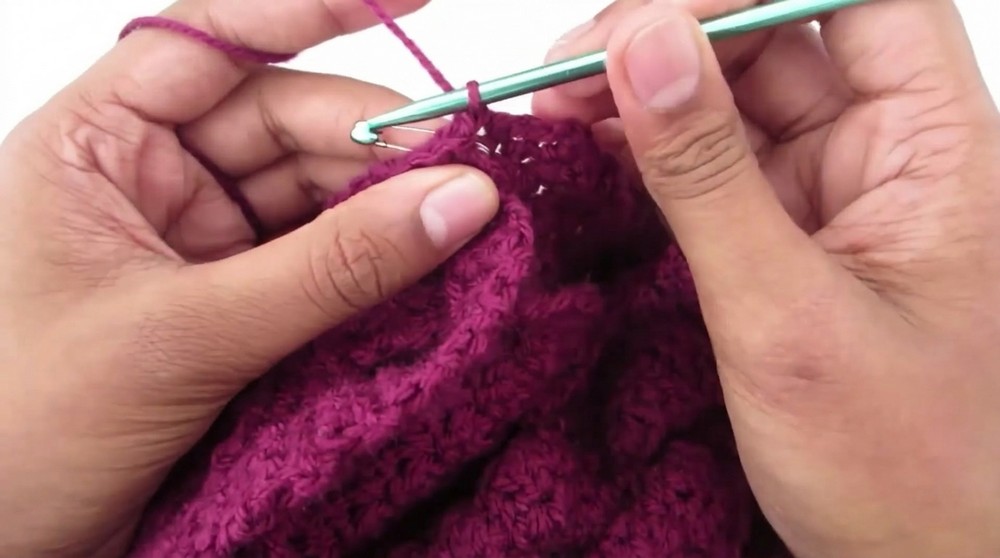
This Free Crochet Twist Top Pattern is perfect for summer days, featuring a unique twist design at the front that looks trendy and modern. The lace up back isn’t just stylish—it’s adjustable, making this top fit comfortably for people of all shapes and sizes. The lemon peel stitch used in the pattern adds a beautiful texture that feels cozy and looks incredible.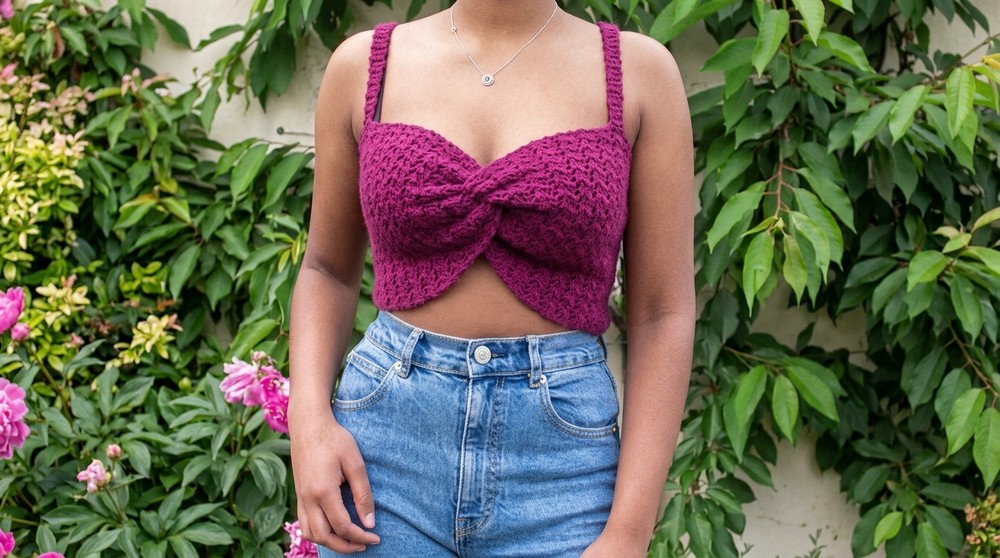
What makes this top even more exciting is how customizable it is. You can adjust the width, height, and strap placement to create a unique design that fits your vibe. It’s lightweight, stylish, and ideal for outings, beach trips, or casual wear. Whether you’re a beginner or an experienced crocheters, this easy pattern guarantees a fun experience and a beautiful, handmade piece you’ll be proud to show off.
Crochet Twist Top Pattern
Materials Needed
- Medium weight yarn (approx. 100 200 grams, depending on your size).
- 4 mm crochet hook.
- Stitch markers or safety pins.
- Scissors.
- Darning needle for weaving in ends.
Techniques Required
- Slip knot: Form the starting loop on the crochet hook.
- Chains (ch): Yarn over and pull through the loop.
- Single crochet (sc): Insert the hook into the stitch, yarn over, pull through a loop, yarn over, pull through both loops.
- Double crochet (dc): Yarn over, insert the hook into the stitch, yarn over and pull through the stitch, yarn over, pull through two loops, yarn over, pull through the last two loops.
- Lemon peel stitch: Alternate between single crochet and double crochet stitches to create texture.
- Blanket stitch for sewing: Use a darning needle to sew the panels together seamlessly.
Step 1: Create Two Panel Pieces
- Begin the first panel with a slipknot.
- Use a 4 mm crochet hook to create a foundation chain of 35 chains. This determines the height of the top. If you want a longer top, add more chains (ensure the total number is odd).
- Once the chain is complete, turn your work 90 degrees and begin stitching into the second chain from the hook.
- Work the lemon peel stitch as follows:
- For the first stitch, make a single crochet (sc).
- For the second stitch, make a double crochet (dc).
- Repeat the pattern (sc, dc) until you reach the end of the row.
- At the end of each row, chain one and turn your work. Continue the lemon peel stitch pattern (alternating between sc and dc) for about 40 rows. If you want the top to fit longer or shorter, adjust the number of rows accordingly.
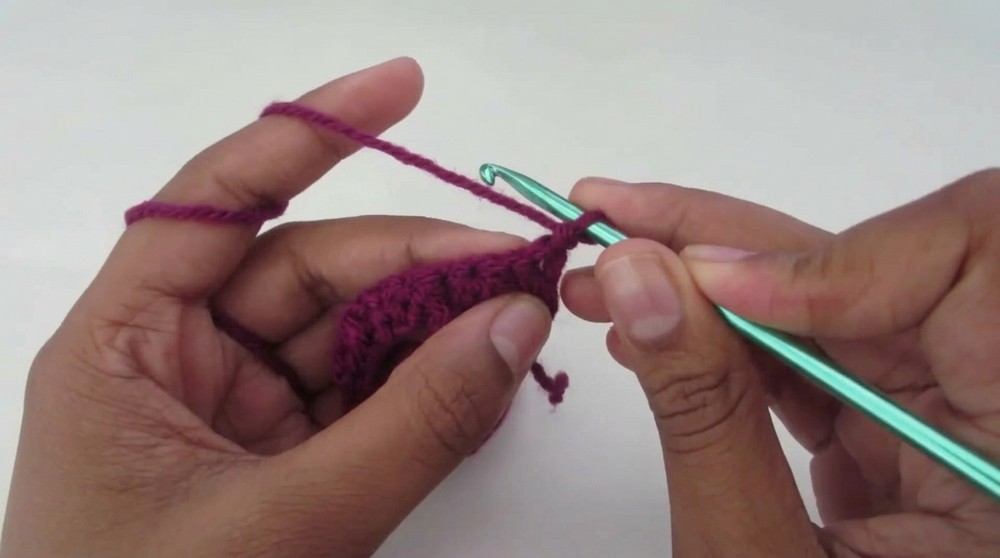
- Complete the first panel and set it aside. Create the second panel in the exact same way.
Step 2: Adding the Lace Up Back
- Select one of the two panels, which will serve as the panel for the lace up back.
- Work along the last row of this panel as follows:
- Begin with three single crochets (sc).
- Chain one (ch 1), then skip one stitch, and sc into the next stitch.
- Sc three stitches, repeat the pattern of (ch 1, skip one, 3 sc).
- At the end of the row, chain 1, turn your work, and single crochet (sc) across the row, stitching into every chain and gap.
- This completes the lace up row. Set this panel aside.
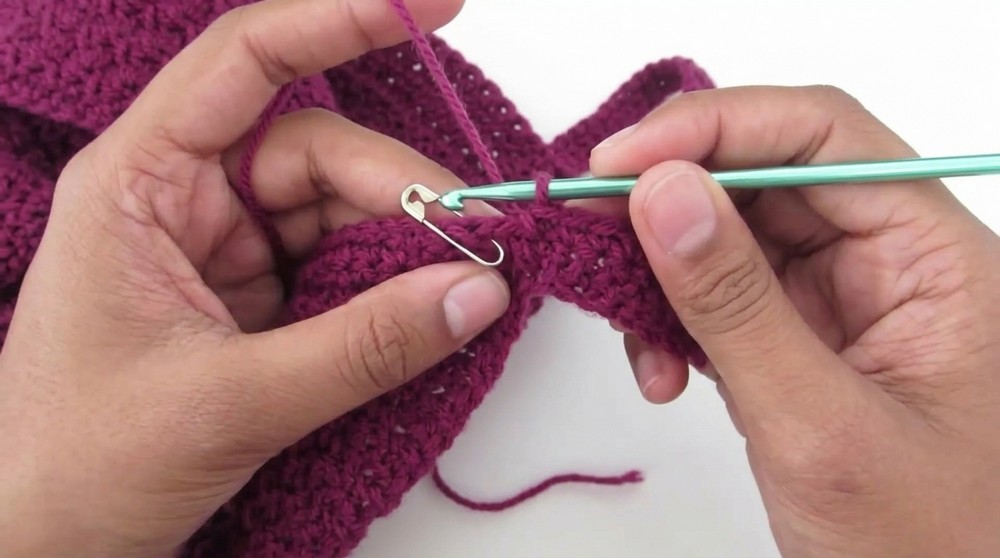
Step 3: Assembling the Panels with a Twisted Center
- Fold each panel in half lengthwise. For both panels, mark the center point using a stitch marker or a safety pin.
- Place the panels right sides together. Align one panel’s edge to the marked center of the other panel.

- To create the twist, do the following:
- Fold the back panel forward to sandwich the front panel.
- Fold the edge of the front panel backward to wrap around the back panel.
- Pin the layers together to keep the edges aligned.
- Using a darning needle and a blanket stitch, sew the edges together evenly through all four layers. Stitch slowly to ensure accuracy.
Step 4: Creating the Lace Up Tie
- Begin with a slipknot.
- Using a 4 mm crochet hook, chain until your tie measures approximately 100 cm in length (customize the length as needed).
- Once the desired length is achieved, cut the yarn and pull it through the loop to secure it.
- Lace the tie through the gaps created in the lace up panel, weaving in and out of the holes.
Step 5: Adding the Straps
- Wear the top and mark the positions for the straps using stitch markers or safety pins on both the front and back of the top.
- To make the straps, start with a slipknot and attach yarn to your top where you’ve marked.
- Work 3 single crochets (sc) to form the strap’s width. If you prefer wider straps, you can add more single crochets (e.g., 4 or 5).
- Chain one (ch 1), turn your work, and sc across. Chain one and repeat until the strap reaches a length that fits you.
- Once the strap is the correct length, attach it to the marked point at the back of the top using single crochets or a sewing needle.
- Repeat the same process to create and attach the second strap.
Finishing the Pattern
- After the straps have been attached, cut the excess yarn and weave in all loose ends using the darning needle.
- Trim any remaining yarn ends for a neat finish.
- Gently block the top by spraying it lightly with water and pinning it in place to achieve the perfect shape. Allow it to air-dry completely.

Final Words
The crochet twist top with a lace up back is a trendy and breathable piece that’s perfect for summertime. The adjustable back ensures that it fits perfectly, no matter your shape or size. By following the lemon peel stitch, you can create a beautiful, textured fabric that resembles the skin of a lemon. It’s a great project for both beginners and experienced crocheters.
Tips to Maintain the Pattern
- Wash the top gently by hand in cold water to maintain its shape and softness. Avoid using harsh detergents.
- Store the top flat to prevent stretching or distortion.
- If gifting, consider customizing the length, width, and color based on the recipient’s preferences.
This top is not only simple but also stylish, making it a fantastic addition to your summer wardrobe.