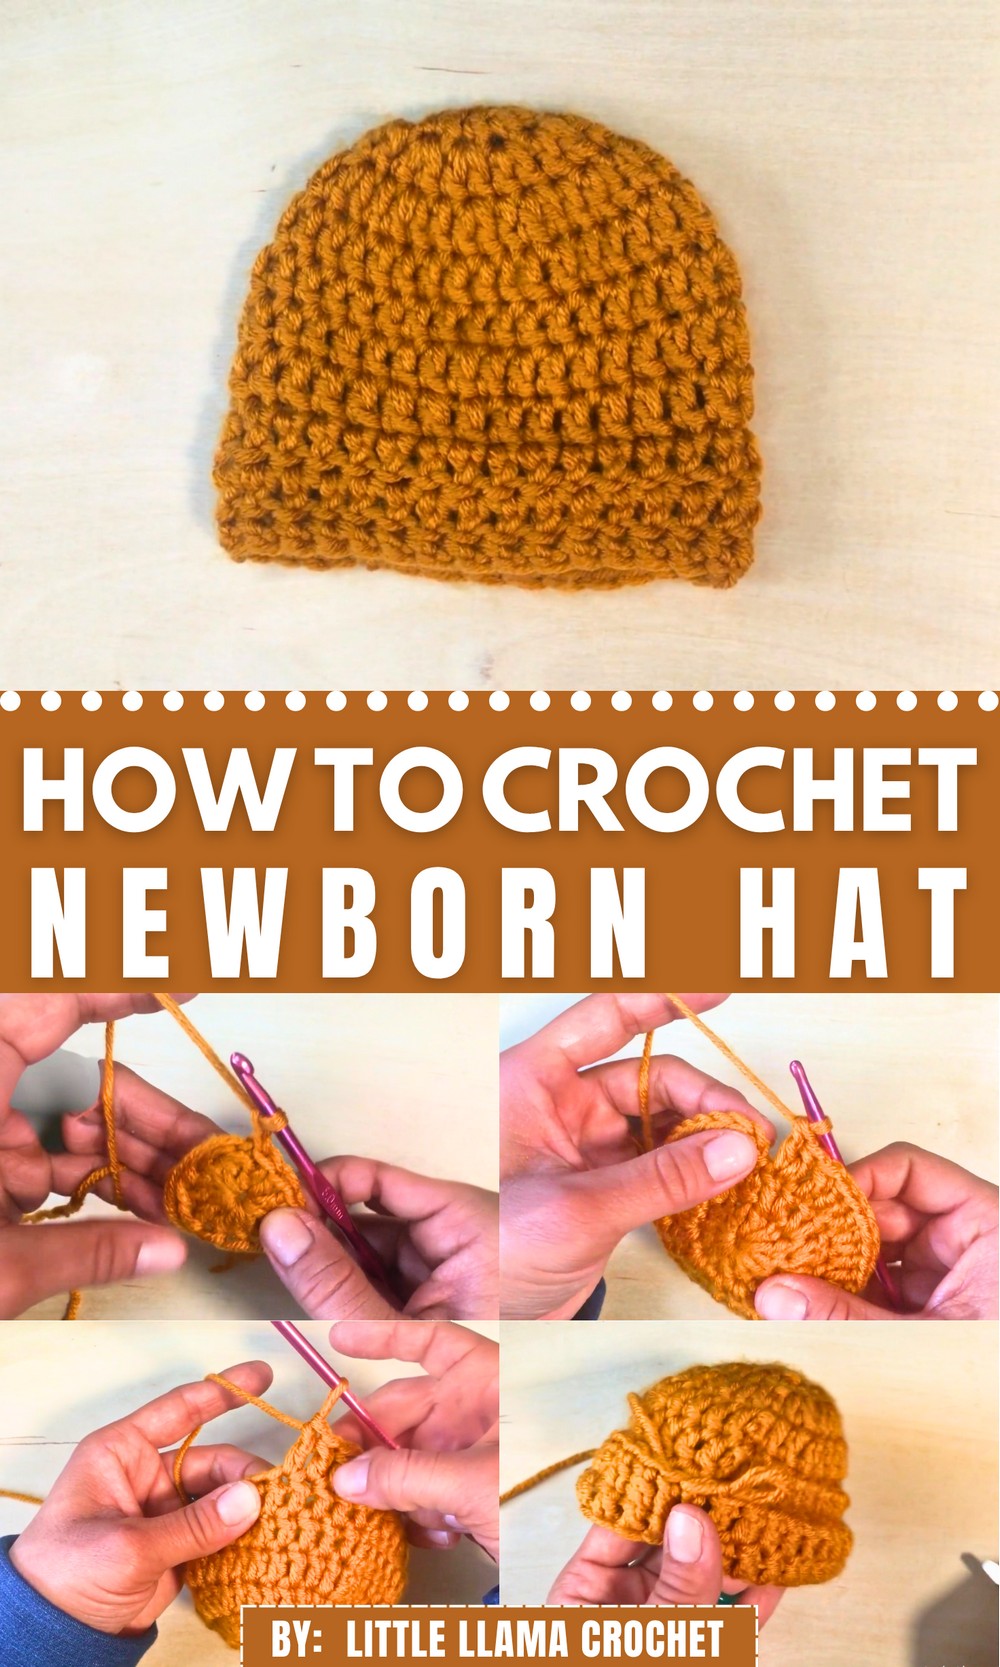
This pattern explains how to crochet a newborn hat using Shippy Chunky Monkey anti-pilling yarn and a size 5 crochet hook. The brim is added by working into the back loops for a textured finish, and single crochet stitches complete the design. The creator offers tips on weaving in yarn ends seamlessly for durability making this hat perfect for years of use!
Crochet Newborn Hat
Newborn Crochet Hat Pattern
Materials
- Yarn:
- Scheepjes Chunky Monkey (100% premium acrylic, anti-pilling).
- Equivalent weight: Bulky yarn (size #5).
- Approximately 50–60 grams.
- Crochet Hook:
- 5 mm crochet hook (H/8).
- Other Tools:
- Scissors.
- Yarn needle for weaving in ends.
Gauge
- 12 double crochets (DC) and 6 rows of DC = 4 inches (10 cm).
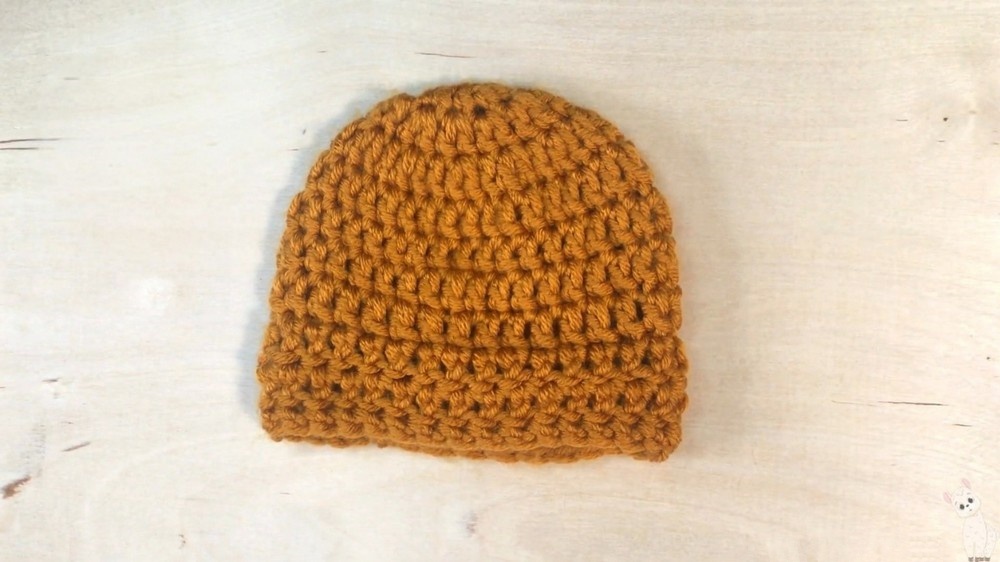
Finished Size
- Circumference: Approx. 12 inches (30.5 cm).
- Height: Approx. 5.5 inches (14 cm).
This size is suitable for a newborn baby, approximately 0–3 months old.
Special Techniques
- Magic Circle (Magic Ring):
Creates a small, adjustable center for working in the round. - Invisible Decrease:
A clean way to reduce stitches without creating large gaps in the fabric. - Working into Back Loops Only (BLO):
Creates subtle ridges for decorative design elements (used for the brim).
Pattern Instructions
Step 1: Start with the Magic Circle
- Create a Magic Circle:
- Wrap the yarn around two fingers, forming an “X”.
- Insert your hook under the first loop, pull up the second loop, twist your hook, and chain 1.
- This will form your adjustable loop for working in the round.
- Round 1 (Foundation Circle):
- Chain 2 (counts as your first DC).
- Crochet 11 DC into the magic circle for a total of 12 stitches (including the chain 2).
- Pull the magic circle tail to close the loop.
- Slip stitch into the top of the starting chain 2 to close the round.
Stitch Count for Round 1: 12 DC.
Step 2: Increase Rounds
- Round 2 (First Increase Round):
- Chain 2 (counts as the first DC).
- Crochet 1 DC into the same stitch as the chain 2.
- Work 2 DC into each stitch around.
- Slip stitch into the top of the starting chain 2 to close the round.
Stitch Count for Round 2: 24 DC.
- Round 3 (Second Increase Round):
- Chain 2 (counts as the first DC).
- Crochet 1 DC into the next stitch.
- Work 2 DC into the following stitch, then 1 DC into the next stitch.
- Repeat from * to * all the way around.
- Slip stitch into the top of the starting chain 2 to close the round.
Stitch Count for Round 3: 36 DC.
Step 3: Rounds for the Hat Body
- Rounds 4–6 (Regular Rounds for the Body):
- Chain 2 (counts as the first DC).
- Crochet 1 DC into each stitch around.
- Slip stitch into the top of the starting chain 2 to close each round.
Stitch Count for Rounds 4–6: 36 DC (for all 3 rounds).
Step 4: Decrease Round
- Round 7 (Decrease Round):
- Chain 2 (counts as your first DC).
- Work 1 DC into the next 5 stitches.
- Work an invisible decrease over the next 2 stitches (see below), then 6 DC into the following stitches.
- Repeat from * to * around.
Invisible Decrease with DC:
- Yarn over, insert your hook into the front loop of the first stitch and the front loop of the second stitch.
- Yarn over, pull through both front loops (3 loops on hook).
- Yarn over, pull through 2 loops (2 loops left on hook).
- Yarn over and pull through the final 2 loops.
Stitch Count for Round 7: 30 DC.

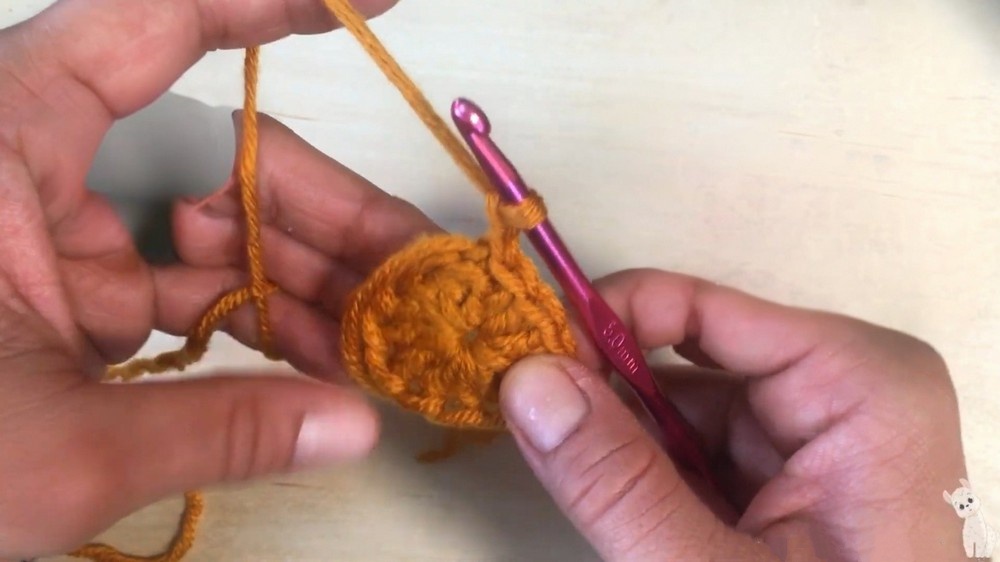
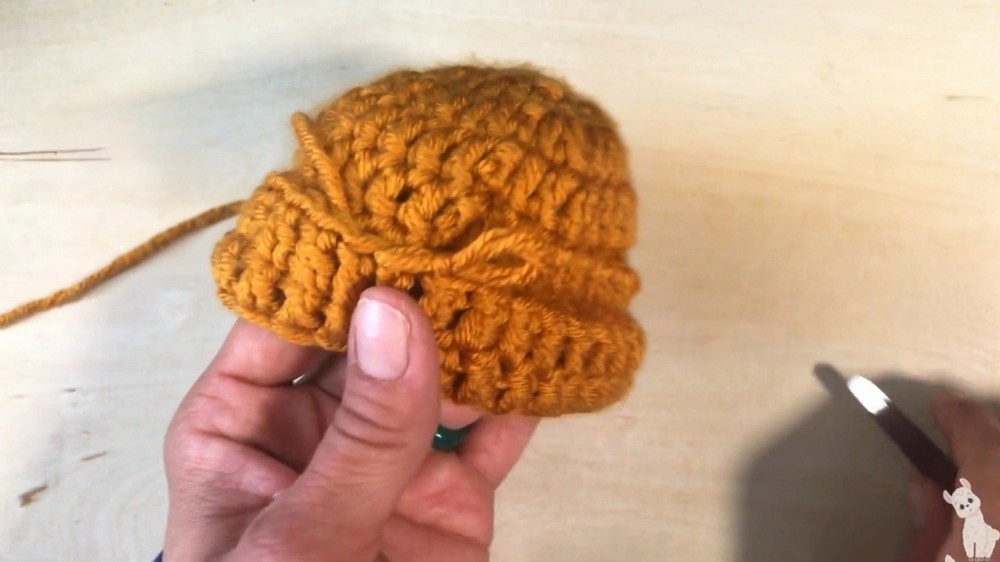
Step 5: Adding the Brim
- Round 8 (Starting the Brim):
- Flip the hat inside out so the brim edge faces outward.
- Chain 2 (counts as your first DC).
- Work 1 DC into the back loop only (BLO) of each stitch around.
- Slip stitch into the top of the starting chain 2 to close the round.
Stitch Count for Round 8: 36 DC.
- Round 9 (Optional Brim Detailing):
- Chain 1.
- Work 1 SC into the BLO of each stitch around to add a decorative ridge.
- Slip stitch into the starting single crochet to close the round.
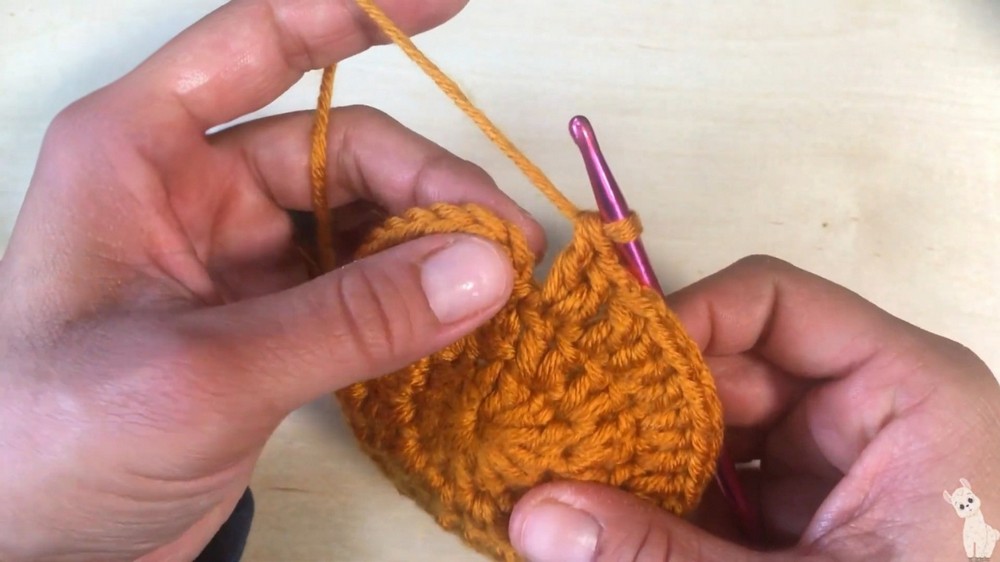
Step 6: Finishing
- Fasten Off and Weave in Ends:
- Cut the yarn, leaving a 4–6 inch tail.
- Use a yarn needle to weave the tail into the inside of the hat, securing it neatly.
- If desired, place a small knot on the brim area (not the inner crown) to prevent unraveling.
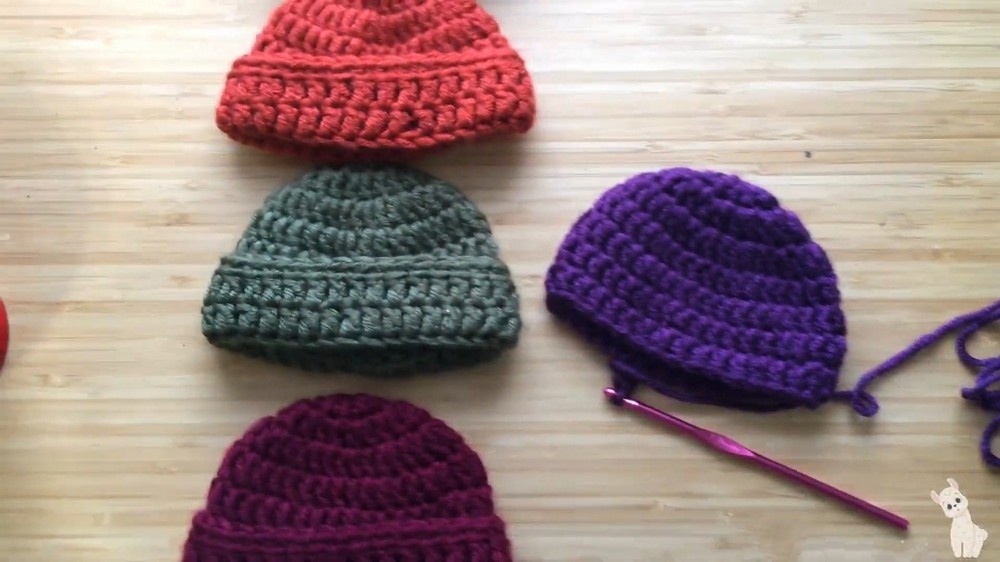
Customization Ideas
- Colors:
- Use two or more colors to create a striped pattern or contrasting brim.
- Embroidery:
- Add small embellishments (e.g., hearts, stars, initials) using embroidery thread.
- Pom-Pom:
- Attach a small pom-pom to the top of the hat for added charm.
- Modified Brim:
- Make the brim longer by adding 2–3 more rows of DC or SC in the BLO.
- Make the brim longer by adding 2–3 more rows of DC or SC in the BLO.
Tips for Success
- Proper Tension: Ensure your stitches are even and not too tight, especially since it’s for a newborn.
- Soft Yarn: Use soft, washable yarns, considering the delicate skin of babies.
- Test the Fit: Measure as you go to adjust the size (if necessary).
Conclusion
Congratulations! You’ve completed an adorable newborn hat that’s perfect for gifting or keeping your little one cozy during colder months. The clean, professional look of this hat is achieved through simple techniques like the invisible decrease and back-loop detailing, which elevate the design. Whether you stick to this basic design or customize it, this hat is sure to delight.
Final Thought:
This pattern is beginner-friendly yet versatile and can be adapted for different colors, sizes, and styles. Share your creations and let us know how you personalized your project.