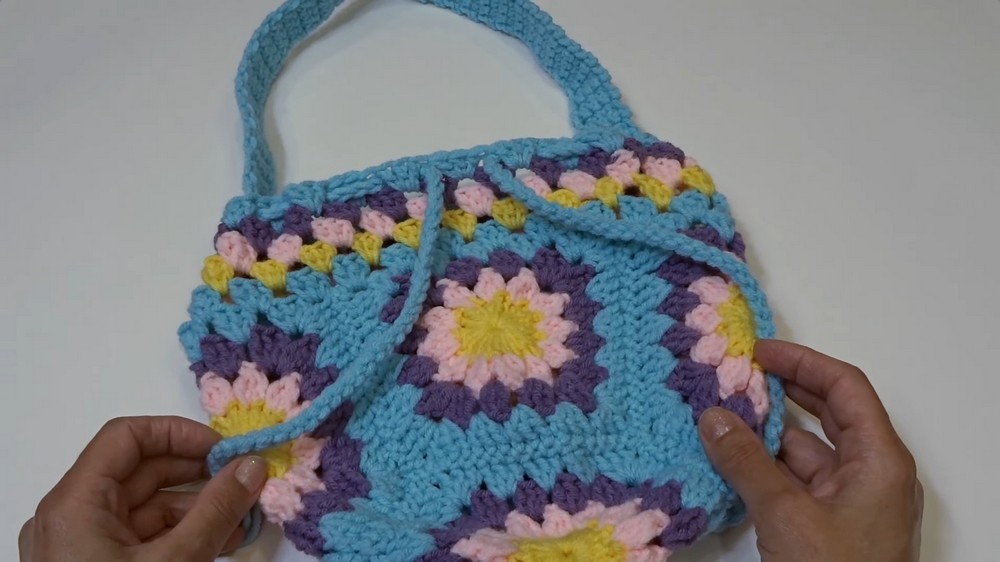
Here is a tutorial to crochet a shoulder bag using colorful sunburst squares with a step-by-step tutorial for beginners and experts. Kite explains the process, starting with creating individual squares, sewing them together, adding height, and attaching a strap to complete the design. The bag measures 10 x 11 inches. The tutorial is beginner-friendly, encouraging customization for personal flair.
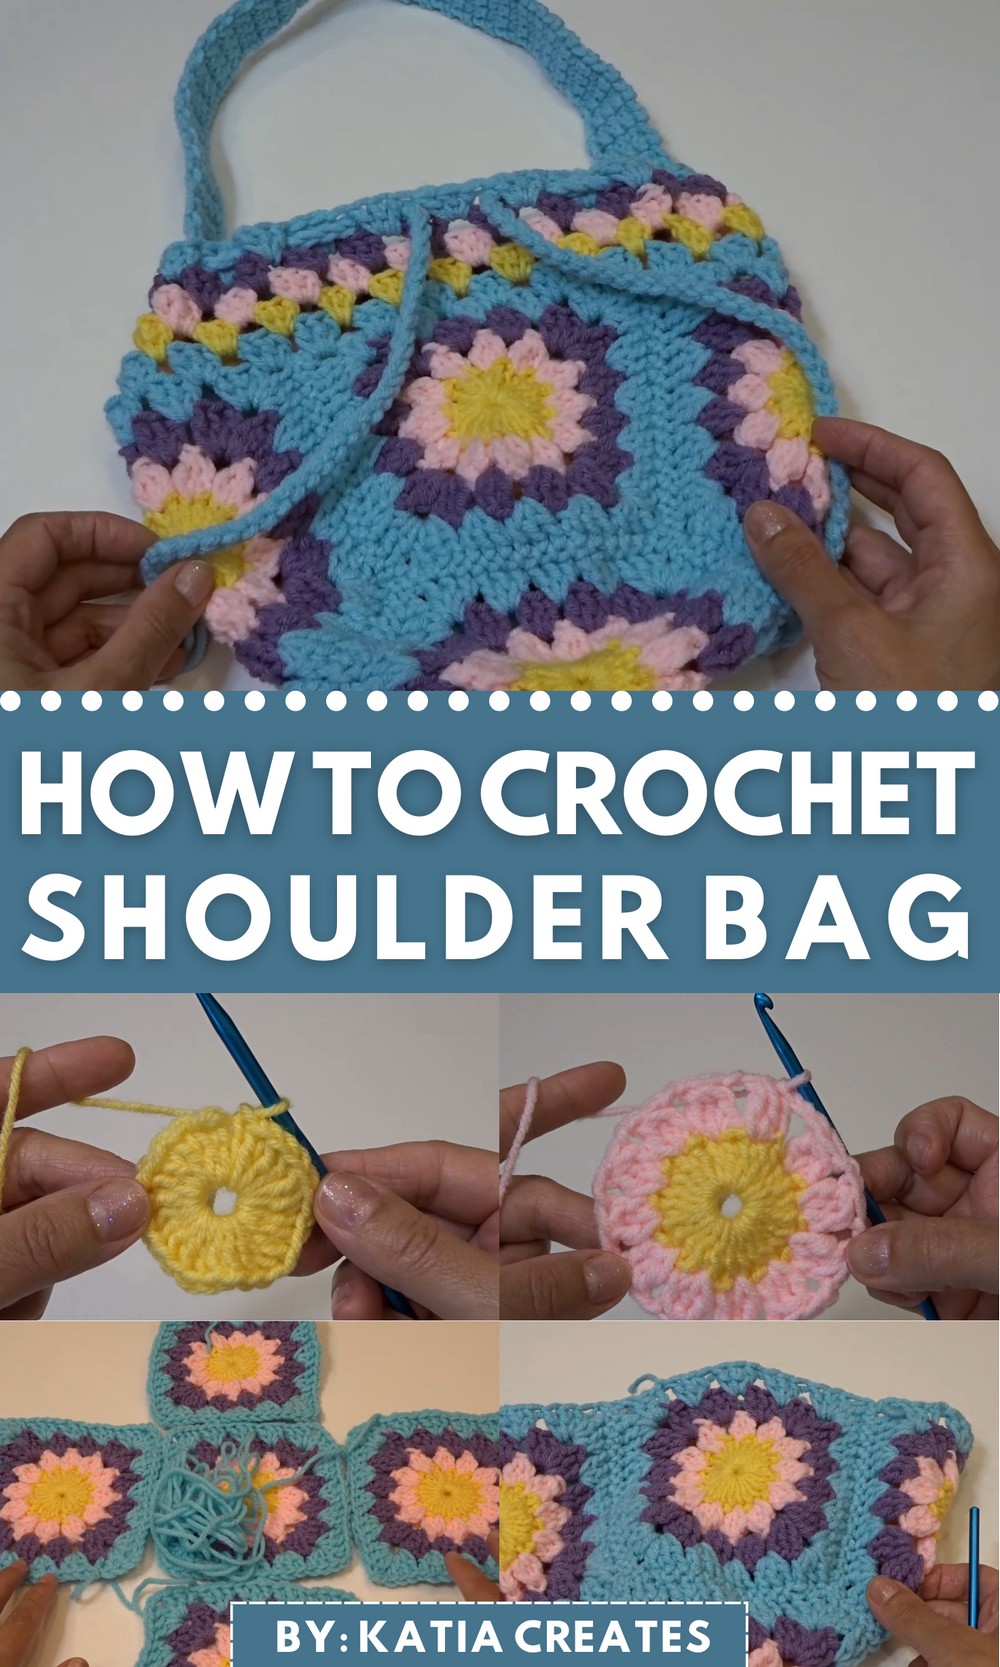
Crochet Granny Shoulder Bag Tutorial
The tutorial is hosted by Kite, who introduces a tutorial on how to crochet a shoulder bag. Kite mentions that the bag uses sunburst squares as the main design pattern and references her previous bucket hat video with the same pattern. The bag can be customized as a drawstring bag or left without a drawstring, depending on the viewer’s preference.
Sunburst Square Creation
- Round 1:
- The tutorial starts by creating a magic ring or an alternative slip knot method.
- Into the magic ring, double crochet stitches are worked to form the foundation of the square.
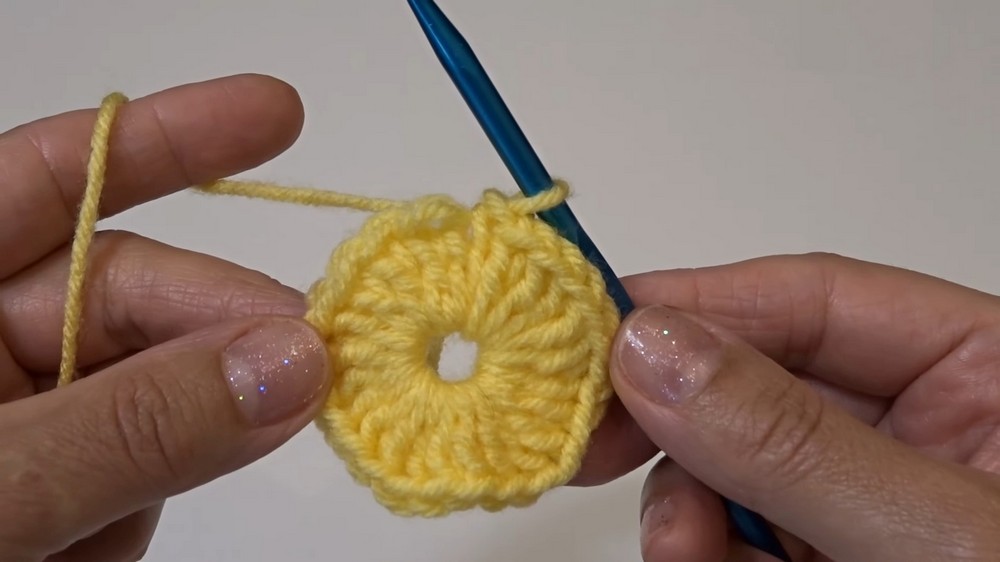
- Round 2:
- A new color is introduced to create three double crochet clusters.
- Kite emphasizes techniques like changing colors seamlessly, tightening the yarn tail to secure the center, and forming a structured design.
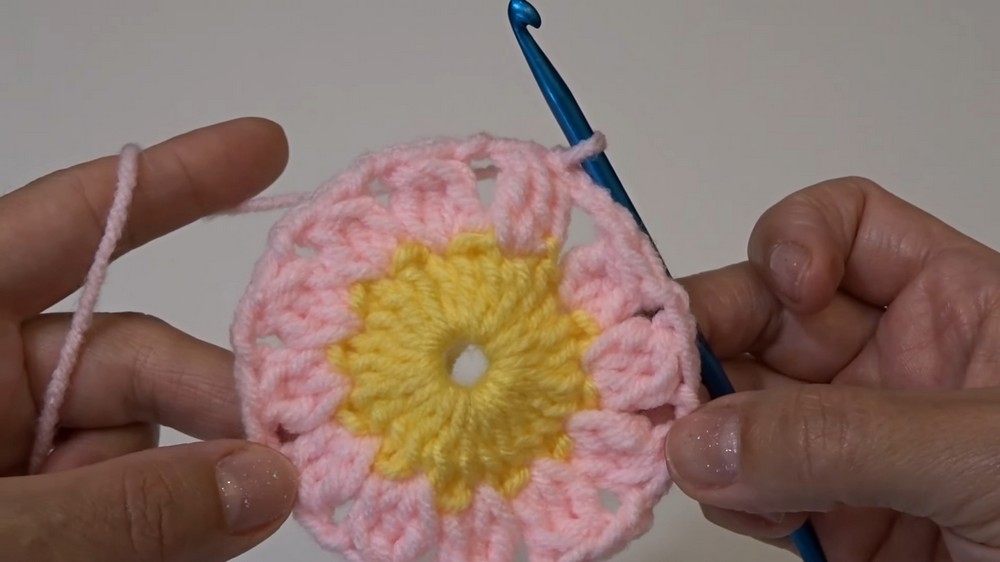
- Round 3:
- The round transforms the circular design into a square by working corners with alternating double crochets and chain spaces.
- Different color yarn, such as purple, is added to give the square its characteristic sunburst style.
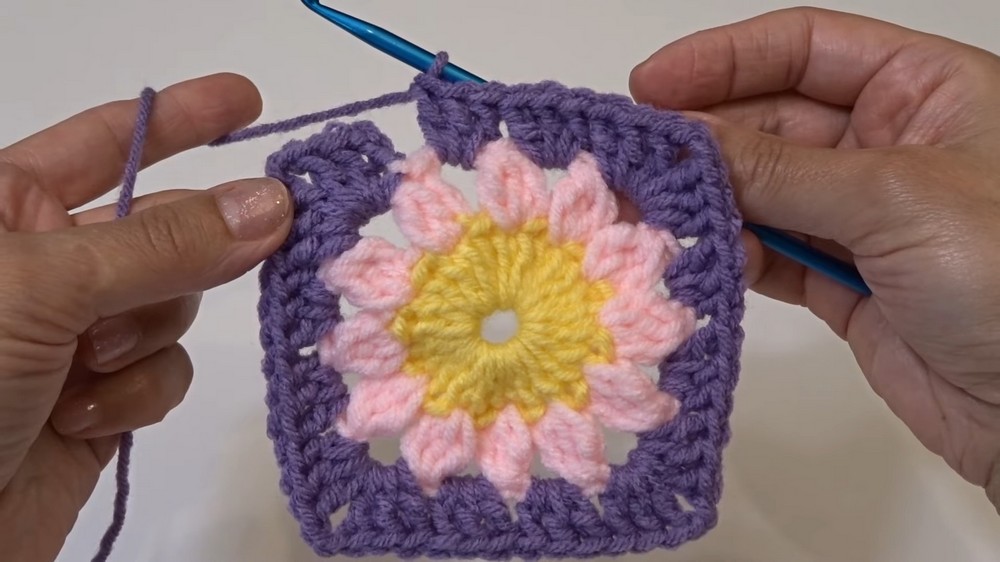
- Round 4:
- The final round continues to expand the square using similar techniques and reinforces the corners.
- The color turquoise is added while holding the yarn tails neatly.
- Repeating Process:
- A total of five squares are needed for this bag, including one with a long yarn tail for sewing.
- Kite demonstrates finishing each square by hiding yarn tails using a needle and tightening the centers for clean results.
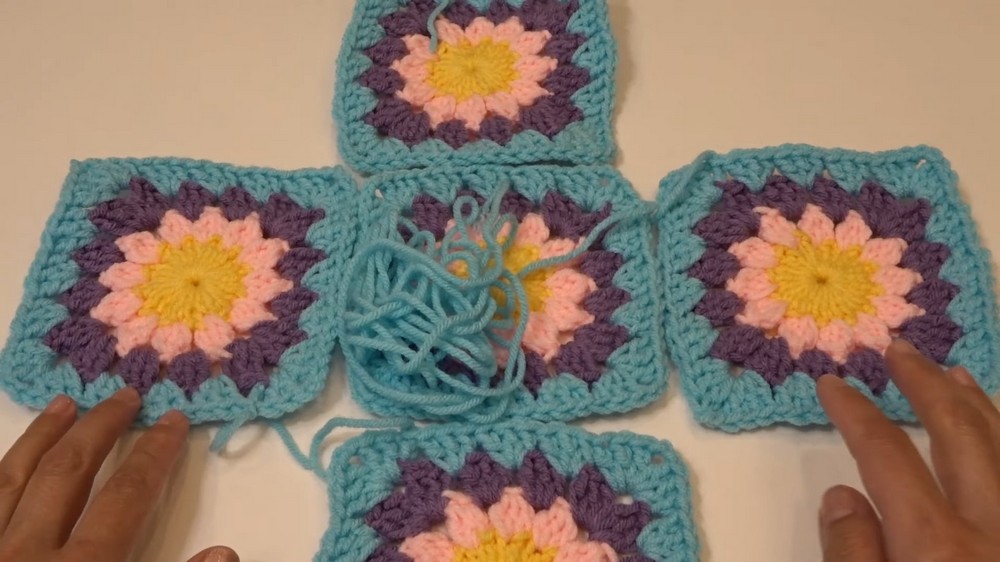
Sewing the Squares Together
- Formation:
- The squares are arranged with one in the center and four surrounding it. The long yarn tail from the center square is used for sewing.
- Kite uses whip stitching to join the squares securely.
- Techniques:
- She aligns the stitches of adjacent squares by sewing through loops to maintain symmetry.
- The edges and corners are carefully sewn together for a seamless finish.
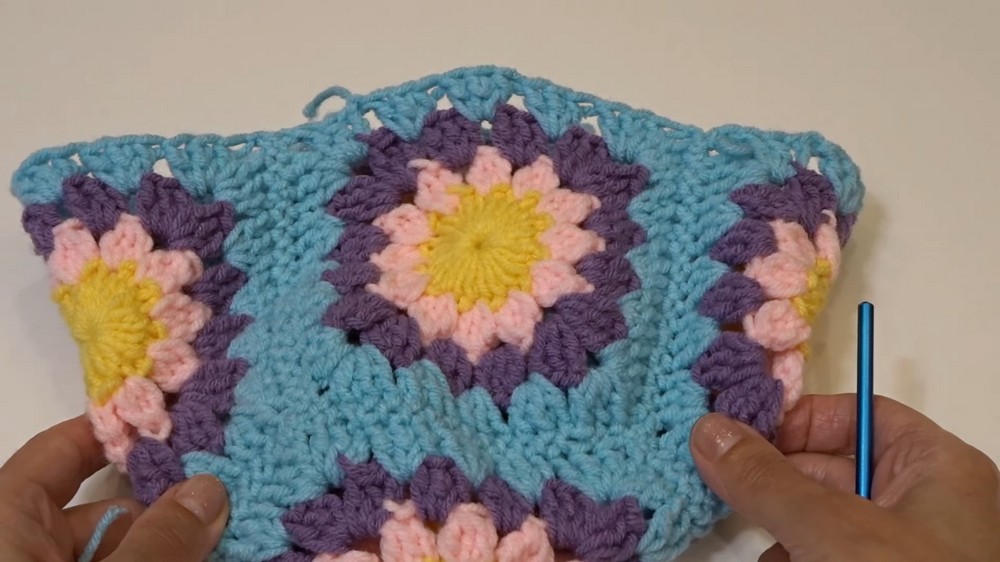
- Sides
- Once the base is assembled, the sides are folded inwards and sewn using whip stitches along the edges to create the bag’s three-dimensional shape.
- All yarn tails are woven in and cleaned up during this process.
Building the Height
- Foundation of Height:
- After the base is complete, crochet work begins along the edges to add height to the bag.
- Rows of double crochets are worked in circular rounds, with additional yarn colors introduced.
- Repetition:
- Kite completes five total rounds to achieve the desired height, though viewers can add more rounds for customization.
Creating the Strap
- Placement of Strap:
- Stitch markers are used to identify strap positions on the sides of the bag.
- Single crochet stitches are used to form an adjustable, durable strap.
- Length:
- Kite works a total of 71 rows to create a strap measuring 21 inches. She encourages viewers to customize strap length according to preference.

- Attachment:
- The strap is attached to the bag using whip stitching or slip stitching techniques.
- Care is taken to avoid twisting the strap for proper placement.
Optional Drawstring
- Creation:
- Kite works a chain of 115 stitches to create a drawstring for the bag.
- The drawstring is woven through the top edge of the bag, alternating between rows, and can be tightened or loosened as desired.
- Customization:
- The drawstring ends can be left plain or decorated with beads, tassels, pom-poms, or charms.
Conclusion
- Kite displays the final bag, demonstrating its versatile look and functionality.
- She closes by thanking viewers, encouraging them to like and subscribe, and expressing excitement for future projects.