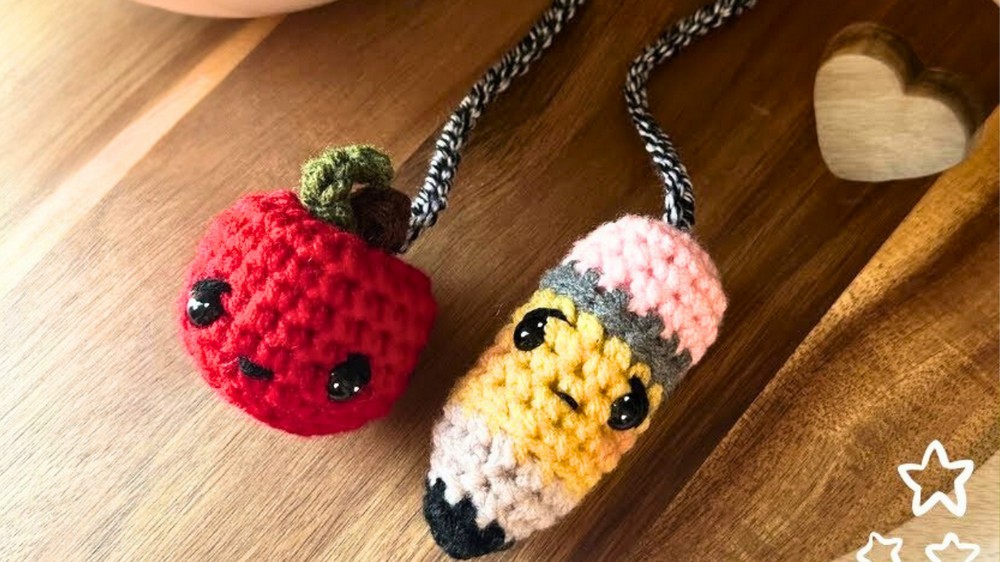
In this tutorial, learn how to crochet an adorable apple charm, perfect for gifts like teacher appreciation, and designed for beginners. Starting with a magic ring and progressing through step-by-step rounds, the tutor crafts the apple, adds safety eyes, decorative accents, and a stem.
Additionally, she shows how to create a matching pencil charm and assemble them into a car or backpack accessory using marbled yarn resembling a composition notebook. Follow through with the complete tutorial!
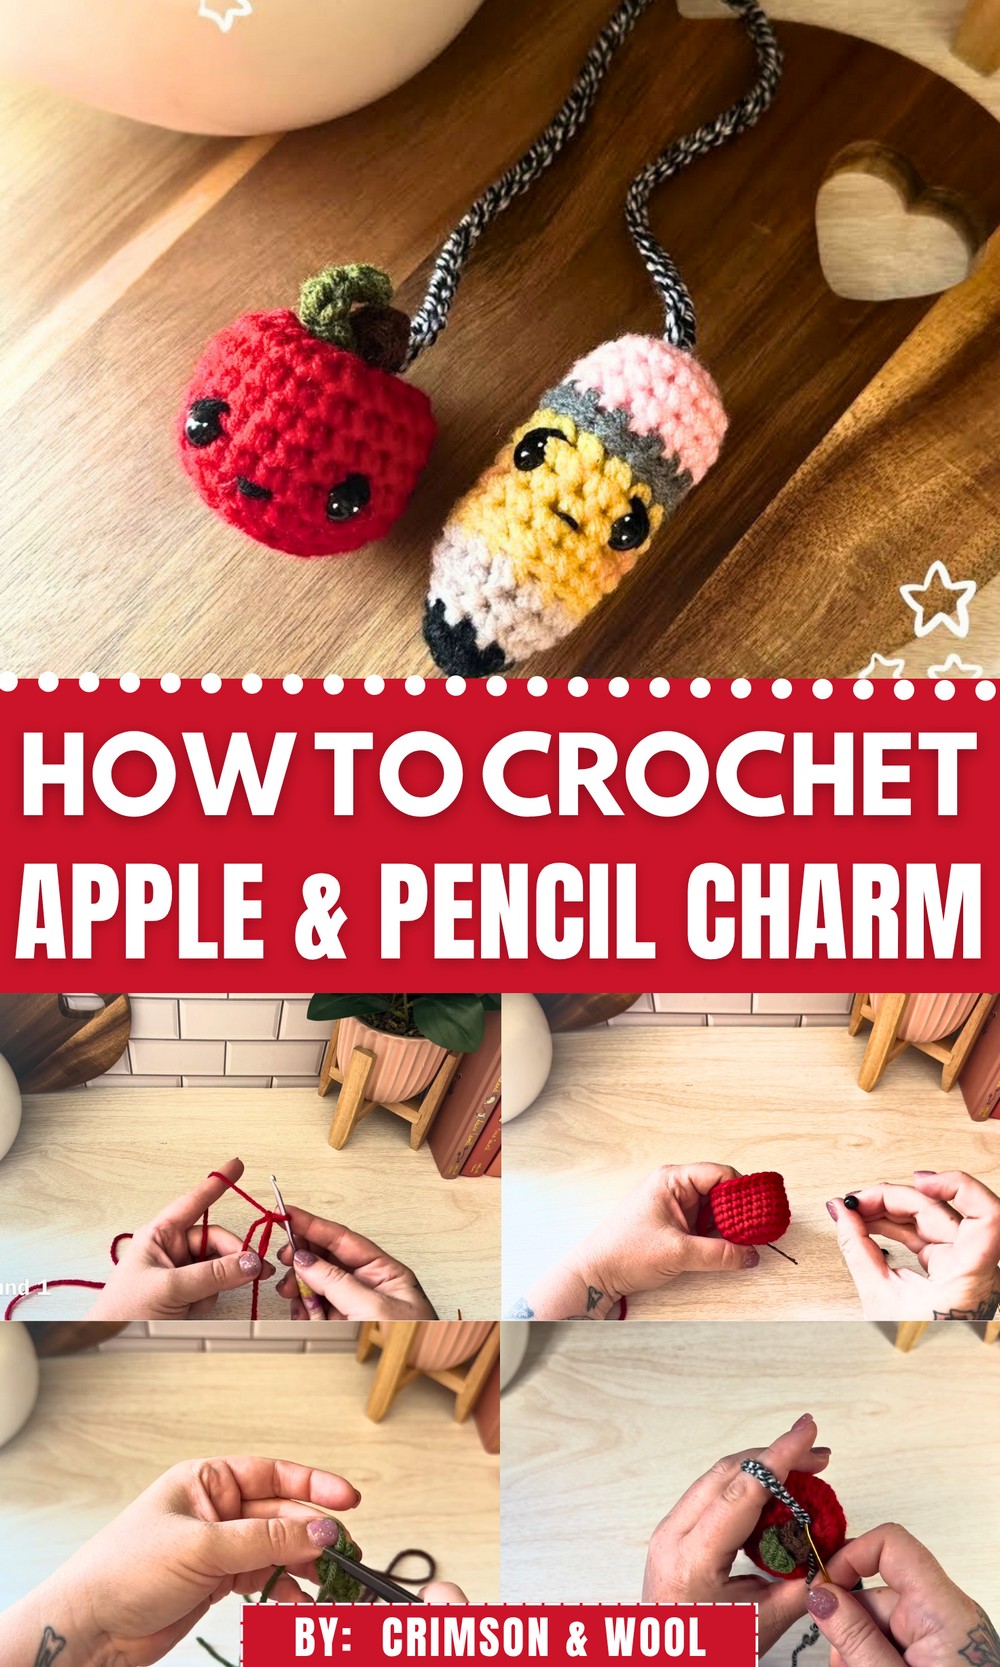
Crochet Teacher Gift Apple and Pencil Car Tutorial
This tutorial, led by Sarah from Crimson and Wool, provides step-by-step instructions on creating a crochet apple charm that can be hung in a car or used as an accessory on a backpack or purse. The video is part of a teacher appreciation gift set and complements the pencil charm, whose tutorial and pattern are linked in the video description.
Introduction and Overview
- Sarah introduces the project as a crochet car charm featuring an apple and pencil design.
- The apple tutorial is covered in this video, while the pencil tutorial is referenced as being available in the video description.
- Sarah mentions using a marbled yarn from Hobby Lobby to create the chain and adds that it resembles a composition notebook, tying into the teacher appreciation theme.
- The tutorial uses a 4 mm crochet hook and medium worsted weight yarn. Specific patterns for the apple and pencil are available in the video description.

Crocheting the Apple Base
- Starting the Apple:
- The project begins with creating a magic ring and using red yarn to form the base of the apple.
- Sarah explains how to adjust the initial round to include seven single crochets (specific counts omitted as per request).
- Progressing Through Rounds:
- Subsequent rounds feature increases to grow the apple’s base evenly.
- Sarah completes the last increase round and moves into rounds with no increases to form the apple’s shape.
- Safety eyes are added between specific rows as part of the design, and their placement is explained in detail.
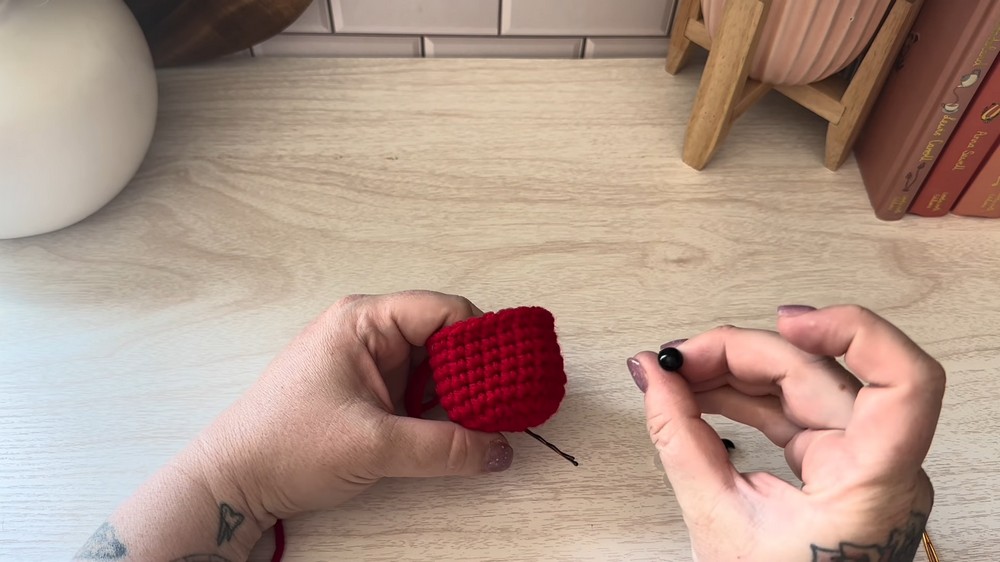
Adding Facial Features
- Placement of Safety Eyes:
- Sarah discusses how to position the eyes evenly using visible stitches as guides.
- Safety backings are attached to secure the eyes.
- Adding Details: Eye Accents and Mouth:
- Using black yarn, Sarah adds eye accents by threading yarn near the safety eyes.
- A simple curved mouth is created beneath the eyes using scrap yarn, enhancing the apple’s cute, animated appearance.

Closing and Shaping the Apple
- Stuffing and Closing:
- After reaching the desired size, the apple is stuffed for volume. Care is taken not to overstuff.
- Using a tapestry needle, Sarah closes the gap at the top of the apple by threading through front loops, pulling tightly to secure.
- Shaping the Apple:
- The tapestry needle is then used to pull the top inward, giving the apple its distinct shape.
- Additional threading helps create the curved, realistic apple appearance.
Adding the Stem and Leaf
- Crocheting the Stem:
- Brown yarn is used to craft the stem, which is folded, stitched, and attached to the top of the apple.
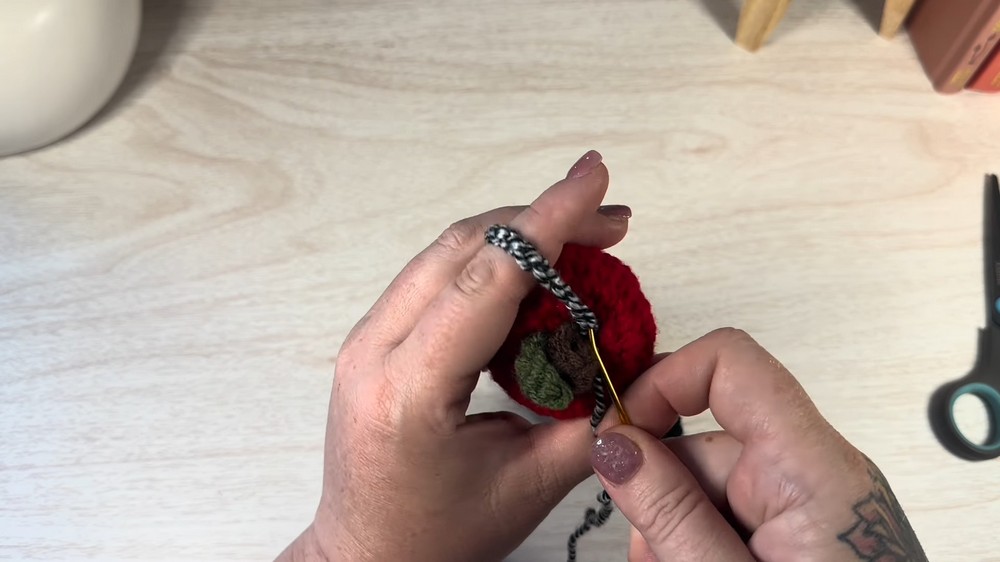
- Crocheting the Leaf:
- Green yarn forms the leaf through a series of chain stitches and different stitch types.
- The leaf is secured near the stem with considerations for its directional orientation to enhance the design.
Creating and Attaching the Chain
- Crochet Chain for the Charm:
- Sarah uses marbled yarn to crochet a long chain that forms the apple charm’s loop.
- After securing the ends, the chain is attached to the pencil charm on one end and the apple charm on the other.
- Attaching Charms to the Chain:
- The pencil and apple are stitched securely to the chain using a tapestry needle.