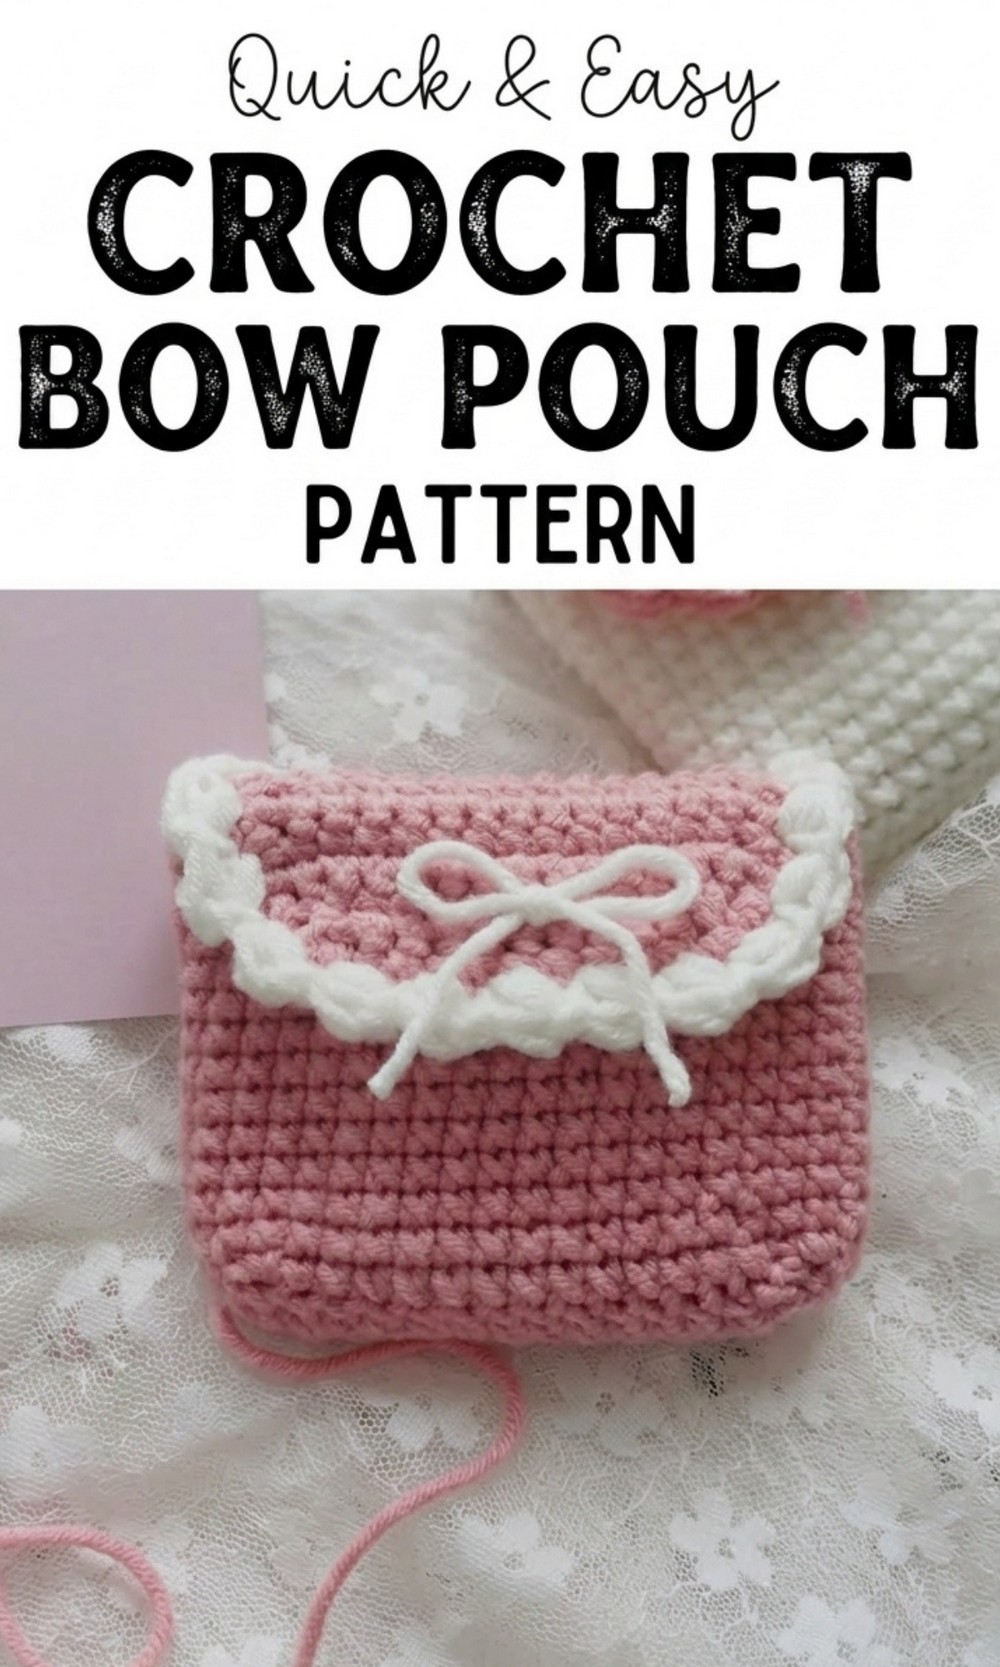
Create a stylish and functional accessory with this free crochet bow pouch pattern, perfect for organizing essentials or gifting loved ones in a unique, handmade way.
Keeping essentials organized has never been more stylish or fun. This free crochet bow pouch pattern is a fantastic way to create a practical yet eye-catching accessory for daily use. The elegant bow detail adds a whimsical charm, making the pouch perfect for storing makeup, small gadgets, or craft tools. Its compact size makes it easy to slip into a handbag or tote, offering convenience while staying fashionable.
Free Crochet Bow Pouch Pattern for Gifts or Yourself
You can customize the colors to suit your personal style or match it with seasonal tones, creating a versatile accessory for any occasion. Whether you’re crocheting a thoughtful handmade gift or adding a fresh piece to your collection, this pattern is the perfect blend of simplicity and beauty. Find the joy of crocheting something functional with this beautifully designed crochet pouch.
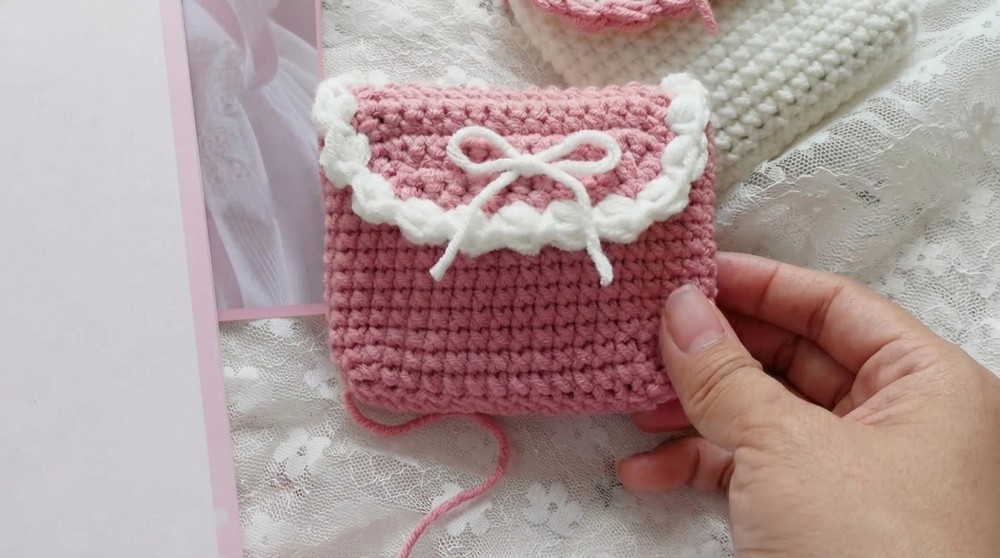
Bow Pouch Crochet Pattern
Materials Needed
- Yarn:
- Main Color: 2mm, 50g (Pink).
- Accent Color: Small amount of white yarn (for border and finishing details).
- Crochet Hook: 4mm hook.
- Magnetic Button: To secure the closure of the pouch.
- Yarn Needle: To weave in ends and sew the button.
- Scissors: For cutting yarn cleanly.
- Measuring Tape: For precision and alignment.
Special Techniques
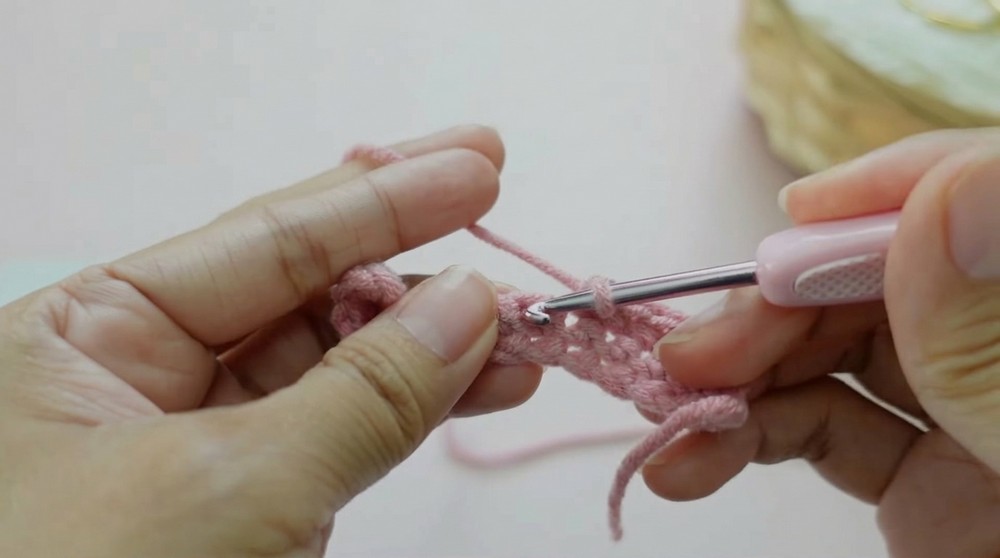
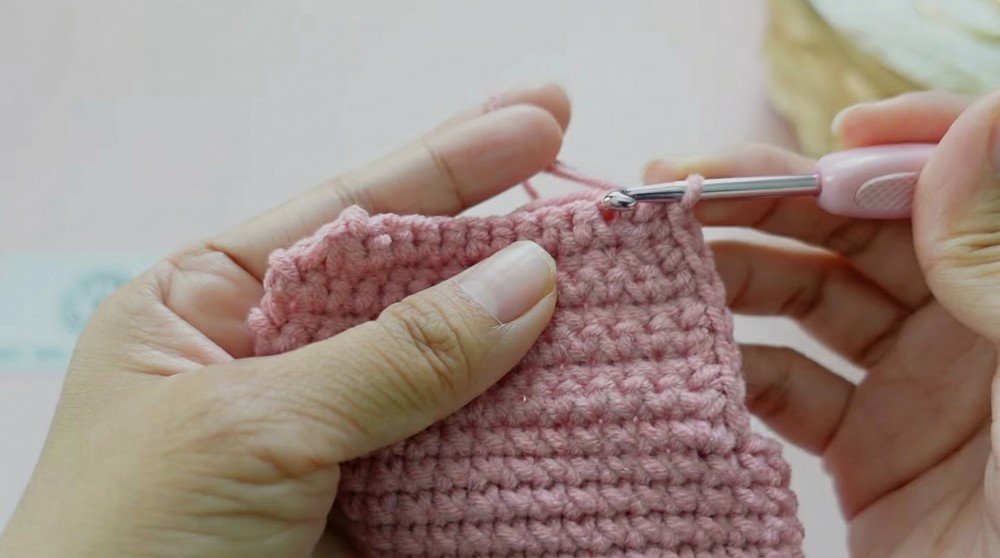
- “X” Single Crochet (X sc):
- Insert hook into the stitch, bring the yarn under the hook, yarn over, and pull through the stitch.
- Complete the single crochet as usual. This stitch creates a crossed texture.
- Puff Stitch:
- Pull the yarn and yarn over, insert your hook into the stitch, and pull the yarn through multiple times to create loops.
- Pull through all loops to complete the puff stitch.
- Decreasing (dec):
- Insert the hook into the next stitch, yarn over and pull through. Repeat for the following stitch.
- Yarn over and pull through all loops on the hook to decrease one stitch.
Pattern Instructions
Part 1: Bottom of the Pouch
- Foundation Chain:
- Chain 15.
- Row 1:
- Chain 1 for turning.
- Skip the first stitch and work 1 X sc in the next stitch.
- Continue making X sc in each stitch across.
- Total stitches: 15.
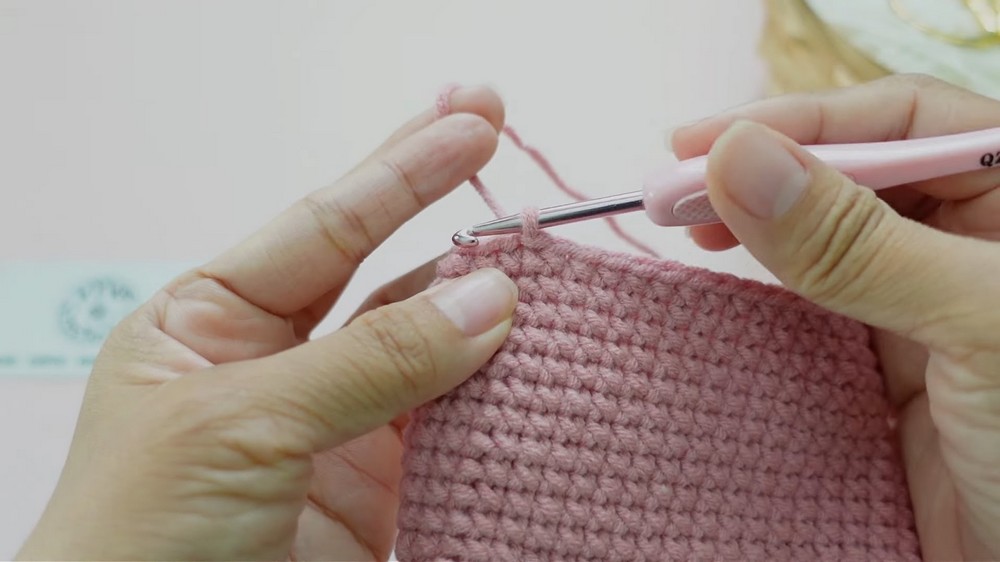
- Row 2 – Row 5:
- Chain 1, turn your work, and make 1 X sc in each stitch across.
- Continue this pattern for 5 rows. (Stitch count per row remains 15).
- At the end of Row 5, you have completed the bottom of the pouch.
Part 2: Body of the Pouch
- Establish the Edges:
- The bottom of the pouch consists of 4 sides:
- First and Third Edges: Each has 5 stitches.
- Second and Fourth Edges: Each has 15 stitches.
- The bottom of the pouch consists of 4 sides:
- Edge Stitches (Row 1 of Body):
- First Edge: Work 5 X sc in each stitch along the first side of the bottom.
- Second Edge: Continue with 15 X sc evenly across the second edge.
- Third Edge: Work 5 X sc along the third edge.
- Fourth Edge: Complete this round with 15 X sc along the fourth edge (total stitches: 40).
- Slip stitch into the first stitch to finish the round.
- Row 2 – Row 14:
- Chain 1 and work 1 X sc in each stitch around (total stitches per row: 40).
- Finish each row with a slip stitch into the first stitch.
- At the end of Round 14, the body of your pouch is complete. Chain 1 and cut yarn.
Part 3: Lid of the Pouch
- Identify Placement:
- The lid of the pouch will span from the 28th stitch to the 1st stitch of the pouch’s body.
- Row 1:
- Insert your hook into the 28th stitch and attach pink yarn with a slip stitch.
- Chain 1 and work 1 X sc in the same stitch.
- Continue working 1 X sc across the specified placement (stitch count: 14).
- Row 2 – Row 6:
- Chain 1, turn, and work 1 X sc in each stitch across (stitch count: 14).
- Row 7: (Decreasing begins)
- Chain 1, turn.
- Decrease at the beginning and end of the row (dec 1 stitch at each side).
- Work 1 X sc in the remaining stitches. (Stitch count: 12)
- Row 8:
- Repeat Row 7 by decreasing 1 stitch at each side (stitch count: 10).
- Chain 1 and cut yarn after finishing Row 8.
Part 4: Border for the Lid of the Pouch
- Attach Yarn:
- Insert your hook into the 27th stitch of the body and attach pink yarn with a slip stitch.
- Border Edging:
- Work on the three edges of the lid:
- First Edge: Work 8 X sc (one stitch per row of lid).
- Second Edge: Work 10 X sc.
- Third Edge: Repeat the first edge with 8 X sc.
- Slip stitch and cut yarn after completing the round.
- Work on the three edges of the lid:
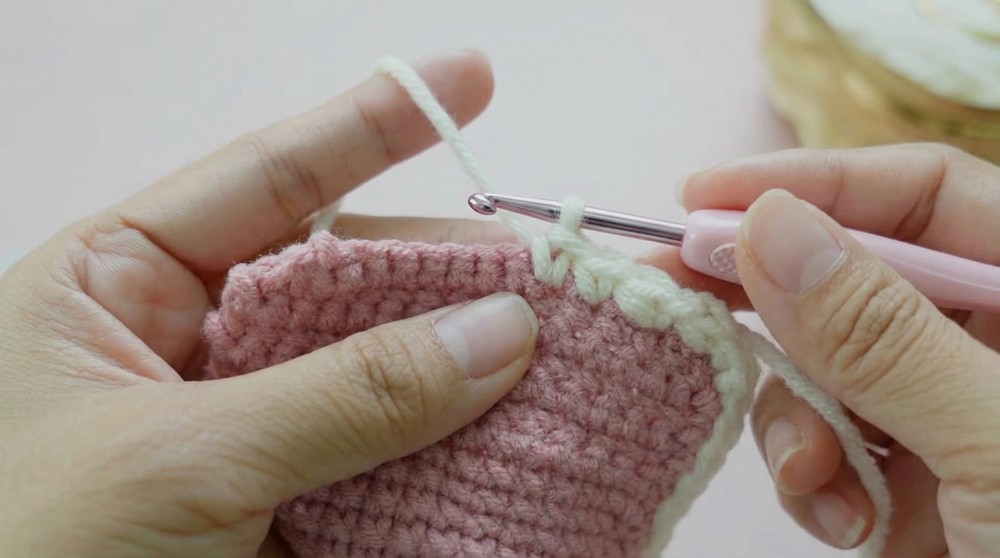
- White Border:
- Attach white yarn at the 26th stitch of the body with a slip stitch.
- Work a puff stitch: Pull up, yarn over twice, and pull through 5 loops.
- Skip one stitch and slip stitch into the next. Repeat puff stitches along all three edges of the lid.
- When completed, slip stitch into the third stitch of the body.
Part 5: Magnetic Button and Bow
- Magnetic Button:
- Sew the magnetic closure to the body of the pouch and the interior of the lid, ensuring proper alignment.
- Bow:
- Create a bow using a small amount of pink (or white) yarn. Attach it to the center of the lid for decoration.
Finishing Details
- Weave in all remaining yarn ends to give it a polished look.
- Clean up any loose stitches or stray threads.

Final Remarks and Tips
- Customization:
- Use different colors for the body, lid, or bow to personalize your pouch.
- Add embellishments like beads or sequins for extra flair.
- Care:
- Handwash gently with cold water to preserve durability and color.
- Reshape and air-dry flat to maintain the pouch’s structure.
- Functionality:
- This pouch is ideal for storing small accessories, cosmetics, or other essentials. It’s a perfect handmade gift!