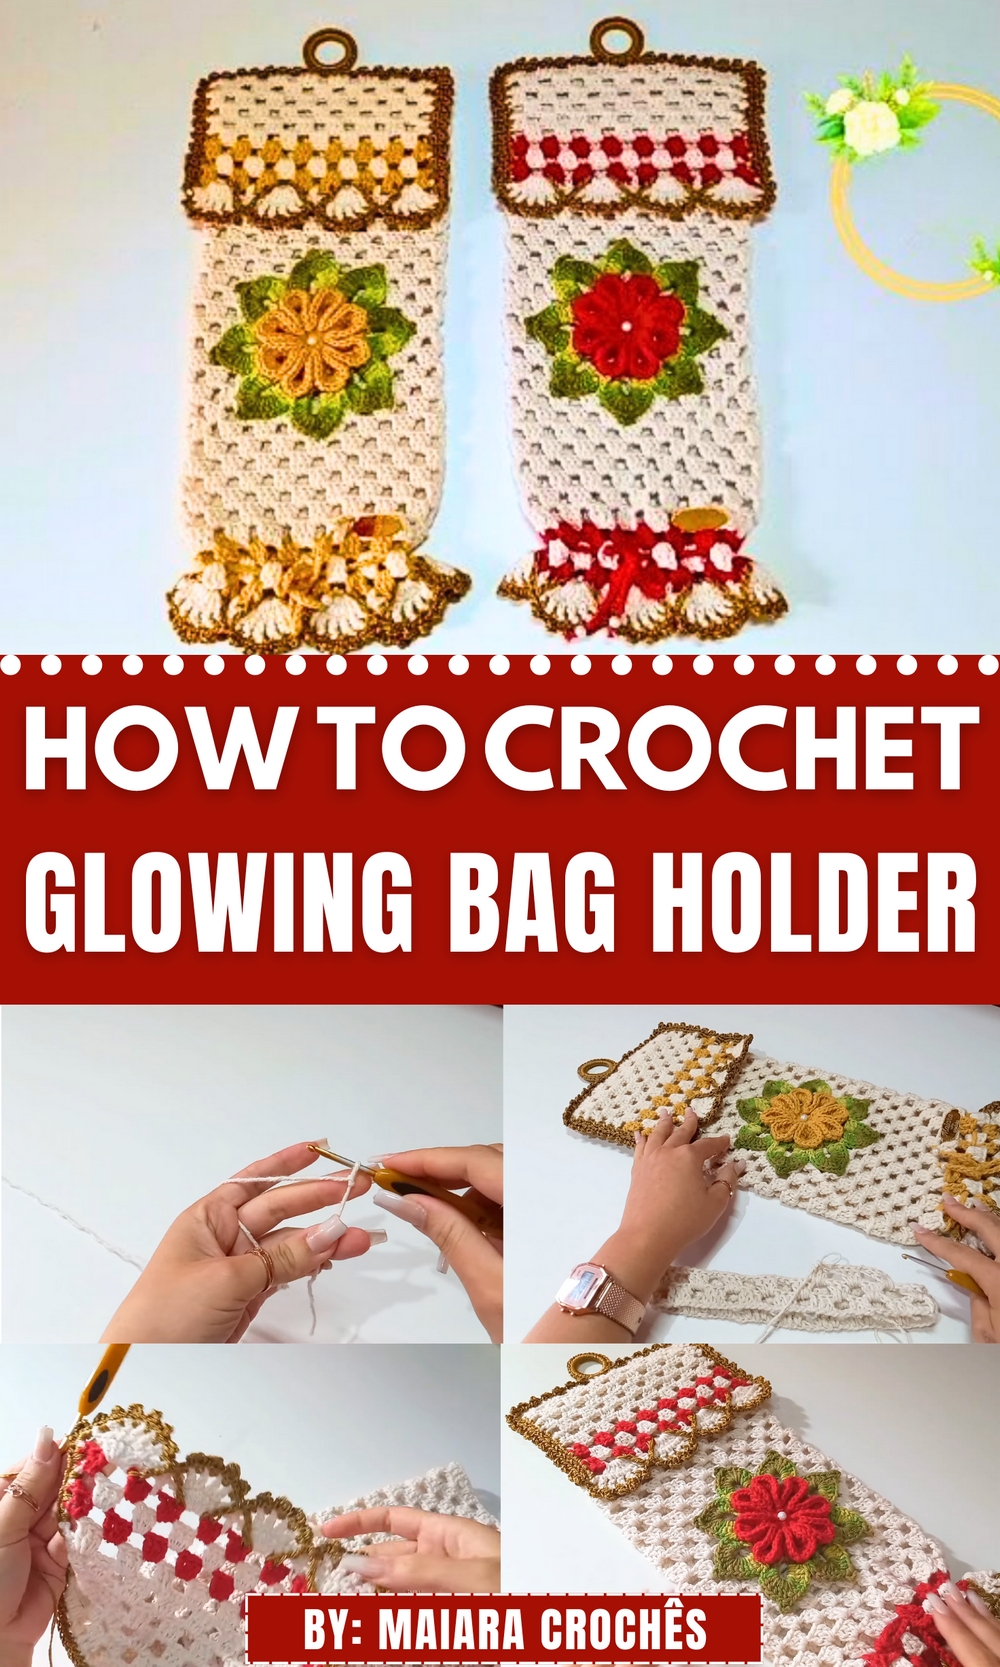
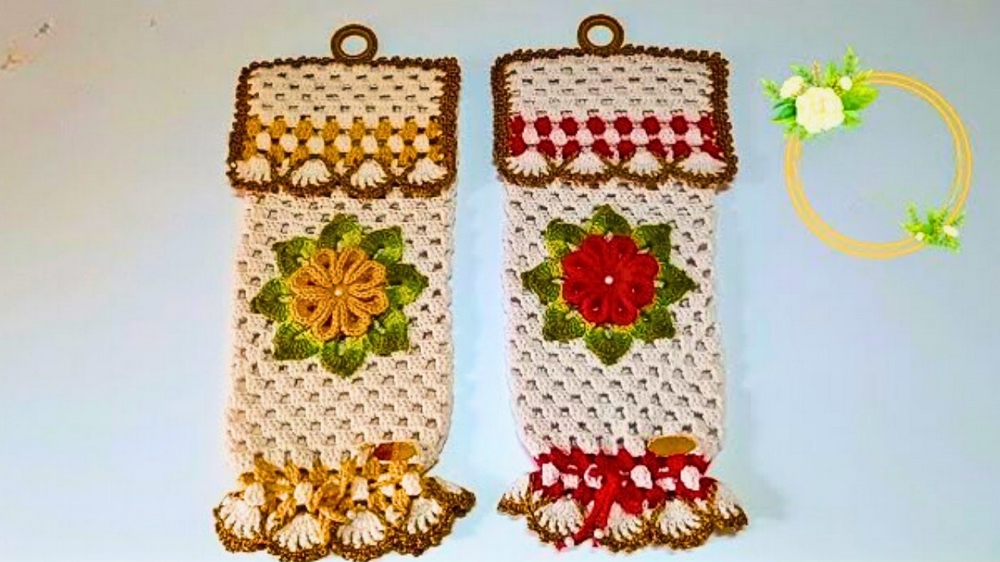
Radiate functional charm with this Free Crochet Glowing Bag Holder Pattern that tidily stores plastic bags while adding a gentle glow to your space.
Plastic bags, though practical, often become a cluttered nuisance in our homes, taking up valuable space and overwhelming drawers. One ingenious solution is the glowing crochet bag holder—a beautiful yet functional storage piece that enhances any corner of your kitchen, pantry, or laundry room. Unlike typical storage solutions, this bag holder combines utility with artistry, doubling as a decorative item while keeping your space tidy. Its charming appeal lies in its thoughtful details, warm color palette, and purposeful design, perfect for anyone who appreciates handmade touches in their daily life.
How You Can Crochet Glowing Bag Holder Pattern Even as a Beginner
In addition to its captivating design, this glowing bag holder is a perfect introduction to intermediate crochet techniques. It teaches consistency, patience, and how small details can transform a simple project into a masterpiece. While its primary use is functional storage, the holder can easily serve as a decorative art piece, showcasing both skill and creativity.
Practical yet artistic, the glowing bag holder embodies the idea that even everyday items should bring joy to your home. Not just a storage solution, it’s an opportunity to add beauty and purpose to your space. one stitch at a time.
Crochet Bag Holder Step-by-Step Pattern
Finished Size
- Approximately 14–16 inches long (height) by 5–6 inches wide, depending on tension and number of rows.
Materials Needed
- Yarn:
- Mustard Yarn (Size 6 thread): For the main section of the bag holder.
- Suggested Brand: Soberana (Brazil).
- Natural/Ecru Yarn (Size 6 thread): For contrasting sections.
- Suggested Brand: Barroco Natural.
- Red Yarn (Size 6 thread): For decorative accents and top/bottom sections.
- Suggested Color Code: #9392.
- Lisa Thick Yarn (100% Polypropylene): For the finishing tip (double strand).
- Suggested Color Code: #7577.
- Mustard Yarn (Size 6 thread): For the main section of the bag holder.
- Crochet Hook:
- 3.5mm crochet hook (adjust size as needed for tight, clean stitches).
- Additional Tools:
- Tapestry Needle: For weaving in ends and sewing.
- Scissors: Sharp and pointed for cutting yarn cleanly.
- Plastic Ring: 4 cm in diameter (used as support).
- Optional Embellishments: Pearls or beads for the drawstring.
Skill Level
- Intermediate: Familiarity with basic crochet techniques, working in rounds and rows, creating picot stitches, and switching between yarn colors.
Key Abbreviations (US Terminology)
- ch: Chain
- sc: Single Crochet
- dc: Double Crochet
- sl st: Slip Stitch
- sp: Space
- picot: Picot stitch (ch 3, sl st into base stitch)
- st(s): Stitch(es)
Special Notes
- Double Yarn with Polypropylene: Make the polypropylene yarn thicker by working with a double strand. This ensures durability and provides a more polished edge for the finishing tip.
- Alternating Colors: This piece uses strategic color changes for an elegant striped look; be sure to securely fasten color changes.
- Customizable Size: Adjust the base chain length and number of rows to fit your preference.
Pattern Instructions
Base of the Bag Holder
Step 1: Foundation Chain
- With Ecru Yarn, make a slip knot.
- Work 81 chains.
- Make sure the chain is straight without twisting it.
- Join the chain to the first chain stitch with a sl st to form a circle.

Step 2: First Round
- Start: Ch 3 (counts as the first dc).
- Work 1 dc in each of the next 2 chains.
- This forms a block of 3 dc stitches.
- Ch 2, skip 2 chains, and repeat (dc, dc, dc) in the next 3 chains.
- Continue this pattern (3 dc, ch 2, skip 2 chains) around the base.
- At the end of the round, instead of ch 2, join with a sl st in the top of the starting ch 3.
Step 3: Second Round and Beyond
- Ch 3 (counts as the first dc), then work 2 more dc into the same ch-2 space.
- This creates the next block of 3 dc stitches.
- Ch 2, proceed to the next ch-2 space, and work (dc, dc, dc) in the space.
- Repeat (3 dc, ch 2) in each ch-2 space around.
- At the end of the round, join with a sl st to the top of the ch 3.
- Repeat this pattern until you have 28 total rows, ensuring you join at the end of every round.
- These rows will form the tube-like main body of the bag holder.
Tip: If you want the bag holder shorter or longer, adjust the number of rows accordingly.
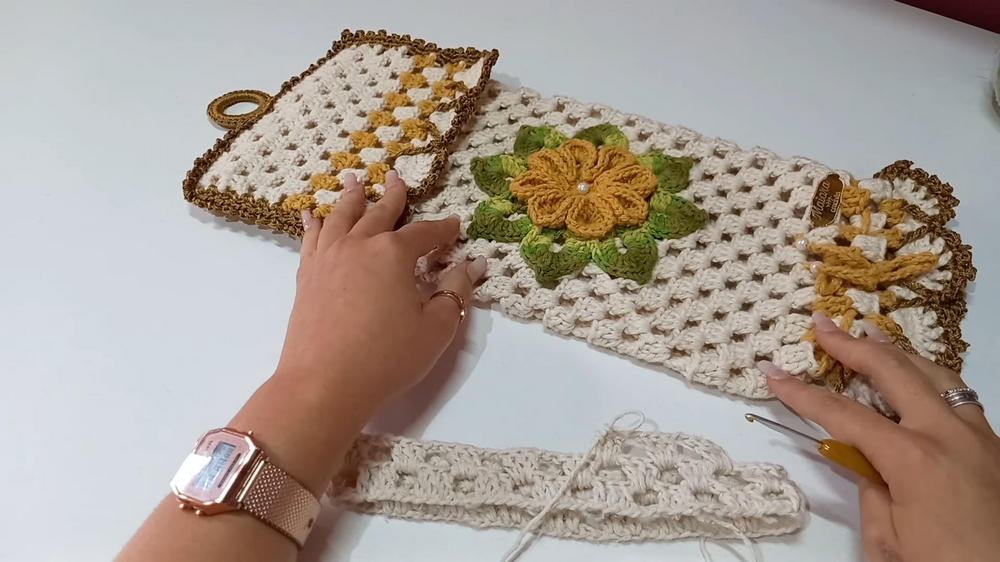
Top of the Bag Holder (Lid)
Step 4: Lid Section
- With the Ecru Yarn, begin working on the lid.
- Fold the tube in half and place a stitch marker at one side (1/3 of the circumference).
- Start working high points across one-half of the bag:
- Begin at a marked ch-2 space and work 3 dc stitches in each ch-2 space for 8 blocks.
- Turn your work and continue working dc rows for another 6 rows total.
- Change the yarn color if desired:
- Add 3 rows in red alternating with 3 rows in ecru, repeating rows of blocks.
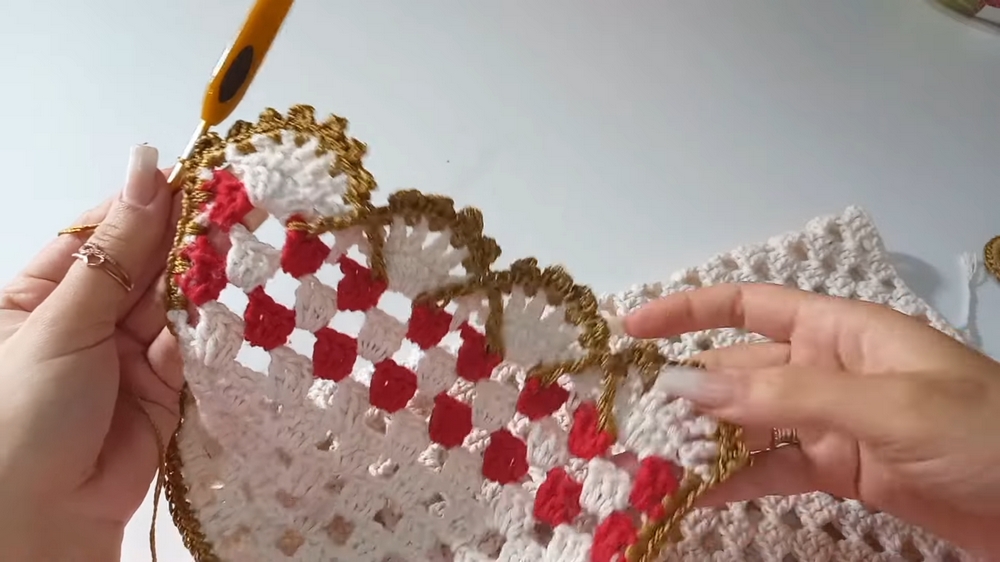
Step 5: Picot Edge for the Lid
- With Lisa Yarn (double strand), attach to the top edge of the lid by working sc into the first stitch.
- Continue to complete the picot edge.
- Work 1 sc in a stitch, then ch 3, and sl st back into the sc for the picot.
- Repeat this around, skipping every other stitch for spacing.
Bottom of the Bag Holder
- Attach red yarn at the bottom edge of the tube and repeat the same sequence as the top lid:
- One row of 3 dc blocks in red yarn.
- One row of 3 dc blocks in ecru yarn.
- One row in red yarn again.
- Add the final picot edge in Lisa yarn using the same method as above.
Step 6: Covering the Plastic Ring
- Use Lisa Yarn (double strand) to cover the 4 cm plastic ring.
- Begin with a slip knot, attach the yarn to the ring, and work sc stitches all around the ring until it is fully covered.
- Secure and weave in the ends. Attach the ring to the bottom opening.
Finishing Touches
- Drawstring Cord:
- Use Red Yarn and make a cord by crocheting 100 chains.
- Weave the cord through the uppermost round of the bag holder, alternating under and over dc blocks.
- Add beads or pearls at the ends for decoration.
- Tie a small, secure knot to close the drawstring.
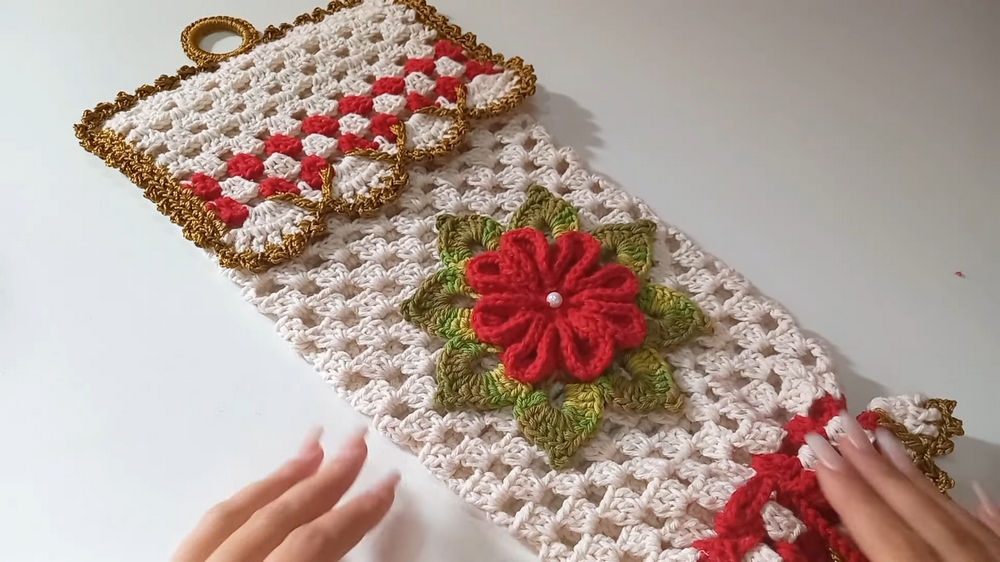
- Flower/Sewed Details:
- Attach an optional crocheted or pre-made flower to the top of the bag holder for a decorative element.
- Attach an optional crocheted or pre-made flower to the top of the bag holder for a decorative element.
Conclusion
Your crochet bag holder is complete! This practical and colorful item is both a functional and decorative addition to your home. The alternating color rows and elegant picot edging provide a modern yet timeless aesthetic.
Important Remarks
- Blocking: If your project appears slightly rippled, lightly block it to smooth the edges and corners.
- Adjustments: You can modify the bag size (chain count and rows) or change the colors to fit your style.
Tips for Success
- Keep stitches consistent: Ensuring even tension will result in uniform blocks and edges.
- Double strands: Be sure to double the Lisa yarn properly for a sturdy finish.
- Experiment with colors: Alternating contrasting shades can elevate the design.