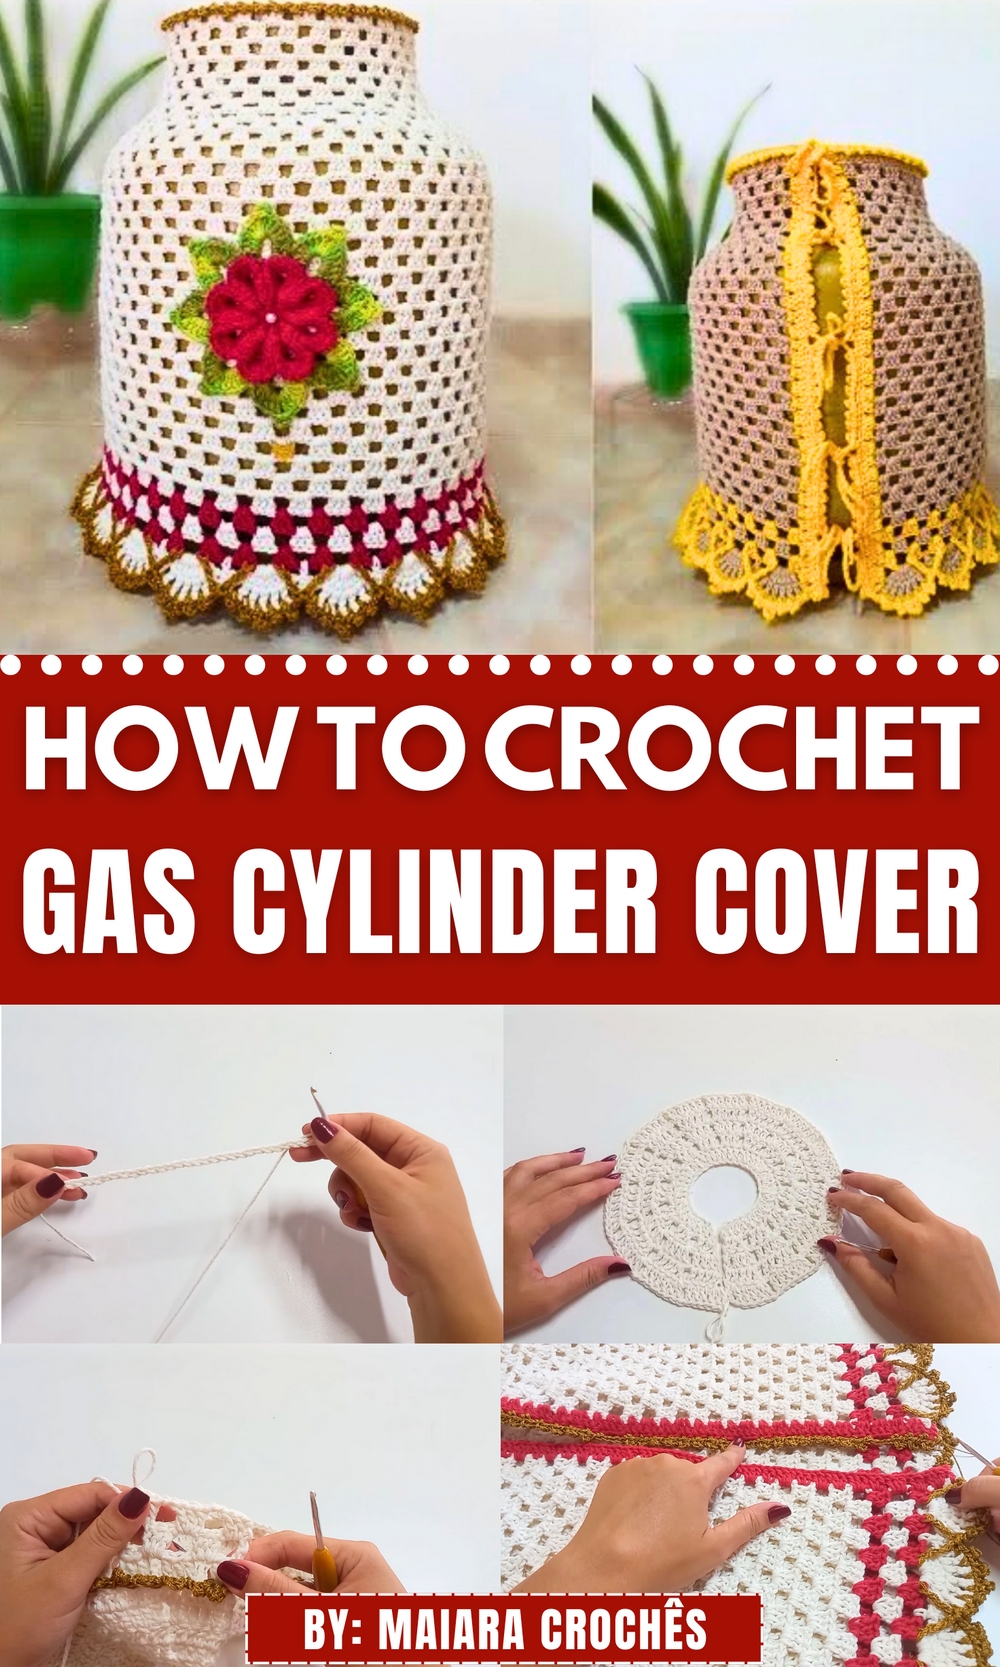
Turn dull utility into home elegance using this Free Crochet Gas Cylinder Cover Pattern that adds texture, protection, and style all in one thoughtful piece.
Most households have one tucked into a corner, functional but far from attractive. The gas cylinder, despite being an essential part of daily life, often disrupts the visual harmony of a space. That’s where this thoughtful crochet concept steps in. By covering it with beautifully worked stitches and structured form, what was once a harsh utility transforms into a soft accent that feels intentional and neat within any room.
Stylish Wrap Crochet Gas Cylinder Cover Pattern with Easy Steps
This isn’t merely about appearance, it’s a balance of practicality and visual comfort. The Free Crochet Gas Cylinder Cover Pattern brings texture and symmetry into focus. This pattern’s value lies in its smart repetition, neat finishes, and home-friendly presence. It suits beginners comfortable with basic stitches and those seeking a creative way to soften a necessary object.
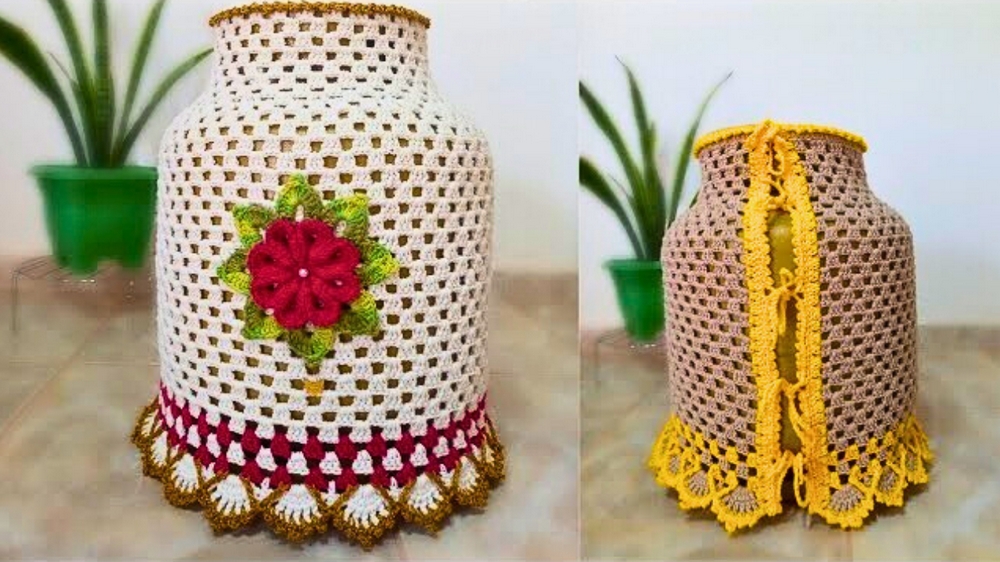
With thoughtful stitch placement and a consistent form, the finished cover blends functionality with elegance. Rather than hiding the cylinder, it now becomes a subtle accent that contributes to the room’s personality, proof that the most unexpected items can be made warm and beautiful with just a bit of intention.
Crochet Gas Cylinder Cover Pattern
Finished Size
The size of the gas cylinder cover is best suited for standard gas cylinders. You can customize the height and circumference by adjusting the number of rows and initial chains.
Materials Needed
- Yarn:
- Ecru Yarn (size 6): For most of the base structure.
- Red Yarn (size 6): For decorative accents and rows.
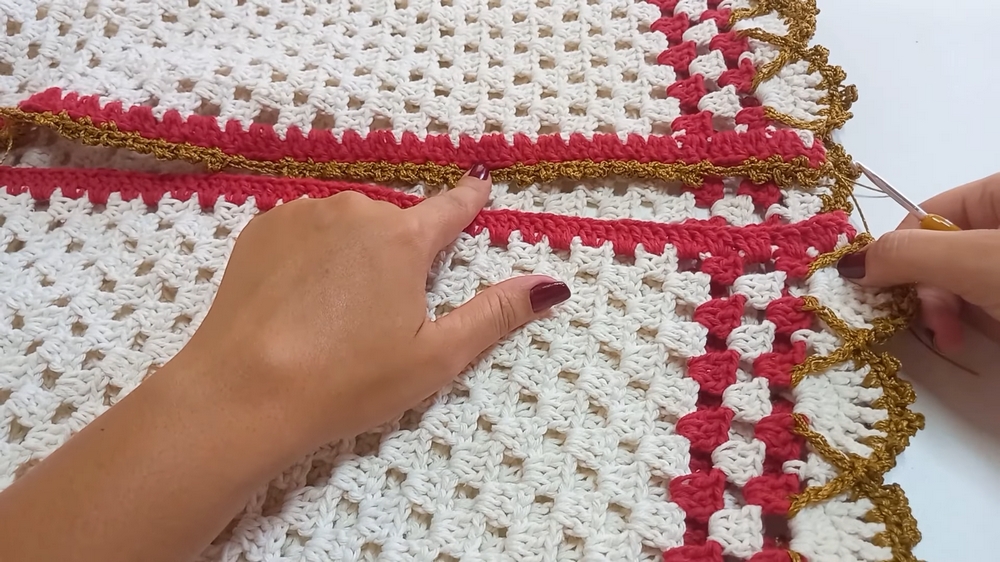
- Gold Thread (100% polypropylene, double-strand): For elegant finishing. Recommended: Lisa Modinha Grossa, color 7577.
- Crochet Hook:
- 3.5 mm (E-4 hook).
- Additional Tools:
- Scissors: For cutting and finishing yarn.
- Finishing Needle (optional): For weaving in ends.
- Flower Embellishment: Optional decorative addition (Reluz flower tutorial available).
- Lighter: For sealing ends of the polypropylene thread.
Skill Level
- Intermediate: Familiarity with US crochet terms, working in rows, increases, decorative picot stitches, and working with multiple colors.
Key Abbreviations (US Terminology)
- ch: Chain
- sc: Single Crochet
- sl st: Slip Stitch
- dc: Double Crochet
- dc inc: Double Crochet Increase (2 dc in the same st)
- picot: Picot stitch (ch 3, sl st into the same st)
- sp: Space
- st: Stitch
Special Notes
- Tension: Maintain consistent tension, especially for the decorative and color-change rows.
- Symmetry: Ensure blocks are always in even numbers for proper finishing.
- Polypropylene Thread: Use a double strand for added thickness, and seal ends with a lighter.
Step-by-Step Pattern
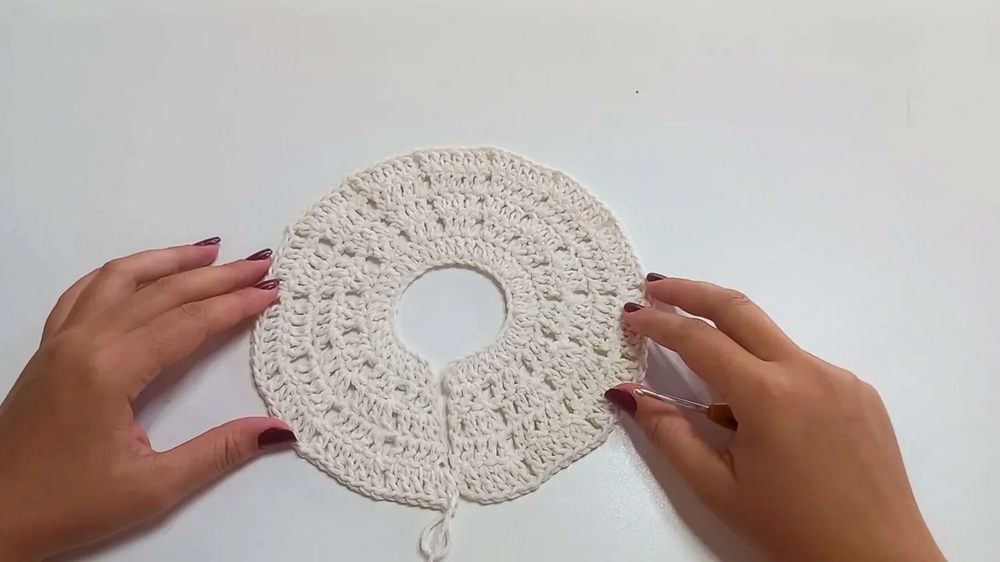
Base (Top Part of Gas Cylinder)
- Foundation Chain: Begin with ecru yarn. Make a starting loop and crochet 33 chains.
- Row 1:
- Count 4 chains back from the hook and work 1 dc.
- Alternate between (1 dc, 1 dc inc) across the row.
- You should end with 45 stitches (15 increases and 15 individual dc).

- Row 2:
- Ch 2 to represent the first dc, turn your work.
- For this reverse row, increases occur at the start of each block.
- (2 dc in one st, 1 dc in next two sts) to form blocks.
- Separate each block with ch 1, skipping a base stitch.
- Result: 15 blocks of 3 dc.
- Row 3:
- Ch 2, turn your work.
- Increases occur at the end of each block. In the last dc of each block, work 2 dc in the same st.
- Continue alternating increases across rows until each block features 6 dc by Row 6.
Transition to Blocks
Once you reach 6 dc per block, work the next row in blocks:
- Picot Preparation:
- On the last row of closed dc, begin working only in back loops of stitches.
- This leaves front loops free for the decorative picots added later.
- Row Setup for Blocks:
- Ch 3 (counts as first dc), skip 1 base st, and work (3 dc, ch 2, skip 1 st) to form blocks.
- Repeat across, ensuring you have 26 blocks (always in even numbers).
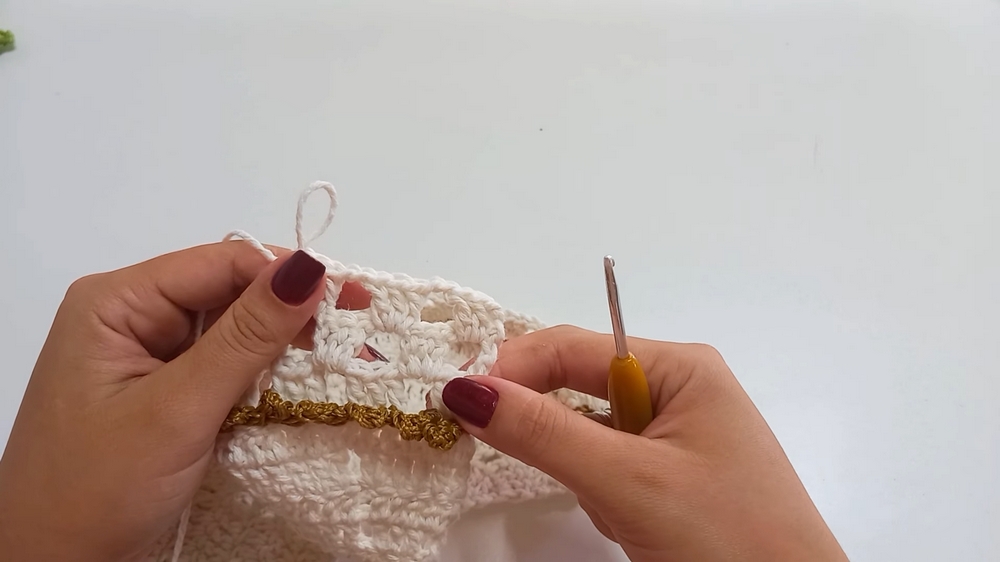
Decorative Picots (Edge Detailing)
- Switch to gold thread (double) for elegant edges:
- Attach thread to the first leftover front loop of the row prior to blocks.
- Picot Row:
- Work [sc, ch 3, sl st in sc] in every other st along the row.
- Place skip stitches between picots, except for the last picot before corners.
Body (Cylinder Section)
Row Repetitions:
- Switch back to ecru yarn.
- Continue working blocks of (3 dc, ch 2) in each sp for a total of 7 rows.
Skirt Expansion – Row 8 (Increase Row):
- Following the last row of the cylinder section, increase by alternating:
- (3 dc block in one sp, V-st in the next sp).
- V-stitch increase: (dc, ch 2, dc) in one sp.
- Ensure even increases to keep blocks symmetrical.
Rows 9–21:
- Switch back to blocks of (3 dc, ch 2) for the remaining rows.
- Adjust the height to suit your gas cylinder.
Color Changes (Optional)
- To add vibrant accents, crochet:
- Row 21: Switch to Red Yarn.
- Row 22: Switch to Ecru Yarn.
- Row 23: Switch to Red Yarn.
Base Skirt Finishing (Final Decorative Edge)
- Attach gold thread (double) for finishing.
Fan Detail (Final Row):
- Work (sc, 3 dc, picot, 3 dc, sc) into each ch-2 sp of the last row.
- Alternate with single sl st in blocks to create a flowing decorative edge.
Back Closure (Open Ties)
- Create Ties for the Open Back:
- Use gold thread, working 36 chains for each tie.
- Secure ties evenly across the back edge, alternating chains at interval points.
- Once the ties are complete, tighten them to secure the cover onto the gas cylinder.
Optional Flower Placement
- Use a pre-made or crocheted flower to center on the front of the cover.
- Secure it with hot glue or by sewing directly onto the cover.
Final Words and Finishing
Congratulations! Your Reluz Gas Cylinder Cover is complete and ready to add sophistication to your home. This design’s combination of elegant picots, bold accents, and practical finishing ensures both functionality and style.
Tips to Maintain the Pattern
- Blocking: Lightly steam block the finished cover for a uniform shape.
- Yarn Care: Use machine-washable yarn or hand wash to keep colors bold and vibrant.
- Customization: Feel free to adjust row counts or materials for other cylinder sizes.