Shine bright this holiday season with the Free Crochet Christmas Star Pattern and charming handmade stars for festive décor effortlessly.
Shimmering softly under holiday lights, a handmade star ornament brings instant warmth and festive charm to any space. The Free Crochet Christmas Star Pattern appears in the second or third sentence of this overview and guides you through crafting a beautifully shaped five‑point star using simple stitches, minimal supplies, and clear steps. In the tutorial you’ll see how to start with a magic loop, make even increases for each point of the star, and finish with a neat tail for hanging or embellishing.
Quick Crochet Christmas Star Pattern to Decorate Your Tree
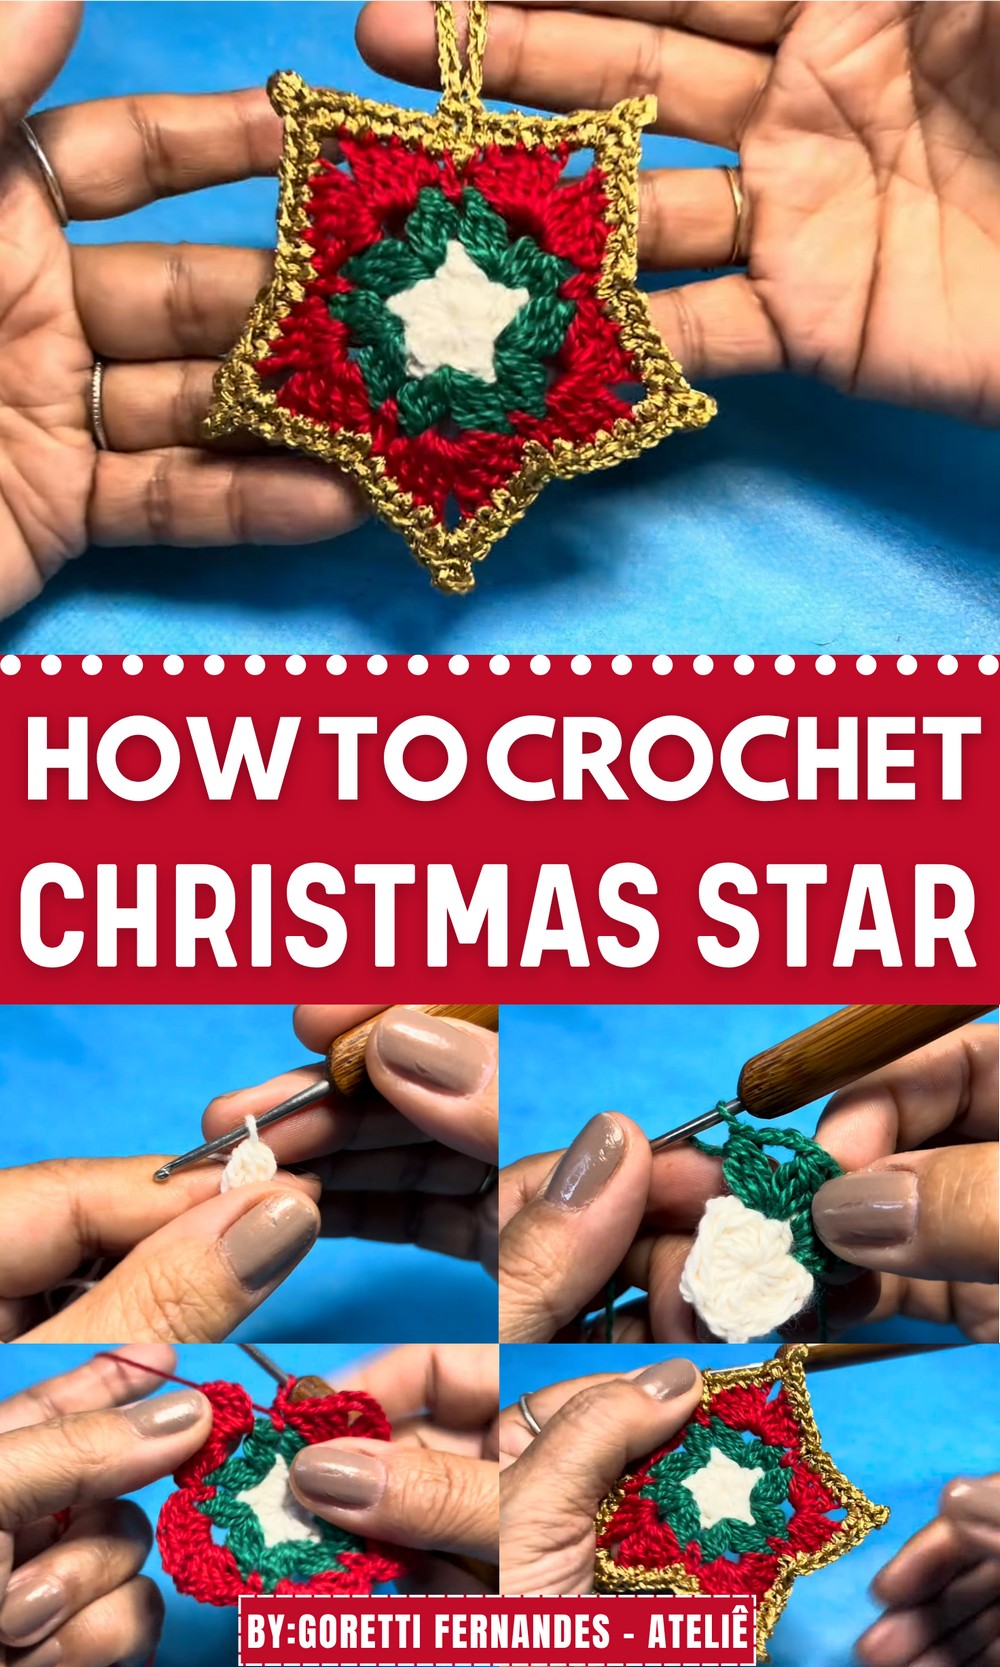
The pattern walks you through every turn of the hook, showing exactly where to place your stitches so your star emerges crisp and symmetrical. Choose yarn in classic red and green or go for metallic silver, gold or pastel tones for a modern twist. This pattern is great for beginners yet offers enough versatility to let experienced crocheters experiment with size and texture.
As you stitch, you’ll end up with a star that holds its shape beautifully, ready to decorate your tree, string into a garland, or tie onto gifts. Simple, stylish and satisfying, this crochet project brings handmade joy into your holiday decorating routine.

Crochet Pattern: Christmas Star Ornament
Skill Level
- Beginner to Intermediate: Basic crochet stitches combined with decorative finishes.
Materials Needed
- Yarn:
- Main Yarn: Anne yarn (a lightweight cotton yarn) in natural, green, red, and gold.
- You may also use amigurumi yarn for a slightly larger star or adjust the yarn type for different sizes.
- Crochet Hook:
- 2mm crochet hook (or hook size compatible with your yarn).
- Notions:
- Scissors (for cutting yarn).
- Yarn Needle (to weave in ends).
- Optional:
- Transparent or sparkly embellishments like small mirrors, sequins, or beads.
- Mixture of 1 part white glue to 3 parts alcohol for stiffening.
Special Techniques Used
- Magic Ring: To start with a tight circle for the center of the star.
- Picot Stitch: Detailing on the edges to give a decorative effect.
- Blocking/Stiffening: Techniques to give the star a perfect and flat shape.
Finished Size
- With the recommended yarn and hook, the finished star measures approximately 7-8cm (2.75-3 inches) from edge to edge.
Pattern Instructions
Step 1: Central Part of the Star (Natural Yarn)
- Start with a Magic Ring:
- Create a magic ring and secure it with your hook.
- Round 1:
- Chain 2 (ch 2).
- Work 3 incomplete double crochets (dc) into the magic ring, leaving the last loop of each on the hook.

- Once you have 4 loops on the hook, yarn over and pull through all the loops to close the stitch (this forms a 3-dc cluster).
- Chain 1 for separation. Repeat this process 4 more times to create a total of 5 clusters with a chain-1 space between each.
- Close the Magic Ring:
- Pull the starting thread tightly to close the circle.
- Slip stitch (sl st) to the top of the first cluster to close the round.
- Fasten off: Cut the yarn and pull through.
Step 2: Second Layer of the Star (Green Yarn)
- Join Green Yarn:
- Tie a slip knot onto your hook.
- Insert your hook into any chain-1 space from the previous round, and pull through the green yarn.
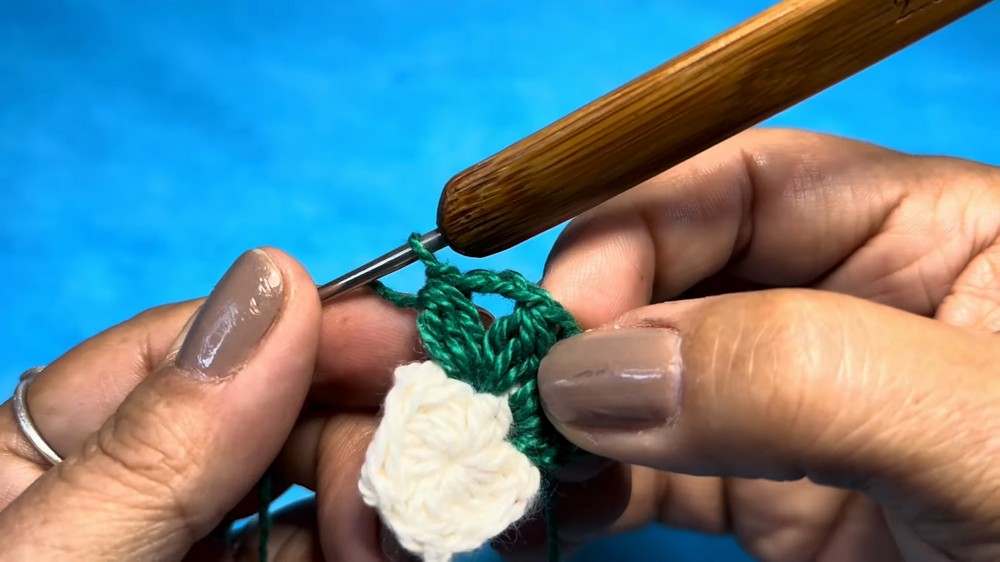
- Round 2:
- Chain 2 (ch 2).
- Work 3 incomplete dc stitches into the same chain-1 space. Leave the last loop of each stitch on the hook. Once you have 4 loops on the hook, yarn over and pull through all loops (3-dc cluster).
- Chain 3 (ch 3).
- In the same chain-1 space, work another 3-dc cluster, followed by a chain 3.
- Repeat:
- In each chain-1 space, work the following:
- 3-dc cluster, chain 3, 3-dc cluster, chain 3.
- Continue this pattern around until all 5 chain-1 spaces are filled.
- In each chain-1 space, work the following:
- Close the Round:
- Slip stitch to the top of the starting cluster.
- Fasten off: Cut the yarn and pull through.
Step 3: Outer Layer of the Star (Red Yarn)
- Join Red Yarn:
- Join the red yarn into any chain-3 space from the previous round.
- Round 3:
- Chain 3 (ch 3).
- Work 4 dc into the chain-3 space. (You now have a total of 4 dc plus the starting chain, making 5 dc total).
- Chain 3 (ch 3).
- Work another 4 dc into the same chain-3 space.
- Low Point of Star:
- Work 1 sc in the middle of the green clusters (between the “fans”).

- Work 1 sc in the middle of the green clusters (between the “fans”).
- Repeat:
- In each chain-3 space, work:
- (4 dc, ch 3, 4 dc)
- Followed by 1 sc in the middle of the next green cluster.
- In each chain-3 space, work:
- Close the Round:
- Slip stitch to the third chain of the starting chain-3.
- Fasten off: Cut the yarn and pull through.
Step 4: Final Embellishment (Gold Yarn)
- Join Gold Yarn:
- Attach the gold yarn to any chain-3 space.
- Round 4:
- In each chain-3 space:
- Work 2 sc, picot stitch (ch 3, slip stitch into the first ch), 2 sc.
- Work 1 sc into each of the 4 dc on either side of the chain space.
- In each chain-3 space:
- Line the edges with sc stitches evenly between the picot accents to ensure a neat look.
- Close the Round:
- Slip stitch to the first sc of the round and fasten off.

- Slip stitch to the first sc of the round and fasten off.
Step 5: Hanging Loop
- Create the Loop:
- Attach any yarn of your choice (gold, red, or natural).
- At any star tip, chain 12 (or adjust for a longer/shorter loop) and slip stitch into the same starting point.
- Fasten off and secure the end.
Finishing the Star
The star is now complete, but for extra durability and polish:
- Block the Star:
- Lightly steam or press the star to flatten and even out the edges.
- Stiffen the Star:
- Mix 1 part white glue with 3 parts alcohol, and brush onto the star. Lay it flat on plastic wrap and shape it accordingly. Let it dry completely for a sturdy, polished finish.
Customization Ideas
- Add sparkly embellishments, like beads, sequins, or metallic thread woven into the stitches, for added flair.
- Change the colors to suit your Christmas décor or make monochromatic stars for a more modern look.
- Connect multiple stars with 30 chains in between to create a garland for your wall or mantel.
Conclusion and Final Tips
This charming crochet Christmas star is versatile, quick to make, and a wonderful project to use up leftover yarn. Whether hung on a tree, added to a holiday gift, or made into garlands, it’s a festive way to add a handmade touch to your holiday décor.
Important Remarks
- Ensure your tension is consistent to create a flat and well-shaped star.
- Experiment with different yarns and hook sizes to create stars of various dimensions.