
Hold your small belongings in style with this Crochet Tulip Wallet Free Pattern and add a cheerful flower detail to your everyday accessories.
Give your everyday accessories a fresh look with a tiny wallet decorated with pretty flowers. This useful item is a fun choice for anyone who likes keeping small belongings in one place. Calm & Crochet by Kajal shares a delightful tutorial for this colorful project.
Easy Crochet Tulip Wallet Free Pattern To Carry Small Items
This Crochet Tulip Wallet is a small pouch with a beautiful flower design and a neat, compact shape. The tulip details give it a fresh spring appearance, while the textured stitches add a pleasant feel. Its carefully finished edges and attractive color combination help it stand out from ordinary wallets.
The floral decoration is the main highlight of this design. Pink, red, or yellow tulips can look especially pretty against a green or cream background. You can also select your favorite shades to match your handbag or personal style.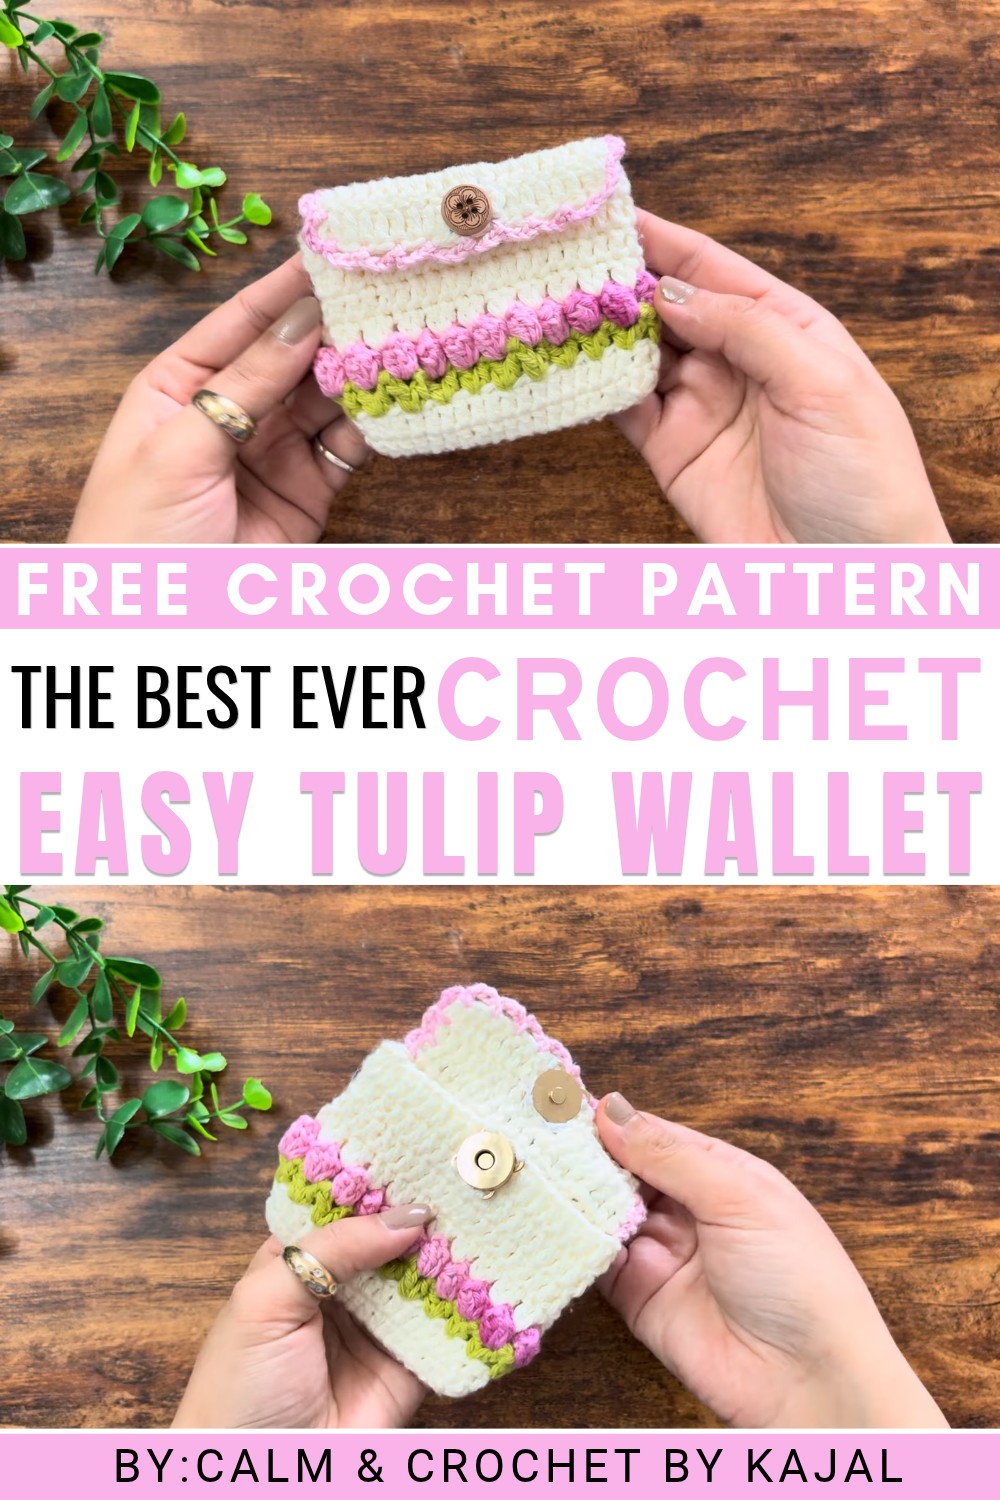 This wallet is useful for keeping coins, folded cash, cards, and other tiny items together. It fits easily inside a purse or bag, making it convenient for shopping and short trips. You can also give it as a handmade birthday present, Mother’s Day gift, or small surprise for a friend.
The making process involves working crochet stitches to form the wallet’s main sections, adding the tulip details, and joining the edges. A neat closure helps keep your belongings secure.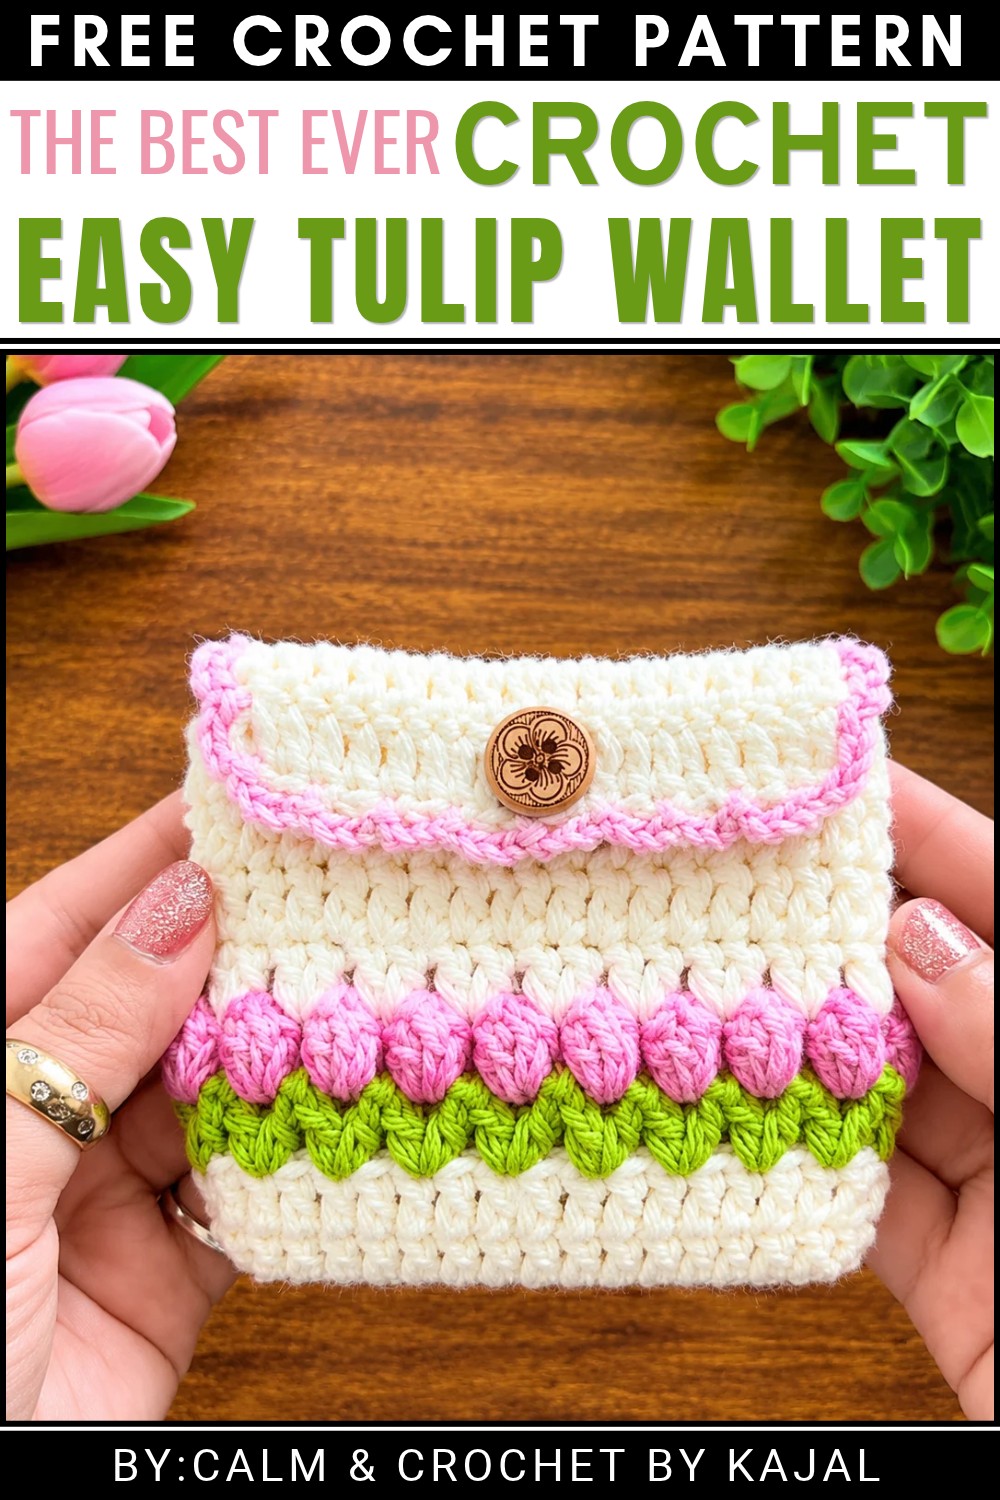 With its floral appearance and handy size, this free tulip wallet pattern is a pleasant choice for anyone who enjoys making useful accessories.
About the Pattern
This crochet tulip wallet showcases a charming blend of texture and function, shaped with classic stitches and detailed with decorative flower motifs. The wallet starts at the base with a sturdy foundation, then builds upward into a seamless body that transitions into a secure flap. Distinct leaf and tulip rows add visual flair, while simple color changes keep the construction approachable yet engaging. The border and closure not only complete the look but also ensure usability, making this wallet a delight to create and a joy to use.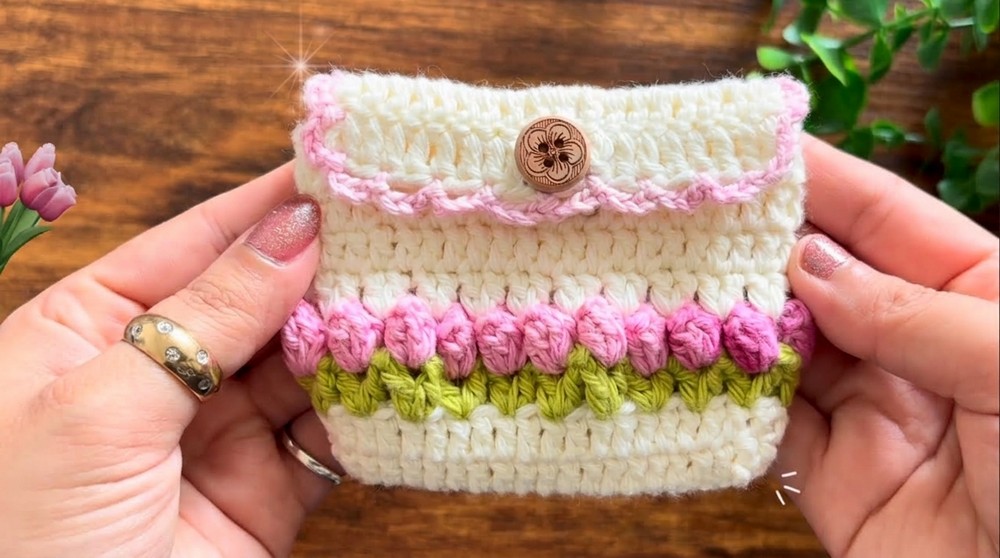
Pattern at a Glance
- Structure: Rectangular wallet with integrated flap
- Motifs: Popcorn tulip flowers and V-stitch leaves
- Closure: Magnetic snap with decorative button
- Technique: Worked in the round at first, then back and forth for flap
- Skill Focus: Color changes, texture creation
Important Notes
- Consistency in tension is essential for an even finished wallet.
- Check the stitch count after each round and row to keep the form symmetrical.
- Ensure a clean finish at color changes for a tidy inside.
- For best results, lightly block the finished wallet before attaching the closure and button.
- Use a strong cotton or acrylic yarn for durability.
Difficulty Level
Advanced Beginner to Intermediate.
The pattern involves basic stitches, color changes, and popcorn formation. Some experience switching colors and working in the round/back and forth is recommended.
Supplies Needed
- Yarn:
- Base: Worsted weight cotton or acrylic (approx. 50g)
- Leaf: Green cotton/acrylic scraps
- Tulip: Pink or flower-colored scraps
- Hook: 3.5mm or size to match gauge
- Scissors
- Tapestry Needle for weaving ends
- Magnetic Snap Closure
- Decorative Button for top accent
- Stitch Markers (optional for flap marking)
Size & Measurements
- Finished Size: Approx. 8 inches wide x 4.5 inches high when closed, flap included
(Actual size varies with tension and yarn choice.)
Gauge & Stitch Details
- Gauge: 8 stitches and 4 rows in double crochet = 2 inches (5 cm)
- Key Stitches: Double crochet, slip stitch, chain, popcorn stitch, V-stitch (dc, ch 2, dc)
Crochet Abbreviations
- ch – chain
- sl st – slip stitch
- sc – single crochet
- dc – double crochet
- popcorn – 5 dc cluster closed together
- sp – space
- st(s) – stitch(es)
- rep – repeat
Special Stitch Guide
Popcorn Stitch: Work 5 double crochets in the same stitch or space. Drop loop from hook, insert hook front to back in first dc of the group, pick up dropped loop, yarn over, pull through.
V-Stitch: (dc, ch 2, dc) worked in the same stitch or space.
Complete Crochet Pattern
1. Wallet Base
- Foundation:
- Start with a slip knot and chain 22.
- Row 1:
- Skip 2 chains from hook (counts as first dc), double crochet (dc) in the 3rd chain, then dc in each chain across the row.
- In the very last chain, work 3 dc (this creates the curve for the turn), then turn to work along the opposite side of the foundation.
- Double crochet along the entire other side of the foundation chain.
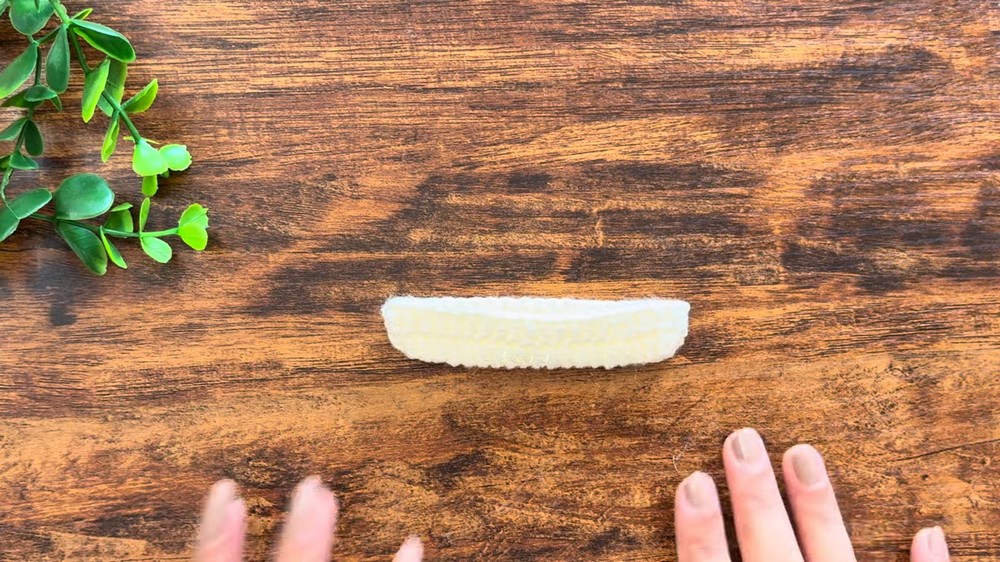
- In the starting chain, work 2 dc in the final stitch to round the curve and complete the base. (Both ends now have rounded edges.)
- Foundation Round 2:
- Chain 2, dc in the same stitch (beginning edge), then dc in each stitch around the entire base, picking up both rounded ends and straight edges as you go.
2. Adding Leaves & Flowers
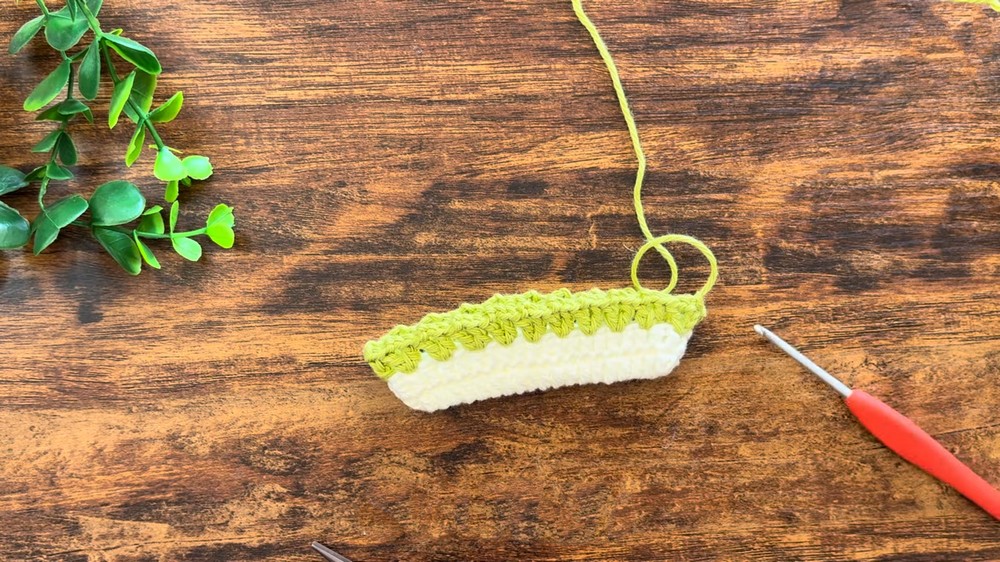
- Leafs (V-Stitch Round):
- Attach green yarn in any stitch.
- In every other stitch around the base: V-Stitch (1 dc, ch 2, 1 dc) in the same stitch.
- Continue until you return to start, placing V-stitches in alternating stitches for leafy effect.
- Tulip Flowers (Popcorn ‘Tulip’ Round):
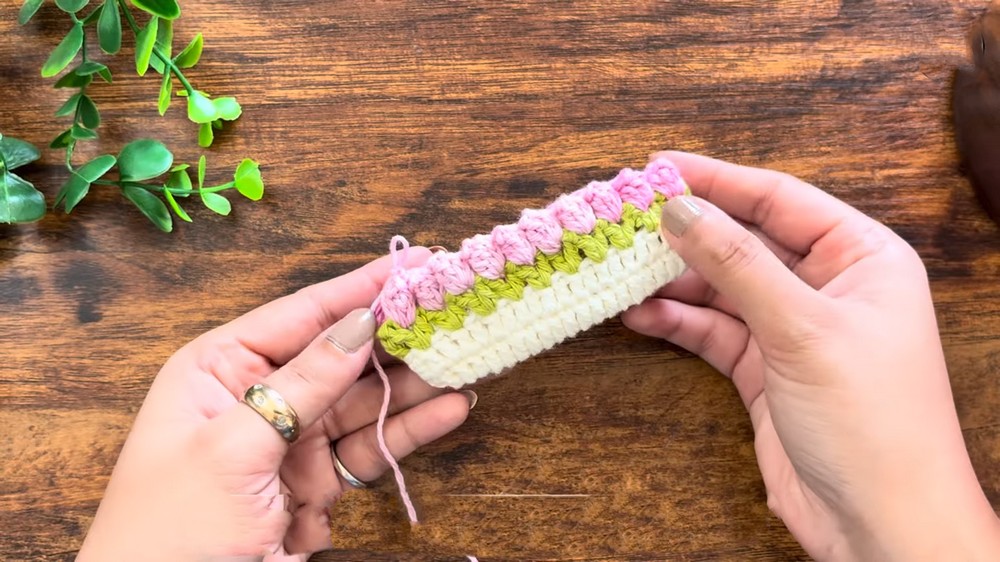
- Attach pink/favorite flower yarn to any V-stitch chain space.
- In each V-stitch space: Work 5 double crochets, remove hook from loop, insert in first dc, pick up loop, yarn over, pull through (popcorn made), ch 1 to lock, ch 1 as spacer before next tulip.
- Repeat this popcorn tulip process in every V-stitch space around.
3. Upper Section & Flap
- Upper Body:
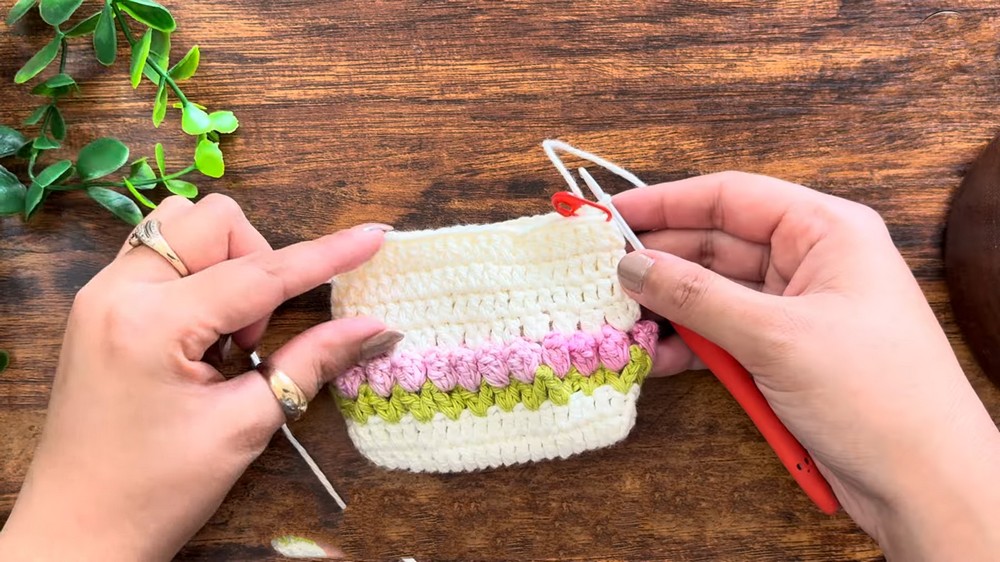
- Re-attach base-colored yarn to any chain space between tulips.
- In each space: Work 2 dc (in every chain space and between tulips) around to create a flat top.
- After this round, work 3 more rounds of dc, making 1 dc in every stitch around for each round to build up body height.
- Flap Construction:
- Mark the center 18 stitches on one long side, this will become the flap.
- Work across the marked stitches only:
- Row 1 (Flap): Dc in each of the 18 marked stitches, at end ch 2, turn.
- Row 2 (Flap): Dc in each stitch across, ch 2, turn.
- Row 3 (Flap): Dc in each stitch across. Fasten off base yarn.
4. Final Touches
- Border:
- Attach tulip-colored yarn to one corner of wallet opening.
- Work a border around the entire wallet opening and flap: Chain 4, slip stitch in the next stitch, chain 4, slip stitch in next stitch, repeat all around the opening and edge of flap to create a soft scalloped finish.
- Closure:
- At the wallet opening (under the flap), attach magnet snap closure as per manufacturer instructions.
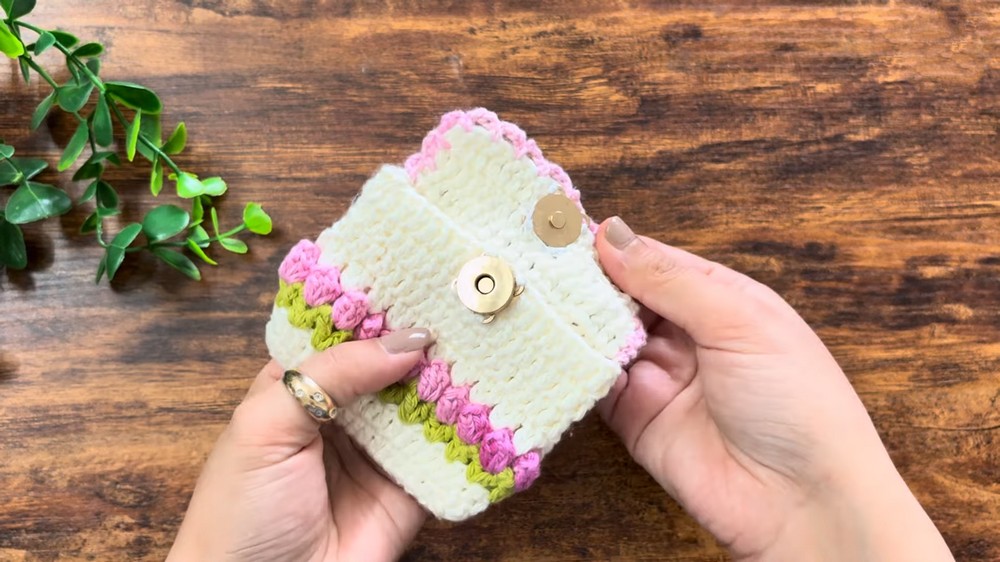
- On the outer side of the flap, sew a decorative button centered over the snap using matching thread or yarn.
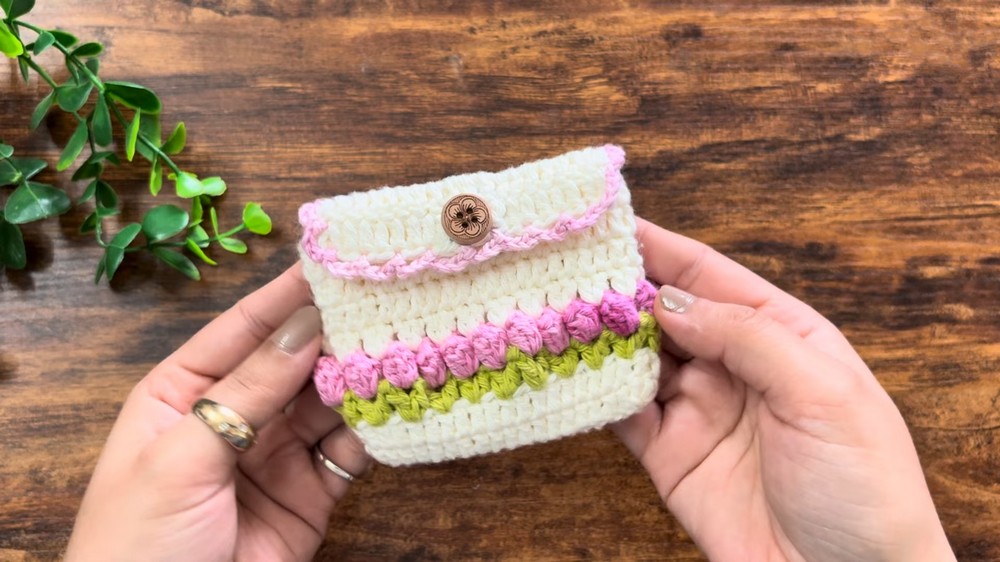
- At the wallet opening (under the flap), attach magnet snap closure as per manufacturer instructions.
Assembly & Finished Size
After all rounds and rows are complete, weave in all ends with a tapestry needle. Lay wallet flat and block gently, if needed, for crisp edges. Attach closure securely; the wallet should fold naturally at the body-flap join. Button should align directly over snap for a balanced look and easy use. Interior will show rows of double crochet, with leafy and floral details at the front.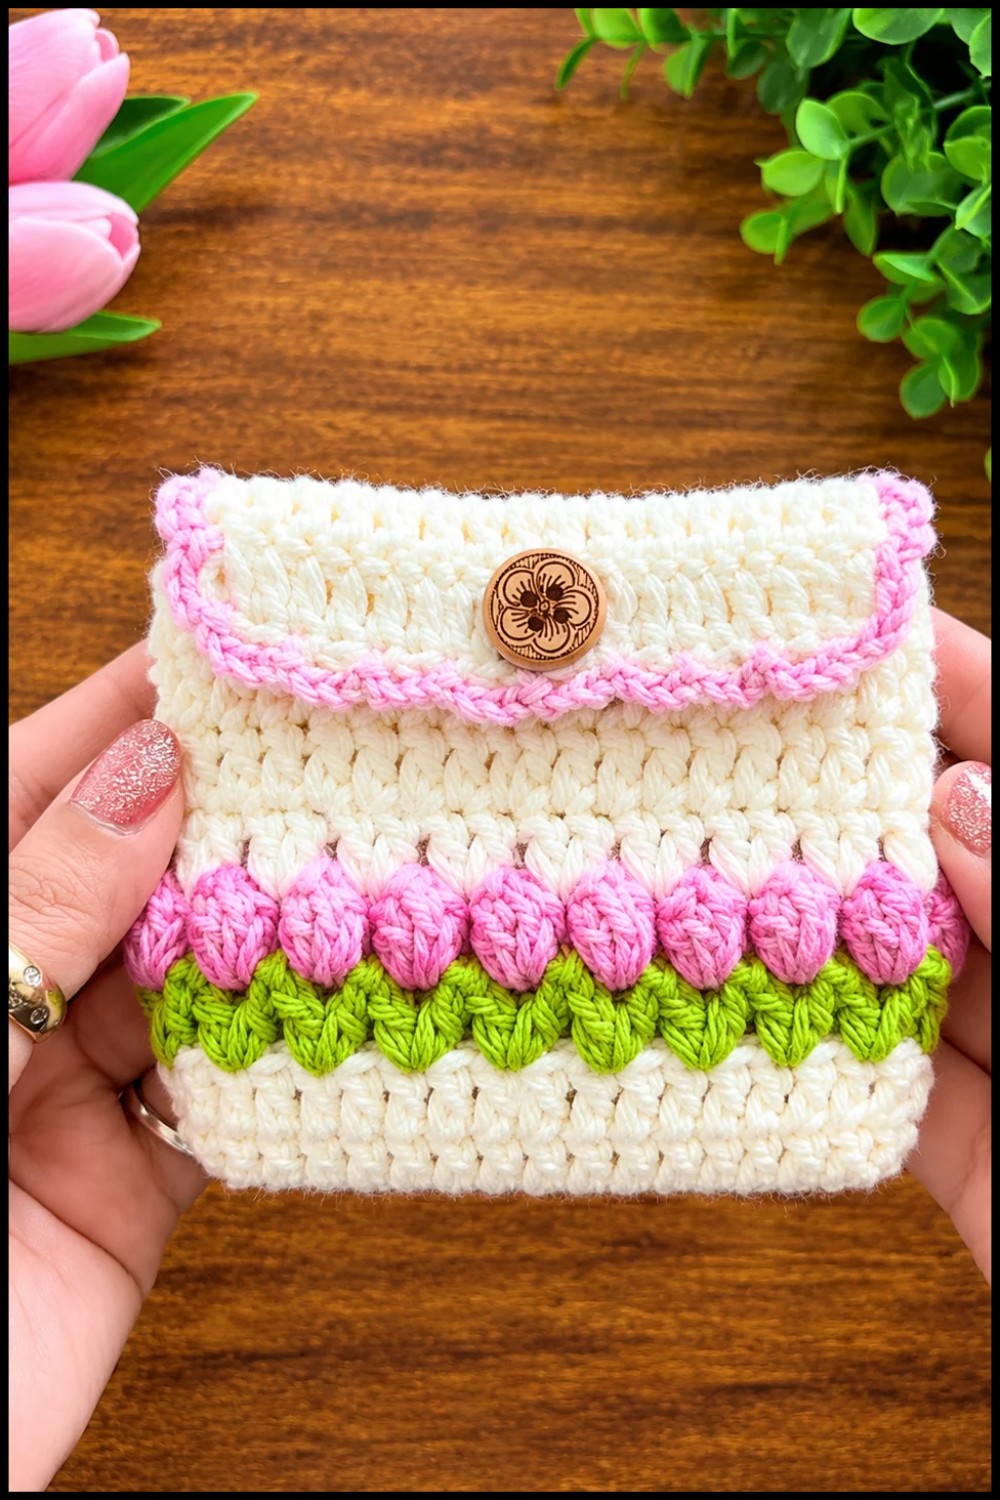
Conclusion
Balancing playful texture with refined utility, this tulip wallet is a charming project for personal use or gifting. Each stage builds skill and showcases design—from the sturdy double crochet base and leafy stitches, through rows of popcorn tulips, to a neat border and polished hardware. This wallet is a perfect opportunity to practice motif techniques and colorwork in a compact, practical format.
