
Add spooky charm to your decor with this free crochet witchy chick amigurumi pattern, offering clear steps and a fun idea for handmade gifts.
While browsing through some crochet tutorials, I came across the free crochet Witchy Chick Amigurumi pattern and was instantly drawn to its charm. This whimsical little figure, shared on the “Crochetlove” channel, is a delightful handmade bird wearing a tiny witch’s hat that adds just the right touch of playful magic.
Free Crochet Witchy Chick Amigurumi – Adorable Stuffed Toy
The Witchy Chick is more than a simple toy, it’s a cozy decorative piece that brings a bit of fun to any shelf or tabletop. Its round shape, bright eyes, and cute little beak give it personality, while the pointed hat adds a festive spirit perfect for fall or Halloween displays. Soft to the touch and full of character, this amigurumi is ideal for anyone who enjoys unique handmade items around the home.
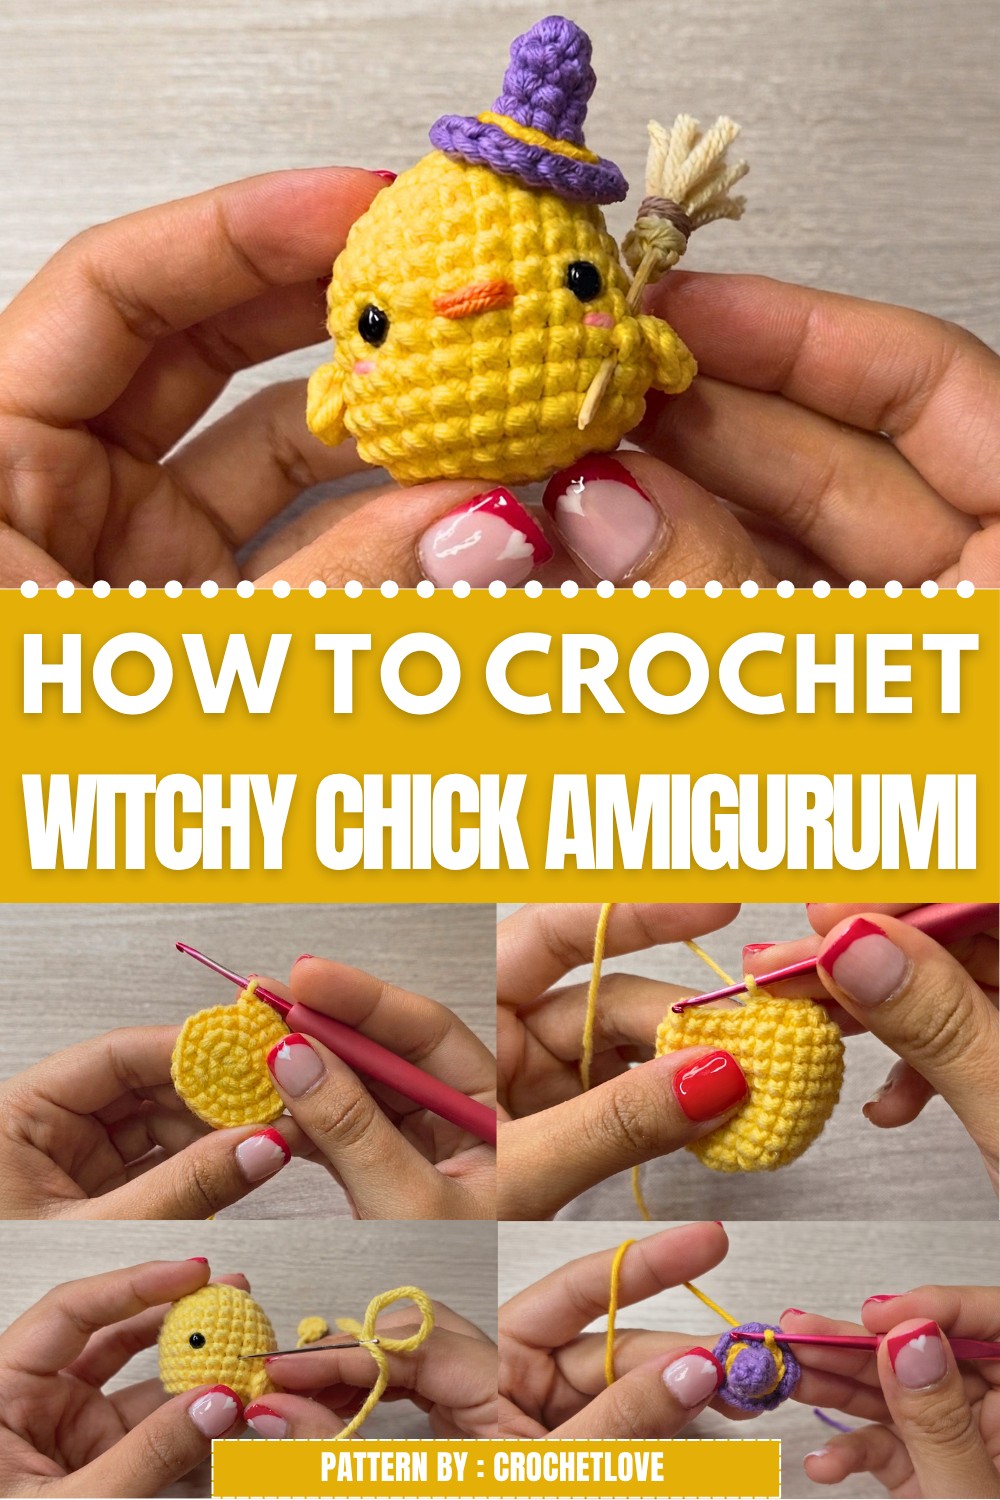
Besides being a lovely decoration, this charming chick is a thoughtful gift idea. It shows care and creativity without being too complicated, making it suitable for friends, family, or anyone who appreciates a touch of cuteness in their collection. It’s small enough to take along as a good luck charm or simply brighten up a workspace.
Working on this fun project brings a sense of joy and accomplishment as each stitch comes together to create such an endearing figure. The free crochet Witchy Chick Amigurumi pattern offers clear instructions that suit crocheters of all skill levels looking for a quick and heartwarming project.
Curious to make your own? Visit Crochetlove’s channel and find the free pattern to add this delightful little character to your handmade treasures.
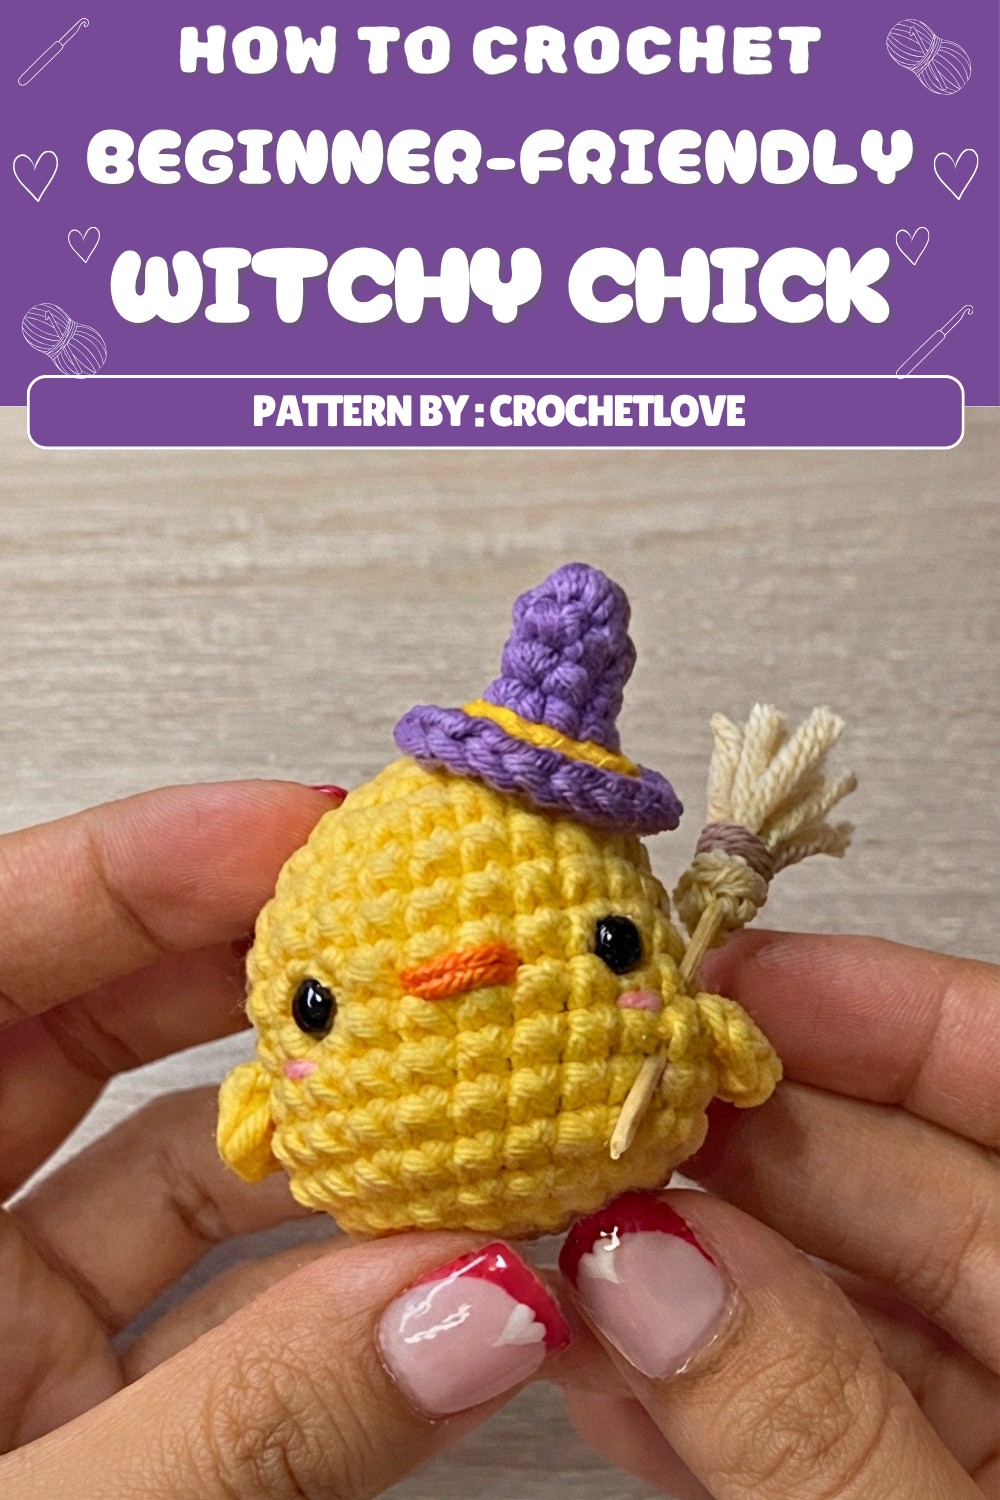
Little Witch Chick Amigurumi Pattern
In this step-by-step crochet tutorial, you will learn how to create an adorable little chick, complete with a witch’s hat and miniature broomstick. Using five yarn colors and a collection of basic materials, this guide will walk you through every detail, from crocheting the body and wings to assembling the broom and embroidering facial features. This cheerful design is perfect for seasonal decor, gifts, or as a charming amigurumi project to enhance your skills.
Quick Overview Of Pattern
- Crochet the chick’s body in continuous rounds, increasing and decreasing for shape.
- Insert safety eyes and stuff the body for a firm finish.
- Make and attach small wings using a magic ring technique.
- Embroider the beak and cheeks for personality.
- Create a small, conical witch hat, with a decorative contrasting band.
- Make a miniature broom using a toothpick and yarn for bristles and accents.
- Assemble and glue or sew pieces in place for a polished and secure finish.
Notes
- All stitches are worked in a spiral (continuous rounds) unless otherwise stated.
- Use the invisible decrease method for a neater finish.
- Choose colors that closely resemble those described, or feel free to adapt for a custom result.
- Safety eyes are the recommended choice for child safety, but you may embroider eyes if preferred.
- Acrylic yarn is ideal, especially for flame-sealing loose fibers as described in the finishing steps.
- Use the long yarn tails from wings and hat for easier sewing and weaving.
- Stuff the body and hat firmly but avoid overstuffing to maintain shape and close stitches.
Skill Level
Adventurous Beginner – Intermediate
Involves basic shaping, magic ring, increases and decreases, embroidering facial features, and simple assembly.
Materials
- Yarn:
- Light yellow (body and wings)
- Pale yellow or beige (broom bristles)
- Bright yellow or mustard (hat band)
- Light brown (broomstick wrap)
- Purple (witch hat)
- Pink (cheeks, embroidery)
- Orange (beak embroidery)
- Black embroidery thread (optional, for facial details)
- Fibrefill/stuffing
- Crochet hook: 2.5–3.0 mm (or size appropriate for your yarn for tight stitches)
- Safety eyes: 5 mm diameter, with washers
- Tapestry/yarn needle (blunt)
- Scissors
- Standard wooden toothpick (for broomstick)
- Hot glue or cold craft glue
- Lighter (for synthetic yarn ends, optional and only if yarn is 100% acrylic)
- Pins (optional, for assembling and placement)
Measurements / Sizing
- Finished chick: ~6–8 cm tall (excluding hat)
- Witch hat: ~3 cm tall
- Broom: ~4–5 cm long
- Wings: ~1.5–2 cm each
(Sizing is approximate and varies by yarn weight and tension.)
Gauge (and Stitch Pattern)
- Gauge is not essential but stitches should be firm and fabric dense, so stuffing does not show through.
- Stitches used:
- Single crochet (sc, US terminology)
- Magic ring (MR)
- Increase (inc – 2 sc in same stitch)
- Decrease (dec – invisible decrease preferred)
- Slip stitch (sl st)
- Chain (ch)
- Half double crochet (hdc) for wings
Stitch Abbreviations
| Abbr | Stitch |
|---|---|
| MR | Magic ring |
| ch | chain |
| sc | single crochet |
| hdc | half double crochet |
| sl st | slip stitch |
| inc | increase (2 sc in one) |
| dec | decrease (sc2tog) |
| st | stitch |
| BLO | back loop only (as noted) |
Special Stitches
- Invisible Decrease (sc2tog):
- Insert hook through front loop only of next 2 stitches, yarn over and pull through both loops, yarn over and pull through remaining loops on hook.
- Magic Ring (MR):
- Create a loop with yarn, crochet into the loop, then pull yarn tail to close tightly.
Step-by-Step Pattern
Chick Body: Light Yellow Yarn
- Round 1: Make a magic ring (MR), ch 1, 6 sc in ring. (6)
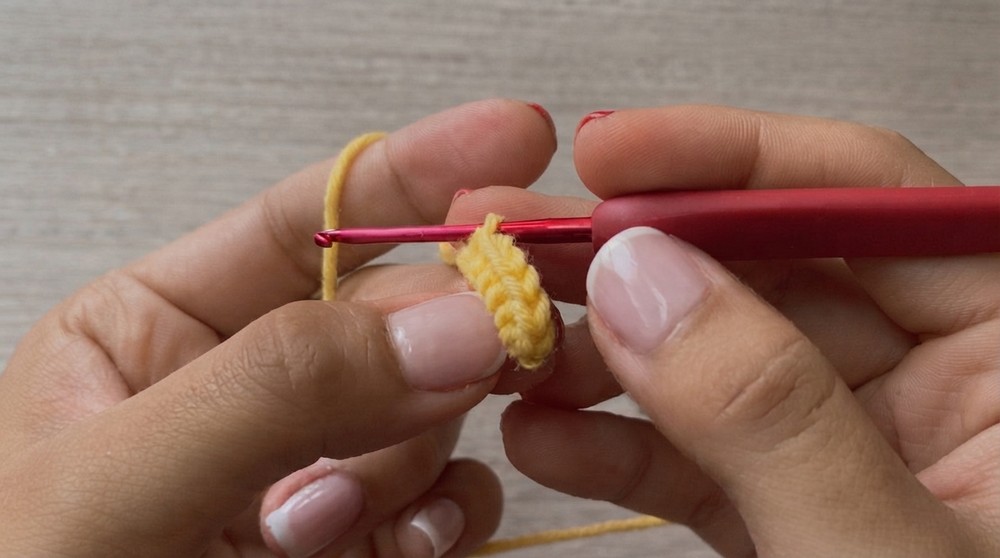
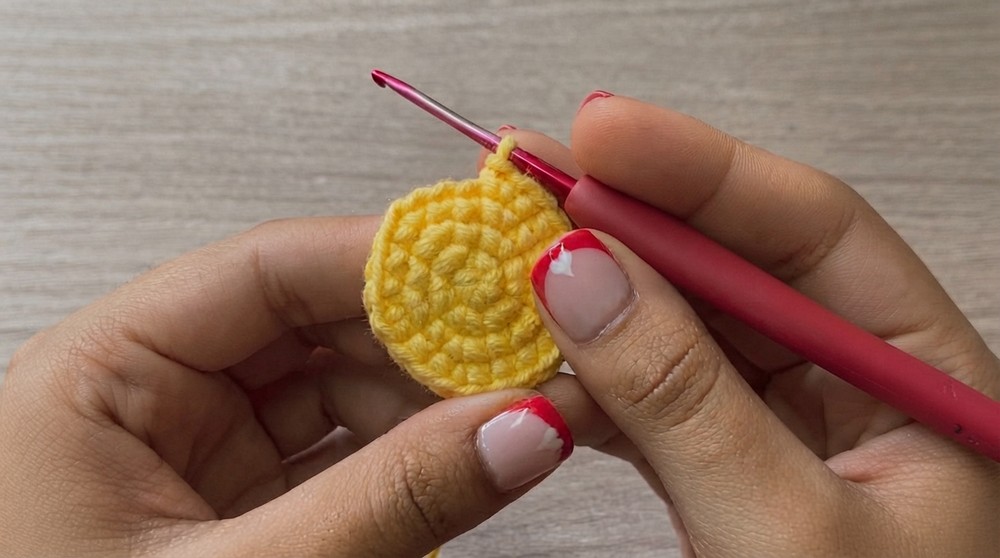
- Round 2: Inc in each st around. (12)
- Round 3: (1 sc, inc) repeat 6 times. (18)
- Round 4: (2 sc, inc) repeat 6 times. (24)
- Rounds 5–11 (7 rounds): Sc around in each st. (24)
- Insert Safety Eyes:
- Place eyes between Rounds 7 & 8, with 6 stitches between them.
- Secure eyes with washers.
- (Optional: melt back of safety eye post for extra hold if using acrylic yarn.)
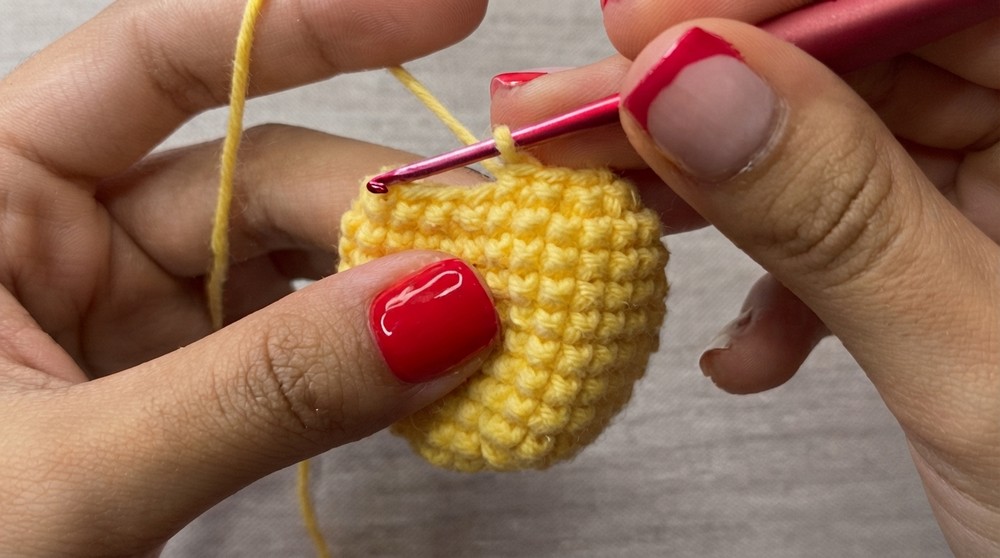
- Round 12: (2 sc, dec) repeat 6 times. (18)
- Round 13: (1 sc, dec) repeat 6 times. (12)
- Stuff firmly with fiberfill.
- Round 14: 6 dec (sc2tog around). (6)
- Finishing:
- Thread yarn tail onto needle, weave through front loops of last round, pull tight to close.
- Weave tail in and trim.
Wings (make 2): Light Yellow Yarn
- MR, ch 1.
- Work 3 hdc into MR.
- Ch 1, sl st back into MR.
- Pull loop to close, cut thread leaving a long tail for sewing.
- Make a second wing in the same way.
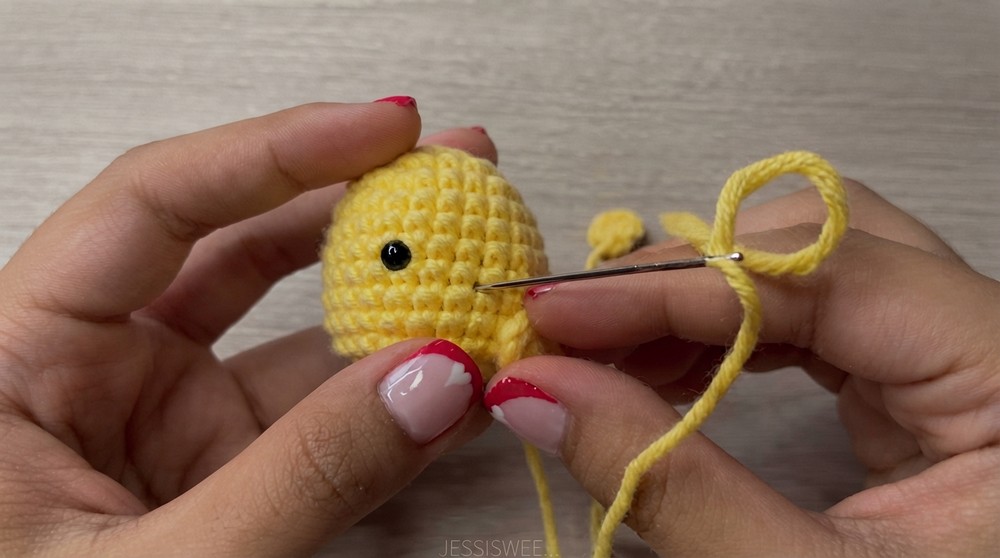
Attach Wings
- Sew wings onto the sides of the body, between Rounds 8 & 9, about 2 stitches away from the eyes.
- Arrange so wings face slightly outward; secure with the long tails, knot on the inside and weave in excess.
Face Embroidery
Beak (Orange yarn):
- Embroider beak between safety eyes with three small horizontal stitches, forming a simple triangle shape.
- Knot securely, hide thread tail inside.
Cheeks (Pink yarn):
- Embroider a small, horizontal stitch under each eye for blush effect.
- Knot and hide threads inside the body.
Witch Hat
With Purple Yarn:
- Round 1: MR, ch 1, 6 sc into ring, pull tight.
- Rounds 2–3: Sc in each st around. (6 per round)
- Round 4: (1 sc, inc) repeat 3 times. (9)
- Now, work in front loop only (FLO) for brim:
- Round 5: Inc in each st (FLO). (18)
- Finishing:
- Sl st in next st, fasten off, leaving a yarn tail.
- Use a tapestry needle, make an invisible join: skip one stitch, insert needle from outside to inside, then from original finishing point, to mimic a regular V-shape.
- Weave in ends on the inside.
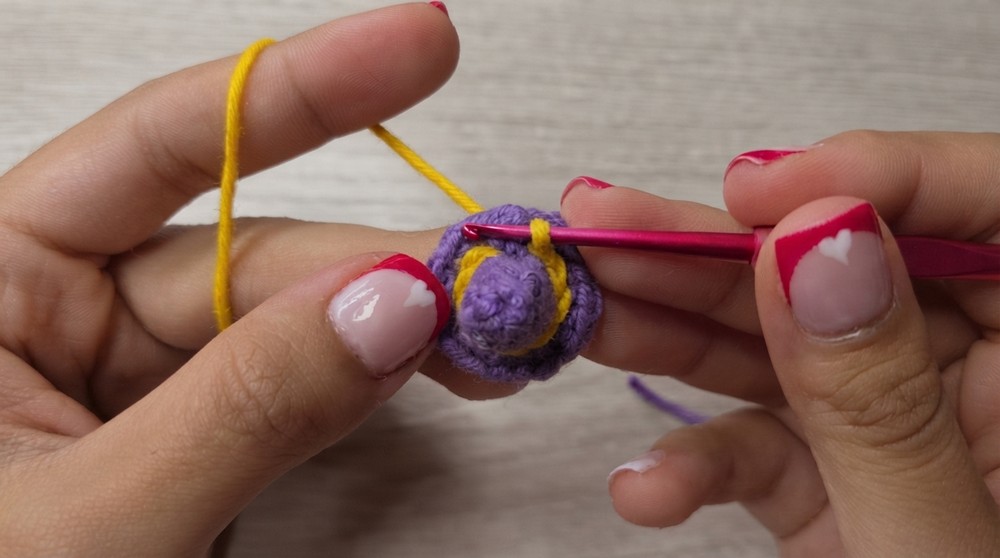
Hat Band (Bright Yellow Yarn):
- Attach yarn between hat cone and brim, between Rounds 4 and 5.
- Surface slip stitch around the hat: insert hook from outside to inside, yarn over, pull up loop and draw through, repeat for nine slip stitches.
- Cut and pull yarn, use needle to make invisible join as before, knot and secure on inside.
Miniature Broom
Broom Bristles (Pale yellow or beige):
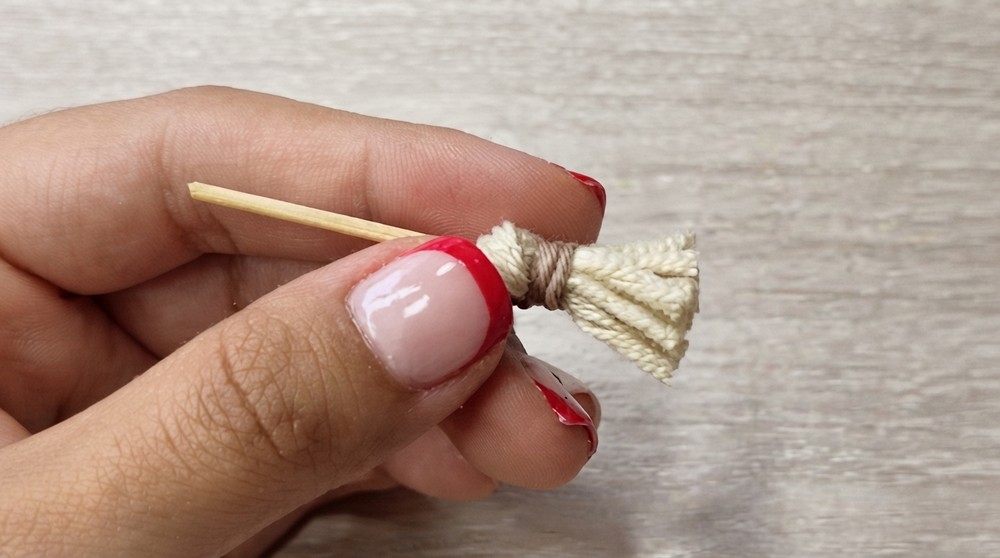
- Wrap yarn around two fingers six times, cut off the bundle.
- Cut the bundle at one end so you have six strands of equal length.
- Using a toothpick, cut off both tapered ends.
Attach Bristles:
- Apply a dab of cold or hot glue to one end of the toothpick.
- Fold each strand in half and attach to the glue end of the stick, fanning the bristles evenly around the tip.
- Allow glue to cool/set.
Broom Wrap (Light brown yarn):
- Take a small length of brown yarn, wind several tight turns just above the bristles to form the classic broom band.
- Knot firmly and cut off excess.
- Trim bristles to even length.
Assembly & Finished Size
- Hat:
- Place the hat slightly to one side atop the chick’s head and glue in place (or sew for added security and durability).
- Broom:
- Insert the broomstick between a couple of stitches on the lower body, near a wing for a natural pose. If using a thicker stick, sew in place as needed.
- Final touches:
- If working with acrylic yarn, carefully run a lighter flame near any stray fibers to “seal” and tidy the surface (do NOT use if your yarn contains cotton or other natural fibers).
Finished chick should measure approximately 6–8 cm tall, with the hat and broom adding a whimsical and festive touch.
Conclusion
You have now completed this endearing Little Witch Chick amigurumi! This pattern provides a wonderful opportunity to practice shaping, basic embroidery, sculptural assembly, and creative finishing techniques, all hallmarks of amigurumi artistry. Display your chick as part of seasonal decor, gift her to a friend, or use these miniature accessories to inspire other playful amigurumi creations.
