Add a touch of sunshine to your accessories with this delightful crochet sun keychain pattern and celebrate the joy of making something handmade and special.
Creating a cheerful and bright sun shaped keychain is a fun and easy project that brings a touch of happiness to your everyday items. With its cute rays, a happy face, and vibrant colors, this crochet pattern is perfect for those who love crocheting small and adorable creations. It’s a quick to make item that doesn’t require advanced skills, so even beginners can enjoy creating it.
Brighten Your Day with This Crochet Sun Amigurumi Keychain Pattern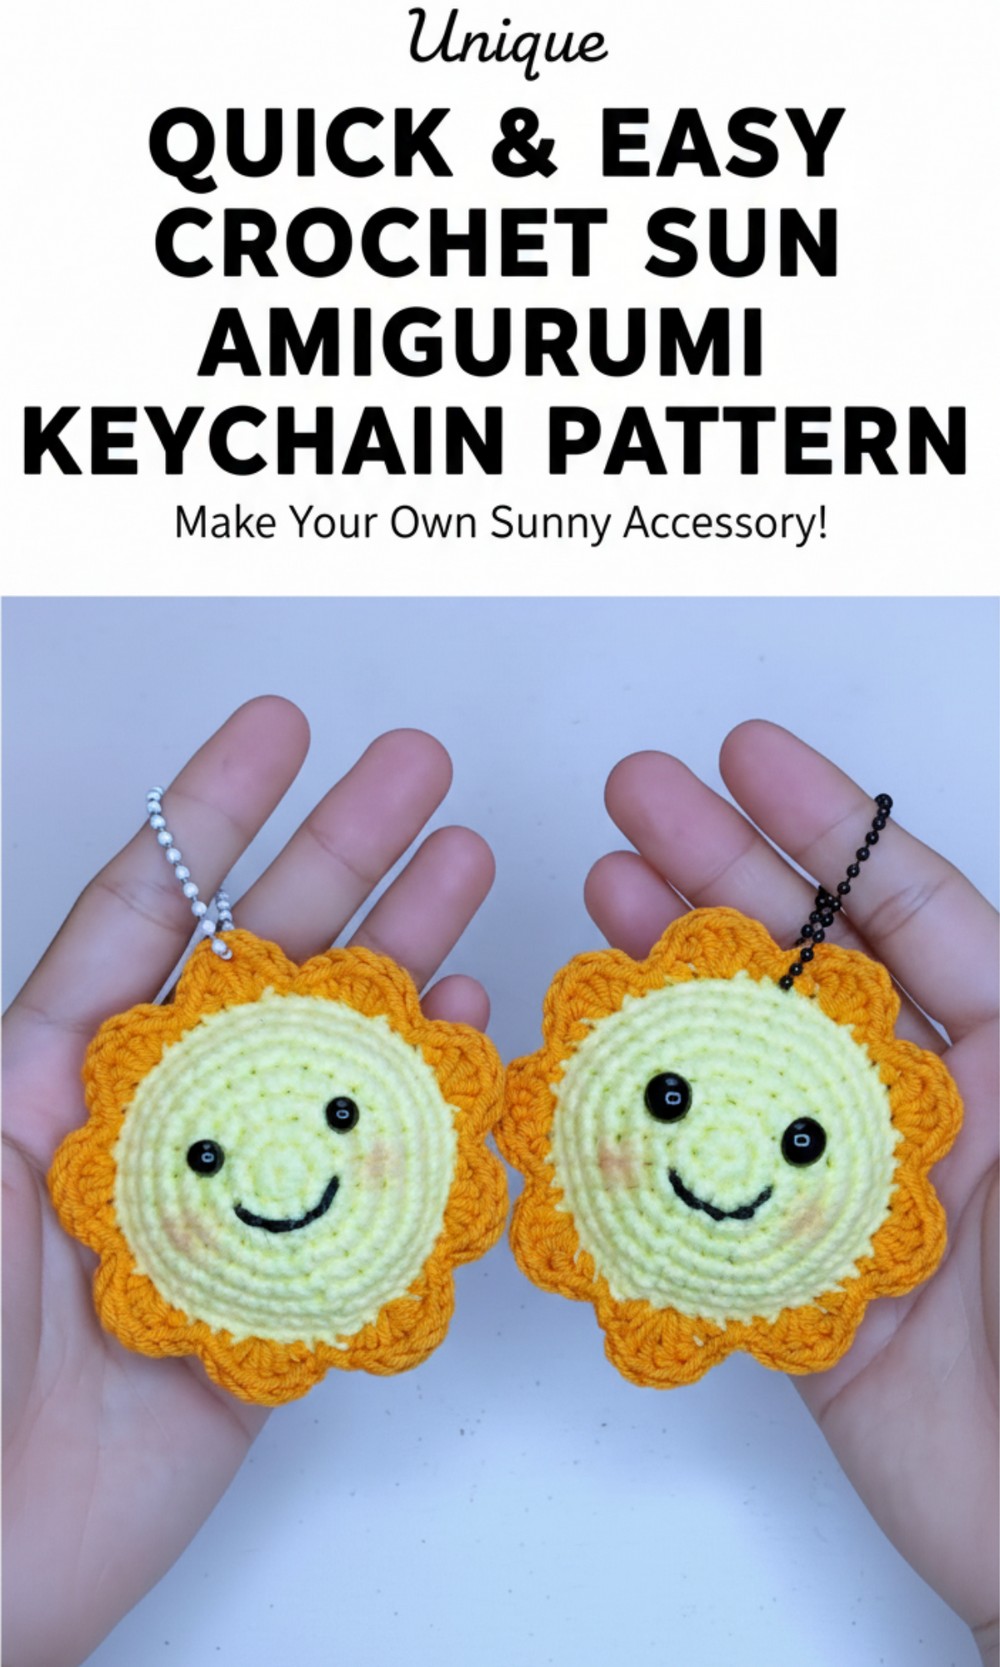

The tiny sun keychain is not just aesthetically pleasing but also wonderfully versatile. You can attach it to bags, backpacks, or even use it as a decorative piece for your room. Its compact size makes it practical to carry around, while the joyful design makes it a perfect gift for friends and loved ones. The warm colors of yellow and orange and the smiling face of the sun add a positive vibe wherever it is placed.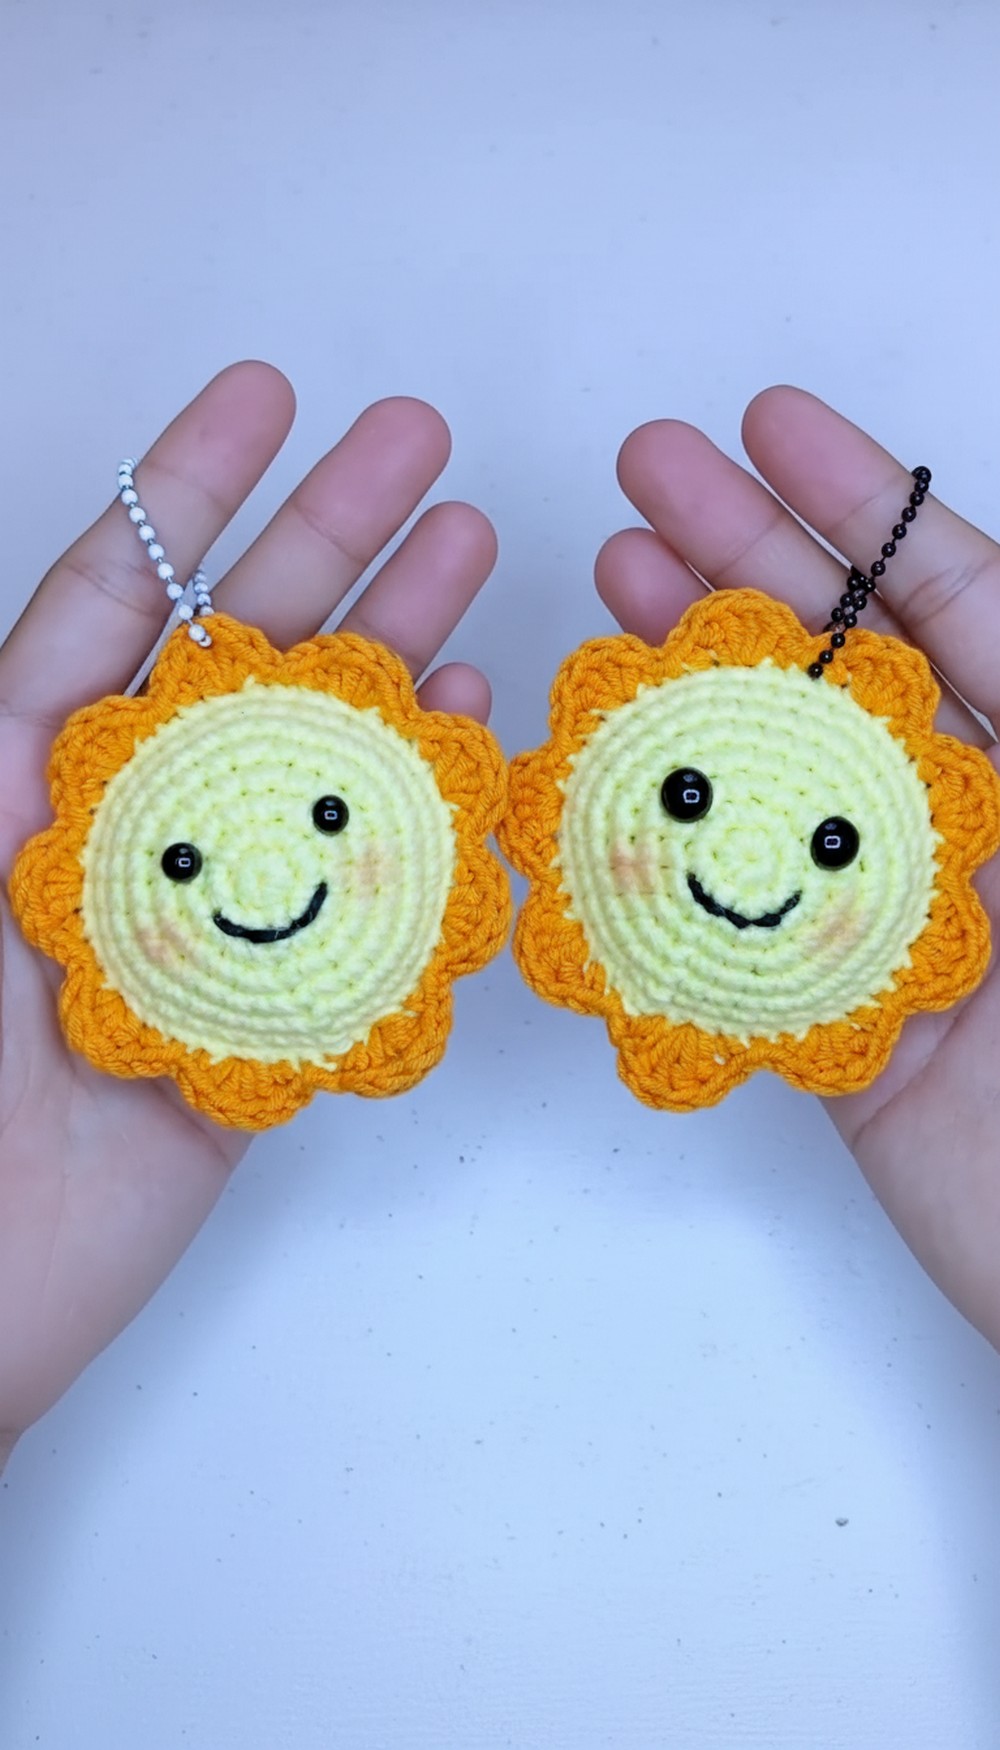
What makes this pattern even more special is the ability to add your creative touch. You can customize the facial expression, use different yarn colors like pink or blue to create a unique look, or change the shape of the rays. It’s up to you how bright and creative you want your sun keychain to be.
This crochet project isn’t just for adults; teens and kids will love trying their hands at this quick crochet as well. It’s an ideal way to introduce them to crochet. With just a few easy steps, anyone can create something vibrant and useful. Start crocheting and enjoy bringing a little sunshine into your life with this charming and personalized keychain.
Crochet Sun Amigurumi Keychain Pattern
Finished Size
The finished size of the Sun Amigurumi will vary depending on the yarn weight and hook size you choose. Using Milk Cotton Yarn and a 3 mm crochet hook, the sun will approximately measure 4–5 inches (10–12 cm) in diameter, excluding the rays.
Materials Required
- Yarn
- Yellow Yarn: For the main body (suggested: Milk Cotton Yarn or medium weight acrylic ).
- Orange Yarn: For the sun’s rays.
- Black Yarn: For the facial features (eyes and mouth).
- Pink Yarn: Optional – for cheeks or decorative blush.
- Hook
- Crochet hook: Recommended size is 3 mm (or customize based on your yarn weight).
- Stuffing
- Polyester fiberfill for stuffing the sun’s body.
- Miscellaneous Supplies
- Stitch markers (optional but helpful for beginners).
- Yarn needle for sewing features and securing loose ends.
- Scissors.
Gauge
Gauge is not crucial for this project, as it’s a decorative item. However, ensure your stitches are tight enough to hold the stuffing securely in place.
For reference:
- A gauge of 7 single crochet stitches per inch works well with medium weight yarn and a 3.5 mm hook.
Tips Before Starting
- Use a stitch marker to mark the beginning of each round.
- For seamless color changes, weave in ends as you go.
- Keep stitches tight to prevent gaps when stuffing.
- Small embroidery details (like blush or rays) can add character to your amigurumi.
Pattern Instructions
Below is the step by step pattern for crocheting the Sun Amigurumi. This pattern uses basic stitches such as single crochet, increases, and decreases.
Abbreviations
- ch: Chain
- sc: Single crochet
- inc: Increase (two single crochets in one stitch)
- dec: Decrease (single crochet two stitches together)
- sl st: Slip stitch
- st(s): Stitch(es)
- Rnd: Round
Body of the Sun
The main body is worked in continuous rounds.
Round 1:
Start with a magic circle and make 6 sc into the loop. Pull the loop tight to close. (6 sts)
Round 2:
Work inc in each stitch around. (12 sts)
Round 3:
(1 sc, inc) repeat around. (18 sts)
Round 4:
(2 sc, inc) repeat around. (24 sts)
Round 5:
(3 sc, inc) repeat around. (30 sts)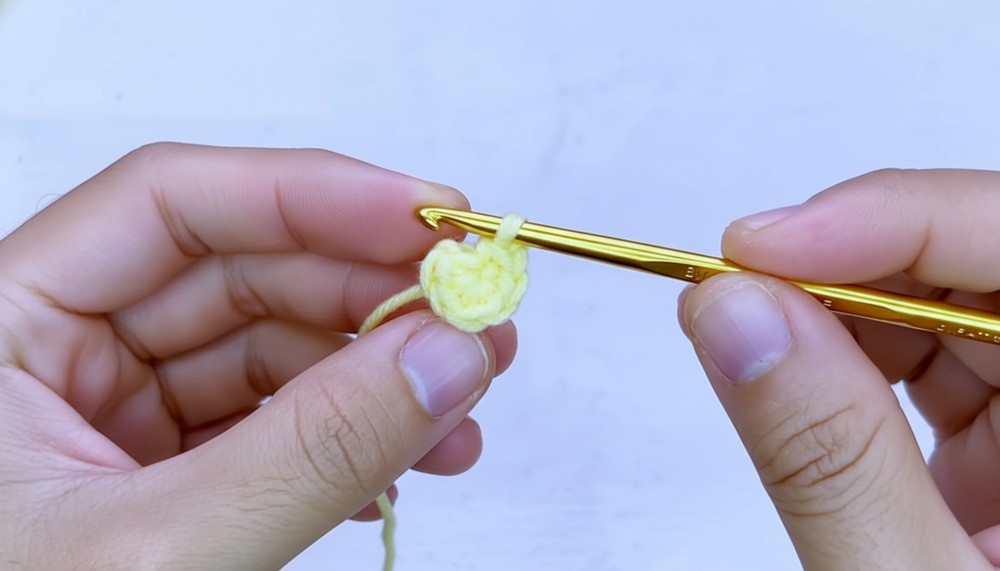
Round 6:
(4 sc, inc) repeat around. (36 sts)
Round 7–12:
Sc in each stitch around (no increases). (36 sts per round)
Round 13:
(4 sc, dec) repeat around. (30 sts)
Round 14:
(3 sc, dec) repeat around. (24 sts)
Round 15:
(2 sc, dec) repeat around. (18 sts)
Stuff the body firmly with fiberfill before proceeding with the next rounds.
Round 16:
(1 sc, dec) repeat around. (12 sts)
Round 17:
Dec around until 6 stitches remain. (6 sts)
Fasten off, leaving a tail for sewing. If needed, sew any small openings.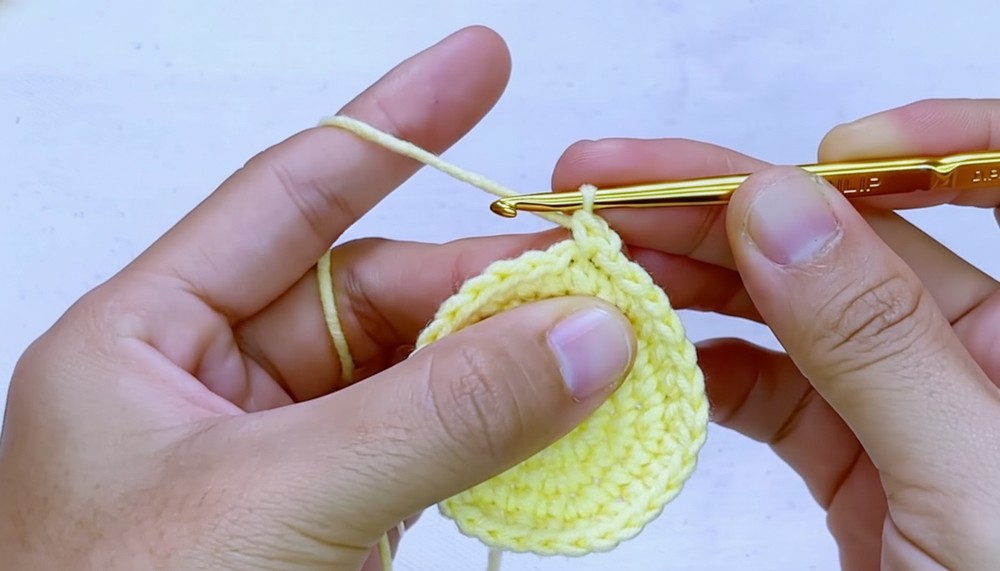
Sun Rays
The sun rays are worked individually and then sewn onto the main body.
Row 1:
Ch 6.
Row 2:
Starting from the second chain from the hook, make 1 sc in each ch. (5 sc)
Row 3:
Turn your work. Ch 1, (inc in the first st, sc across). (6 sts)
Row 4:
Turn your work. Ch 1, sc across. (6 sts)
Fasten off, leaving a long tail for sewing.
Repeat this process to make 8–12 rays (depending on your preference for fullness).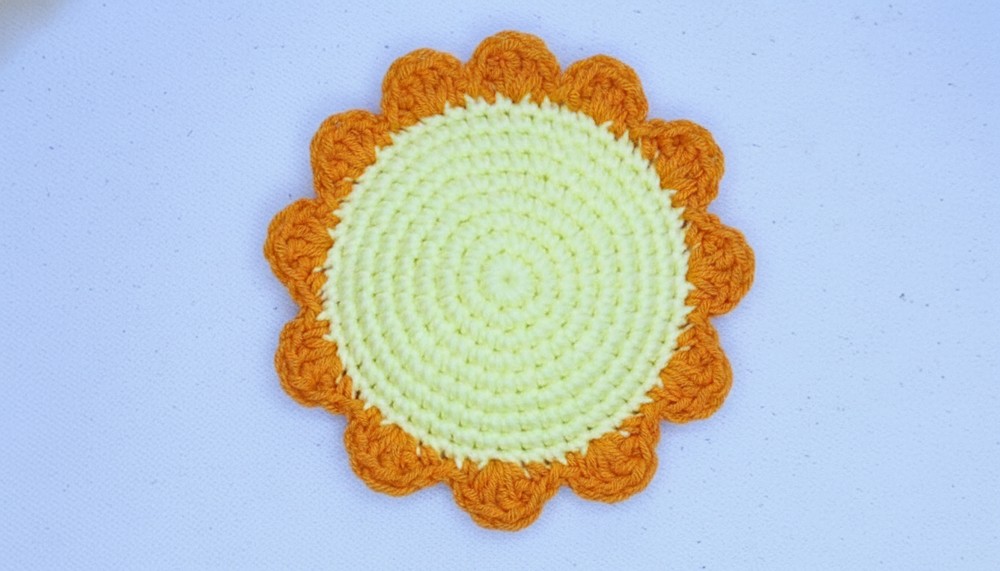
Face Details
Eyes (Make 2):
Using black yarn, embroider simple round eyes.
Alternatively, crochet two circles with the following pattern:
- Magic circle: 6 sc into the loop. Pull tight to close and sl st to finish.
Mouth:
Using black yarn and a yarn needle, stitch a smile.
Cheeks (Optional):
Use pink yarn to embroider tiny blush dots on either side of the mouth.
Assembly
- Attach Rays:
- Position the rays evenly around the body.
- Sew each ray to the edges of the sun using the long tail left after crocheting.
- Face:
- Sew or embroider eyes, mouth, and cheeks in place. Customize the expression based on personal preference (happy, sleepy, or winking eyes).
- Secure Loose Ends:
Once all components are attached, weave in all loose ends securely using a yarn needle.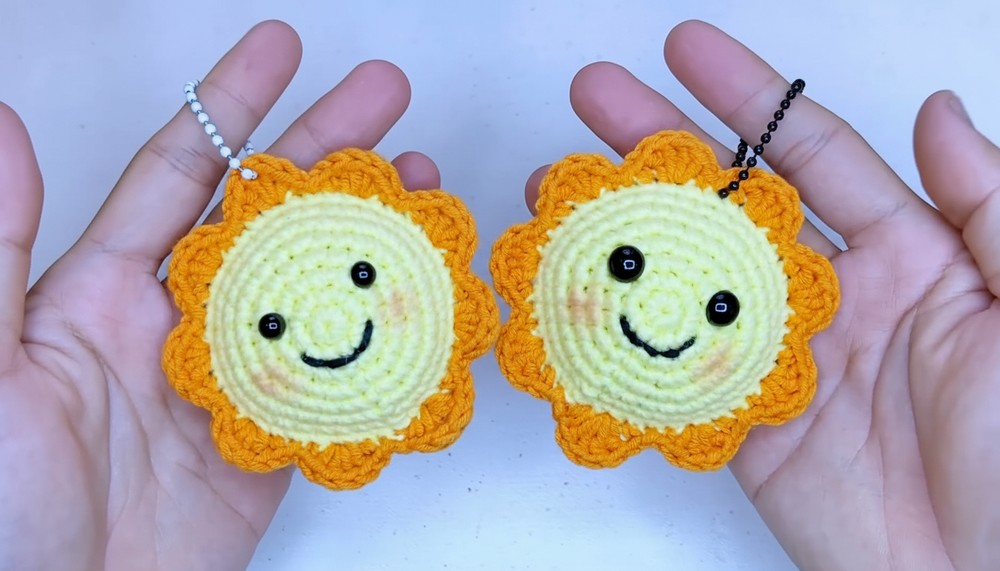
Customization Ideas
- Colors:
- Try alternating shades (yellow for the body, orange or red for the rays).
- Add variegated yarn for a fun multicolor effect.
- Expressions:
- Embroider different facial expressions (closed eyes for a sleepy sun, winking face for playful energy).
- Rays Variation:
- Add triangular or scalloped edges for unique rays.
- Design Element:
- Add a hanging loop to turn the sun into a mobile or ornament.
Special Techniques
Magic Circle
The magic circle, also known as the magic ring, is a method for starting a project in the round without leaving a hole in the center. To create the magic circle:
- Wrap the yarn around your fingers to create a loop.
- Insert your hook into the loop and pull up a loop.
- Chain 1 to secure the loop, then work the required number of stitches into the circle.
Conclusion
By following this detailed guide, you’ll create an adorable Sun Amigurumi perfect for decorating your home, gifting to loved ones, or using as a keychain or mobile ornament. This cheerful project is beginner-friendly and offers ample room for customization.
Important Remarks About the Final Look
The final Sun Amigurumi should have a smooth, rounded body and evenly spaced, well-attached rays. The facial expression adds character, while the bright colors make it an inviting decoration. Ensure that the stuffing is distributed evenly and no gaps appear in the stitching.
This project is versatile and customizable, making it a fun and engaging crochet suitable for all skill levels.