Enhance your laptop’s style and safety with this free crochet laptop sleeve pattern, featuring an easy-to-follow guide for a perfect fit.
Modern Crochet Laptop Sleeve Pattern for Tech Protection
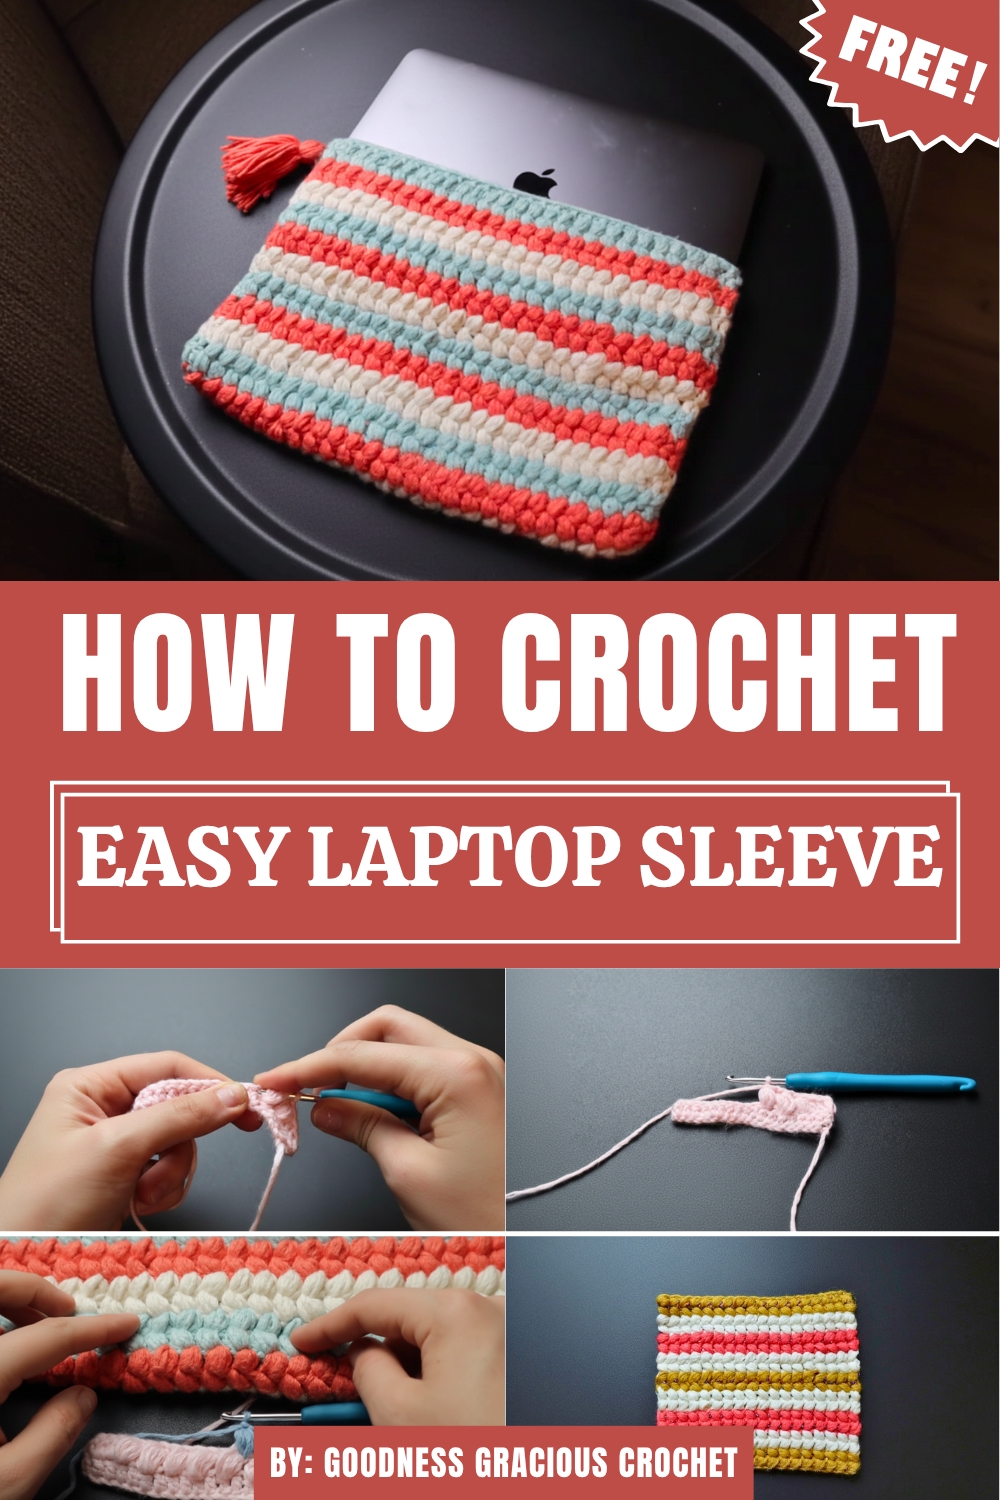
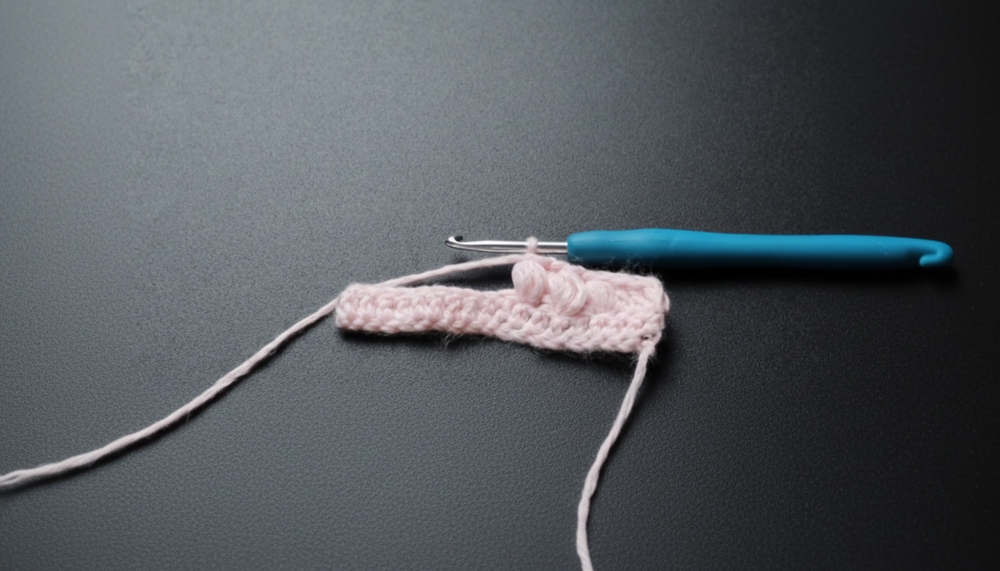
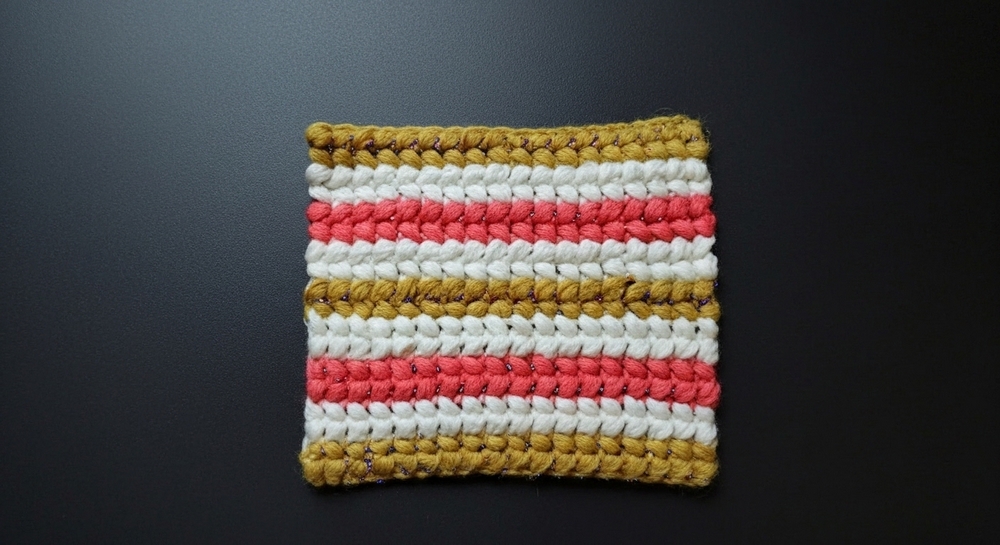
A handmade crochet sleeve adds a perfect balance of beauty, functionality, and creativity to your everyday essentials. This simple crochet pattern guides you through crocheting a charming and protective laptop sleeve using puff stitches that give it a dense, textured look.
Materials Needed
- Yarn: The instructor uses loops and threads yarn (preferred) but suggests using any yarn of your choice.
- Crochet Hook: Suitable for your chosen yarn (size isn’t specified but matches a medium-weight yarn).
- Zipper: Used to securely close the cover (can be sourced via Amazon).
- Needle and Thread: Essential for sewing the zipper onto the laptop cover.
- Rectangular Object: For crafting the tassel (e.g., a pack of note cards).
- Scissors: To cut yarn and finish edges neatly.
Crochet Laptop Cover with Zipper and Tassel
Skill Level
Intermediate to Advanced
Materials
To make the crocheted laptop cover, you will need the following:
Yarn
- Yarn Type: Worsted Weight Yarn (Recommended: Loops & Threads Yarn or any medium-weight yarn of your choice).
- Approximate Yardage: 300–400 yards (depending on your laptop size).
- You can use multiple colors to create stripes (optional).
Hooks
- Hook Sizes:
- 5.0 mm (H/8) for the puff stitch and body.
- Optional: 4.5 mm hook for tighter slip stitching when sewing sides.
Additional Tools
- Zipper (length to match your final laptop cover; recommended to purchase longer and trim as needed).
- Needle and thread to sew the zipper (hand or machine sewing is fine).
- Yarn Needle (for weaving in ends).
- Scissors.
- A rectangular or square object (e.g., a notecard pack) for making the tassel.
Key Abbreviations
These are written in US Crochet Terminology:
- CH: Chain.
- DC: Double Crochet.
- SC: Single Crochet.
- ST(s): Stitch(es).
- YO: Yarn Over.
- SL ST: Slip Stitch.
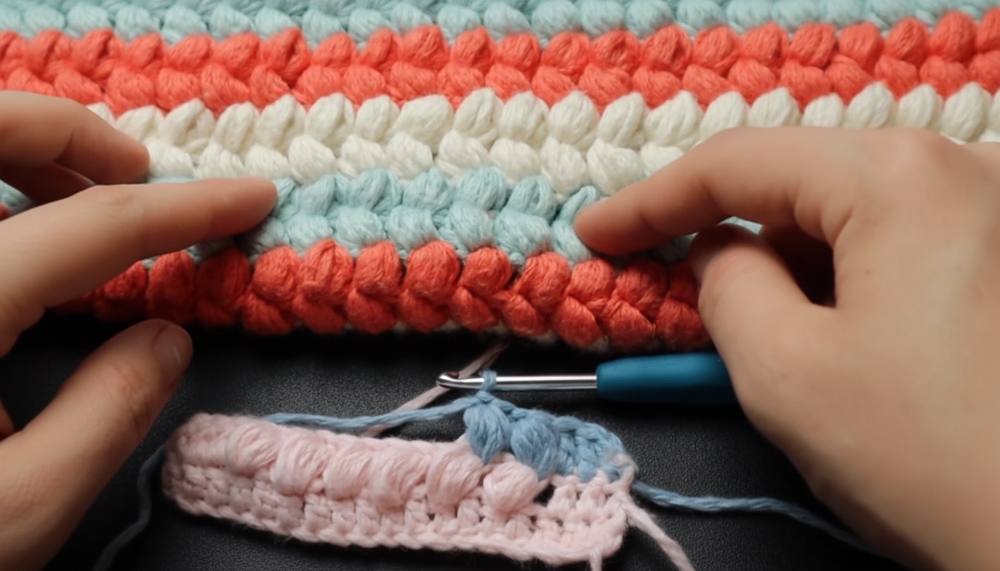
- Puff Stitch (Puff): Repeat inserting the hook into the same stitch, YO, and pull up a loop 4–5 times (specified below). YO and pull through all loops on the hook.
Special Notes
- Foundation Chain Options: You can create the foundation chain in two ways:
- Entirely Puff Stitch Design: Use a foundation chain in multiples of 2 + 1.
- Puff with DC Borders: Use a foundation chain in multiples of 2 + 1 + 6 to allow for cleaner DC edges. Adjust the number of DCs on each side as desired for your design.
- For denser protection of the laptop, puff stitches can be done by pulling through loops 5 times (instead of the usual 4).
- Work flat for the body before folding and joining sides to form a pouch.
Pattern Instructions
Foundation Chain
- CH a desired length:
- A multiple of 2 + 1 for puff stitches.
- If adding DC borders, use a foundation chain in multiples of 2 + 1 + 6.
- Ensure the length matches the width of your laptop when slightly stretched.
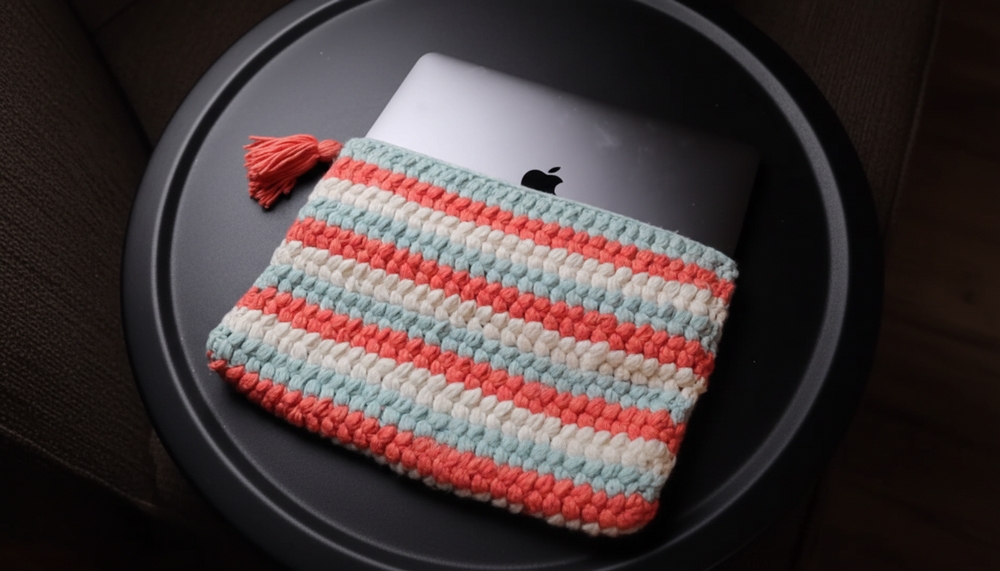
Row 1: Double Crochet Row
- Start in the 3rd CH from the hook, and work DC across the foundation CH. (Tip: The skipped CHs count as the turning CHs.)
- Turn your work. Mark the last DC on each side if you will add DC borders.
- Tip for DCs: Instead of CH 2 turning chains at row edges, start DC rows by pulling up the loop slightly and directly inserting into the first stitch for a cleaner edge.
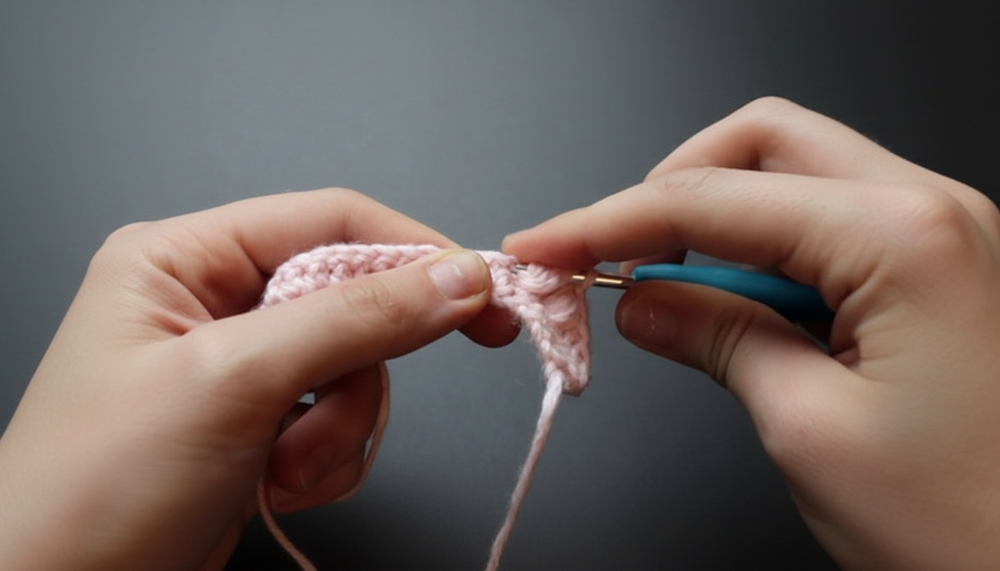
Row 2: Setting Up Puff Stitches
- Turn your work. Optional for DC Borders: Place 3 DCs (or reduce to 2 DCs as suggested) on each side of the row.
- Start Puff Stitches:
- YO, insert the hook into the next ST.
- Pull up the loop to the height of a DC.
- Repeat 4 to 5 times, depending on desired puff density.
- YO and pull through all loops on the hook.
- Chain 1 to close the puff. Do not skip the CH as it becomes the “eye” of the puff in future rows.
- Repeat Puff Process: Skip 1 stitch, and place the next puff in the following stitch.
- For the last 3 stitches: Place 3 DCs (or 2 DCs if borders are reduced).
Row 3: Puff Stitch Continuation
- Flip your work. Start with DC border stitches as required (3 or 2).
- Work Puff Stitches directly into the “eye” or chain-1 spaces from the previous row. Continue across the row.
- Maintain DC edging by finishing with 3 or 2 DCs at the end.
Color Changes
To change colors:
- Work as normal until the last YO of your final DC.
- Before pulling through the last 2 loops, YO with your new color and pull it through.
- Tighten the strand and continue into the next row with the new color.
Color Pattern and Sizing
- Repeat the Puff Stitch rows and change colors every 2 rows (or desired frequency).
- Continue for a total of 44 rows (or adjust for a custom laptop size).
- Ensure your panel can wrap around the laptop when folded and fits snugly.
Assembly
- Once the flat piece is complete, fold it in half lengthwise to form a sleeve.
- Using your hook and matching yarn, work SL STs along the sides to join the edges together, leaving one short side open for the zipper.
Adding the Zipper
- Position the zipper along the opening. The DC rows on the opening edge offer a stable base for attaching the zipper.
- Hand or machine sew the zipper along the edges, taking care to ensure smooth closure.
- Test the zipper to ensure it works properly and aligns evenly.
Making the Tassel
- Take a rectangular object (e.g., a notecard pack) and wrap yarn around it several times until the desired thickness is achieved.
- Slide a separate piece of yarn under the loops, tie a secure triple knot at the top to hold the loops in place.
- Cut the bottom of the loops to form the tassel’s fringe.
- Wrap another piece of yarn a short distance below the top knot to create a “head” for the tassel. Knot securely.
Finishing
- Attach the tassel by threading its ties through the zipper pull or the DC border and knotting it securely.
- Weave in all loose yarn ends with a yarn needle.
- Trim tassel fringe for a neat, even appearance.
Conclusion
Congratulations on completing your Crocheted Laptop Cover! This stylish, functional project offers a soft yet durable way to protect your laptop while giving you the opportunity to personalize the design with color changes and unique details like the tassel. The addition of a zipper ensures functionality and a polished look, while the puff stitch offers extra padding and texture.
Pattern Corrections
- If you prefer tighter edges, opt for 2 DCs instead of 3 on the borders.
- Adjust Puff density based on personal preference (4 repeats instead of 5 for a looser fabric).
Tips for Success
- Measuring Your Laptop: Ensure your piece is snug, as the puff stitch will stretch slightly over time.
- Avoid Gaps Near Puff Stitches: Remember to work into the chain-1 “eye” for even puff rows.
- Zipper Alignment: Use blocking clips or pins to temporarily hold the zipper in place while sewing to ensure alignment.